


STOP... pressuring me!
< GGST
| (20 intermediate revisions by 6 users not shown) | |||
| Line 4: | Line 4: | ||
| overview = Nagoriyuki is a mid-ranged powerhouse who dynamically shifts between extended pressure strings which threaten strike/throw mix-ups and space control with massive normals, depending on what the Blood Rage mechanic allows. | | overview = Nagoriyuki is a mid-ranged powerhouse who dynamically shifts between extended pressure strings which threaten strike/throw mix-ups and space control with massive normals, depending on what the Blood Rage mechanic allows. | ||
Nagoriyuki's long and rewarding {{MiniMoveCard|game=GGST|chara=Nagoriyuki|input=f.S Level 2|label={{clr| | Nagoriyuki's long and rewarding {{MiniMoveCard|game=GGST|chara=Nagoriyuki|input=f.S Level 2|label={{clr|S|f.S}}}} and {{MiniMoveCard|game=GGST|chara=Nagoriyuki|input=2S Level 2|label={{clr|S|2S}}}} control [[{{PAGENAME}}/Strategy#Neutral|mid-ranged neutral]]. His {{MiniMoveCard|game=GGST|chara=Nagoriyuki|input=5K|label={{clr|K|5K}}}} is a good poke for stagger pressure due to its excellent range and frame data. His exceptional [[#Special_Moves|special moves]] are uniquely special-to-special cancelable. This includes {{MiniMoveCard|game=GGST|chara=Nagoriyuki|input=236K|label=Fukyo}}, a command dash that compensates for his weak mobility. Fukyo also grants [[{{PAGENAME}}/Strategy#Pressure|devastating pressure]] in the form of strike/throw mix-ups when combined with other moves. {{MiniMoveCard|game=GGST|chara=Nagoriyuki|input=214H|label=Kamuriyuki}} is an especially powerful frame trap that doubles as a gap-closing tool. Using specials has the side effect of filling Nagoriyuki's unique resource, the Blood Gauge. Filling it boosts the speed and power of all his sword normals. His {{Prompt|GGST|H|18px}} normals receive boosts to range on top of speed and power, transforming {{MiniMoveCard|game=GGST|chara=Nagoriyuki|input=5H Level 2|label={{clr|H|5H}}}} and {{MiniMoveCard|game=GGST|chara=Nagoriyuki|input=2H Level 2|label={{clr|H|2H}}}} into outstanding space control tools against grounded and aerial opponents, respectively. | ||
However, filling the Blood Gauge completely activates [[{{PAGENAME}}/Strategy#Blood_Rage|Blood Rage]], a state so punishing that triggering it during ill opportune moments renders defeat near certain. Deplete the Blood Gauge by landing sword normals or by feasting with {{MiniMoveCard|game=GGST|chara=Nagoriyuki|input=623P|label=Bloodsucking Universe}}, a command grab. This is vital for controlling the Blood Gauge and averting an untimely demise to Blood Rage. Excelling with Nagoriyuki requires situational awareness and [[{{PAGENAME}}/Strategy#Blood Gauge Management|Blood Gauge management]] by adeptly shifting tactics midmatch. Manage the gauge well to benefit from enhanced sword normals at high blood levels and stellar special moves at low blood levels. | However, filling the Blood Gauge completely activates [[{{PAGENAME}}/Strategy#Blood_Rage|Blood Rage]], a state so punishing that triggering it during ill opportune moments renders defeat near certain. Deplete the Blood Gauge by landing sword normals or by feasting with {{MiniMoveCard|game=GGST|chara=Nagoriyuki|input=623P|label=Bloodsucking Universe}}, a command grab. This is vital for controlling the Blood Gauge and averting an untimely demise to Blood Rage. Excelling with Nagoriyuki requires situational awareness and [[{{PAGENAME}}/Strategy#Blood Gauge Management|Blood Gauge management]] by adeptly shifting tactics midmatch. Manage the gauge well to benefit from enhanced sword normals at high blood levels and stellar special moves at low blood levels. | ||
| Line 19: | Line 19: | ||
* '''Astounding Durability''': Equipped with a strong defense modifier, a high Guts Rating and a command throw that restores health, Nagoriyuki is as durable as a warrior can be. | * '''Astounding Durability''': Equipped with a strong defense modifier, a high Guts Rating and a command throw that restores health, Nagoriyuki is as durable as a warrior can be. | ||
* '''Special Cancels''': Has the unique ability to cancel specials into other specials, allowing for unique pressure routes and combo routes. | * '''Special Cancels''': Has the unique ability to cancel specials into other specials, allowing for unique pressure routes and combo routes. | ||
* '''Brutal Punishment''': | * '''Brutal Punishment''': Nagoriyuki's long range, high damage and special cancels allow him to massively punish any mistake, especially so on counter hit. He is classified as a ''One Shot'' type for a reason. | ||
* '''Strong Pressure''': | * '''Strong Pressure''': Nagoriyuki has strong strike/throw mix-ups and frame traps thanks to {{MiniMoveCard|game=GGST|chara=Nagoriyuki|input=236K|label=Fukyo}}. This is further reinforced by his command grab and his normals dealing chip damage. He can also Fukyo backwards to bait responses and punish. | ||
| cons = | | cons = | ||
* '''Blood Rage''': If he mismanages Blood Gauge he will be forced into Blood Rage, a mode that is difficult to exit and has three punishing drawbacks: | * '''Blood Rage''': If he mismanages Blood Gauge he will be forced into Blood Rage, a mode that is difficult to exit and has three punishing drawbacks: | ||
| Line 30: | Line 30: | ||
|footnote=Nagoriyuki's Super jump is unique, and behaves more similarly to a launch jump from other games. It covers more horizontal and vertical distance than other jumps. Its downside is its significant startup. This can both help and hurt Nagoriyuki depending on the circumstance and match-up. Tied to this is how mobility applies to defense. Nagoriyuki's limited mobility exacerbate specific problems on defense. Common tactics for getting out of the corner involves super jumping or air dashing over the opponent's reset. Nagoriyuki can't air dash and his super jump has significant startup, forcing the user to look for opportunities to punish, abare, reversal, or otherwise force a turn. | |footnote=Nagoriyuki's Super jump is unique, and behaves more similarly to a launch jump from other games. It covers more horizontal and vertical distance than other jumps. Its downside is its significant startup. This can both help and hurt Nagoriyuki depending on the circumstance and match-up. Tied to this is how mobility applies to defense. Nagoriyuki's limited mobility exacerbate specific problems on defense. Common tactics for getting out of the corner involves super jumping or air dashing over the opponent's reset. Nagoriyuki can't air dash and his super jump has significant startup, forcing the user to look for opportunities to punish, abare, reversal, or otherwise force a turn. | ||
| fastestAttack = [[#5P|5P]] (5F) | |||
| reversal = [[#Wasureyuki|632146S]] (9F) ''(Normal state only)''<br>[[#Zansetsu|632146H]] (21F) ''(Blood Rage only)'' | |||
| voice_actor = Japanese: [https://en.wikipedia.org/wiki/Taiten_Kusunoki Taiten Kusunoki] English: Evan Michael Lee | | voice_actor = Japanese: [https://en.wikipedia.org/wiki/Taiten_Kusunoki Taiten Kusunoki] English: Evan Michael Lee | ||
| difficulty_rating = 2 | | difficulty_rating = 2 | ||
| Line 38: | Line 40: | ||
|header= Blood Gauge & Blood Rage | |header= Blood Gauge & Blood Rage | ||
|content= <gallery widths="400px" heights="45px" mode="nolines" place="right"> | |content= <gallery widths="400px" heights="45px" mode="nolines" place="right"> | ||
File:GGST_Nagoriyuki_BloodrageGauge.png| The Blood Gauge shown | File:GGST_Nagoriyuki_BloodrageGauge.png| The Blood Gauge shown above is slightly more than half full | ||
</gallery> | </gallery> | ||
[[File:GGST_Nagoriyuki_NormalState.png|thumb|right|200px|Normal state]] | [[File:GGST_Nagoriyuki_NormalState.png|thumb|right|200px|Normal state]] | ||
| Line 52: | Line 54: | ||
{{FrameChartKey}} | {{FrameChartKey}} | ||
===<big>{{clr| | ===<big>{{clr|P|5P}}</big>=== | ||
<div class="attack-container"> | <div class="attack-container"> | ||
<div class="attack-gallery"> | <div class="attack-gallery"> | ||
| Line 85: | Line 87: | ||
Nagoriyuki's fastest strike. Useful for abare and as an occasional anti-air. | Nagoriyuki's fastest strike. Useful for abare and as an occasional anti-air. | ||
A standard jab. It's Nagoriyuki's only frame 5 strike, making it important for mashing out of grabs on wake up and for scramble situations. It's a serviceable anti-air in some scenarios, a strength accentuated by its ability to cancel into {{MiniMoveCard|game=GGST|chara=Nagoriyuki|input=6P|label={{clr| | A standard jab. It's Nagoriyuki's only frame 5 strike, making it important for mashing out of grabs on wake up and for scramble situations. It's a serviceable anti-air in some scenarios, a strength accentuated by its ability to cancel into {{MiniMoveCard|game=GGST|chara=Nagoriyuki|input=6P|label={{clr|P|6P}}}}. For example, {{clr|P|5P}} is a good option for punishing {{Character Label|GGST|Millia Rage|label=Millia's}} {{MiniMoveCard|game=GGST|chara=Millia Rage|input=j.H|label={{clr|H|j.H}}}} > air dash. | ||
* Initial Proration for combo : 80% | * Initial Proration for combo : 80% | ||
[[GGST/Nagoriyuki/Frame_Data#Gatling_Table|Gatling Options:]] {{clr| | [[GGST/Nagoriyuki/Frame_Data#Gatling_Table|Gatling Options:]] {{clr|P|5P}}, {{clr|P|2P}}, {{clr|P|6P}}, {{clr|K|6K}}, {{clr|H|6H}} | ||
{{CloseCard}} | {{CloseCard}} | ||
===<big>{{clr| | ===<big>{{clr|K|5K}}</big>=== | ||
<div class="attack-container"> | <div class="attack-container"> | ||
<div class="attack-gallery"> | <div class="attack-gallery"> | ||
| Line 124: | Line 126: | ||
A phenomenal kick attack. It's an amazing poke as well as a strong {{keyword|stagger pressure}} option. | A phenomenal kick attack. It's an amazing poke as well as a strong {{keyword|stagger pressure}} option. | ||
{{clr| | {{clr|K|5K}} is one of Nagoriyuki's most important moves. {{#lst:GGST/Nagoriyuki/Strategy|5K}} | ||
* Needs one blood bar to combo into {{clr| | * Needs one blood bar to combo into {{clr|H|6H}} against a standing opponent. | ||
* Initial Proration for combo : 90% | * Initial Proration for combo : 90% | ||
[[GGST/Nagoriyuki/Frame_Data#Gatling_Table|Gatling Options:]] {{clr| | [[GGST/Nagoriyuki/Frame_Data#Gatling_Table|Gatling Options:]] {{clr|P|6P}}, {{clr|K|6K}}, {{clr|H|6H}}, {{clr|D|5D}}, {{clr|D|2D}} | ||
{{CloseCard}} | {{CloseCard}} | ||
===<big>{{clr| | ===<big>{{clr|S|c.S}}</big>=== | ||
<div class="attack-container"> | <div class="attack-container"> | ||
<div class="attack-gallery"> | <div class="attack-gallery"> | ||
| Line 164: | Line 166: | ||
A very powerful, plus on block normal. A magnificent tool for pressure and combos. | A very powerful, plus on block normal. A magnificent tool for pressure and combos. | ||
Nagoriyuki uses his shortsword for a quick slash. Its strong frame advantage and many active frames make it | Nagoriyuki uses his shortsword for a quick slash. Its strong frame advantage and many active frames make it strong during pressure and as a meaty attack. With momentum from {{MiniMoveCard|game=GGST|chara=Nagoriyuki|input=236K|label=Fukyo}} ({{clr|K|236K}}), two {{clr|S|c.S}} can reliably be used in a row to pressure the opponent. Gatlings from {{clr|S|c.S}} lead to strong counter hit combos, dissuading the opponent from retaliating. {{clr|S|c.S}} can be used as an anti-air due to its speed and high hitbox, but {{MiniMoveCard|game=GGST|chara=Nagoriyuki|input=6P|label={{clr|P|6P}}}} and {{MiniMoveCard|game=GGST|chara=Nagoriyuki|input=623H|label=Shizuriyuki}} ({{clr|H|623H}}) are preferred due to their better range and upper body invulnerability. | ||
A staple of Nagoriyuki's offense, {{clr| | {{clr|S|c.S}} is a powerful combo starter. It lifts a grounded opponent into the air, allowing for two {{clr|S|c.S}} hits up close, such as with {{clr|K|236K}} momentum or in the corner. On block, gatlings {{clr|H|6H}} and {{clr|S|2S}} are a true blockstring at any Blood Gauge level. {{clr|H|5H}} and {{clr|H|2H}} are a true blockstring at one blood bar or more. | ||
A staple of Nagoriyuki's offense, {{clr|S|c.S}} is an oppressive tool that is sure to instill fear in even the most robust opponents. | |||
* Does not interact with the Blood Gauge in any way. | * Does not interact with the Blood Gauge in any way. | ||
[[GGST/Nagoriyuki/Frame_Data#Gatling_Table|Gatling Options:]] {{clr| | [[GGST/Nagoriyuki/Frame_Data#Gatling_Table|Gatling Options:]] {{clr|P|6P}}, {{clr|K|6K}}, {{clr|S|f.S}}, {{clr|S|2S}}, {{clr|H|5H}}, {{clr|H|2H}}, {{clr|H|6H}}, {{clr|D|5D}}, {{clr|D|2D}} | ||
{{CloseCard}} | {{CloseCard}} | ||
===<big>{{clr| | ===<big>{{clr|S|f.S}}</big>=== | ||
<div class="attack-container"> | <div class="attack-container"> | ||
<div class="attack-gallery"> | <div class="attack-gallery"> | ||
| Line 208: | Line 212: | ||
A long reaching stab attack. A good choice for poking, pressure and combos that also complements Nagoriyuki's other space control tools. | A long reaching stab attack. A good choice for poking, pressure and combos that also complements Nagoriyuki's other space control tools. | ||
{{clr| | {{clr|S|f.S}} is Nagoriyuki’s longest poke at 0 blood bars, though it is a bit slow and has long recovery. It improves at higher blood levels due to speed and power buffs, patching up two of the move’s shortcomings. It’s a strong pressure starter due to its gatlings and special cancel options. However, the hitbox is lacking vertically, making it vulnerable to low-profile moves. Comboing into {{clr|S|f.SSS}} significantly reduces the Blood Gauge, making {{clr|S|f.S}} a strong whiff punisher at high blood. It’s also a great combo tool for increasing wall carry. | ||
An essential tool for many aspects of Nagoriyuki's gameplan, {{clr| | An essential tool for many aspects of Nagoriyuki's gameplan, {{clr|S|f.S}} is a move that's easy for anyone to make good use of when familiarised with its range. | ||
* Deals chip damage. | * Deals chip damage. | ||
* Decreases Blood Gauge on hit (-7.2/300) over 6 seconds. | * Decreases Blood Gauge on hit (-7.2/300) over 6 seconds. | ||
| Line 216: | Line 220: | ||
* Initial combo proration: 90% | * Initial combo proration: 90% | ||
[[GGST/Nagoriyuki/Frame_Data#Gatling_Table|Gatling Options:]] {{clr| | [[GGST/Nagoriyuki/Frame_Data#Gatling_Table|Gatling Options:]] {{clr|S|f.SS}}, {{clr|H|5H}}, {{clr|H|2H}} | ||
{{CloseCard}} | {{CloseCard}} | ||
===<big>{{clr| | ===<big>{{clr|S|f.SS}}</big>=== | ||
<div class="attack-container"> | <div class="attack-container"> | ||
<div class="attack-gallery"> | <div class="attack-gallery"> | ||
| Line 251: | Line 255: | ||
}} | }} | ||
==== ==== | ==== ==== | ||
The second hit of Nagoriyuki's {{clr| | The second hit of Nagoriyuki's {{clr|S|f.S}} rekka. Extends combos and pressure that {{clr|S|f.S}} initiates, and leads to decent mix-ups of its own. | ||
Nagoriyuki advances while swinging his sword. {{clr| | Nagoriyuki advances while swinging his sword. {{clr|S|f.SS}} amplifies the capabilities of {{clr|S|f.S}}. It gives Nagoriyuki more combo routes and boosts wall carry. It's also a valuable mix-up tool. If nothing is pressed afterwards, Nagoriyuki feints the animation for {{clr|S|f.SSS}}, which can keep the opponent on their toes and let the user escape a punish. The natural frame trap between the two strikes allows {{clr|S|f.SSS}} to hit an opponent pressing buttons. However, {{clr|S|f.SSS}} is -25 on block and cannot be special cancelled, so it's best to use specials instead. The best choices are {{MiniMoveCard|game=GGST|chara=Nagoriyuki|input=623H|label=Shizuriyuki}} ({{clr|H|623H}}) which must be manually delayed, or {{MiniMoveCard|game=GGST|chara=Nagoriyuki|input=214H|label=Kamuriyuki}} ({{clr|H|214H}}) which has a natural frame trap; both give great reward on counter hit. {{clr|S|f.SS}} > {{clr|H|214H}} > {{clr|H|623HH}} grants three frame traps. Should the opponent block all strikes, a backward {{MiniMoveCard|game=GGST|chara=Nagoriyuki|input=214K|label=Fukyo}} ({{clr|K|214K}}) lets the user disengage safely. | ||
* Deals chip damage. | * Deals chip damage. | ||
* Decreases Blood Gauge on hit (-7.2/300). | * Decreases Blood Gauge on hit (-7.2/300). | ||
** Total Blood Gauge recovery for {{clr| | ** Total Blood Gauge recovery for {{clr|S|f.S}} > {{clr|S|f.SS}} on hit is (-14.4/300) and the reduction applies as 2 separate instances each lasting 6 seconds. | ||
[[GGST/Nagoriyuki/Frame_Data#Gatling_Table|Gatling Options:]] {{clr| | [[GGST/Nagoriyuki/Frame_Data#Gatling_Table|Gatling Options:]] {{clr|S|f.SSS}} | ||
{{CloseCard}} | {{CloseCard}} | ||
===<big>{{clr| | ===<big>{{clr|S|f.SSS}}</big>=== | ||
<div class="attack-container"> | <div class="attack-container"> | ||
<div class="attack-gallery"> | <div class="attack-gallery"> | ||
| Line 293: | Line 297: | ||
}} | }} | ||
==== ==== | ==== ==== | ||
The finisher to Nagoriyuki's {{clr| | The finisher to Nagoriyuki's {{clr|S|f.S}} rekka. Useful as a combo finisher and occasional blockstring extender if backed up with a Roman Cancel. | ||
A strike that frame traps from {{clr| | A strike that frame traps from {{clr|S|f.SS}}. It's an alternative to {{MiniMoveCard|game=GGST|chara=Nagoriyuki|input=623H|label=Shizuriyuki}} ({{clr|H|623H}}) and {{MiniMoveCard|game=GGST|chara=Nagoriyuki|input=214H|label=Kamuriyuki}} ({{clr|H|214H}}) after {{clr|S|f.SS}} on block if the user wishes to decrease the Blood Gauge. {{#lst:GGST/Nagoriyuki/Strategy|f.SSS}} | ||
{{clr| | {{clr|S|f.SSS}} is also a staple combo finisher in juggle combos due to its long range, wall carry and high Blood Gauge reduction. It's a great choice for finishing a combo that has been extended by using special moves, as it will mitigate said combo's Blood gauge increase. It can also wallsplat, allowing the user to combo into {{clr|S|c.S}} or {{MiniMoveCard|game=GGST|chara=Nagoriyuki|input=632146S|label=Wasureyuki}} ({{clr|S|632146S}}). | ||
* Deals chip damage. | * Deals chip damage. | ||
* Decreases Blood Gauge on hit and block (OH -115.2/300, OB -64.8/300). | * Decreases Blood Gauge on hit and block (OH -115.2/300, OB -64.8/300). | ||
** Total Blood Gauge recovery for {{clr| | ** Total Blood Gauge recovery for {{clr|S|f.S}} > {{clr|S|f.SS}} > {{clr|S|f.SSS}} on hit is (-129.6/300) and the reduction applies as 3 separate instances each lasting 6 seconds. | ||
{{CloseCard}} | {{CloseCard}} | ||
===<big>{{clr| | ===<big>{{clr|H|5H}}</big>=== | ||
<div class="attack-container"> | <div class="attack-container"> | ||
<div class="attack-gallery"> | <div class="attack-gallery"> | ||
| Line 353: | Line 357: | ||
A massive horizontal sword slash. One of the best space control tools GGST has to offer, and a good punisher. Also a rewarding frame trap option. | A massive horizontal sword slash. One of the best space control tools GGST has to offer, and a good punisher. Also a rewarding frame trap option. | ||
{{#lst:GGST/Nagoriyuki/Strategy|5H}} On hit, cancel into {{MiniMoveCard|game=GGST|chara=Nagoriyuki|input=236K|label=Fukyo}} ({{clr| | {{#lst:GGST/Nagoriyuki/Strategy|5H}} On hit, cancel into {{MiniMoveCard|game=GGST|chara=Nagoriyuki|input=236K|label=Fukyo}} ({{clr|K|236K}}) to maintain optimal spacing and keep up the pressure. On counter hit, cancel into {{clr|K|236K}} and go for {{MiniMoveCard|game=GGST|chara=Nagoriyuki|input=6H Level 2|label={{clr|H|6H}}}} or {{clr|H|5H}} OTG for good, stable damage. | ||
{{clr| | {{clr|H|5H}} is a move that can make or break space control. Learn to recognize how far each blood level will allow {{clr|H|5H}} to reach, and study the opponent's movement patterns to determine when to swing. With correct usage, an impatient opponent can always be kept at bay. | ||
* Deals chip damage. | * Deals chip damage. | ||
* Decreases Blood Gauge on hit/block (OH -57.6/300, OB -7.2/300) over 6 seconds. | * Decreases Blood Gauge on hit/block (OH -57.6/300, OB -7.2/300) over 6 seconds. | ||
| Line 362: | Line 366: | ||
{{CloseCard}} | {{CloseCard}} | ||
===<big>{{clr| | ===<big>{{clr|D|5D}}</big>=== | ||
<div class="attack-container"> | <div class="attack-container"> | ||
<div class="attack-gallery"> | <div class="attack-gallery"> | ||
| Line 403: | Line 407: | ||
* Causes 80% proration on-hit | * Causes 80% proration on-hit | ||
Nagoriyuki uses his long sword for a quick overhead. Can be gatlinged into from {{clr| | Nagoriyuki uses his long sword for a quick overhead. Can be gatlinged into from {{clr|K|5K}}, {{clr|K|2K}}, or {{clr|S|c.S}} for a mixup. | ||
---- | ---- | ||
;Charged Dust | ;Charged Dust | ||
| Line 409: | Line 413: | ||
* Holding up during the hitstop frames of charged dust will activate homing jump: | * Holding up during the hitstop frames of charged dust will activate homing jump: | ||
** Doing a homing jump will cause an area shift and put the opponent into a unique high damaging air combo state. | ** Doing a homing jump will cause an area shift and put the opponent into a unique high damaging air combo state. | ||
** During homing dust, using {{clr| | ** During homing dust, using {{clr|S|j.S}}, {{clr|H|j.H}}, and {{clr|D|j.D}} will recover Blood Gauge like they normally would. | ||
** Gives Nago a double jump that he wouldn't normally have. | ** Gives Nago a double jump that he wouldn't normally have. | ||
** Pressing any attack twice without jump/dash cancel will activate the homing jump finisher causing a hard knockdown (+23). | ** Pressing any attack twice without jump/dash cancel will activate the homing jump finisher causing a hard knockdown (+23). | ||
** Homing jump combos can sometimes increase meter balance enough to activate positive bonus. | ** Homing jump combos can sometimes increase meter balance enough to activate positive bonus. | ||
Similar to uncharged but is slow enough to be reacted to, but if it does land it gives a very high damaging combo. Using {{clr| | Similar to uncharged but is slow enough to be reacted to, but if it does land it gives a very high damaging combo. Using {{clr|H|j.H}} drains 8 times as much of the blood gauge as {{clr|S|j.S}} or {{clr|D|j.D}} do, so route in as many {{clr|H|j.H}} as possible to maximize recovery of the Blood Gauge. | ||
{{CloseCard}} | {{CloseCard}} | ||
===<big>{{clr| | ===<big>{{clr|P|2P}}</big>=== | ||
<div class="attack-container"> | <div class="attack-container"> | ||
<div class="attack-gallery"> | <div class="attack-gallery"> | ||
| Line 448: | Line 452: | ||
}} | }} | ||
==== ==== | ==== ==== | ||
A standard low jab. Primarily used for abare, as a slightly slower alternative to {{clr| | A standard low jab. Primarily used for abare, as a slightly slower alternative to {{clr|P|5P}} that hits lower. | ||
{{clr| | {{clr|P|2P}} is a decent move for scramble situations where the opponent uses {{keyword|low profile}} moves. However, some moves can still slip under it, and the reward on hit is low. It is also one frame slower than {{clr|P|5P}}, which makes it more likely to lose to some moves that {{clr|P|5P}} would not. A rather unremarkable attack overall. | ||
* Initial Proration for combo : 80% | * Initial Proration for combo : 80% | ||
[[GGST/Nagoriyuki/Frame_Data#Gatling_Table|Gatling Options:]] {{clr| | [[GGST/Nagoriyuki/Frame_Data#Gatling_Table|Gatling Options:]] {{clr|P|5P}}, {{clr|P|2P}}, {{clr|P|6P}}, {{clr|K|6K}}, {{clr|H|6H}} | ||
{{CloseCard}} | {{CloseCard}} | ||
===<big>{{clr| | ===<big>{{clr|K|2K}}</big>=== | ||
<div class="attack-container"> | <div class="attack-container"> | ||
<div class="attack-gallery"> | <div class="attack-gallery"> | ||
| Line 490: | Line 494: | ||
A low kick with minor low-profile properties. Useful as a low mix-up and as a meaty attack. | A low kick with minor low-profile properties. Useful as a low mix-up and as a meaty attack. | ||
The speed of {{clr| | The speed of {{clr|K|2K}} makes it a decent mix-up and Nagoriyuki's best low at close range. It can be used from an empty jump to hit an opponent expecting an aerial attack, though aerial approaches are far from Nagoriyuki's specialty. Because of its high amount of active frames, {{clr|K|2K}} becomes plus on block if it hits late. On counter hit, {{clr|K|2K}} can combo into {{clr|S|c.S}}. These factors make {{clr|K|2K}} an excellent meaty option if there isn't enough time to get in range for a {{MiniMoveCard|game=GGST|chara=Nagoriyuki|input=c.S|label={{clr|S|c.S}}}}. | ||
* Initial Proration for combo : 70% | * Initial Proration for combo : 70% | ||
[[GGST/Nagoriyuki/Frame_Data#Gatling_Table|Gatling Options:]] {{clr| | [[GGST/Nagoriyuki/Frame_Data#Gatling_Table|Gatling Options:]] {{clr|P|6P}}, {{clr|K|6K}}, {{clr|H|6H}}, {{clr|D|5D}}, {{clr|D|2D}} | ||
{{CloseCard}} | {{CloseCard}} | ||
===<big>{{clr| | ===<big>{{clr|S|2S}}</big>=== | ||
<div class="attack-container"> | <div class="attack-container"> | ||
<div class="attack-gallery"> | <div class="attack-gallery"> | ||
| Line 530: | Line 534: | ||
}} | }} | ||
==== ==== | ==== ==== | ||
A slash low to the ground. With excellent range and frame data, {{clr| | A slash low to the ground. With excellent range and frame data, {{clr|S|2S}} is rewarding space control tool that is nigh impossible to punish. | ||
This is a contender for the strongest mid-ranged poke in the game. {{#lst:GGST/Nagoriyuki/Strategy|2S}} | This is a contender for the strongest mid-ranged poke in the game. {{#lst:GGST/Nagoriyuki/Strategy|2S}} | ||
When mixed with other poking moves, {{clr| | When mixed with other poking moves, {{clr|S|2S}} can really get into the opponent's head. The threat of the move will likely make them play more carefully, giving the user more opportunities to enforce offense. It's impossible to overstate how strong of a move this is. | ||
* Deals chip damage. | * Deals chip damage. | ||
* Decreases Blood Gauge on hit (-7.2/300) over 6 seconds. | * Decreases Blood Gauge on hit (-7.2/300) over 6 seconds. | ||
* With each bar of Blood Gauge, speed and power are improved. | * With each bar of Blood Gauge, speed and power are improved. | ||
* On hit, gatling {{clr| | * On hit, gatling {{clr|H|5H}} combos at 2 blood bars or higher. | ||
* Initial Proration for combo : 90% | * Initial Proration for combo : 90% | ||
[[GGST/Nagoriyuki/Frame_Data#Gatling_Table|Gatling Options:]] {{clr| | [[GGST/Nagoriyuki/Frame_Data#Gatling_Table|Gatling Options:]] {{clr|H|5H}}, {{clr|H|2H}} | ||
{{CloseCard}} | {{CloseCard}} | ||
===<big>{{clr| | ===<big>{{clr|H|2H}}</big>=== | ||
<div class="attack-container"> | <div class="attack-container"> | ||
<div class="attack-gallery"> | <div class="attack-gallery"> | ||
| Line 601: | Line 605: | ||
{{CloseCard}} | {{CloseCard}} | ||
===<big>{{clr| | ===<big>{{clr|D|2D}}</big>=== | ||
<div class="attack-container"> | <div class="attack-container"> | ||
<div class="attack-gallery"> | <div class="attack-gallery"> | ||
| Line 634: | Line 638: | ||
Standard sweep. Only sees use in combos and blockstrings due to being outperformed by other lows in neutral. | Standard sweep. Only sees use in combos and blockstrings due to being outperformed by other lows in neutral. | ||
The range and frame data of {{clr| | The range and frame data of {{clr|D|2D}} are decent. On hit, it can combo into {{clr|H|6H}} > {{clr|K|236K}} for good damage and okizeme. Despite being a passable move, it doesn’t see much use in neutral due to | ||
{{MiniMoveCard|game=GGST|chara=Nagoriyuki|input=2K|label={{clr| | {{MiniMoveCard|game=GGST|chara=Nagoriyuki|input=2K|label={{clr|K|2K}}}} | ||
and {{MiniMoveCard|game=GGST|chara=Nagoriyuki|input=2S Level 1|label={{clr| | and {{MiniMoveCard|game=GGST|chara=Nagoriyuki|input=2S Level 1|label={{clr|S|2S}}}} outshining it. {{clr|K|2K}} is faster and can combo into {{clr|D|2D}}, giving {{clr|K|2K}} the same reward {{clr|D|2D}} has. {{clr|S|2S}} has longer range, is more rewarding, and its speed is equal or better depending on the Blood Gauge. That being said, {{clr|D|2D}} is a staple in combos and blockstrings due to being a low attack that knocks the opponent down. | ||
* Initial Proration for combo : 90% | * Initial Proration for combo : 90% | ||
| Line 642: | Line 646: | ||
{{CloseCard}} | {{CloseCard}} | ||
===<big>{{clr| | ===<big>{{clr|P|6P}}</big>=== | ||
<div class="attack-container"> | <div class="attack-container"> | ||
<div class="attack-gallery"> | <div class="attack-gallery"> | ||
| Line 673: | Line 677: | ||
}} | }} | ||
==== ==== | ==== ==== | ||
A fast, upper body invulnerable strike. Used as a counter poke and anti-air. A standard {{clr| | A fast, upper body invulnerable strike. Used as a counter poke and anti-air. A standard {{clr|P|6P}}, which makes it very good. | ||
{{#lst:GGST/Offense|6P}} | {{#lst:GGST/Offense|6P}} | ||
{{clr| | {{clr|P|6P}} is also an excellent anti-air. Its range is much smaller than {{MiniMoveCard|game=GGST|chara=Nagoriyuki|input=2H Level 2|label={{clr|H|2H}}}}, but it comes with the benefit of being a lot easier to use in a pinch due to its upper body invulnerability and superior speed. This is Nagoriyuki's main tool to stop opponents from trying to engage with air attacks on reaction. Combo it into {{MiniMoveCard|game=GGST|chara=Nagoriyuki|input=623H|label=Shizuriyuki}} ({{clr|H|623H}}) for powerful juggle combos. | ||
* Initial Proration for combo : 90% | * Initial Proration for combo : 90% | ||
{{CloseCard}} | {{CloseCard}} | ||
===<big>{{clr| | ===<big>{{clr|K|6K}}</big>=== | ||
<div class="attack-container"> | <div class="attack-container"> | ||
<div class="attack-gallery"> | <div class="attack-gallery"> | ||
| Line 717: | Line 721: | ||
A forward-moving stomp attack. It's a niche move, seeing use only in the occasional blockstring and combo. Still good at what it does, though. | A forward-moving stomp attack. It's a niche move, seeing use only in the occasional blockstring and combo. Still good at what it does, though. | ||
{{clr| | {{clr|K|6K}} has use during blockstrings because the forward movement positions Nagoriyuki into throw range, though Faultless Defense can push him out. Staggering {{clr|K|5K}} > {{clr|K|6K}} can make the opponent freeze up due to the risk of special cancels. Due to pulling Nagoriyuki's lower hurtbox back, {{clr|K|6K}} can be a rewarding choice in anticipation of a low poke, though there are safer and more consistent moves to go for. | ||
For combos, {{clr| | For combos, {{clr|K|6K}} is a good way to lead into {{clr|H|623H}} or {{clr|H|214H}} after a {{clr|K|5K}}. {{clr|K|5K}} > {{clr|K|6K}} can be reliably hit confirmed into follow-ups, such as the aforementioned special moves or an Overdrive. On counter hit, {{clr|K|6K}} staggers the enemy, allowing it to combo into a command throw. {{clr|K|6K}} also ground bounces on air hit, but there are better combo extenders for juggle combos. | ||
* Initial Proration for combo : 90% | * Initial Proration for combo : 90% | ||
{{CloseCard}} | {{CloseCard}} | ||
===<big>{{clr| | ===<big>{{clr|H|6H}}</big>=== | ||
<div class="attack-container"> | <div class="attack-container"> | ||
<div class="attack-gallery"> | <div class="attack-gallery"> | ||
| Line 772: | Line 776: | ||
A large sword slash downwards. Very strong pressure option and combo tool. | A large sword slash downwards. Very strong pressure option and combo tool. | ||
{{clr| | {{clr|H|6H}} is a great move for punishing {{keyword|abare}}, as it leads to big damage off of a counter hit. {{MiniMoveCard|game=GGST|chara=Nagoriyuki|input=5K|label={{clr|K|5K}}}} and {{MiniMoveCard|game=GGST|chara=Nagoriyuki|input=c.S|label={{clr|S|c.S}}}} are good options to gatling into it. {{clr|S|c.S}} > {{clr|H|6H}} is a true blockstring if done instantly, or a frame trap if delayed. Its high hitbox also allow it to force a cornered opponent back to the ground, should they jump. Canceling {{clr|H|6H}} into backwards {{MiniMoveCard|game=GGST|chara=Nagoriyuki|input=214K|label=Fukyo}} ({{clr|K|214K}}) will grant Nagoriyuki +2 on block frame advantage. | ||
Due to its damage, knockdown, and Blood Gauge reduction, {{clr| | Due to its damage, knockdown, and Blood Gauge reduction, {{clr|H|6H}} is a good combo finisher in many situations. When ending a combo with {{clr|H|6H}} OTG, canceling into forward {{MiniMoveCard|game=GGST|chara=Nagoriyuki|input=236K|label=Fukyo}} ({{clr|K|236K}}) results in favorable {{keyword|Okizeme}}, for which {{clr|S|c.S}} is a good option. If Nagoriyuki isn't in range to use {{clr|S|c.S}}, then {{MiniMoveCard|game=GGST|chara=Nagoriyuki|input=2K|label={{clr|K|2K}}}} is a fine alternative. | ||
* Deals chip damage. | * Deals chip damage. | ||
| Line 782: | Line 786: | ||
{{CloseCard}} | {{CloseCard}} | ||
===<big>{{clr| | ===<big>{{clr|P|j.P}}</big>=== | ||
<div class="attack-container"> | <div class="attack-container"> | ||
<div class="attack-gallery"> | <div class="attack-gallery"> | ||
| Line 818: | Line 822: | ||
* Initial Proration for combo : 80% | * Initial Proration for combo : 80% | ||
[[GGST/Nagoriyuki/Frame_Data#Gatling_Table|Gatling Options:]] {{clr| | [[GGST/Nagoriyuki/Frame_Data#Gatling_Table|Gatling Options:]] {{clr|P|j.P}} | ||
{{CloseCard}} | {{CloseCard}} | ||
===<big>{{clr| | ===<big>{{clr|K|j.K}}</big>=== | ||
<div class="attack-container"> | <div class="attack-container"> | ||
<div class="attack-gallery"> | <div class="attack-gallery"> | ||
| Line 858: | Line 862: | ||
* Initial Proration for combo : 80% | * Initial Proration for combo : 80% | ||
[[GGST/Nagoriyuki/Frame_Data#Gatling_Table|Gatling Options:]] {{clr| | [[GGST/Nagoriyuki/Frame_Data#Gatling_Table|Gatling Options:]] {{clr|D|j.D}} | ||
{{CloseCard}} | {{CloseCard}} | ||
===<big>{{clr| | ===<big>{{clr|S|j.S}}</big>=== | ||
<div class="attack-container"> | <div class="attack-container"> | ||
<div class="attack-gallery"> | <div class="attack-gallery"> | ||
| Line 903: | Line 907: | ||
* Initial Proration for combo : 80% | * Initial Proration for combo : 80% | ||
[[GGST/Nagoriyuki/Frame_Data#Gatling_Table|Gatling Options:]] {{clr| | [[GGST/Nagoriyuki/Frame_Data#Gatling_Table|Gatling Options:]] {{clr|H|j.H}}, {{clr|D|j.D}} | ||
{{CloseCard}} | {{CloseCard}} | ||
===<big>{{clr| | ===<big>{{clr|H|j.H}}</big>=== | ||
<div class="attack-container"> | <div class="attack-container"> | ||
<div class="attack-gallery"> | <div class="attack-gallery"> | ||
| Line 962: | Line 966: | ||
* Initial Proration for combo : 80% | * Initial Proration for combo : 80% | ||
[[GGST/Nagoriyuki/Frame_Data#Gatling_Table|Gatling Options:]] {{clr| | [[GGST/Nagoriyuki/Frame_Data#Gatling_Table|Gatling Options:]] {{clr|D|j.D}} | ||
{{CloseCard}} | {{CloseCard}} | ||
===<big>{{clr| | ===<big>{{clr|D|j.D}}</big>=== | ||
<div class="attack-container"> | <div class="attack-container"> | ||
<div class="attack-gallery"> | <div class="attack-gallery"> | ||
| Line 1,012: | Line 1,016: | ||
===<big>Ground Throw</big>=== | ===<big>Ground Throw</big>=== | ||
<span class="input-badge">'''{{clr| | <span class="input-badge">'''{{clr|D|6D}} or {{clr|D|4D}}'''</span> | ||
<div class="attack-container"> | <div class="attack-container"> | ||
<div class="attack-gallery"> | <div class="attack-gallery"> | ||
| Line 1,037: | Line 1,041: | ||
Universal throw. Useful for mix-ups and for escaping pressure. | Universal throw. Useful for mix-ups and for escaping pressure. | ||
Nagoriyuki throws his opponent down to the ground like the trash they are. Like other characters' throws, this is a good mix-up option. Think of it as a faster but less rewarding alternative to {{MiniMoveCard|game=GGST|chara=Nagoriyuki|input=623P|label=Bloodsucking Universe}} ({{clr| | Nagoriyuki throws his opponent down to the ground like the trash they are. Like other characters' throws, this is a good mix-up option. Think of it as a faster but less rewarding alternative to {{MiniMoveCard|game=GGST|chara=Nagoriyuki|input=623P|label=Bloodsucking Universe}} ({{clr|P|623P}}). Its unusually long range for a ground throw makes it good for disrespecting pressure, which helps compensate for Nagoriyuki's generally slow moves. Ground throw grants strong okizeme on hit. {{#lst:GGST/Nagoriyuki/Strategy|Ground Throw}} | ||
* Can throw the opponent either forward or backwards. | * Can throw the opponent either forward or backwards. | ||
| Line 1,044: | Line 1,048: | ||
===<big>Air Throw</big>=== | ===<big>Air Throw</big>=== | ||
<span class="input-badge">'''{{clr| | <span class="input-badge">'''{{clr|D|j.6D}} or {{clr|D|j.4D}}'''</span> | ||
<div class="attack-container"> | <div class="attack-container"> | ||
<div class="attack-gallery"> | <div class="attack-gallery"> | ||
| Line 1,064: | Line 1,068: | ||
Universal air throw. Excellent air-to-air and complements Nagoriyuki's mix-ups. | Universal air throw. Excellent air-to-air and complements Nagoriyuki's mix-ups. | ||
Air throw has long range, especially so above Nagoriyuki, making it a useful tool for interrupting air approaches. It is also faster than any of Nagoriyuki's aerial strikes, though air throw has a lot of recovery, so beware. On hit, it combos into {{clr| | Air throw has long range, especially so above Nagoriyuki, making it a useful tool for interrupting air approaches. It is also faster than any of Nagoriyuki's aerial strikes, though air throw has a lot of recovery, so beware. On hit, it combos into {{clr|H|6H}} OTG, making it more rewarding than other characters' air throws. In addition, it can complement Nagoriyuki's mix-ups. A common option against Nagoriyuki's {{MiniMoveCard|game=GGST|chara=Nagoriyuki|input=236K|label=Fukyo}} mix-ups is {{keyword|chicken block}}, as it will cover many of Nagoriyuki's options. {{clr|K|236K}} into air throw is useful for countering chicken blocking. | ||
''For more on Fukyo mix-ups and how air throw plays into it, see [[GGST/Nagoriyuki/Strategy#Fukyo Mix-Ups & Pressure Resets|the Strategy page]].'' | ''For more on Fukyo mix-ups and how air throw plays into it, see [[GGST/Nagoriyuki/Strategy#Fukyo Mix-Ups & Pressure Resets|the Strategy page]].'' | ||
| Line 1,074: | Line 1,078: | ||
==Special Moves== | ==Special Moves== | ||
=== | ===<big>Fukyo</big>=== | ||
<span class="input-badge">'''{{clr| | <span class="input-badge">'''{{clr|K|236K}} or {{clr|K|214K}}'''</span> | ||
<div class="attack-container"> | <div class="attack-container"> | ||
<div class="attack-gallery"> | <div class="attack-gallery"> | ||
| Line 1,086: | Line 1,090: | ||
Hitboxes= | Hitboxes= | ||
<gallery widths="210px" heights="210px" mode="nolines"> | <gallery widths="210px" heights="210px" mode="nolines"> | ||
GGST_Nagoriyuki_Fukyo-Hitbox.png | This can slip under some high pokes, like Axl's {{clr| | GGST_Nagoriyuki_Fukyo-Hitbox.png | This can slip under some high pokes, like Axl's {{clr|P|5P}} | ||
</gallery> | </gallery> | ||
</tabber> | </tabber> | ||
| Line 1,104: | Line 1,108: | ||
A versatile command dash that increases the Blood Gauge. Essential for every aspect of Nagoriyuki's gameplan, from movement and punishment to pressure and combos alike. | A versatile command dash that increases the Blood Gauge. Essential for every aspect of Nagoriyuki's gameplan, from movement and punishment to pressure and combos alike. | ||
Fukyo has two versions: {{clr| | Fukyo has two versions: {{clr|K|236K}}, which moves forwards, and {{clr|K|214K}}, which moves backwards. Both versions increase the Blood Gauge. Fukyo has many applications. Firstly, it compensates for Nagoriyuki's poor movement. {{clr|K|236K}} can be used to approach and {{clr|K|214K}} can be used to retreat and to dodge and punish attacks. Both versions leave Nagoriyuki with sliding momentum. The momentum can be canceled after the recovery by walking in the opposite direction. This allows the user to fine tune Nagoriyuki's positioning, which is key for moving to the optimal range to keep up pressure. The forward momentum of {{clr|K|236K}} can also be imparted to other actions, namely Nagoriyuki's other special moves and his jumps. {{clr|K|236K}} > {{clr|H|214H}} grants Nagoriyuki a relatively fast, full-screen lunging attack. This helps with closing space against characters with full-screen zoning options, such as {{Character Label|GGST|Happy Chaos|label=Happy Chaos}}. | ||
The forward momentum of {{clr| | The forward momentum of {{clr|K|236K}} can extend combos, such as following up after {{clr|H|623H}} or staying in range for multiple {{clr|S|c.S}}. The sliding momentum can also move him into position to extend pressure. For example, {{clr|K|236K}} > {{clr|S|c.S}} on block leaves Nagoriyuki close enough for a follow-up {{clr|P|623P}}. Given that {{clr|K|236K}} and {{clr|K|214K}} has the same animation, the two versions can be mixed up to throw the opponent off. The user can bait and punish abare by moving backwards, or condition the opponent to expect backward movement and then move forward to open them up. For more on Fukyo mix-ups, check [[GGST/Nagoriyuki/Strategy#Fukyo Mix-Ups & Pressure Resets|the Strategy page]]. | ||
Fukyo is the glue that binds Nagoriyuki's move set together. Proper use of it is essential for mastering Nagoriyuki, so get comfortable with it. | Fukyo is the glue that binds Nagoriyuki's move set together. Proper use of it is essential for mastering Nagoriyuki, so get comfortable with it. | ||
* Increases Blood Gauge (+43.2/300) over 3 seconds | * Increases Blood Gauge (+43.2/300) over 3 seconds | ||
* {{clr| | * {{clr|K|236K}} and {{clr|K|214K}} can cancel into specials from frame 14 and frame 9 onwards, respectively, except either variant of Fukyo. | ||
* Cancelable into itself with a {{Ni|4|18px}} or {{Ni|6|18px}} input while holding {{prompt|GGST|K|18px}}. | * Cancelable into itself with a {{Ni|4|18px}} or {{Ni|6|18px}} input while holding {{prompt|GGST|K|18px}}. | ||
| Line 1,117: | Line 1,121: | ||
===<big>Zarameyuki</big>=== | ===<big>Zarameyuki</big>=== | ||
<span class="input-badge">'''{{clr| | <span class="input-badge">'''{{clr|S|236S}}'''</span> | ||
<div class="attack-container"> | <div class="attack-container"> | ||
<div class="attack-gallery"> | <div class="attack-gallery"> | ||
| Line 1,149: | Line 1,153: | ||
Nagoriyuki fires a body double of himself as a projectile. {{#lst:GGST/Nagoriyuki/Strategy|Zarameyuki}} | Nagoriyuki fires a body double of himself as a projectile. {{#lst:GGST/Nagoriyuki/Strategy|Zarameyuki}} | ||
At close range, Zarameyuki provides strong mix-ups thanks to its high frame advantage on block. For example, {{clr| | At close range, Zarameyuki provides strong mix-ups thanks to its high frame advantage on block. For example, {{clr|S|c.S}} will interrupt abare attempts after the projectile is blocked, which can be mixed up with a throw. Its long active duration also make it easy to hit the move meaty. Using it after knocking the opponent down with Bloodsucking Universe in the corner allows for extended pressure sequences due to the stage positioning and Blood Gauge reduction. | ||
* Increases Blood Gauge (+90/300) over 3 seconds. | * Increases Blood Gauge (+90/300) over 3 seconds. | ||
| Line 1,161: | Line 1,165: | ||
===<big>Kamuriyuki</big>=== | ===<big>Kamuriyuki</big>=== | ||
<span class="input-badge">'''{{clr| | <span class="input-badge">'''{{clr|H|214H}}'''</span> | ||
<div class="attack-container"> | <div class="attack-container"> | ||
<div class="attack-gallery"> | <div class="attack-gallery"> | ||
| Line 1,196: | Line 1,200: | ||
A powerful and versatile lunging attack that increases the Blood Gauge. An excellent tool for closing space, punishment, pressure and combos. | A powerful and versatile lunging attack that increases the Blood Gauge. An excellent tool for closing space, punishment, pressure and combos. | ||
Thanks to its impressive speed and range, Kamuriyuki is a good option for closing the gap and initiating offense. If used unpredictably during neutral, it's likely to interrupt forward movement or even score a counter hit. It's an excellent punisher, should the opponent whiff a risky move. It's also good for interrupting slow, reactable moves, such as {{Character Label|GGST|Ky Kiske|label=Ky's}} {{MiniMoveCard|game=GGST|chara=Ky Kiske|input=236H|label=Charged Stun Edge}} ({{clr| | Thanks to its impressive speed and range, Kamuriyuki is a good option for closing the gap and initiating offense. If used unpredictably during neutral, it's likely to interrupt forward movement or even score a counter hit. It's an excellent punisher, should the opponent whiff a risky move. It's also good for interrupting slow, reactable moves, such as {{Character Label|GGST|Ky Kiske|label=Ky's}} {{MiniMoveCard|game=GGST|chara=Ky Kiske|input=236H|label=Charged Stun Edge}} ({{clr|H|236H}}). If {{clr|H|214H}} hits close and with low combo scaling, the knockdown from {{clr|H|214H}} can combo into {{clr|H|6H}} OTG, mitigating the move's Blood Gauge increase. During less ideal conditions, the user will need to close space with {{MiniMoveCard|game=GGST|chara=Nagoriyuki|input=236K|label=Fukyo}} ({{clr|K|236K}}) before using {{clr|H|6H}}, if it can combo at all. Alternatively, combo {{clr|H|214H}} into {{MiniMoveCard|game=GGST|chara=Nagoriyuki|input=623H|label=Shizuriyuki}} ({{clr|H|623H}}) to launch the opponent for a stronger conversion, at the cost of high Blood Gauge increase. | ||
However, the move is -3 on block at close range. This | However, the move is -3 on block at close range. This forces the user to special cancel or risk being punished by a throw. Nagoriyuki's special moves puts the user in a decent position to play mindgames with the opponent. If the opponent attempts a punish, a cancel into {{clr|H|623H}} will counter hit them, whereas {{clr|K|214K}} can dodge and punish. If the opponent is conditioned to stay passive, they become open to a throw. {{clr|H|214H}} also yields high reward on counter hit, making it a strong frame trap from moves such as {{clr|H|5H}}. Note that if only the final frames of {{clr|H|214H}} hit the opponent - such as from max range - Nagoriyuki is -1 on block, which means that special canceling isn't a must to stay safe. {{clr|H|214H}} also has airborne frames, allowing it to jump over certain attacks. | ||
Kamuriyuki is a phenomenal move. It approaches, it combos, it punishes, it mixes, it sets up frame traps, it slices, it dices and it makes julienne fries. However, it will ''not'' pay your taxes. Nagoriyuki players are still debating how to best work around this significant shortcoming. | Kamuriyuki is a phenomenal move. It approaches, it combos, it punishes, it mixes, it sets up frame traps, it slices, it dices and it makes julienne fries. However, it will ''not'' pay your taxes. Nagoriyuki players are still debating how to best work around this significant shortcoming. | ||
| Line 1,208: | Line 1,212: | ||
===<big>Shizuriyuki</big>=== | ===<big>Shizuriyuki</big>=== | ||
<span class="input-badge">'''{{clr| | <span class="input-badge">'''{{clr|H|623H}}'''</span> | ||
<div class="attack-container"> | <div class="attack-container"> | ||
<div class="attack-gallery"> | <div class="attack-gallery"> | ||
| Line 1,249: | Line 1,253: | ||
A large and versatile two-hit rekka that increases the Blood Gauge. A strong frame trap and combo extender, as well as a powerful anti-air and oppressive round start option. | A large and versatile two-hit rekka that increases the Blood Gauge. A strong frame trap and combo extender, as well as a powerful anti-air and oppressive round start option. | ||
The {{clr| | The {{clr|H|623H}} input initiates the first hit, and pressing {{Prompt|GGST|H|18px}} again initiates the follow-up ({{clr|H|623HH}}). The follow-up is highly delayable and can be used even on whiff. {{clr|H|623H}} is a good choice after moves such as {{MiniMoveCard|game=GGST|chara=Nagoriyuki|input=214H|label=Kamuriyuki}} ({{clr|H|214H}}) on block to punish an opponent that challenges the user. The follow-up can be used to cover for the first hit. Both hits yield great reward on counter hit, making it a strong conditioning tool. Shizuriyuki is also used to extend combos. {{clr|H|623H}} launches the opponent, setting up juggle combos. {{clr|H|623HH}} causes a ground bounce, allowing for combos such as {{clr|H|623HH}} > {{clr|H|214H}} loops. | ||
Shizuriyuki is also strong during neutral and on defense thanks to its range, disjoint and upper body invulnerability. | Shizuriyuki is also strong during neutral and on defense thanks to its range, disjoint and upper body invulnerability. It is an excellent addition to Nagoriyuki’s arsenal of anti-airs, alongside {{MiniMoveCard|game=GGST|chara=Nagoriyuki|input=6P|label={{clr|P|6P}}}} and {{MiniMoveCard|game=GGST|chara=Nagoriyuki|input=2H Level 2|label={{clr|H|2H}}}}. Lastly, the move is an oppressive round start option. Its powerful properties allow it to beat many aggressive round start options. Even if the opponent evades the first hit by moving back, the second hit can dissuade the opponent from punishing it. Many characters struggle to contest it at round start, such as {{Character Label|GGST|Goldlewis Dickinson|label=Goldlewis}}. | ||
For an oppressive, dirty and rage-inducing move, look no further than Shizuriyuki. Just don't go too wild with it during get-togethers... unless you want to destroy your friendships. | |||
* The first hit increases Blood Gauge (+90/300) over 3 seconds. | * The first hit increases Blood Gauge (+90/300) over 3 seconds. | ||
| Line 1,260: | Line 1,264: | ||
===<big>Bloodsucking Universe</big>=== | ===<big>Bloodsucking Universe</big>=== | ||
<span class="input-badge">'''{{clr| | <span class="input-badge">'''{{clr|P|623P}}'''</span> | ||
<div class="attack-container"> | <div class="attack-container"> | ||
<div class="attack-gallery"> | <div class="attack-gallery"> | ||
| Line 1,266: | Line 1,270: | ||
Images = | Images = | ||
<gallery widths="210px" heights="210px" mode="nolines"> | <gallery widths="210px" heights="210px" mode="nolines"> | ||
GGST_Nagoriyuki_Bloodsucking_Universe.png | | GGST_Nagoriyuki_Bloodsucking_Universe.png |Live by the bite, die by the bite.<br>It's the way of the vampire. | ||
GGST_Nagoriyuki_BloodsuckingUniverseDrainEffect.png| Unique visual on the Blood Gauge | GGST_Nagoriyuki_BloodsuckingUniverseDrainEffect.png| Unique visual on the Blood Gauge | ||
</gallery> | </gallery> | ||
| Line 1,294: | Line 1,298: | ||
A command throw that depletes the Blood Gauge on hit. Indispensable for mix-ups and Blood Gauge management. | A command throw that depletes the Blood Gauge on hit. Indispensable for mix-ups and Blood Gauge management. | ||
Bloodsucking Universe is used to punish blocking and to condition the opponent to challenge blockstrings. Thanks to its speed, it's easy to surprise the opponent with this after a few moves. Try using it from forward {{MiniMoveCard|game=GGST|chara=Nagoriyuki|input=236K|label=Fukyo}} ({{clr| | Bloodsucking Universe is used to punish blocking and to condition the opponent to challenge blockstrings. Thanks to its speed, it's easy to surprise the opponent with this after a few moves. Try using it from forward {{MiniMoveCard|game=GGST|chara=Nagoriyuki|input=236K|label=Fukyo}} ({{clr|K|236K}}), the second hit of {{MiniMoveCard|game=GGST|chara=Nagoriyuki|input=f.SS Level 2|label={{clr|S|f.SS}}}}, {{MiniMoveCard|game=GGST|chara=Nagoriyuki|input=214H|label=Kamuriyuki}} ({{clr|H|214H}}), or after {{MiniMoveCard|game=GGST|chara=Nagoriyuki|input=c.S|label={{clr|S|c.S}}}} or {{MiniMoveCard|game=GGST|chara=Nagoriyuki|input=5K|label={{clr|K|5K}}}} with momentum from {{clr|K|236K}}. | ||
The heal is based on a percentage of the damage dealt. Considering the Guts mechanic, this means the heal will have a greater effect when Nagoriyuki is at low health, the opponent is at high health, and/or the opponent has a low defense modifier. | The heal is based on a percentage of the damage dealt. Considering the Guts mechanic, this means the heal will have a greater effect when Nagoriyuki is at low health, the opponent is at high health, and/or the opponent has a low defense modifier. | ||
| Line 1,300: | Line 1,304: | ||
{{#lst:GGST/Nagoriyuki/Strategy|Bloodsucking Universe}} | {{#lst:GGST/Nagoriyuki/Strategy|Bloodsucking Universe}} | ||
The okizeme from {{clr| | The okizeme from {{clr|P|623P}} becomes stronger in the corner, as Nagoriyuki will end up close to the opponent. This, in combination with liberal special move usage from the Blood Gauge drain effect, allows for devastating pressure sequences. For more details, see the [[GGST/Nagoriyuki/Strategy#Bloodsucking Universe: The Demonic Pressure Starter|strategy page]]. | ||
For all of its strengths, the move is still a throw, making it vulnerable to being mashed out of or punished on whiff. As much fun as it is to feast on your foe, if you try it in a predictable manner, then all you're gonna be eating is a counter hit combo. Don't be gluttonous... just a little hungry! | For all of its strengths, the move is still a throw, making it vulnerable to being mashed out of or punished on whiff. As much fun as it is to feast on your foe, if you try it in a predictable manner, then all you're gonna be eating is a counter hit combo. Don't be gluttonous... just a little hungry! | ||
| Line 1,349: | Line 1,353: | ||
In most cases, Blood Rage activation is a failstate for Nagoriyuki that should be avoided. | In most cases, Blood Rage activation is a failstate for Nagoriyuki that should be avoided. | ||
Activation happens when the Blood Gauge becomes full, deactivation happens when Nagoriyuki uses {{MiniMoveCard|game=GGST|chara=Nagoriyuki|input=632146H|label=Zansetsu}} ({{clr| | Activation happens when the Blood Gauge becomes full, deactivation happens when Nagoriyuki uses {{MiniMoveCard|game=GGST|chara=Nagoriyuki|input=632146H|label=Zansetsu}} ({{clr|H|632146H}}) or after enough time passes (roughly 3,5 seconds). Nagoriyuki gradually loses life in this state, up to 50% of his maximum health, though it cannot KO him. Faultless Defense can stall the activation for as long as Nagoriyuki has Tension, though it will activate the moment the user lets go of Faultless Defense. | ||
The activation has a hitbox | The activation has a nondamaging hitbox. On hit, the opponent is launched away and knocked down. Activation cannot wall break, a wall splatted opponent hit by it will instead be knocked down. If blocked, the opponent is put into a Guard Crush animation and pushed back a fair distance if not in the corner. It is -12 on block, making it consistently punishable despite its Guard Crush properties. The long recovery also leaves Nagoriyuki wide open for punishment on whiff. Eating a combo and 50% HP drain at the same time is not the most pleasant experience. If you somehow manage to survive such punishment, contact your local newspaper. They are probably yearning for such an incredible story. | ||
There are some ways for Blood Rage activation to be safe. One way is to make the opponent block it meaty. A more reliable way is comboing into it, though this requires some practice to learn how set up. For most players though, the most frequent way is when the opponent doesn’t pay attention to the Blood Gauge and gets hit unnecessarily. | There are some ways for Blood Rage activation to be safe. One way is to make the opponent block it meaty. A more reliable way is comboing into it, though this requires some practice to learn how set up. For most players though, the most frequent way is when the opponent doesn’t pay attention to the Blood Gauge and gets hit unnecessarily. | ||
The deactivation animation has 1F invincible startup up to the super flash and 0 recovery afterwards. It's essentially a free screen freeze. This not only means it's not punishable but it gives the Nagoriyuki player a chance to see and react to what the opponent is doing during the screen freeze. This becomes particularly relevant when Blood Rage ends while Nagoriyuki is knocked down and/or meter is available for a reversal super. | |||
* The activation hitbox can cancel out single-hit projectiles. | * The activation hitbox can cancel out single-hit projectiles. | ||
| Line 1,360: | Line 1,366: | ||
==Overdrives== | ==Overdrives== | ||
===<big>Wasureyuki</big>=== | ===<big>Wasureyuki</big>=== | ||
<span class="input-badge">'''{{clr| | <span class="input-badge">'''{{clr|S|632146S}}'''</span> | ||
<div class="attack-container"> | <div class="attack-container"> | ||
<div class="attack-gallery"> | <div class="attack-gallery"> | ||
| Line 1,389: | Line 1,395: | ||
An invincible Overdrive that reduces the Blood Gauge. Useful as an invincible reversal and is a very powerful combo tool. | An invincible Overdrive that reduces the Blood Gauge. Useful as an invincible reversal and is a very powerful combo tool. | ||
If the first strike hits up close, it transitions to the cinematic | If the first strike hits up close, it transitions to the cinematic. The Blood Gauge will be temporarily paused during the cinematic but will continue increasing or decreasing afterwards. If the opponent is hit with the tip of the blade, it will launch them into the air, but will not cause the cinematic. Instead, it grants a knockdown. The Blood Gauge reduction will not apply in this scenario. However, the user can still extend the combo after the opponent falls to the ground, such as by using {{clr|S|f.SSS}}. | ||
Wasureyuki is an especially powerful reversal due to its high damage and good blood drain. Its hitbox is generous, though it is | Wasureyuki is an especially powerful reversal due to its high damage and good blood drain. Its hitbox is generous, though it is punishable on whiff or block. Due to its many hits, it will deal considerable damage even after severe scaling late into a combo, and it massively drains the Blood Gauge, making it a powerful finisher in lengthy combos. | ||
It’s powerful, it’s invincible, it manages blood and it oozes with style. What’s not to love? | It’s powerful, it’s invincible, it manages blood and it oozes with style. What’s not to love? | ||
| Line 1,398: | Line 1,404: | ||
===<big>Zansetsu</big>=== | ===<big>Zansetsu</big>=== | ||
<span class="input-badge">'''{{clr| | <span class="input-badge">'''{{clr|H|632146H}} during Blood Rage'''</span> | ||
<div class="attack-container"> | <div class="attack-container"> | ||
<div class="attack-gallery"> | <div class="attack-gallery"> | ||
| Line 1,427: | Line 1,433: | ||
A Blood Rage exclusive Overdrive. Primarily a combo finisher, but also works as a sub-par invincible reversal. | A Blood Rage exclusive Overdrive. Primarily a combo finisher, but also works as a sub-par invincible reversal. | ||
In Blood Rage | In Blood Rage, Zansetsu is Nagoriyuki’s only overdrive. It reaches full screen, which means it can be confirmed off of virtually any strike. Its power is immense, even at the end of a scaled combo. Generally, it should be used as quickly as possible to avoid drastic health depletion from Blood Rage. | ||
However, it is a | However, it is a poor reversal. The hefty startup frames make it tricky to connect, and the long recovery makes it consistently punishable by all characters, even if used at a sizable distance. It’s even worse if the opponent has 50% Tension, as they can PRC Zansetsu on reaction to the super flash animation. Using this tool for neutral or defense requires good understanding of the opponent’s habits and tendencies. | ||
* Does not exit Blood Rage mode if it is Roman Canceled before the animation finishes | * Does not exit Blood Rage mode if it is Roman Canceled before the animation finishes | ||
{{CloseCard}} | {{CloseCard}} | ||
==Colors== | |||
{{GGSTColors|color12=1|Size=160}} | |||
==External References== | ==External References== | ||
==Navigation== | ==Navigation== | ||
Revision as of 22:25, 13 August 2022
Overview
Nagoriyuki is a mid-ranged powerhouse who dynamically shifts between extended pressure strings which threaten strike/throw mix-ups and space control with massive normals, depending on what the Blood Rage mechanic allows.
Nagoriyuki's long and rewarding f.S GuardAllStartup14Recovery28Advantage-17 and 2S
 GuardLowStartup11Recovery21Advantage-11 control mid-ranged neutral. His 5K
 GuardAllStartup7Recovery14Advantage-2 is a good poke for stagger pressure due to its excellent range and frame data. His exceptional special moves are uniquely special-to-special cancelable. This includes Fukyo
 GuardN/AStartup-RecoveryTotal 25AdvantageN/A, a command dash that compensates for his weak mobility. Fukyo also grants devastating pressure in the form of strike/throw mix-ups when combined with other moves. Kamuriyuki
 GuardLowStartup14Recovery17Advantage-3 is an especially powerful frame trap that doubles as a gap-closing tool. Using specials has the side effect of filling Nagoriyuki's unique resource, the Blood Gauge. Filling it boosts the speed and power of all his sword normals. His
 ![]() normals receive boosts to range on top of speed and power, transforming 5H
normals receive boosts to range on top of speed and power, transforming 5H GuardAllStartup18Recovery27Advantage-14 and 2H
 GuardAllStartup17Recovery29Advantage-17 into outstanding space control tools against grounded and aerial opponents, respectively.
However, filling the Blood Gauge completely activates Blood Rage, a state so punishing that triggering it during ill opportune moments renders defeat near certain. Deplete the Blood Gauge by landing sword normals or by feasting with Bloodsucking Universe GuardGround ThrowStartup7Recovery48AdvantageNA, a command grab. This is vital for controlling the Blood Gauge and averting an untimely demise to Blood Rage. Excelling with Nagoriyuki requires situational awareness and Blood Gauge management by adeptly shifting tactics midmatch. Manage the gauge well to benefit from enhanced sword normals at high blood levels and stellar special moves at low blood levels.
Memorise the Blood Gauge's behavior by heart and sharpen your instincts to stop approaches with your blade. Now it’s time to feast!
![]() Nagoriyuki
Nagoriyuki ![]() Nagoriyuki (名残雪), classified as a One Shot type, is a noble vampire samurai who exchanges bloodlust for long range, fearsome pressure and massive damage.
Nagoriyuki (名残雪), classified as a One Shot type, is a noble vampire samurai who exchanges bloodlust for long range, fearsome pressure and massive damage.
Pros
Cons
- Massive Range: Nagoriyuki's giant katana lets him safely control the screen from further ranges than most of the cast. His range must be respected because of the sizable chunk of damage each hit deals.
- Blood Gauge: Increasing the Blood Gauge boosts the range, speed and power of his sword normals, transforming them into outstanding space control tools.
- Astounding Durability: Equipped with a strong defense modifier, a high Guts Rating and a command throw that restores health, Nagoriyuki is as durable as a warrior can be.
- Special Cancels: Has the unique ability to cancel specials into other specials, allowing for unique pressure routes and combo routes.
- Brutal Punishment: Nagoriyuki's long range, high damage and special cancels allow him to massively punish any mistake, especially so on counter hit. He is classified as a One Shot type for a reason.
- Strong Pressure: Nagoriyuki has strong strike/throw mix-ups and frame traps thanks to Fukyo
 GuardN/AStartup-RecoveryTotal 25AdvantageN/A. This is further reinforced by his command grab and his normals dealing chip damage. He can also Fukyo backwards to bait responses and punish.
- Blood Rage: If he mismanages Blood Gauge he will be forced into Blood Rage, a mode that is difficult to exit and has three punishing drawbacks:
- He loses access to all of his special moves.
- 50% of his maximum health is drained during its duration.
- The activation has a long, easily punishable animation.
- Limited Mobility: Does not have a dash, air dash or double jump. FukyoGuardN/AStartup-RecoveryTotal 25AdvantageN/A forces him to spend blood meter in order to approach quickly. The lack of special moves in Blood Rage means he cannot command dash, either.
- Weak to Pressure: Nagoriyuki's limited mobility exacerbates weaknesses on defense. Tactics for escaping the corner involve super jumping or air dashing over the opponent's reset. Nagoriyuki can't air dash and his super jump has long startup, forcing the user to look for opportunities to punish, abare or reversal.
Note: Nagoriyuki's Super jump is unique, and behaves more similarly to a launch jump from other games. It covers more horizontal and vertical distance than other jumps. Its downside is its significant startup. This can both help and hurt Nagoriyuki depending on the circumstance and match-up. Tied to this is how mobility applies to defense. Nagoriyuki's limited mobility exacerbate specific problems on defense. Common tactics for getting out of the corner involves super jumping or air dashing over the opponent's reset. Nagoriyuki can't air dash and his super jump has significant startup, forcing the user to look for opportunities to punish, abare, reversal, or otherwise force a turn.
Error: No field named "weight" found for any of the specified database tables.
| Nagoriyuki | |
|---|---|
| Fastest Ground Abare:This character's fastest attacks for mashing or scrambles. Excludes universal throws. | 5P (5F) |
| Reversal Attacks:Any reversal-esque moves this character has. Excludes universal options. | 632146S (9F) (Normal state only) 632146H (21F) (Blood Rage only) |
Blood Gauge & Blood Rage

The Blood Gauge shown above is slightly more than half full
The Blood Gauge is a mechanic exclusive to Nagoriyuki. It is divided into three "Blood bars", consisting of 100 "Blood points" each. The gauge will start to fill when he uses special moves. He can cancel special moves into each other, which stacks their effects. Every Blood bar filled up increases the speed and power of his sword normals, as well as the range of his ![]() normals. The gauge depletes if he lands any sword normal, Bloodsucking UniverseGuardGround ThrowStartup7Recovery48AdvantageNA (623P) or Wasureyuki
normals. The gauge depletes if he lands any sword normal, Bloodsucking UniverseGuardGround ThrowStartup7Recovery48AdvantageNA (623P) or Wasureyuki GuardAllStartup7+(173 Flash)+2Recovery54Advantage-39 (632146S). It also depletes passively over time at a rate of 2.4 Blood (.8% of the total Blood gauge) per second.
The benefits of filling the Blood Gauge are significant, but it comes with drawbacks as well. Filling one or two bars increases the amount of damage Nagoriyuki takes (+11% at one bar filled, +25% at two bars filled). Filling it completely forces Nagoriyuki into the dangerous Blood Rage state, which has several immense drawbacks.
- Loss of specials: Blood Rage disables Nagoriyuki's specials, impairing his ability to approach and mix up enemies. Without specials, Nagoriyuki is forced to walk, jump, or high jump in order to close space. This leaves him with little to open up a patient player with.
- HP depletion: Blood Rage drains 50% of Nagoriyuki's maximum health over its duration, making every second spent in Blood Rage very costly. The health depletion cannot KO Nagoriyuki, but it persists even if Nagoriyuki is being comboed. As a result, getting caught in a combo during Blood Rage can spell a swift end.
- Transformation animation: Entering Blood Rage forces a lengthy, vulnerable animation, allowing any character to whiff punish. On block the animation is less unsafe at -12, but still leaves him consistently punishable.
- Squishy: Nagoriyuki takes 25% extra damage while in Blood Rage (compared to his baseline damage taken modifier). Combined with its punishable activation and 50% health drain, this means that an unsafe Blood Rage activation allows for a very high damage combo against Nagoriyuki, if not an outright round loss.
In addition, Nagoriyuki has no good way to exit Blood Rage. The player can either let Blood Rage end naturally at a massive health cost, or spend 50% Tension on Zansetsu GuardAllStartup11+(58 Flash)+10Recovery80Advantage-66 (632146H) to end it early. The latter option is a -66 mid, which is punishable even at long distances. To summarise, the drawbacks of the mode massively outweigh the advantages, so it should generally be avoided. Nagoriyuki players must constantly watch the Blood Gauge and manage it carefully to avoid Blood Rage. You must maximise the benefits and mitigate the drawbacks of Blood Gauge to play Nagoriyuki effectively.
For more information on intentional Blood Rage activation and Blood Gauge in general, see the Strategy page.
Normal Moves
StartupThe time before an attack is active. Written startup values include the first active frame, so the startup on a frame chart will display one less square than the written value. Frames
Active The active frames of an attack refers to the amount of time an attack can hit the opponent. Frames
InactiveFrames in the middle of multi-hit attacks which cannot hit the opponent, but are after the move has become active at least once. Frames
Recovery The recovery of an attack refers to the amount of time an attacker must wait before they may perform another action, even blocking. Frames
Special RecoveryThe recovery of an attack refers to the amount of time an attacker must wait before they may perform another action.Recovery frames which happen under abnormal conditions, such as after landing. Frames
ProjectileIndicates an entity that exists separately from the character has become active. Usually something like a Fireball A projectile which usually travels slowly across the screen in a horizontal path above the ground.. Active
CancelA window in which to cancel a move. Can be varied in usage. Window
5P


Total: 16
Nagoriyuki's fastest strike. Useful for abare and as an occasional anti-air.
A standard jab. It's Nagoriyuki's only frame 5 strike, making it important for mashing out of grabs on wake up and for scramble situations. It's a serviceable anti-air in some scenarios, a strength accentuated by its ability to cancel into 6P GuardAllStartup12Recovery15Advantage-6. For example, 5P is a good option for punishing
 ![]() Millia's j.H
Millia's j.H GuardHighStartup8Recovery25Advantage+1 (IAD) > air dash.
- Initial Proration for combo : 80%
Gatling Options: 5P, 2P, 6P, 6K, 6H
5K

Total: 20
A phenomenal kick attack. It's an amazing poke as well as a strong stagger pressure The use of intentionally delaying gatlings or cancels in order to create frame traps with the intent of catching your opponent mashing or jumping. Loses to reversals. option.
5K is one of Nagoriyuki's most important moves. It possesses best-in-class frame data and range, hitting about as far as most characters' Far Slashes. It is -2 on block and has threatening gatlings and special cancels, which allows for powerful, unpredictable stagger pressure. This is useful for tick throw set-ups when combined with the forward momentum gained from a 236K. With Blood to spend, it can lead to midscreen to corner carry combos that deal 50% damage with a wall break.
- Needs one blood bar to combo into 6H against a standing opponent.
- Initial Proration for combo : 90%
Gatling Options: 6P, 6K, 6H, 5D, 2D
c.S

Flex on the haters

Total: 22
A very powerful, plus on block normal. A magnificent tool for pressure and combos.
Nagoriyuki uses his shortsword for a quick slash. Its strong frame advantage and many active frames make it strong during pressure and as a meaty attack. With momentum from FukyoGuardN/AStartup-RecoveryTotal 25AdvantageN/A (236K), two c.S can reliably be used in a row to pressure the opponent. Gatlings from c.S lead to strong counter hit combos, dissuading the opponent from retaliating. c.S can be used as an anti-air due to its speed and high hitbox, but 6PGuardAllStartup12Recovery15Advantage-6 and Shizuriyuki GuardAllStartup11Recovery21Advantage-7 (623H) are preferred due to their better range and upper body invulnerability.
c.S is a powerful combo starter. It lifts a grounded opponent into the air, allowing for two c.S hits up close, such as with 236K momentum or in the corner. On block, gatlings 6H and 2S are a true blockstring at any Blood Gauge level. 5H and 2H are a true blockstring at one blood bar or more.
A staple of Nagoriyuki's offense, c.S is an oppressive tool that is sure to instill fear in even the most robust opponents.
- Does not interact with the Blood Gauge in any way.
Gatling Options: 6P, 6K, f.S, 2S, 5H, 2H, 6H, 5D, 2D
f.S


Total: 46
A long reaching stab attack. A good choice for poking, pressure and combos that also complements Nagoriyuki's other space control tools.
f.S is Nagoriyuki’s longest poke at 0 blood bars, though it is a bit slow and has long recovery. It improves at higher blood levels due to speed and power buffs, patching up two of the move’s shortcomings. It’s a strong pressure starter due to its gatlings and special cancel options. However, the hitbox is lacking vertically, making it vulnerable to low-profile moves. Comboing into f.SSS significantly reduces the Blood Gauge, making f.S a strong whiff punisher at high blood. It’s also a great combo tool for increasing wall carry.
An essential tool for many aspects of Nagoriyuki's gameplan, f.S is a move that's easy for anyone to make good use of when familiarised with its range.
- Deals chip damage.
- Decreases Blood Gauge on hit (-7.2/300) over 6 seconds.
- With each bar of Blood Gauge, speed and power are improved.
- Initial combo proration: 90%
Gatling Options: f.SS, 5H, 2H
f.SS

Total: 34
The second hit of Nagoriyuki's f.S rekka. Extends combos and pressure that f.S initiates, and leads to decent mix-ups of its own.
Nagoriyuki advances while swinging his sword. f.SS amplifies the capabilities of f.S. It gives Nagoriyuki more combo routes and boosts wall carry. It's also a valuable mix-up tool. If nothing is pressed afterwards, Nagoriyuki feints the animation for f.SSS, which can keep the opponent on their toes and let the user escape a punish. The natural frame trap between the two strikes allows f.SSS to hit an opponent pressing buttons. However, f.SSS is -25 on block and cannot be special cancelled, so it's best to use specials instead. The best choices are ShizuriyukiGuardAllStartup11Recovery21Advantage-7 (623H) which must be manually delayed, or KamuriyukiGuardLowStartup14Recovery17Advantage-3 (214H) which has a natural frame trap; both give great reward on counter hit. f.SS > 214H > 623HH grants three frame traps. Should the opponent block all strikes, a backward FukyoGuardN/AStartup-RecoveryTotal 16AdvantageN/A (214K) lets the user disengage safely.
- Deals chip damage.
- Decreases Blood Gauge on hit (-7.2/300).
- Total Blood Gauge recovery for f.S > f.SS on hit is (-14.4/300) and the reduction applies as 2 separate instances each lasting 6 seconds.
Gatling Options: f.SSS
f.SSS


Total: 57
The finisher to Nagoriyuki's f.S rekka. Useful as a combo finisher and occasional blockstring extender if backed up with a Roman Cancel.
A strike that frame traps from f.SS. It's an alternative to ShizuriyukiGuardAllStartup11Recovery21Advantage-7 (623H) and KamuriyukiGuardLowStartup14Recovery17Advantage-3 (214H) after f.SS on block if the user wishes to decrease the Blood Gauge. It also drains an impressive 64.8 Blood points on block; higher than any other blocked move. However, f.SSS is unsafe on block and does not lead to any extended combos. Therefore, it is best used with 50% Tension. That allows the user to PRC for safety on block and reduce the Blood Gauge without opening the opponent up. On hit, f.SSS > RRC provides combo opportunities while reducing the gauge.
f.SSS is also a staple combo finisher in juggle combos due to its long range, wall carry and high Blood Gauge reduction. It's a great choice for finishing a combo that has been extended by using special moves, as it will mitigate said combo's Blood gauge increase. It can also wallsplat, allowing the user to combo into c.S or WasureyukiGuardAllStartup7+(173 Flash)+2Recovery54Advantage-39 (632146S).
- Deals chip damage.
- Decreases Blood Gauge on hit and block (OH -115.2/300, OB -64.8/300).
- Total Blood Gauge recovery for f.S > f.SS > f.SSS on hit is (-129.6/300) and the reduction applies as 3 separate instances each lasting 6 seconds.
5H

Get really comfortable with the range of #3, as it's a vital tool.

The hitbox is just the Empire State Building.


Total: 52
Total: 50
Total: 48
A massive horizontal sword slash. One of the best space control tools GGST has to offer, and a good punisher. Also a rewarding frame trap option.
With one or more Blood bars, 5H has outstanding range and good speed, outranging even f.S. At two Blood bars it is a great tool to keep the opponent at bay, especially considering Nagoriyuki's limited options. It’s an excellent tool for bullying characters with less range than Nagoriyuki, which is most characters. 5H covers ground space well, but can be vulnerable to jump-ins and certain low profile When a character's hurtbox is entirely beneath an opponent's attack. This can be caused by crouching, certain moves, and being short. moves. On hit, cancel into FukyoGuardN/AStartup-RecoveryTotal 25AdvantageN/A (236K) to maintain optimal spacing and keep up the pressure. On counter hit, cancel into 236K and go for 6H GuardAll (Guard Crush)Startup16Recovery30Advantage-2 or 5H OTG for good, stable damage.
5H is a move that can make or break space control. Learn to recognize how far each blood level will allow 5H to reach, and study the opponent's movement patterns to determine when to swing. With correct usage, an impatient opponent can always be kept at bay.
- Deals chip damage.
- Decreases Blood Gauge on hit/block (OH -57.6/300, OB -7.2/300) over 6 seconds.
- With each bar of Blood Gauge, range, speed and power are improved.
5D


Total: 48
Total: 56
- Uncharged Dust
- Uncharged dust on-hit is 0 or neutral frame advantage and causes float
- Causes 80% proration on-hit
Nagoriyuki uses his long sword for a quick overhead. Can be gatlinged into from 5K, 2K, or c.S for a mixup.
- Charged Dust
- Charged dust leads to soft knockdown (+36).
- Holding up during the hitstop frames of charged dust will activate homing jump:
- Doing a homing jump will cause an area shift and put the opponent into a unique high damaging air combo state.
- During homing dust, using j.S, j.H, and j.D will recover Blood Gauge like they normally would.
- Gives Nago a double jump that he wouldn't normally have.
- Pressing any attack twice without jump/dash cancel will activate the homing jump finisher causing a hard knockdown (+23).
- Homing jump combos can sometimes increase meter balance enough to activate positive bonus.
Similar to uncharged but is slow enough to be reacted to, but if it does land it gives a very high damaging combo. Using j.H drains 8 times as much of the blood gauge as j.S or j.D do, so route in as many j.H as possible to maximize recovery of the Blood Gauge.
2P


Total: 19
A standard low jab. Primarily used for abare, as a slightly slower alternative to 5P that hits lower.
2P is a decent move for scramble situations where the opponent uses low profile When a character's hurtbox is entirely beneath an opponent's attack. This can be caused by crouching, certain moves, and being short. moves. However, some moves can still slip under it, and the reward on hit is low. It is also one frame slower than 5P, which makes it more likely to lose to some moves that 5P would not. A rather unremarkable attack overall.
- Initial Proration for combo : 80%
Gatling Options: 5P, 2P, 6P, 6K, 6H
2K

Total: 19
A low kick with minor low-profile properties. Useful as a low mix-up and as a meaty attack.
The speed of 2K makes it a decent mix-up and Nagoriyuki's best low at close range. It can be used from an empty jump to hit an opponent expecting an aerial attack, though aerial approaches are far from Nagoriyuki's specialty. Because of its high amount of active frames, 2K becomes plus on block if it hits late. On counter hit, 2K can combo into c.S. These factors make 2K an excellent meaty option if there isn't enough time to get in range for a c.S GuardAllStartup7Recovery10Advantage+3.
- Initial Proration for combo : 70%
Gatling Options: 6P, 6K, 6H, 5D, 2D
2S

Plus on whiff


Total: 30
A slash low to the ground. With excellent range and frame data, 2S is rewarding space control tool that is nigh impossible to punish.
This is a contender for the strongest mid-ranged poke in the game. It has a great combination of speed and range. It's likely to score a counter hit or interrupt a grounded approach when used in footsies range. If the opponent jumps while 2S is out, there might be enough time to interrupt their approach with an anti-air. In addition, the hitbox of 2S hits low enough to counter low profile When a character's hurtbox is entirely beneath an opponent's attack. This can be caused by crouching, certain moves, and being short. moves, such as ![]() I-No's Stroke the Big Tree
I-No's Stroke the Big Tree GuardLowStartup16Recovery16Advantage-7 or
 ![]() Sol's Night Raid Vortex
Sol's Night Raid Vortex![]() GuardAllStartup15~31 [32]Recovery32Advantage-17. Thanks to Nagoriyuki’s powerful special moves, 2S is exceptionally rewarding for an
GuardAllStartup15~31 [32]Recovery32Advantage-17. Thanks to Nagoriyuki’s powerful special moves, 2S is exceptionally rewarding for an ![]() button.
button.
When mixed with other poking moves, 2S can really get into the opponent's head. The threat of the move will likely make them play more carefully, giving the user more opportunities to enforce offense. It's impossible to overstate how strong of a move this is.
- Deals chip damage.
- Decreases Blood Gauge on hit (-7.2/300) over 6 seconds.
- With each bar of Blood Gauge, speed and power are improved.
- On hit, gatling 5H combos at 2 blood bars or higher.
- Initial Proration for combo : 90%
Gatling Options: 5H, 2H
2H

The biggest of air counter hits

The Millia/Chipp swatter


Total: 54
Total: 52
Total: 50
A massive, highly rewarding anti-air. Best used preemptively to interrupt aerial approaches from longer distances, such as IAD approaches.
2H is sluggish, but compensates with sheer size. It's a powerful move, but it does have its fair share of weaknesses. It lacks the speed and upper body invulnerability of moves like 6PGuardAllStartup12Recovery15Advantage-6. This means that a slow or improper read makes the user likely get Counter-Hit. The long recovery frames also means that Nagoriyuki is likely to get punished on a whiff. On the flip side, 2H is massively rewarding on counter hit, and on block, its air blockstun is high enough to initiate offense if 2H is canceled into FukyoGuardN/AStartup-RecoveryTotal 25AdvantageN/A (236K). However, the speed and range of 2H isn't impressive with Blood Level 1, other anti-airs are usually better in that scenario. It's when boosted by one or more Blood bars that 2H truly shines.
Score a Counter-Hit or two with good use of this move, and the opponent will be forced to slow down and rethink their aerial approach.
- Deals chip damage.
- Decreases Blood Gauge on hit/block (OH -57.6/300, OB -7.2/300) over 6 seconds.
- With each bar of Blood Gauge, range, speed and power are improved.
2D


Total: 32
Standard sweep. Only sees use in combos and blockstrings due to being outperformed by other lows in neutral.
The range and frame data of 2D are decent. On hit, it can combo into 6H > 236K for good damage and okizeme. Despite being a passable move, it doesn’t see much use in neutral due to
2K GuardLowStartup7Recovery8Advantage-1
and 2SGuardLowStartup12Recovery21Advantage-11 outshining it. 2K is faster and can combo into 2D, giving 2K the same reward 2D has. 2S has longer range, is more rewarding, and its speed is equal or better depending on the Blood Gauge. That being said, 2D is a staple in combos and blockstrings due to being a low attack that knocks the opponent down.
GuardLowStartup7Recovery8Advantage-1
and 2SGuardLowStartup12Recovery21Advantage-11 outshining it. 2K is faster and can combo into 2D, giving 2K the same reward 2D has. 2S has longer range, is more rewarding, and its speed is equal or better depending on the Blood Gauge. That being said, 2D is a staple in combos and blockstrings due to being a low attack that knocks the opponent down.
- Initial Proration for combo : 90%
6P
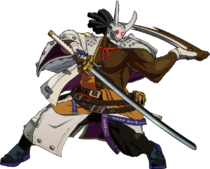
Karate... CHOP!

Total: 31
A fast, upper body invulnerable strike. Used as a counter poke and anti-air. A standard 6P, which makes it very good.
Thanks to its frame 1 upper body invulnerability, 6P is useful as a counter poke. It can challenge an opponent's attack in mid or close range. Many forward-lunging, plus on block special moves, such as ![]() Giovanna's Trovão
Giovanna's Trovão GuardAll [All (Guard Crush)]Startup27Recovery13Advantage+4 [+15] and
 ![]() May's
May's ![]() Mr. Dolphin Horizontal
Mr. Dolphin Horizontal GuardAllStartup25Recovery20 (18 OH)Advantage+7, are vulnerable to 6P. In addition, many
 ![]() attacks extends the character's hurtbox further out than the animation implies, due to the weapon itself having a hurtbox. This is especially prevalent on moves like
attacks extends the character's hurtbox further out than the animation implies, due to the weapon itself having a hurtbox. This is especially prevalent on moves like ![]() Nagoriyuki's f.SGuardAllStartup16Recovery28Advantage-17 and
Nagoriyuki's f.SGuardAllStartup16Recovery28Advantage-17 and ![]() Leo's f.S
Leo's f.S GuardAllStartup12Recovery21Advantage-13. If you experiment with 6P, you might be surprised at how many attacks can be beaten with it.
6P is also an excellent anti-air. Its range is much smaller than 2HGuardAllStartup17Recovery29Advantage-17, but it comes with the benefit of being a lot easier to use in a pinch due to its upper body invulnerability and superior speed. This is Nagoriyuki's main tool to stop opponents from trying to engage with air attacks on reaction. Combo it into ShizuriyukiGuardAllStartup11Recovery21Advantage-7 (623H) for powerful juggle combos.
- Initial Proration for combo : 90%
6K
This one's gonna hurt!

35 damage


Total: 32
A forward-moving stomp attack. It's a niche move, seeing use only in the occasional blockstring and combo. Still good at what it does, though.
6K has use during blockstrings because the forward movement positions Nagoriyuki into throw range, though Faultless Defense can push him out. Staggering 5K > 6K can make the opponent freeze up due to the risk of special cancels. Due to pulling Nagoriyuki's lower hurtbox back, 6K can be a rewarding choice in anticipation of a low poke, though there are safer and more consistent moves to go for.
For combos, 6K is a good way to lead into 623H or 214H after a 5K. 5K > 6K can be reliably hit confirmed into follow-ups, such as the aforementioned special moves or an Overdrive. On counter hit, 6K staggers the enemy, allowing it to combo into a command throw. 6K also ground bounces on air hit, but there are better combo extenders for juggle combos.
- Initial Proration for combo : 90%
6H

The one that ACTUALLY hurts.


| Version | Damage | GuardHow this attack can be blocked. | StartupThe number of frames between inputting an attack and when the attack becomes active. Includes first active frame. | ActiveThe number of frames for which a move has hitboxes. Occurs after Startup. | RecoveryThe number of frames after a move's active frames during which the character cannot act assuming the move is not canceled. | On-BlockThe difference between the attacker's recovery and the period that the opponent is in blockstun. This Frame Advantage value is based off the fact that the very first active frame touches the opponent. | Invuln |
|---|---|---|---|---|---|---|---|
| 70 | All (Guard Crush) | 17 | 6 | 30 | -2 | ||
| 80 | All (Guard Crush) | 16 | 6 | 30 | -2 | ||
| 90 | All (Guard Crush) | 15 | 6 | 30 | -2 | ||
| 117 | All (Guard Crush) | 15 | 6 | 30 | -2 |
Total: 52
Total: 51
Total: 50
A large sword slash downwards. Very strong pressure option and combo tool.
6H is a great move for punishing abare An attack during the opponent's pressure, intended to interrupt it., as it leads to big damage off of a counter hit. 5KGuardAllStartup7Recovery14Advantage-2 and c.SGuardAllStartup7Recovery10Advantage+3 are good options to gatling into it. c.S > 6H is a true blockstring if done instantly, or a frame trap if delayed. Its high hitbox also allow it to force a cornered opponent back to the ground, should they jump. Canceling 6H into backwards FukyoGuardN/AStartup-RecoveryTotal 16AdvantageN/A (214K) will grant Nagoriyuki +2 on block frame advantage.
Due to its damage, knockdown, and Blood Gauge reduction, 6H is a good combo finisher in many situations. When ending a combo with 6H OTG, canceling into forward FukyoGuardN/AStartup-RecoveryTotal 25AdvantageN/A (236K) results in favorable Okizeme From Japanese "起き攻め". Attacking an opponent about to wake up after they were knocked down, usually with meaty attacks or mix-ups., for which c.S is a good option. If Nagoriyuki isn't in range to use c.S, then 2KGuardLowStartup7Recovery8Advantage-1 is a fine alternative.
- Deals chip damage.
- Decreases Blood Gauge on hit/block (OH -57.6/300, OB -7.2/300) over 6 seconds.
- With each bar of Blood Gauge, range, speed and power are improved.
j.P


Total: 21
A fast air-to-air. Has occasional use, but is mediocre and unrewarding.
Tied for Nagoriyuki's fastest aerial attack, alongside j.K. Its combination of fast start-up speed and short recovery means it can stop air approaches. j.P has a niche use in having a high enough hitbox to swat air-stall options, such as Zato's superjump Flight GuardStartupRecoveryAdvantage-, while not being punishable on a whiff like Air Throw. However, Nagoriyuki’s lack of aerial special moves means that j.P doesn't lead to any powerful conversions. Air Throw and ground-to-airs are better options than j.P overall.
- Initial Proration for combo : 80%
Gatling Options: j.P
j.K


Total: 28
Another mediocre air-to-air. Can cross-up, but jumping mix-ups are generally ill-advised for Nagoriyuki.
Has a larger hitbox than j.P and has the same startup speed, but has longer recovery and suffers from the same lack of reward. If Nagoriyuki is already airborne and the opponent is at a lower altitude, j.K is the only option that is both fast and reliably hits at the right angle. In most cases however, the move is outclassed by Air Throw and ground-to-airs. The hitbox below Nagoriyuki is wide enough for j.K to function as a cross-up Attacking your opponent after changing which horizontal side you are on, usually by jumping over them., which can be set up with j.H combined with drift RC.
- Initial Proration for combo : 80%
Gatling Options: j.D
j.S


Total: 35
A standard air-to-air poke with good horizontal range. Also works as a jump-in punish against projectiles.
j.S is fairly slow and unrewarding at 0 Blood bars, but improves with higher Blood. It's Nagoriyuki's best air-to-air option when long, horizontal range is required, but his ground-to-airs are better for contesting aerial foes. j.S leads to powerful combos on counter hit against grounded foes. This, in combination with its long horizontal range, makes it important for punishing projectiles. Decent enough of a move when the situation calls for it, but nothing to write home about.
- Deals chip damage.
- Decreases Blood Gauge on hit (-7.2/300) over 6 seconds.
- With each bar of Blood Gauge, speed and power are improved.
- Initial Proration for combo : 80%
Gatling Options: j.H, j.D
j.H


Total: 42
Total: 41
Total: 40
A large, downward sword slash. Has use as a jump-in and projectile punish, though jumping is rarely the best option for Nagoriyuki.
A decent jump-in option due to having a good hitbox below Nagoriyuki. However, its horizontal range is lacking. At 0 Blood bars, this move is too slow and short ranged to be worth using. This changes with at least one Blood bar. It can also lead to powerful combos on counter hit, making it a rewarding option for punishing projectiles with the right read.
In Blood Rage, j.H becomes an unreactable overhead if done instantly from a jump, which can be mixed up with lows and throws. However, a Roman Cancel is required to convert off of this instant overhead j.H. Without Tension, it is punishable even on hit.
- Deals chip damage.
- Decreases Blood Gauge on hit/block (OH -57.6/300, OB -7.2/300) over 6 seconds.
- With each bar of Blood Gauge, range, speed and power are improved.
- Initial Proration for combo : 80%
Gatling Options: j.D
j.D


Any further and this'll reach into the technical data it's pointing at.


Any further and this'll reach into the technical data it's pointing at.


Total: 37
A long, disjointed attack that hits diagonally upwards in front of Nagoriyuki. A niche combo extender and air-to-air.
j.D functions as an air-to-air for opponents that approach from high angles, especially those that 2H cannot cover. It can be useful for keeping opponents from escaping the corner via the air, as well as hitting characters out of certain aerial moves, such as ![]() Elphelt's air Miss Charlotte
Elphelt's air Miss Charlotte GuardAllStartup14RecoveryUntil Landing + 7Advantage-17 (IAS) or
 ![]() Faust's Love
Faust's Love GuardAllStartup27RecoveryTotal 48Advantage-.
On hit, it doesn't lead to any reward midscreen, though it does blow them back very far. Near the corner, however, the opponent is put into a very generous wallbounce. If it wallbounces, it is highly likely to combo into almost anything, but 2H generally has the best balance of high reward and consistency.
Lastly, it briefly stalls Nagoriyuki's air momentum on use, which can be used to alter the time when Nagoriyuki hits the ground; this constitutes Nagoriyuki's only way of mixing up his air movement, so it can be useful to confuse the opponent briefly, although this is risky due to its high recovery.
- Deals chip damage.
- Decreases Blood Gauge on hit (-7.2/300) over 6 seconds.
- With each bar of Blood Gauge, speed and power are improved.
- Initial Proration for combo : 80%
Universal Mechanics
Ground Throw
6D or 4D

Total: 42
Universal throw. Useful for mix-ups and for escaping pressure.
Nagoriyuki throws his opponent down to the ground like the trash they are. Like other characters' throws, this is a good mix-up option. Think of it as a faster but less rewarding alternative to Bloodsucking UniverseGuardGround ThrowStartup7Recovery48AdvantageNA (623P). Its unusually long range for a ground throw makes it good for disrespecting pressure, which helps compensate for Nagoriyuki's generally slow moves. Ground throw grants strong okizeme on hit.
- Can throw the opponent either forward or backwards.
- 75% forced proration before all damage is dealt, 50% forced proration after all damage is dealt.
Air Throw
j.6D or j.4D

Universal air throw. Excellent air-to-air and complements Nagoriyuki's mix-ups.
Air throw has long range, especially so above Nagoriyuki, making it a useful tool for interrupting air approaches. It is also faster than any of Nagoriyuki's aerial strikes, though air throw has a lot of recovery, so beware. On hit, it combos into 6H OTG, making it more rewarding than other characters' air throws. In addition, it can complement Nagoriyuki's mix-ups. A common option against Nagoriyuki's FukyoGuardN/AStartup-RecoveryTotal 25AdvantageN/A mix-ups is chicken block Jumping into the air and blocking rather than standing on the ground and being forced to guess a high-low mixup. Loses to air unblockable attacks such as BBTAG's Reversal Actions., as it will cover many of Nagoriyuki's options. 236K into air throw is useful for countering chicken blocking.
For more on Fukyo mix-ups and how air throw plays into it, see the Strategy page.
- Can throw the opponent either forward or backwards.
- 75% forced proration before all damage is dealt, 50% forced proration after all damage is dealt.
Special Moves
Fukyo
236K or 214K

This can slip under some high pokes, like Axl's 5P

A versatile command dash that increases the Blood Gauge. Essential for every aspect of Nagoriyuki's gameplan, from movement and punishment to pressure and combos alike.
Fukyo has two versions: 236K, which moves forwards, and 214K, which moves backwards. Both versions increase the Blood Gauge. Fukyo has many applications. Firstly, it compensates for Nagoriyuki's poor movement. 236K can be used to approach and 214K can be used to retreat and to dodge and punish attacks. Both versions leave Nagoriyuki with sliding momentum. The momentum can be canceled after the recovery by walking in the opposite direction. This allows the user to fine tune Nagoriyuki's positioning, which is key for moving to the optimal range to keep up pressure. The forward momentum of 236K can also be imparted to other actions, namely Nagoriyuki's other special moves and his jumps. 236K > 214H grants Nagoriyuki a relatively fast, full-screen lunging attack. This helps with closing space against characters with full-screen zoning options, such as ![]() Happy Chaos.
Happy Chaos.
The forward momentum of 236K can extend combos, such as following up after 623H or staying in range for multiple c.S. The sliding momentum can also move him into position to extend pressure. For example, 236K > c.S on block leaves Nagoriyuki close enough for a follow-up 623P. Given that 236K and 214K has the same animation, the two versions can be mixed up to throw the opponent off. The user can bait and punish abare by moving backwards, or condition the opponent to expect backward movement and then move forward to open them up. For more on Fukyo mix-ups, check the Strategy page.
Fukyo is the glue that binds Nagoriyuki's move set together. Proper use of it is essential for mastering Nagoriyuki, so get comfortable with it.
- Increases Blood Gauge (+43.2/300) over 3 seconds
- 236K and 214K can cancel into specials from frame 14 and frame 9 onwards, respectively, except either variant of Fukyo.
- Cancelable into itself with a
 or
or  input while holding
  .
.
Zarameyuki
236S


This part clashes with projectiles

This part hits the opponent


A versatile projectile attack that increases the Blood Gauge. Useful for counter-zoning, closing space and for pressure.
Nagoriyuki fires a body double of himself as a projectile. It starts up with a projectile clashing hitbox before becoming a traditional hitbox. It travels full screen quite fast while destroying almost any non-Overdrive projectile in the game, making it a very strong anti-zoning tool. 236S > 236K allows the user to advance towards the opponent while using the projectile as cover, providing an opportunity for a follow-up attack. This is a key approach option, as it allows the user to nullify an enemy projectile and close space at the same time. It is a rewarding, albeit Blood Gauge intensive, way to bypass enemy zoning. If 236S > 236K connect, Nagoriyuki can combo into f.SSS, mitigating the Blood Gauge increase.
At close range, Zarameyuki provides strong mix-ups thanks to its high frame advantage on block. For example, c.S will interrupt abare attempts after the projectile is blocked, which can be mixed up with a throw. Its long active duration also make it easy to hit the move meaty. Using it after knocking the opponent down with Bloodsucking Universe in the corner allows for extended pressure sequences due to the stage positioning and Blood Gauge reduction.
- Increases Blood Gauge (+90/300) over 3 seconds.
- Cancels single-hit projectiles.
- Projectile becomes active on frame 12 with a projectile clashbox before transitioning to a projectile hitbox when near the opponent.
- Clashbox lasts between 6~17F before transitioning to traditional active frames (total on-screen active time 15~26F).
- Can be canceled into other specials starting from frame 16.
- Initial Proration for combo : 80%
Kamuriyuki
214H

Gap closer, mix-up tool, punisher:
A 3 in 1 move!
Late active frames


Total: 32
A powerful and versatile lunging attack that increases the Blood Gauge. An excellent tool for closing space, punishment, pressure and combos.
Thanks to its impressive speed and range, Kamuriyuki is a good option for closing the gap and initiating offense. If used unpredictably during neutral, it's likely to interrupt forward movement or even score a counter hit. It's an excellent punisher, should the opponent whiff a risky move. It's also good for interrupting slow, reactable moves, such as ![]() Ky's Charged Stun Edge
Ky's Charged Stun Edge GuardAllStartup39RecoveryTotal 62Advantage+22 [+25] (236H). If 214H hits close and with low combo scaling, the knockdown from 214H can combo into 6H OTG, mitigating the move's Blood Gauge increase. During less ideal conditions, the user will need to close space with FukyoGuardN/AStartup-RecoveryTotal 25AdvantageN/A (236K) before using 6H, if it can combo at all. Alternatively, combo 214H into ShizuriyukiGuardAllStartup11Recovery21Advantage-7 (623H) to launch the opponent for a stronger conversion, at the cost of high Blood Gauge increase.
However, the move is -3 on block at close range. This forces the user to special cancel or risk being punished by a throw. Nagoriyuki's special moves puts the user in a decent position to play mindgames with the opponent. If the opponent attempts a punish, a cancel into 623H will counter hit them, whereas 214K can dodge and punish. If the opponent is conditioned to stay passive, they become open to a throw. 214H also yields high reward on counter hit, making it a strong frame trap from moves such as 5H. Note that if only the final frames of 214H hit the opponent - such as from max range - Nagoriyuki is -1 on block, which means that special canceling isn't a must to stay safe. 214H also has airborne frames, allowing it to jump over certain attacks.
Kamuriyuki is a phenomenal move. It approaches, it combos, it punishes, it mixes, it sets up frame traps, it slices, it dices and it makes julienne fries. However, it will not pay your taxes. Nagoriyuki players are still debating how to best work around this significant shortcoming.
- Increases Blood Gauge (+90/300) over 3 seconds
- Airborne 5~12F
- Initial Proration for combo : 90%
Shizuriyuki
623H

Block and play smart
Or die on round start


Total: 34
Total: 44
A large and versatile two-hit rekka that increases the Blood Gauge. A strong frame trap and combo extender, as well as a powerful anti-air and oppressive round start option.
The 623H input initiates the first hit, and pressing ![]() again initiates the follow-up (623HH). The follow-up is highly delayable and can be used even on whiff. 623H is a good choice after moves such as KamuriyukiGuardLowStartup14Recovery17Advantage-3 (214H) on block to punish an opponent that challenges the user. The follow-up can be used to cover for the first hit. Both hits yield great reward on counter hit, making it a strong conditioning tool. Shizuriyuki is also used to extend combos. 623H launches the opponent, setting up juggle combos. 623HH causes a ground bounce, allowing for combos such as 623HH > 214H loops.
again initiates the follow-up (623HH). The follow-up is highly delayable and can be used even on whiff. 623H is a good choice after moves such as KamuriyukiGuardLowStartup14Recovery17Advantage-3 (214H) on block to punish an opponent that challenges the user. The follow-up can be used to cover for the first hit. Both hits yield great reward on counter hit, making it a strong conditioning tool. Shizuriyuki is also used to extend combos. 623H launches the opponent, setting up juggle combos. 623HH causes a ground bounce, allowing for combos such as 623HH > 214H loops.
Shizuriyuki is also strong during neutral and on defense thanks to its range, disjoint and upper body invulnerability. It is an excellent addition to Nagoriyuki’s arsenal of anti-airs, alongside 6PGuardAllStartup12Recovery15Advantage-6 and 2HGuardAllStartup17Recovery29Advantage-17. Lastly, the move is an oppressive round start option. Its powerful properties allow it to beat many aggressive round start options. Even if the opponent evades the first hit by moving back, the second hit can dissuade the opponent from punishing it. Many characters struggle to contest it at round start, such as ![]() Goldlewis.
Goldlewis.
For an oppressive, dirty and rage-inducing move, look no further than Shizuriyuki. Just don't go too wild with it during get-togethers... unless you want to destroy your friendships.
- The first hit increases Blood Gauge (+90/300) over 3 seconds.
- The second hit has no effect on the Blood Gauge.
Bloodsucking Universe
623P

Live by the bite, die by the bite.
It's the way of the vampire.
Unique visual on the Blood Gauge

Total: 56
A command throw that depletes the Blood Gauge on hit. Indispensable for mix-ups and Blood Gauge management.
Bloodsucking Universe is used to punish blocking and to condition the opponent to challenge blockstrings. Thanks to its speed, it's easy to surprise the opponent with this after a few moves. Try using it from forward FukyoGuardN/AStartup-RecoveryTotal 25AdvantageN/A (236K), the second hit of f.SS GuardAllStartup13Recovery19Advantage-8, KamuriyukiGuardLowStartup14Recovery17Advantage-3 (214H), or after c.SGuardAllStartup7Recovery10Advantage+3 or 5KGuardAllStartup7Recovery14Advantage-2 with momentum from 236K.
The heal is based on a percentage of the damage dealt. Considering the Guts mechanic, this means the heal will have a greater effect when Nagoriyuki is at low health, the opponent is at high health, and/or the opponent has a low defense modifier.
If 623P connects, the Blood Gauge's progression halts - no matter how fast it was previously increasing or depleting - before the move applies its Drain effect. This can save the user from activating Blood Rage. In addition, the Drain effect lasts its full 2 second duration even if the Gauge empties during the effect. Several Special moves can have their Blood Gauge costs negated when used during the Drain effect, as long as their total Blood Gauge cost is less than 312 points. This enables more Special move usage and longer pressure sequences than normal if 623P lands.
The okizeme from 623P becomes stronger in the corner, as Nagoriyuki will end up close to the opponent. This, in combination with liberal special move usage from the Blood Gauge drain effect, allows for devastating pressure sequences. For more details, see the strategy page.
For all of its strengths, the move is still a throw, making it vulnerable to being mashed out of or punished on whiff. As much fun as it is to feast on your foe, if you try it in a predictable manner, then all you're gonna be eating is a counter hit combo. Don't be gluttonous... just a little hungry!
- Greatly decreases Blood Gauge (-280.8/300) over 3 seconds.
- Removes all Blood Gauge increases/decreases before applying its own drain effect.
- With Blood Gauge(100-200, 200-300), damage increases.
- Recovers health on successful grab (15% of damage dealt rounded down).
- Has counter hit recovery.
- 75% forced proration before all damage is dealt, 50% forced proration after all damage is dealt.
Blood Rage Activation

I'm bleeding, making me the victor.

"We have purposely trained him wrong, as a joke." -Slayer


In most cases, Blood Rage activation is a failstate for Nagoriyuki that should be avoided.
Activation happens when the Blood Gauge becomes full, deactivation happens when Nagoriyuki uses ZansetsuGuardAllStartup11+(58 Flash)+10Recovery80Advantage-66 (632146H) or after enough time passes (roughly 3,5 seconds). Nagoriyuki gradually loses life in this state, up to 50% of his maximum health, though it cannot KO him. Faultless Defense can stall the activation for as long as Nagoriyuki has Tension, though it will activate the moment the user lets go of Faultless Defense.
The activation has a nondamaging hitbox. On hit, the opponent is launched away and knocked down. Activation cannot wall break, a wall splatted opponent hit by it will instead be knocked down. If blocked, the opponent is put into a Guard Crush animation and pushed back a fair distance if not in the corner. It is -12 on block, making it consistently punishable despite its Guard Crush properties. The long recovery also leaves Nagoriyuki wide open for punishment on whiff. Eating a combo and 50% HP drain at the same time is not the most pleasant experience. If you somehow manage to survive such punishment, contact your local newspaper. They are probably yearning for such an incredible story.
There are some ways for Blood Rage activation to be safe. One way is to make the opponent block it meaty. A more reliable way is comboing into it, though this requires some practice to learn how set up. For most players though, the most frequent way is when the opponent doesn’t pay attention to the Blood Gauge and gets hit unnecessarily.
The deactivation animation has 1F invincible startup up to the super flash and 0 recovery afterwards. It's essentially a free screen freeze. This not only means it's not punishable but it gives the Nagoriyuki player a chance to see and react to what the opponent is doing during the screen freeze. This becomes particularly relevant when Blood Rage ends while Nagoriyuki is knocked down and/or meter is available for a reversal super.
- The activation hitbox can cancel out single-hit projectiles.
Overdrives
Wasureyuki
632146S

Pretend to be weak, that he may grow arrogant.

The Art of War


An invincible Overdrive that reduces the Blood Gauge. Useful as an invincible reversal and is a very powerful combo tool.
If the first strike hits up close, it transitions to the cinematic. The Blood Gauge will be temporarily paused during the cinematic but will continue increasing or decreasing afterwards. If the opponent is hit with the tip of the blade, it will launch them into the air, but will not cause the cinematic. Instead, it grants a knockdown. The Blood Gauge reduction will not apply in this scenario. However, the user can still extend the combo after the opponent falls to the ground, such as by using f.SSS.
Wasureyuki is an especially powerful reversal due to its high damage and good blood drain. Its hitbox is generous, though it is punishable on whiff or block. Due to its many hits, it will deal considerable damage even after severe scaling late into a combo, and it massively drains the Blood Gauge, making it a powerful finisher in lengthy combos.
It’s powerful, it’s invincible, it manages blood and it oozes with style. What’s not to love?
- Decreases Blood Gauge (-194.4/300) over 6 seconds.
Zansetsu
632146H during Blood Rage

In baseball this is called a hole-in-one.

As if millions of Chipp players suddenly cried out in terror, and were silenced.


A Blood Rage exclusive Overdrive. Primarily a combo finisher, but also works as a sub-par invincible reversal.
In Blood Rage, Zansetsu is Nagoriyuki’s only overdrive. It reaches full screen, which means it can be confirmed off of virtually any strike. Its power is immense, even at the end of a scaled combo. Generally, it should be used as quickly as possible to avoid drastic health depletion from Blood Rage.
However, it is a poor reversal. The hefty startup frames make it tricky to connect, and the long recovery makes it consistently punishable by all characters, even if used at a sizable distance. It’s even worse if the opponent has 50% Tension, as they can PRC Zansetsu on reaction to the super flash animation. Using this tool for neutral or defense requires good understanding of the opponent’s habits and tendencies.
- Does not exit Blood Rage mode if it is Roman Canceled before the animation finishes
Colors
 |
 |
 |
 |
 |
 |
 |
 |
 |
 |
 |
 |
 |
 |
 | |||
| Colors 7-15 are available through DLCColor 13 is included in the 25th Anniversary Appreciation Colors free DLC Colors 14 and 15 are included in the 25th Anniversary Colors DLCColors 7-11 are included in Season Pass 1 Color 12 is included in Ultimate Edition | |||||
External References
To edit frame data, edit values in GGST/Nagoriyuki/Data.
 Anji Mito [★]
 Asuka R♯ [★]
 Axl Low [★]
 Baiken [★]
 Bedman? [★]
 Bridget [★]
 Chipp Zanuff [★]
 Faust [★]
 Giovanna [★]
 Goldlewis [★]
 Happy Chaos [★]
 I-No [★]
 Jack-O' [★]
 Johnny [★]
 Ky Kiske [★]
 Leo Whitefang [★]
 May [★]
 Millia Rage [★]
 Nagoriyuki [★]
 Potemkin [★]
 Ramlethal [★]
 Sin Kiske [★]
 Sol Badguy [★]
 Testament [★]
 Zato-1 [★]
Click [★] for character's full frame data
Essentials
• HUD •
Controls •
FAQ •
The Basics
• Movement/Canceling •
Offense •
Defense •
Gauges •
Universal Strategy •
Detailed & Advanced Information
• Damage/Combo •
Frame Data & System Data •
Attack Attributes •
Misc •
Archived Information
• Patch Notes • Tier Lists •
- Attack Level
- Blocking
- Burst Gauge
- Cancels
- Clash
- Dash Cancel
- Faultless Defense
- Frame Advantage
- Gatling
- Gravity
- Guard Crush
- Guts
- Hitstop
- Hitstun
- Instant Air Dash (IAD)
- Instant Block
- Instant Faultless Defense
- Invalid Combos
- Knockdown Recovery
- Low Profile
- Minimum Damage
- Negative Penalty
- Off the Ground (OTG)
- Positive Bonus
- Prejump
- Proration
- Psych Burst
- Punish
- Overdrive (Super Attack)
- R.I.S.C. Level
- Roman Cancel (RC)
- Stagger Recovery
- Tension Gauge
- Throw
- Throw Clash
- Wall