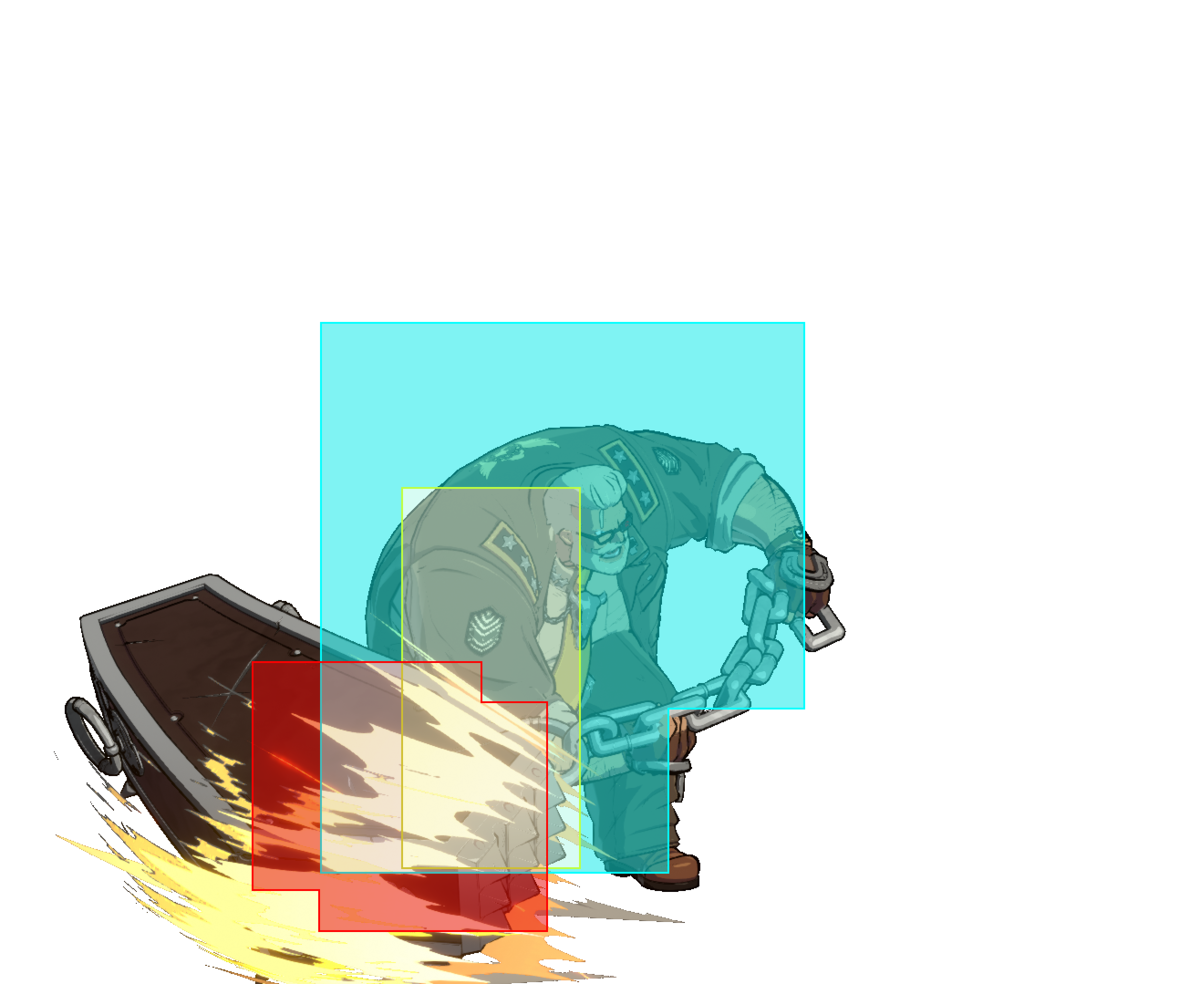
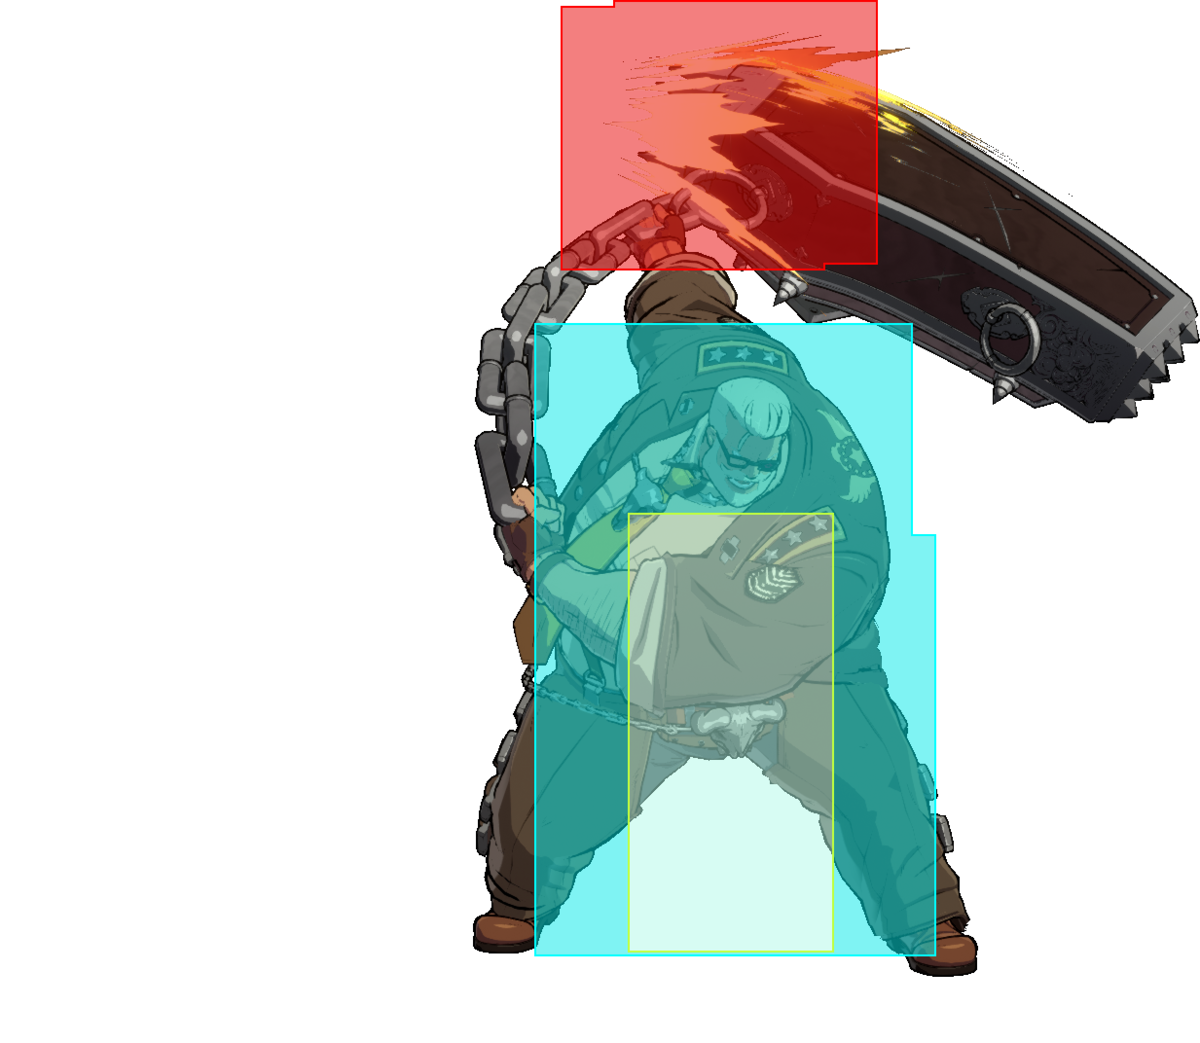
< GGST | Goldlewis Dickinson
Links
Infobox Data
| Portrait | Icon | Name | Defense | Guts | R.I.S.C. Gain Modifier | Prejump | Backdash Duration | Backdash Invuln | Backdash Airborne | Unique Movement Options |
|---|---|---|---|---|---|---|---|---|---|---|

|
Goldlewis Dickinson | 0.96 | 3 | 0.8748 | 5 | No Double Jump | ||||
| Jump Duration | High Jump Duration | Jump Height | High Jump Height | Pre-Instant Air Dash | Air Dash Duration | Air Backdash Duration | Air Dash Distance | Air Backdash Distance | ||
| 31 | 38 | 273 | 419.9 | |||||||
| Movement Tension Gain | Jumping Tension Gain | Air Dash Tension Gain | Walk Speed | Backwalk Speed | Initial Dash Speed | Dash Acceleration | Friction | |||
| 6.3 | 5.2 | 10 | 0.297 | 100 | ||||||
| Jump Gravity | High Jump Gravity | Forward Step Dash | ||||||||
Normal Moves
5P Data
| 5P normal |
Damage | Guard | Startup | Active | Recovery | On-Block | On-Hit | Level | CH Type |
|---|---|---|---|---|---|---|---|---|---|
| 26 | All | 7 | 3 | 6 | +3 | +6 | 1 | Small | |
| R.I.S.C. Gain | R.I.S.C. Loss | Wall Damage | Input Tension | Chip Ratio | OTG Ratio | Proration | Invuln | Cancel | |
| 1000 | 1500 | 300 | 80% | 80% | none | ||||

| |||||||||

| |||||||||
5K Data
| 5K normal |
Damage | Guard | Startup | Active | Recovery | On-Block | On-Hit | Level | CH Type |
|---|---|---|---|---|---|---|---|---|---|
| 33 | Low | 10 | 9 | 12 | -7 | -4 | 2 | Small | |
| R.I.S.C. Gain | R.I.S.C. Loss | Wall Damage | Input Tension | Chip Ratio | OTG Ratio | Proration | Invuln | Cancel | |
| 1125 | 1000 | 300 | 80% | 70% | none | ||||

| |||||||||

| |||||||||
| Retracts lower hurtbox 1-2F, slightly retracts further 3-18F | |||||||||
c.S Data
| c.S normal |
Damage | Guard | Startup | Active | Recovery | On-Block | On-Hit | Level | CH Type |
|---|---|---|---|---|---|---|---|---|---|
| 39 | All | 7 | 6 | 12 | +1 | +4 | 4 | Mid | |
| R.I.S.C. Gain | R.I.S.C. Loss | Wall Damage | Input Tension | Chip Ratio | OTG Ratio | Proration | Invuln | Cancel | |
| 2500 | 1000 | 300 | 80% | none | |||||

| |||||||||

| |||||||||
| Input Proximity Range: 300 | |||||||||
f.S Data
| f.S normal |
Damage | Guard | Startup | Active | Recovery | On-Block | On-Hit | Level | CH Type |
|---|---|---|---|---|---|---|---|---|---|
| 31 | All | 10 | 3 | 18 | -7 | -4 | 2 | Mid | |
| R.I.S.C. Gain | R.I.S.C. Loss | Wall Damage | Input Tension | Chip Ratio | OTG Ratio | Proration | Invuln | Cancel | |
| 1500 | 1000 | 300 | 80% | 90% | none | ||||

| |||||||||

| |||||||||
| Forward movement occurs on the first active frame | |||||||||
5H Data
| 5H normal |
Damage | Guard | Startup | Active | Recovery | On-Block | On-Hit | Level | CH Type |
|---|---|---|---|---|---|---|---|---|---|
| 41 | All | 19 | 6 | 15 | -2 | +1 | 4 | Large | |
| R.I.S.C. Gain | R.I.S.C. Loss | Wall Damage | Input Tension | Chip Ratio | OTG Ratio | Proration | Invuln | Cancel | |
| 2500 | 1000 | 300 | 100% | 100% | none | ||||

| |||||||||
| Yep, you definitely missed that cancel into Behemoth Typhoon | |||||||||

| |||||||||
5D Data
| 5D Uncharged normal |
Damage | Guard | Startup | Active | Recovery | On-Block | On-Hit | Level | CH Type |
|---|---|---|---|---|---|---|---|---|---|
| 50 | High | 20 | 3 | 26 | -15 | 0 | 2 | Mid | |
| R.I.S.C. Gain | R.I.S.C. Loss | Wall Damage | Input Tension | Chip Ratio | OTG Ratio | Proration | Invuln | Cancel | |
| 1125 | 3000 | 700 (900) | 60% | 80% | none | ||||

| |||||||||

| |||||||||
| Hitstop on block: 20F Hitstop on hit: 16F [raw hit: 45F] Floating crumple: Total 28F (can block 19~28F) | |||||||||
| 5[D] Charged normal |
Damage | Guard | Startup | Active | Recovery | On-Block | On-Hit | Level | CH Type |
|---|---|---|---|---|---|---|---|---|---|
| 62 | High | 28 | 3 | 26 | -10 | KD | 4 | Mid | |
| R.I.S.C. Gain | R.I.S.C. Loss | Wall Damage | Input Tension | Chip Ratio | OTG Ratio | Proration | Invuln | Cancel | |
| 1875 | 1500 | 700 (900) | 60% | ~ | none | ||||
|
| |||||||||
|
| |||||||||
6P Data
| 6P normal |
Damage | Guard | Startup | Active | Recovery | On-Block | On-Hit | Level | CH Type |
|---|---|---|---|---|---|---|---|---|---|
| 39 | All | 12 | 6 | 27 | -19 | -16 | 2 | Mid | |
| R.I.S.C. Gain | R.I.S.C. Loss | Wall Damage | Input Tension | Chip Ratio | OTG Ratio | Proration | Invuln | Cancel | |
| 1500 | 1000 | 500 | 60% | 90% | 1~2 Upper Body 3~17 Above Knees |
||||

| |||||||||

| |||||||||
| Hitbox extends downward on the last three active frames allowing it to hit crouching opponents | |||||||||
6H Data
| 6H normal |
Damage | Guard | Startup | Active | Recovery | On-Block | On-Hit | Level | CH Type |
|---|---|---|---|---|---|---|---|---|---|
| 65 | All | 25 | 3 | 30 | -14 | -11 | 4 | Large | |
| R.I.S.C. Gain | R.I.S.C. Loss | Wall Damage | Input Tension | Chip Ratio | OTG Ratio | Proration | Invuln | Cancel | |
| 2500 | 1000 | 500 | 80% | none | |||||

| |||||||||

| |||||||||
2P Data
| 2P normal |
Damage | Guard | Startup | Active | Recovery | On-Block | On-Hit | Level | CH Type |
|---|---|---|---|---|---|---|---|---|---|
| 23 | All | 5 | 3 | 6 | +3 | +6 | 1 | Small | |
| R.I.S.C. Gain | R.I.S.C. Loss | Wall Damage | Input Tension | Chip Ratio | OTG Ratio | Proration | Invuln | Cancel | |
| 1000 | 1500 | 80% | 80% | none | |||||

| |||||||||

| |||||||||
2K Data
| 2K normal |
Damage | Guard | Startup | Active | Recovery | On-Block | On-Hit | Level | CH Type |
|---|---|---|---|---|---|---|---|---|---|
| 26 | Low | 8 | 3 | 11 | -3 | 0 | 1 | Small | |
| R.I.S.C. Gain | R.I.S.C. Loss | Wall Damage | Input Tension | Chip Ratio | OTG Ratio | Proration | Invuln | Cancel | |
| 750 | 1000 | 300 | 80% | 70% | none | ||||

| |||||||||

| |||||||||
2S Data
| 2S normal |
Damage | Guard | Startup | Active | Recovery | On-Block | On-Hit | Level | CH Type |
|---|---|---|---|---|---|---|---|---|---|
| 29 | All | 13 | 3 | 20 | -9 | -6 | 2 | Mid | |
| R.I.S.C. Gain | R.I.S.C. Loss | Wall Damage | Input Tension | Chip Ratio | OTG Ratio | Proration | Invuln | Cancel | |
| 1500 | 1000 | 300 | 80% | 90% | none | ||||

| |||||||||

| |||||||||
2H Data
| 2H normal |
Damage | Guard | Startup | Active | Recovery | On-Block | On-Hit | Level | CH Type |
|---|---|---|---|---|---|---|---|---|---|
| 43 | All | 20 | 4 | 30 | -15 | KD | 4 | Large | |
| R.I.S.C. Gain | R.I.S.C. Loss | Wall Damage | Input Tension | Chip Ratio | OTG Ratio | Proration | Invuln | Cancel | |
| 2500 | 1000 | 500 | 60% | none | |||||

| |||||||||

| |||||||||
2D Data
| 2D normal |
Damage | Guard | Startup | Active | Recovery | On-Block | On-Hit | Level | CH Type |
|---|---|---|---|---|---|---|---|---|---|
| 34 | Low | 14 | 3 | 24 | -10 | KD | 3 | Large | |
| R.I.S.C. Gain | R.I.S.C. Loss | Wall Damage | Input Tension | Chip Ratio | OTG Ratio | Proration | Invuln | Cancel | |
| 1500 | 1000 | 300 | 80% | 90% | none | ||||

| |||||||||

| |||||||||
j.P Data
| j.P normal |
Damage | Guard | Startup | Active | Recovery | On-Block | On-Hit | Level | CH Type |
|---|---|---|---|---|---|---|---|---|---|
| 25 | High | 6 | 3 | 12 | 0 | Small | |||
| R.I.S.C. Gain | R.I.S.C. Loss | Wall Damage | Input Tension | Chip Ratio | OTG Ratio | Proration | Invuln | Cancel | |
| 375 | 1000 | 300 | 60% | 80% | none | ||||

| |||||||||

| |||||||||
j.K Data
| j.K normal |
Damage | Guard | Startup | Active | Recovery | On-Block | On-Hit | Level | CH Type |
|---|---|---|---|---|---|---|---|---|---|
| 29 | High | 9 | 4 | 17 | 1 | Small | |||
| R.I.S.C. Gain | R.I.S.C. Loss | Wall Damage | Input Tension | Chip Ratio | OTG Ratio | Proration | Invuln | Cancel | |
| 750 | 1000 | 300 | 80% | 80% | none | ||||

| |||||||||

| |||||||||
j.S Data
| j.S normal |
Damage | Guard | Startup | Active | Recovery | On-Block | On-Hit | Level | CH Type |
|---|---|---|---|---|---|---|---|---|---|
| 37 | High | 11 | 11 | 13 | 2 | Mid | |||
| R.I.S.C. Gain | R.I.S.C. Loss | Wall Damage | Input Tension | Chip Ratio | OTG Ratio | Proration | Invuln | Cancel | |
| 1125 | 1000 | 300 | 80% | 80% | none | ||||

| |||||||||

| |||||||||
j.H Data
| j.H normal |
Damage | Guard | Startup | Active | Recovery | On-Block | On-Hit | Level | CH Type |
|---|---|---|---|---|---|---|---|---|---|
| 43 | High | 15 | 4 | 2 | Mid | ||||
| R.I.S.C. Gain | R.I.S.C. Loss | Wall Damage | Input Tension | Chip Ratio | OTG Ratio | Proration | Invuln | Cancel | |
| 1125 | 1000 | 300 | 80% | 80% | none | ||||

| |||||||||

| |||||||||
j.D Data
| j.D normal |
Damage | Guard | Startup | Active | Recovery | On-Block | On-Hit | Level | CH Type |
|---|---|---|---|---|---|---|---|---|---|
| 47 | High | 14 | 10 | 3 | Mid | ||||
| R.I.S.C. Gain | R.I.S.C. Loss | Wall Damage | Input Tension | Chip Ratio | OTG Ratio | Proration | Invuln | Cancel | |
| 1500 | 1000 | 500 | 80% | 80% | none | ||||

| |||||||||

| |||||||||
Universal Mechanics
Ground Throw Data
| 6D or 4D Ground Throw other |
Damage | Guard | Startup | Active | Recovery | On-Block | On-Hit | Level | CH Type |
|---|---|---|---|---|---|---|---|---|---|
| 80 | Ground Throw | 2 | 3 | 38 | HKD +54 | ||||
| R.I.S.C. Gain | R.I.S.C. Loss | Wall Damage | Input Tension | Chip Ratio | OTG Ratio | Proration | Invuln | Cancel | |
| 2500 | 1000 | none | |||||||

| |||||||||
| File:GGST Goldlewis Dickinson Ground Throw Hitbox.png | |||||||||
| Opponent cannot use Blue Psych Burst on hit or the resulting knockdown. Builds 1000 Tension once all damage is dealt. On hit, applies an increased 25 Combo Decay. Properties change if Roman Canceled before all damage is dealt: * Reduces positive R.I.S.C. by 25% before applying R.I.S.C. Loss, similar to regular strikes. * R.I.S.C. Loss: 1000 * Proration: Forced 75% * Combo Decay on hit: 15 | |||||||||
Air Throw Data
| j.6D or j.4D Air Throw other |
Damage | Guard | Startup | Active | Recovery | On-Block | On-Hit | Level | CH Type |
|---|---|---|---|---|---|---|---|---|---|
| 80 | Air Throw | 2 | 3 | Until L+10 | |||||
| R.I.S.C. Gain | R.I.S.C. Loss | Wall Damage | Input Tension | Chip Ratio | OTG Ratio | Proration | Invuln | Cancel | |
| 2500 | 1000 | none | |||||||

| |||||||||

| |||||||||
| Opponent cannot use Blue Psych Burst on hit or the resulting knockdown. Builds 1000 Tension once all damage is dealt. On hit, applies an increased 25 Combo Decay. Properties change if Roman Canceled before all damage is dealt: * Reduces positive R.I.S.C. by 25% before applying R.I.S.C. Loss, similar to regular strikes. * R.I.S.C. Loss: 1000 * Proration: Forced 75% * Combo Decay on hit: 15 | |||||||||
Dash Cancel Data
| 66 Dash Cancel other |
Damage | Guard | Startup | Active | Recovery | On-Block | On-Hit | Level | CH Type |
|---|---|---|---|---|---|---|---|---|---|
| Total 22 | |||||||||
| R.I.S.C. Gain | R.I.S.C. Loss | Wall Damage | Input Tension | Chip Ratio | OTG Ratio | Proration | Invuln | Cancel | |
| Can be kara canceled into special moves or Overdrives on frames 1~3. If canceled on frame 1, Dash Cancel will not start, but momentum will still be applied. | |||||||||
Special Moves
41236H Data
| 41236H Behemoth Typhoon special |
Damage | Guard | Startup | Active | Recovery | On-Block | On-Hit | Level | CH Type |
|---|---|---|---|---|---|---|---|---|---|
| 70 | All (Guard Crush) | 12 | 20 | 18 | +12 | KD | 4 | Mid | |
| R.I.S.C. Gain | R.I.S.C. Loss | Wall Damage | Input Tension | Chip Ratio | OTG Ratio | Proration | Invuln | Cancel | |
| 2500 | 1000 | 700 | 150 | 50% | 60% | 100% | none | ||
.png)
| |||||||||
| 'Forward' | |||||||||
_Hitbox.png)
| |||||||||
| First (left) and Last (right) active frames Click here for animated hitboxes | |||||||||
| Active frames groups: start 4+5+5, midpoint 2+1, ending 1+2 Usually connects on the 6th set of active frames giving it a practical startup of 29 (connects on 5th up close [28] and 7th on air hit [30]) Horizontal Activation Range: 0 (Frames 12~25 only). Functionally, cannot hit opponents extending a hurtbox through Goldlewis. | |||||||||
j.41236H Data
| j.41236H Behemoth Typhoon special |
Damage | Guard | Startup | Active | Recovery | On-Block | On-Hit | Level | CH Type |
|---|---|---|---|---|---|---|---|---|---|
| 70 | All | 12 | 20 | KD | 4 | Mid | |||
| R.I.S.C. Gain | R.I.S.C. Loss | Wall Damage | Input Tension | Chip Ratio | OTG Ratio | Proration | Invuln | Cancel | |
| 2500 | 1000 | 700 | 150 | 25% | 60% | 100% | none | ||
|
| |||||||||
|
| |||||||||
| Active frames groups: start 4+5+5, midpoint 2+1, ending 1+2 | |||||||||
63214H Data
| 63214H Behemoth Typhoon special |
Damage | Guard | Startup | Active | Recovery | On-Block | On-Hit | Level | CH Type |
|---|---|---|---|---|---|---|---|---|---|
| 70 | All (Guard Crush) | 12 | 20 | 21 | -5 | KD | 4 | Mid | |
| R.I.S.C. Gain | R.I.S.C. Loss | Wall Damage | Input Tension | Chip Ratio | OTG Ratio | Proration | Invuln | Cancel | |
| 2500 | 1000 | 700 | 150 | 50% | 80% | 100% | none | ||
.png)
| |||||||||
| 'Fast' | |||||||||
_Hitbox.png)
| |||||||||
| First active hitbox (right) and last active hitbox (left) Click here for animated hitboxes | |||||||||
| Active frames groups: start 4+5+5, midpoint 2+1, ending 1+2 Horizontal Activation Range: 0 (Frames 28~31 only). Functionally, cannot hit opponents extending a hurtbox through Goldlewis. | |||||||||
j.63214H Data
| j.63214H Behemoth Typhoon special |
Damage | Guard | Startup | Active | Recovery | On-Block | On-Hit | Level | CH Type |
|---|---|---|---|---|---|---|---|---|---|
| 70 | All | 12 | 20 | KD | 4 | Mid | |||
| R.I.S.C. Gain | R.I.S.C. Loss | Wall Damage | Input Tension | Chip Ratio | OTG Ratio | Proration | Invuln | Cancel | |
| 2500 | 1000 | 700 | 150 | 25% | 80% | 100% | none | ||
|
| |||||||||
|
| |||||||||
| Active frames groups: start 4+5+5, midpoint 2+1, ending 1+2 | |||||||||
23698H Data
| 23698H Behemoth Typhoon special |
Damage | Guard | Startup | Active | Recovery | On-Block | On-Hit | Level | CH Type |
|---|---|---|---|---|---|---|---|---|---|
| 70 | All (Guard Crush) | 12 | 15 | 18 | +3~12 | KD | 4 | Mid | |
| R.I.S.C. Gain | R.I.S.C. Loss | Wall Damage | Input Tension | Chip Ratio | OTG Ratio | Proration | Invuln | Cancel | |
| 2500 | 1000 | 700 | 150 | 50% | 60% | 100% | none | ||
.png)
| |||||||||
| 'Launch' | |||||||||
_Hitbox.png)
| |||||||||
| First active hitbox (Lower) and last active (upper) Click here for animated hitboxes | |||||||||
| Active frames groups: start 3+3+3, midpoint 2+1, ending 1+2 Usually connects on the 2nd (+6 OB), 3rd (+9 OB), or 4th (+12 OB) set of active frames for grounded hits giving it a practical startup of 15, 18, and 21 respectively depending on spacing | |||||||||
j.23698H Data
| j.23698H Behemoth Typhoon special |
Damage | Guard | Startup | Active | Recovery | On-Block | On-Hit | Level | CH Type |
|---|---|---|---|---|---|---|---|---|---|
| 70 | All | 12 | 15 | KD | 4 | Mid | |||
| R.I.S.C. Gain | R.I.S.C. Loss | Wall Damage | Input Tension | Chip Ratio | OTG Ratio | Proration | Invuln | Cancel | |
| 2500 | 1000 | 700 | 150 | 25% | 60% | 100% | none | ||
|
| |||||||||
|
| |||||||||
| Active frames groups: start 3+3+3, midpoint 2+1, ending 1+2 | |||||||||
21478H Data
| 21478H Behemoth Typhoon special |
Damage | Guard | Startup | Active | Recovery | On-Block | On-Hit | Level | CH Type |
|---|---|---|---|---|---|---|---|---|---|
| 70 | Low (Guard Crush) | 12 | 15 | 18 | +3 | KD | 4 | Mid | |
| R.I.S.C. Gain | R.I.S.C. Loss | Wall Damage | Input Tension | Chip Ratio | OTG Ratio | Proration | Invuln | Cancel | |
| 1875 | 1000 | 700 | 150 | 50% | 60% | 90% | none | ||
.png)
| |||||||||
| 'Back' | |||||||||
_Hitbox.png)
| |||||||||
| First active hitbox (lower) and last active hitbox (upper) Click here for animated hitboxes | |||||||||
| Active frames groups: start 3+3+3, midpoint 2+1, ending 1+2 First three active frame sets side switch the opponent Above head air hits connect on last two sets of active frames (24, 25 startup) behind the back hits connect on 4th (lower back) and 5th (upper back) sets (21, 23 startup) Horizontal Activation Range: 200 (Frames 15~24 only). Functionally, cannot hit opponents extending a hurtbox through Goldlewis from a distance. | |||||||||
j.21478H Data
| j.21478H Behemoth Typhoon special |
Damage | Guard | Startup | Active | Recovery | On-Block | On-Hit | Level | CH Type |
|---|---|---|---|---|---|---|---|---|---|
| 70 | All | 12 | 15 | KD | 4 | Mid | |||
| R.I.S.C. Gain | R.I.S.C. Loss | Wall Damage | Input Tension | Chip Ratio | OTG Ratio | Proration | Invuln | Cancel | |
| 2500 | 1000 | 700 | 150 | 25% | 60% | 100% | none | ||
|
| |||||||||
|
| |||||||||
| Active frames groups: start 3+3+3, midpoint 2+1, ending 1+2 | |||||||||
69874H Data
| 69874H Behemoth Typhoon special |
Damage | Guard | Startup | Active | Recovery | On-Block | On-Hit | Level | CH Type |
|---|---|---|---|---|---|---|---|---|---|
| 70 | All* (Guard Crush) | 12 | 20 | 21 | -5 | KD | 4 | Mid | |
| R.I.S.C. Gain | R.I.S.C. Loss | Wall Damage | Input Tension | Chip Ratio | OTG Ratio | Proration | Invuln | Cancel | |
| 2500 | 1000 | 700 | 150 | 50% | 60% | 80% | none | ||
.png)
| |||||||||
| 'Up' | |||||||||
_Hitbox.png)
| |||||||||
| First active hitbox (right) to last active (left) Click here for animated hitboxes | |||||||||
| Active frames groups: start 4+5+5, midpoint 2+1, ending 1+2 *Last two active frame sets are overheads Horizontal Activation Range: 0 (Frames 28~31 only). Functionally, cannot hit opponents extending a hurtbox through Goldlewis. | |||||||||
j.69874H Data
| j.69874H Behemoth Typhoon special |
Damage | Guard | Startup | Active | Recovery | On-Block | On-Hit | Level | CH Type |
|---|---|---|---|---|---|---|---|---|---|
| 70 | All | 12 | 20 | KD | 4 | Mid | |||
| R.I.S.C. Gain | R.I.S.C. Loss | Wall Damage | Input Tension | Chip Ratio | OTG Ratio | Proration | Invuln | Cancel | |
| 2500 | 1000 | 700 | 150 | 25% | 80% | 100% | none | ||
|
| |||||||||
|
| |||||||||
| Active frames groups: start 4+5+5, midpoint 2+1, ending 1+2 | |||||||||
47896H Data
| 47896H Behemoth Typhoon special |
Damage | Guard | Startup | Active | Recovery | On-Block | On-Hit | Level | CH Type |
|---|---|---|---|---|---|---|---|---|---|
| 70 | High (Guard Crush) | 12 | 20 | 18 | +14~15 | KD | 4 | Mid | |
| R.I.S.C. Gain | R.I.S.C. Loss | Wall Damage | Input Tension | Chip Ratio | OTG Ratio | Proration | Invuln | Cancel | |
| 2500 | 1000 | 700 | 150 | 50% | 100% | 100% | none | ||
.png)
| |||||||||
| 'Slow Overhead' | |||||||||
_Hitbox.png)
| |||||||||
| First active hitbox (left) to last active (right) Click here for animated hitboxes | |||||||||
| Active frames groups: start 4+5+5, midpoint 2+1, ending 1+2 Usually hits on the 5th set of active frames (+14), but hits slightly meatier (+15) on the 6th set against standing GI,MA,CH,MI,RA,LE,IN,JC Horizontal Activation Range: 0 (Frames 12~25 only). Functionally, cannot hit opponents extending a hurtbox through Goldlewis. | |||||||||
j.47896H Data
| j.47896H Behemoth Typhoon special |
Damage | Guard | Startup | Active | Recovery | On-Block | On-Hit | Level | CH Type |
|---|---|---|---|---|---|---|---|---|---|
| 70 | All | 12 | 20 | KD | 4 | Mid | |||
| R.I.S.C. Gain | R.I.S.C. Loss | Wall Damage | Input Tension | Chip Ratio | OTG Ratio | Proration | Invuln | Cancel | |
| 2500 | 1000 | 700 | 150 | 25% | 100% | 100% | none | ||
|
| |||||||||
|
| |||||||||
| Active frames groups: start 4+5+5, midpoint 2+1, ending 1+2 | |||||||||
87412H Data
| 87412H Behemoth Typhoon special |
Damage | Guard | Startup | Active | Recovery | On-Block | On-Hit | Level | CH Type |
|---|---|---|---|---|---|---|---|---|---|
| 70 | Low (Guard Crush) | 12 | 15 | 18 | +16 | KD | 4 | Mid | |
| R.I.S.C. Gain | R.I.S.C. Loss | Wall Damage | Input Tension | Chip Ratio | OTG Ratio | Proration | Invuln | Cancel | |
| 1875 | 1000 | 700 | 150 | 50% | 80% | 90% | none | ||
.png)
| |||||||||
| 'Slow Low' | |||||||||
_Hitbox.png)
| |||||||||
| First active hitbox (Upper) to last active (lower) Click here for animated hitboxes | |||||||||
| Active frames groups: start 3+3+3, midpoint 2+1, ending 1+2 First three active frame sets launch the opponent behind Goldlewis Horizontal Activation Range: 200 (Frames 12~24 only). Functionally, cannot hit opponents extending a hurtbox through Goldlewis at a distance. | |||||||||
j.87412H Data
| j.87412H Behemoth Typhoon special |
Damage | Guard | Startup | Active | Recovery | On-Block | On-Hit | Level | CH Type |
|---|---|---|---|---|---|---|---|---|---|
| 70 | All | 12 | 15 | KD | 4 | Mid | |||
| R.I.S.C. Gain | R.I.S.C. Loss | Wall Damage | Input Tension | Chip Ratio | OTG Ratio | Proration | Invuln | Cancel | |
| 2500 | 1000 | 700 | 150 | 25% | 100% | 100% | none | ||
|
| |||||||||
|
| |||||||||
| Active frames groups: start 3+3+3, midpoint 2+1, ending 1+2 | |||||||||
89632H Data
| 89632H Behemoth Typhoon special |
Damage | Guard | Startup | Active | Recovery | On-Block | On-Hit | Level | CH Type |
|---|---|---|---|---|---|---|---|---|---|
| 70 | High (Guard Crush) | 12 | 15 | 18 | +12(+14 GI) | KD | 4 | Mid | |
| R.I.S.C. Gain | R.I.S.C. Loss | Wall Damage | Input Tension | Chip Ratio | OTG Ratio | Proration | Invuln | Cancel | |
| 1875 | 1000 | 700 | 150 | 50% | 100% | 80% | none | ||
.png)
| |||||||||
| 'Overhead' | |||||||||
_Hitbox.png)
| |||||||||
| First active hitbox (upper) to last active (lower) Click here for animated hitboxes | |||||||||
| Active frames groups: start 3+3+3, midpoint 2+1, ending 1+2 Usually hits on the 4th set of active frames against standing opponents (startup 21) except on Giovanna where it hits on the 5th set (startup 23) | |||||||||
j.89632H Data
| j.89632H Behemoth Typhoon special |
Damage | Guard | Startup | Active | Recovery | On-Block | On-Hit | Level | CH Type |
|---|---|---|---|---|---|---|---|---|---|
| 70 | All | 12 | 20 | KD | 4 | Mid | |||
| R.I.S.C. Gain | R.I.S.C. Loss | Wall Damage | Input Tension | Chip Ratio | OTG Ratio | Proration | Invuln | Cancel | |
| 2500 | 1000 | 700 | 150 | 25% | 100% | 100% | none | ||
|
| |||||||||
|
| |||||||||
| Active frames groups: start 4+5+5, midpoint 2+1, ending 1+2 Has 20 active frames unlike its grounded counterpart oddly | |||||||||
214S Level 1 Data
| 214S Level 1 Thunderbird special |
Damage | Guard | Startup | Active | Recovery | On-Block | On-Hit | Level | CH Type |
|---|---|---|---|---|---|---|---|---|---|
| 10, 30 | All | 57 | 24 | 42 Total | 2 | Very Small | |||
| R.I.S.C. Gain | R.I.S.C. Loss | Wall Damage | Input Tension | Chip Ratio | OTG Ratio | Proration | Invuln | Cancel | |
| 100×2 | 1000 | 150×2 | 100 | 12% | 80% | 80% | |||

| |||||||||
| Go my child, and hold down the neutral. | |||||||||
  
| |||||||||
| Visual desyncs with hitbox when used from a distance (Early);Middle;Far; | |||||||||
| Horizontal Activation Range: 200 (All levels) Vertical Activation Range: 200 (All levels) Security level is reset on frame 3 (All levels) Drone disappears if Goldlewis is hit anytime from frame 1-56f | |||||||||
214S Level 2 Data
| 214S Level 2 Thunderbird special |
Damage | Guard | Startup | Active | Recovery | On-Block | On-Hit | Level | CH Type |
|---|---|---|---|---|---|---|---|---|---|
| 10×2, 30 | All | 57 | 84 | 38 Total | 2 | Very Small | |||
| R.I.S.C. Gain | R.I.S.C. Loss | Wall Damage | Input Tension | Chip Ratio | OTG Ratio | Proration | Invuln | Cancel | |
| 100×3 | 1000 | 100×3 | 100 | 12% | 80% | 80% | none | ||
|
| |||||||||
|
| |||||||||
| Drone disappears if Goldlewis is hit anytime from frame 1-44f | |||||||||
214S Level 3 Data
| 214S Level 3 Thunderbird special |
Damage | Guard | Startup | Active | Recovery | On-Block | On-Hit | Level | CH Type |
|---|---|---|---|---|---|---|---|---|---|
| 10×3, 30 | All | 57 | 144 | 34 Total | 2 | Very Small | |||
| R.I.S.C. Gain | R.I.S.C. Loss | Wall Damage | Input Tension | Chip Ratio | OTG Ratio | Proration | Invuln | Cancel | |
| 100×4 | 1000 | 80×4 | 100 | 12% | 80% | 80% | none | ||
|
| |||||||||
|
| |||||||||
| Drone disappears if Goldlewis is hit anytime from frame 1-32f | |||||||||
236S Level 1 Data
| 236S Level 1 Skyfish special |
Damage | Guard | Startup | Active | Recovery | On-Block | On-Hit | Level | CH Type |
|---|---|---|---|---|---|---|---|---|---|
| 5×10 | All | 35 | 84 Total | -13 | -10 | 0 | Very Small | ||
| R.I.S.C. Gain | R.I.S.C. Loss | Wall Damage | Input Tension | Chip Ratio | OTG Ratio | Proration | Invuln | Cancel | |
| 100×10 | 1000 | 10×10 | 100 | 12% | 80% | 80% | none | ||

| |||||||||
| Despite what the animation suggests, each bullet's hitbox is positioned identically | |||||||||
| Vertical Activation Range: 0 (from projectile's height of 200). Unable to hit extended air-to-ground hurtboxes. Security level is reset on frame 3 | |||||||||
236S Level 2 Data
| 236S Level 2 Skyfish special |
Damage | Guard | Startup | Active | Recovery | On-Block | On-Hit | Level | CH Type |
|---|---|---|---|---|---|---|---|---|---|
| 5×20 | All | 30 | 109 Total | -13 | KD | 0 | Very Small | ||
| R.I.S.C. Gain | R.I.S.C. Loss | Wall Damage | Input Tension | Chip Ratio | OTG Ratio | Proration | Invuln | Cancel | |
| 100×20 | 1000 | 10×20 | 100 | 12% | 80% | 80% | none | ||
|
| |||||||||
236S Level 3 Data
| 236S Level 3 Skyfish special |
Damage | Guard | Startup | Active | Recovery | On-Block | On-Hit | Level | CH Type |
|---|---|---|---|---|---|---|---|---|---|
| 5×30 | All | 25 | 134 Total | -13 | HKD | 0 | Very Small | ||
| R.I.S.C. Gain | R.I.S.C. Loss | Wall Damage | Input Tension | Chip Ratio | OTG Ratio | Proration | Invuln | Cancel | |
| 100×30 | 1000 | 10×30 | 100 | 12% | 80% | 80% | none | ||
|
| |||||||||
Overdrives
632146P Data
| 632146P Down With The System super |
Damage | Guard | Startup | Active | Recovery | On-Block | On-Hit | Level | CH Type |
|---|---|---|---|---|---|---|---|---|---|
| 160 [160,25] | All | 6+(135 Flash)+4 | 5 | 46 | -33 | 3 | Mid | ||
| R.I.S.C. Gain | R.I.S.C. Loss | Wall Damage | Input Tension | Chip Ratio | OTG Ratio | Proration | Invuln | Cancel | |
| 2000 | 1000 [1000x2] | 0 | 25% | 100% | 1~14 All | ||||

| |||||||||
| More Circles = More Damage | |||||||||

| |||||||||
| reversal Does not behave as a true multi-hit attack, follow-up hits will be scaled after previous hits ● R.I.S.C. Loss does not stack after the first hit, but 25% R.I.S.C. reduction still applies per hit of R.I.S.C. Loss. ● Maximum damage is achieved from at least 1333 R.I.S.C. (approx. 10.4% gauge). | |||||||||
720P Data
| 720P Down With The System super |
Damage | Guard | Startup | Active | Recovery | On-Block | On-Hit | Level | CH Type |
|---|---|---|---|---|---|---|---|---|---|
| 175 [160,25×2] | All | 11+(191 Flash)+4 | 5 | 46 | -33 | 3 | Mid | ||
| R.I.S.C. Gain | R.I.S.C. Loss | Wall Damage | Input Tension | Chip Ratio | OTG Ratio | Proration | Invuln | Cancel | |
| 2000 | 1000 [1000×3] | 0 | 25% | 100% | 1~19 All | ||||
|
| |||||||||
| More Circles = More Damage | |||||||||
|
| |||||||||
| reversal Does not behave as a true multi-hit attack, follow-up hits will be scaled after previous hits
| |||||||||
1080P Data
| 1080P Down With The System super |
Damage | Guard | Startup | Active | Recovery | On-Block | On-Hit | Level | CH Type |
|---|---|---|---|---|---|---|---|---|---|
| 190 [160,25×3] | All | 16+(230 Flash)+4 | 5 | 46 | -33 | 3 | Mid | ||
| R.I.S.C. Gain | R.I.S.C. Loss | Wall Damage | Input Tension | Chip Ratio | OTG Ratio | Proration | Invuln | Cancel | |
| 2000 | 1000 [1000×4] | 0 | 25% | 100% | 1~24 All | ||||
|
| |||||||||
| More Circles = More Damage | |||||||||
|
| |||||||||
| reversal Does not behave as a true multi-hit attack, follow-up hits will be scaled after previous hits
| |||||||||
236236K Level 1 Data
| 236236K Level 1 Burn It Down super |
Damage | Guard | Startup | Active | Recovery | On-Block | On-Hit | Level | CH Type |
|---|---|---|---|---|---|---|---|---|---|
| 8×5 | All | 13+(84 Flash)+79 | 32 | 27 Total | 2 | Small | |||
| R.I.S.C. Gain | R.I.S.C. Loss | Wall Damage | Input Tension | Chip Ratio | OTG Ratio | Proration | Invuln | Cancel | |
| 100x5 | 1000 | 0 | 12% | none | |||||
 
| |||||||||
| I used two resources for that? | |||||||||

| |||||||||
236236K Level 2 Data
| 236236K Level 2 Burn It Down super |
Damage | Guard | Startup | Active | Recovery | On-Block | On-Hit | Level | CH Type |
|---|---|---|---|---|---|---|---|---|---|
| 8×10 | All | 13+(84 Flash)+79 | 52 | 27 Total | 2 | Small | |||
| R.I.S.C. Gain | R.I.S.C. Loss | Wall Damage | Input Tension | Chip Ratio | OTG Ratio | Proration | Invuln | Cancel | |
| 100x10 | 1000 | 0 | 12% | none | |||||
|
| |||||||||
|
| |||||||||
236236K Level 3 Data
| 236236K Level 3 Burn It Down super |
Damage | Guard | Startup | Active | Recovery | On-Block | On-Hit | Level | CH Type |
|---|---|---|---|---|---|---|---|---|---|
| 8×15 | All | 13+(84 Flash)+79 | 72 | 27 Total | 2 | Small | |||
| R.I.S.C. Gain | R.I.S.C. Loss | Wall Damage | Input Tension | Chip Ratio | OTG Ratio | Proration | Invuln | Cancel | |
| 100x15 | 1000 | 0 | 12% | none | |||||
|
| |||||||||
|
| |||||||||
 Anji Mito [★]
 Asuka R♯ [★]
 Axl Low [★]
 Baiken [★]
 Bedman? [★]
 Bridget [★]
 Chipp Zanuff [★]
 Faust [★]
 Giovanna [★]
 Goldlewis [★]
 Happy Chaos [★]
 I-No [★]
 Jack-O' [★]
 Johnny [★]
 Ky Kiske [★]
 Leo Whitefang [★]
 May [★]
 Millia Rage [★]
 Nagoriyuki [★]
 Potemkin [★]
 Ramlethal [★]
 Sin Kiske [★]
 Sol Badguy [★]
 Testament [★]
 Zato-1 [★]
Click [★] for character's full frame data
Essentials
• HUD •
Controls •
FAQ •
The Basics
• Movement/Canceling •
Offense •
Defense •
Gauges •
Universal Strategy •
Detailed & Advanced Information
• Damage/Combo •
Frame Data & System Data •
Attack Attributes •
Misc •
Archived Information
• Patch Notes • Tier Lists •
- Attack Level
- Blocking
- Burst Gauge
- Cancels
- Clash
- Dash Cancel
- Faultless Defense
- Frame Advantage
- Gatling
- Gravity
- Guard Crush
- Guts
- Hitstop
- Hitstun
- Instant Air Dash (IAD)
- Instant Block
- Instant Faultless Defense
- Invalid Combos
- Knockdown Recovery
- Low Profile
- Minimum Damage
- Negative Penalty
- Off the Ground (OTG)
- Positive Bonus
- Prejump
- Proration
- Psych Burst
- Punish
- Overdrive (Super Attack)
- R.I.S.C. Level
- Roman Cancel (RC)
- Stagger Recovery
- Tension Gauge
- Throw
- Throw Clash
- Wall