< GGST
This can be due to patches to the game, or developments in the metagame. You can help by updating it.
Overview
Anji is a unique but well rounded character, with a gameplan revolving around taking calculated risks and cashing out for big rewards. The most notable thing that is unique to Anji is his autoguard specials, which make him go straight through the opponents attacks when timed well, which allows him to create unique and threatening RPS scenarios for the opponent in neutral and his own offense.
Anji is primarily a strike/throw oriented character outside of using Fuujin (236H), while his strikes on their own can lead to big damage, his throws also have their own unique threat thanks to Shitsu (236P) oki, which hands Anji an advantageous, but moderately layered situation. While not having a great amount of plus frames to assert his offense, Anji excels at stealing turns from the opponent by using the threat of his strong counterhit starters and autoguard to get away with leaving large gaps in his offense and still continuing pressure.
This kind of playstyle, however, makes Anji a character who asks for strong reads from those who play him, as making one incorrect play can put you in a very bad spot, since Anji has bad abare options without meter. On the topic of meter, Anji is a character who demands having 50 meter as often as possible, since it allows him to mitigate the risks he has to take in neutral and offence, as well as granting him greater defensive capabilities.
In summary, Anji is a well rounded character that rewards strong reads and calculated risk taking to break down the opponent.
![]() Anji Mito
Anji Mito ![]() Anji Mito , classified as a Balance type, is an elegant martial artist who dodges all with his dance.
Anji Mito , classified as a Balance type, is an elegant martial artist who dodges all with his dance.
Pros
Cons
- Autoguard: Autoguard allows Anji to go around and punish the opponent's attacks in a way completely unique to him.
- Swiss Army Knife: Anji has a pretty well rounded moveset, granting him a tool for most situations.
- Good Offense: A potent strike/throw game, Fuujin, and the infamous butterfly oki give Anji several ways to pressure the opponent. The threat of his massive counterhit starters allow Anji to steal turns even while being minus 8 or more.
- Anti Airs: Kou and 6P are both very fast and reliable anti air options
- Fuujin: Anji's infamous 236H rekka dash punch special move that blasts him across the screen, and makes up a core part of his gameplan. While a decent move on its own, the ability to autoguard through the startup and cancel into its follow-ups before the move even becomes active gives Anji a huge amount of mindgame potential.
- Autoguard: Anji's autoguard can put him at disadvantage if the guarded move is low recovery, multi hit, or the opponent can PRC to steal their turn back.
- Abare: Anji's fastest normals (5P and 2P) both have 6 frames of startup and don't provide much reward on hit. As a result, he cannot mash out of well timed tick throws.
- High Risk: Anji's tools can be punished heavily if the opponent is expecting them or if they're used improperly. Fuujin and its followups, Kou, and Suigetsu no Hakobi can all put Anji at major risk against an opponent with proper matchup knowledge.
Error: No field named "weight" found for any of the specified database tables.
| Anji Mito |
|---|
GGST Anji Character Guide
Normal Moves
5P


- Anji's fastest button, tied with 2P
- Can be used as a quick anti-air or to mash out of pressure
Gatling Options: 5P, 2P, 6P, 6H
5K

do the Nago


- Anji's best low commitment poke.
Excellent at stopping reckless approaches on reaction and it's 6H gatling makes it a pretty good pressure starter. Also has a wide enough cancel window to make 5K>2D into a frametrap.
Gatling Options: 6P, 6H, 5D, 2D
c.S

"You're only minus if you're a bitch" - Lao Tzu


A very important attack in Anji's pressure and combos.
Pressure: cS can be canceled to 2S, fS, 5H, or 6H. You can delay your timings to frame trap the opponent and catch their mash out. If you properly condition them to avoid mashing, you can go for greedier things like run up/236K throw after cS, since it's only -2 on block.
Mixup: cS->5D can be strong. cS->delay 2D or cS->2H can catch opponent's mash or jump.
Combos: cS combos to 5H, 6H and Fuujin. When hitting airborne opponents, you can combo into 2H or Kou. On counterhit combos into 2H which leads to Kou.
Gatling Options: 6P, f.S, 2S, 5H, 2H, 6H, 5D, 2D
f.S

No, it's not 6S


- Anji's best long range poke
Works well when paired with Fuujin, but it only combos on counterhit or if the opponent is crouching.
Gatling Options: 5H, 2H
5H


Frames 15-16

Frames 17-18


- Hits on both sides of Anji
- Does not combo from a max range f.S
Covers an incredible area above and around Anji. This move's wide range and tall hitbox make it a great tool for forcing the opponent back down onto the ground, most notably in the corner. 5H's slightly disjointed hitbox can make for a decent counterpoke in some matchups. This move's long range also makes it a go-to throw whiff punisher.
5D

Where the hella did he get that umbrella from?


- Data in [] represents values when fully charged.
- Causes floating crumple on uncharged, ground hit, delaying a follow-up will force stand.
- Deals more damage when fully charged, launches opponent on hit if combo'd into.
- Homing Jump cancelable on raw hit when fully charged, Homing Jump sequence forces an Area Shift.
- 80% proration if not fully charged.
Standard pressure overhead, gatlings from K buttons or cS for a mixup.
6P

Anti Air


- Upper body invincible anti-air, can also be used to counter-poke
- Unlike some 6Ps, this move is hard to combo into on a grounded opponent unless at very close range
6H


Frames 16-18

Frames 22-24

Frames 29-32


- Simultaneously hits up rather high and hits low enough to hit low profile moves such as Sol's Night Raid Vortex and I-No's Stroke the Big Tree.
An advancing command normal with 3 hits. Cancelling this move into Fuujin on any of the 3 hits is a frametrap. Should be used pretty much exclusively as a pressure tool, namely after a P or K normal.
2P


- Hits low enough to catch some situations where 5P whiffs.
If you really need a mash a frame faster than 2K this is your button. Not any safer than 2K, but has its own uses.
Gatling Options: 5P, 2P, 6P, 6H
2K


- Faster than 2D but slightly shorter, combos into 2D at most ranges.
No longer +6 on block, but still good nonetheless. 2K ought to be your go to move if you need a quick punish into a knockdown with 2D.
Gatling Options: 6P, 6H, 5D, 2D
2S


Frames 12-13

Frames 14-15


- Hits on both sides of Anji
This move has two uses: your opponent is stalling in the air and you want to catch them while they land, or you're fishing for counter hits.
Gatling Options: 5H, 2H
2H


- One of if not the highest reward combo starters Anji has, especially on counterhit.
- Good for his corner pressure as an OTG after throw
2H is used for frametraps, catching jumps, and catching backdashes, often simultaneously. While landing this move is quite an ordeal, it will ALWAYS combo in to 236[S], which is especially huge in the corner, where Anji will get monstrous amounts of damage. You can only combo into this move on a grounded opponent with a counterhit or as a crouch confirm from c.S.
2D

whistles


- Decent range and a great low profile property.
Practically identical in terms of utility to Sol's 2D in previous guilty gear games. Use to low profile the opponent's attacks, run up with it to catch people backing up, or use it to fish for rewarding counterhits. Important neutral tool that you should not sleep on.
j.P


- A quick air to air when you are not confident in anti airing the opponent.
Gatling Options: j.P
j.K


- Quick startup sometimes used in air combos.
- Strong air to air due to its speed and good hitbox.
Gatling Options: j.D
j.S

Why is this faster than my j. P?


Frames 7-8
Frames 9-11


- An in between of a jump in and air to air, not exactly excelling at either, but still a move that should see a lot of use. Use primarily as a way to cover yourself when doing an IAD backwards.
Gatling Options: j.H
j.H

Jump in


- Anji's primary jump in.
j.D

Blow them away like the rain


- Strong air to air tool, can be used to efficiently stop airdash approaches.
- Wall bounces if opponent is near the corner. Can continue a combo with 5K or cS but height is a factor.
- Almost completely kills Anji's air momentum and quickly brings him back to the ground after a brief float.
- Anji can still attack as he's falling if he does jD high enough in the air.
Universal Mechanics
Ground Throw

Yeeted right into pressure

No results
Ground throw that gives a hard knockdown, allowing for butterfly oki. Throw is a very big part of Anji's pressure, so make sure to do it often.
Air Throw

Another anti-air

No results
Anji's 6P has tendencies to whiff if the opponent air dashes over him. Air throwing is sometimes a better anti-air as a result.
Special Moves
Shitsu
236P

"Insane" Anji mix vid #21450


- Listed frame advantage is for the initial projectile impact
A slow moving butterfly projectile that transforms into a bird when it collides with something, flying up and then falling back down for another hit. This move sees most of its use after a hard knockdown (e.g. Throw, 2D, Kou) where you can perform a strike/throw mixup once you have conditioned your opponent to stop mashing/backdashing/upbacking. Use sparingly outside of knockdowns, as it has very long startup and does not travel fullscreen. It has very specific and matchup dependent use in neutral, but when used appropriately it can help Anji make safer approaches against a defensive opponent, as it's slow travel time allows Anji to run behind it.
Suigetsu No Hakobi (水月の運び)
236K (Hold OK)

"If only it was frame 1...
...Nevermind, they still pressed!"


- Autoguard starts on frame 10
- Can be held to extend autoguard window up to frame 41
- Anji is vulnerable to throws during autoguard window
- On successful guard, Anji enters a spin animation for 38f where he is fully invulnerable. You can perform any action including blocking after invuln ends, so the spin cannot be punished.
- If Anji guards a non-projectile move, the opponent will be locked in hitstop for 28f before continuing their move. They can still RC afterwards to avoid being punished.
- Frame advantage after autoguard depends on the move guarded. (Frame Advantage = Remaining active and recovery frames - 10f)
Anji spins forward with autoguard. This twirl can also be done with 236[S] and 236[H], with the respective attack coming out if nothing is guarded. 236K finds use in scaring the opponent into expecting Fuujin or Kou, allowing you to freely reset pressure, set up grabs, or just gain ground. Make sure to be EXTREMELY careful when using this move as the move puts Anji into counterhit state for the startup and recovery of the move, lending you to potentially getting hit by one of the opponent's most damaging confirms. The held version of this move has a longer autoguard window than any other move Anji has, which will catch people timing their attacks to coincide with the vulnerable period of Anji's other autoguard attacks.
Fuujin (風神)
236H (Hold OK)

The Art of War
"Wind God"


- Can be held to add autoguard to startup.
- Held version floats the opponent on hit
- Unsafe by itself, but can be made safer with follow-ups, all of which can be done on Fuujin hit, block, or even whiff.
- By inputting one of Fuujin's follow-up specials just before Fuujin's active frames, Anji will perform the follow-up without needing Fuujin's actual attack to come out first. This is known as "kara Fuujin" or "early cancel," and can be done as early as frame 13.
A dash punch/rekka type move that is critical to Anji's offense. Fuujin has a variety of follow-ups that create a guessing game for you and the opponent as none of the follow-ups can be punished in the exact same way, forcing the opponent to open themselves up to one option to try dealing with another.
On pressure, try not to overuse Fuujin as a savvy opponent can handle most follow-ups and punish you if you guess wrong. Think of it as the butter to the bread of Anji's pressure; it makes everything better, but if you eat it by itself you'll look like a clown.
In neutral, however, Fuujin turns Anji into a rapidly advancing swiss army knife able to whiff punish/poke anything with early cancel Nagiha, zone or bait DPs with early cancel Shin, or get in the opponent's face with early cancel Issokutobi. Fuujin and its follow-ups all still have long recoveries and cannot have autoguard until frame 10 at the earliest, so make sure you space correctly or whiff them in places where the opponent cannot get a meaningful punish.
Shin: Ichishiki (針: 壱式)
P after Fuujin

WHY ARE YOU BLOCKING?


- The hitbox only exists once the fans have reached the ground
A slightly plus on block followup to Fuujin, allowing you to frametrap the opponent or potentially reset pressure. This move can always be completely avoided and even punished by an opponent jumping, so you must condition the opponent to stay put before you can use this safely. With early cancel, this turns into an alternate guaranteed plus meaty Anji can combo with on hit, or a projectile to keep opponents out. Can make an opponent's DPs whiff with proper spacing, which may lead to a full punish depending on matchup. Can also lead to a 50/50 with drift PRC that can either cross up or not depending on when you do the PRC
Issokutobi(一足飛び)
K after Fuujin

Zoning? Not on me, sorry.


- -12 on block and -9 on regular hit if cancelled immediately
A small hop that gets you up close to the opponent, allowing you to set up throws or reset pressure against opponents who are conditioned to stay put and aren't expecting it, otherwise you can be punished on reaction with a button or throw. Use very rarely to keep the opponent on their toes. You are considered airborne while using this move, allowing for some sneaky mixups with RC. Also used in certain combo routes. With early cancel, this becomes a massive command dash with lower body invuln. Use on Pots mashing slide head, general zoning, or to close the gap.
Nagiha
S after Fuujin

WHY ARE YOU NOT BLOCKING?


- Sweep follow-up to Fuujin.
- High pushback and only slightly minus on block makes it difficult to punish.
- Soft knockdown on hit
- Only followup that's a true blockstring
The safest followup to Fuujin, allowing you to end your pressure with little to no risk. Using this move with a slight delay after Fuujin gives you a great way to catch opponents who are upbacking or mashing, allowing you to condition them to stay put and do other followups. If done right away it's a true blockstring which doesn't allow for reversals/DPs. On counterhit this move grants you a hard knockdown, allowing you to set up butterfly oki. Early cancel turns this into a 26 frame half screen low, usable for whiff punishing, poking, and anything inbetween. On CH, you can do either 2K>Kou or a full cS combo if you're close enough.
Rin
H after Fuujin
- GGST Anji Mito Rin.png
Bonk

- Overhead Fuujin follow-up.
- Ground bounces on hit.
- Bigger ground bounce on counter hit.
The biggest risk but biggest reward followup to Fuujin. Use this move to catch people who are staying put and looking out for Issokutobi. Massively minus on block. Not super useful with early cancel due to being even slower and more minus. However, this can be used in conjunction with early Nagiha to fool the opponent to getting hit by a halfscreen overhead, and can catch backdashes if your opponent loves to do it out of Shitsu. Plus, sometimes you just want to go YOLO.
Kou
236S (Hold OK)

Wait this isn't On


Frames 9-14

Frames 15-19


- Does not hit grounded opponents.
- Can be held to add autoguard to startup
- Pops the opponent up higher than usual when held
- Can use air actions while falling.
A lightning fast anti air with a monstrous hitbox and also an incredible combo starter, ender, and extender. This move grants a hard knockdown when it connects, allowing you to set up butterfly oki when you are closer to the corner, or go for an airdash > OTG j.H for guaranteed damage. An incredibly strong anti-air with very little recovery
Overdrives
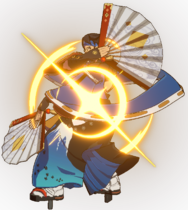
Issei Ougi: Sai
632146H

like Sonic Huricane but it screams Nippon


- Counted as a projectile.
- Because this super is a projectile, it will continue if you RC it. This allows Anji to pack in more damage by himself while the fan keeps people locked in place, but keep in mind that it's 100 meter gone.
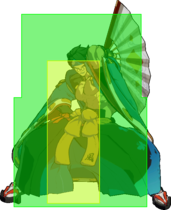
Kachoufuugetsu Kai
632146S

Learned this one from Baiken

The Hook

The Line

The Sinker


- Reversal counter super, and a pretty good one at that. Because it's a counter super, it beats safejumps, which gives it some unique utility.
- Scales incredibly well, which leads to huge damage on RC, but keep in mind that's 100% meter gone.
| 54% complete | ||
|
|
| Page | Status | % |
|---|---|---|
| Overview | Needs overview paragraph describing playstyle, more detailed/accurate pros and cons, more detailed description of moves and their uses. | 9/20 |
| Combos | Combo theory is blank, needs videos examples too. | 4/10 |
| Strategy | Very bare, what's there needs formatting and video examples. Okizeme, blockstrings, tactics, and how to fight sections needed. | 1/20 |
| Frame Data | Missing proration on all moves. Overdrive data is incomplete. | 40/50 |
Click here for the scoring criteria to assess character page completion.
External References
To edit frame data, edit values in GGST/Anji Mito/Data.