< GGML
Overview
Pros
Cons
- Break the Law: Break the Law is obscenely strong in Missing Link with only 6 vulnerable frames on startup, 4 vulnerable frames during recovery, and great speed. Combined with guard cancels it's very hard to deal with and lets Zato gain space from the opponent without much risk.
- Good Zoning Options: With Invite Hell, Climb Darkness, Break the Law, and huge normals like j.S and 5H, Zato is a powerful zoner.
- Strong Anti-Zoning: Invite Hell is good at catching opponents trying to zone and Drunkard Shade is an incredibly effective projectile reflector.
- Long Vulnerability on Invite Hell: Invite Hell lasts for a very long duration and Zato is open to a full ground punish the entire time. This is partially helped by Aerial Invite Hell, but comes at the cost of nerfed hitboxes.
- Incredibly Weak Reversal: Zato's 623P, Rise and Fall, is fully invincible on startup. However, it's fully punishable by an infinite on block and hit, making it useless outside of kills.
- Weak Super: Dark Sentinel, despite looking cool, is a very underwhelming super, lacking any use outside of specific situations. Most of the time Zato will be spending meter on FD.
- Small Instant Kill: Zato's instant kill, while fairly fast, has barely any range and can be crouched by most of the cast.
| Zato | |
|---|---|
 | |
| Defense | |
| 100%Raw Value: 10 | |
| Jump Startup | |
| 3f | |
| Backdash | |
| 22f | |
| Meter Gain Mod | |
| 100%Raw Value: 10 | |
| Charge Time | |
| 70f | |
| Forward Walk Speed | |
| 73%Raw Value: 563 | |
| Backward Walk Speed | |
| 65%Raw Value: 384 | |
| Dizzy Resistance | |
| 100%Raw Value: 30 | |
| Fastest Attack | |
| Reversals | |
Normals
5P
5P


| Damage | Guard | Startup | Active | Recovery | On-Block | On-Hit | Invuln |
|---|---|---|---|---|---|---|---|
| 5 | All | 7 | 4 | 12 | +2 | 0 | none |
Add a description to this move using the |description= field
Describe what the move is used for.
Explain the basics of why the initial purpose of the move is worth knowing or worth doing. Mention downsides that are important to know. If the move is particularly important it might have a spot on the stategy page—an important anti-air will likely be mentioned in the neutral section, or an important combo move will be mentioned in the combo theory.5K
5K
stanky leg


| Damage | Guard | Startup | Active | Recovery | On-Block | On-Hit | Invuln |
|---|---|---|---|---|---|---|---|
| 9 | All | 8 | 9 | 8 | +1 | -1 | none |
Add a description to this move using the |description= field
Describe what the move is used for.
Explain the basics of why the initial purpose of the move is worth knowing or worth doing. Mention downsides that are important to know. If the move is particularly important it might have a spot on the stategy page—an important anti-air will likely be mentioned in the neutral section, or an important combo move will be mentioned in the combo theory.c.S
c.S


| Damage | Guard | Startup | Active | Recovery | On-Block | On-Hit | Invuln |
|---|---|---|---|---|---|---|---|
| 9 | All | 10 | 4 | 12 | +1 | -1 | none |
Add a description to this move using the |description= field
Describe what the move is used for.
Explain the basics of why the initial purpose of the move is worth knowing or worth doing. Mention downsides that are important to know. If the move is particularly important it might have a spot on the stategy page—an important anti-air will likely be mentioned in the neutral section, or an important combo move will be mentioned in the combo theory.f.S
f.S


| Damage | Guard | Startup | Active | Recovery | On-Block | On-Hit | Invuln |
|---|---|---|---|---|---|---|---|
| 8x2 | All | 6 | 4,4,7 | 30 | -20 | -22 | none |
Add a description to this move using the |description= field
Describe what the move is used for.
Explain the basics of why the initial purpose of the move is worth knowing or worth doing. Mention downsides that are important to know. If the move is particularly important it might have a spot on the stategy page—an important anti-air will likely be mentioned in the neutral section, or an important combo move will be mentioned in the combo theory.5H
5H


| Damage | Guard | Startup | Active | Recovery | On-Block | On-Hit | Invuln |
|---|---|---|---|---|---|---|---|
| 16 | All | 4 | 10 | 25 | -10 | -8 | none |
Add a description to this move using the |description= field
Describe what the move is used for.
Explain the basics of why the initial purpose of the move is worth knowing or worth doing. Mention downsides that are important to know. If the move is particularly important it might have a spot on the stategy page—an important anti-air will likely be mentioned in the neutral section, or an important combo move will be mentioned in the combo theory.6P
6P


| Damage | Guard | Startup | Active | Recovery | On-Block | On-Hit | Invuln |
|---|---|---|---|---|---|---|---|
| 9x2 | All | 8 | 4,5 | 5 | +7 | +5 | none |
Add a description to this move using the |description= field
Describe what the move is used for.
Explain the basics of why the initial purpose of the move is worth knowing or worth doing. Mention downsides that are important to know. If the move is particularly important it might have a spot on the stategy page—an important anti-air will likely be mentioned in the neutral section, or an important combo move will be mentioned in the combo theory.6K
6K

even stankier leg


| Damage | Guard | Startup | Active | Recovery | On-Block | On-Hit | Invuln |
|---|---|---|---|---|---|---|---|
| 9 | Overhead | 31 | 4 | 16 | -3 | -5 | none |
Zato's classic overhead, except it's painfully slow in this game. You're more likely to be hit out of it than to ever land it. Bizarrely, it can be special canceled at any point in the move's duration, which would be cool if he had any low hitting specials but unfortunately he doesn't in Missing Link.
Can be confirmed into an infinite on hit.
For some baffling reason, the command list gets the input for this move wrong. It says "Press forwards when holding K" but that doesn't even work. Instead of doing [K]6, like the command list implies, you just do a normal 6K input.2P
2P


| Damage | Guard | Startup | Active | Recovery | On-Block | On-Hit | Invuln |
|---|---|---|---|---|---|---|---|
| 4 | Low | 7 | 5 | 11 | 0 | -2 | none |
Add a description to this move using the |description= field
Describe what the move is used for.
Explain the basics of why the initial purpose of the move is worth knowing or worth doing. Mention downsides that are important to know. If the move is particularly important it might have a spot on the stategy page—an important anti-air will likely be mentioned in the neutral section, or an important combo move will be mentioned in the combo theory.2K
2K


| Damage | Guard | Startup | Active | Recovery | On-Block | On-Hit | Invuln |
|---|---|---|---|---|---|---|---|
| 8 | Low | 12 | 10 | 16 | -4 | -2 | none |
Add a description to this move using the |description= field
Describe what the move is used for.
Explain the basics of why the initial purpose of the move is worth knowing or worth doing. Mention downsides that are important to know. If the move is particularly important it might have a spot on the stategy page—an important anti-air will likely be mentioned in the neutral section, or an important combo move will be mentioned in the combo theory.2S
2S


| Damage | Guard | Startup | Active | Recovery | On-Block | On-Hit | Invuln |
|---|---|---|---|---|---|---|---|
| 12 | Low | 12 | 4 | 13 | -1 | -3 | none |
Add a description to this move using the |description= field
Describe what the move is used for.
Explain the basics of why the initial purpose of the move is worth knowing or worth doing. Mention downsides that are important to know. If the move is particularly important it might have a spot on the stategy page—an important anti-air will likely be mentioned in the neutral section, or an important combo move will be mentioned in the combo theory.2H
2H


| Damage | Guard | Startup | Active | Recovery | On-Block | On-Hit | Invuln |
|---|---|---|---|---|---|---|---|
| 18 | Low | 8 | 9 | 13 | 0 | +4 | none |
Add a description to this move using the |description= field
Describe what the move is used for.
Explain the basics of why the initial purpose of the move is worth knowing or worth doing. Mention downsides that are important to know. If the move is particularly important it might have a spot on the stategy page—an important anti-air will likely be mentioned in the neutral section, or an important combo move will be mentioned in the combo theory.j.P
j.P


| Damage | Guard | Startup | Active | Recovery | On-Block | On-Hit | Invuln |
|---|---|---|---|---|---|---|---|
| 5 | Overhead | 10 | 4 | 1 | N/A | N/A | none |
Add a description to this move using the |description= field
Describe what the move is used for.
Explain the basics of why the initial purpose of the move is worth knowing or worth doing. Mention downsides that are important to know. If the move is particularly important it might have a spot on the stategy page—an important anti-air will likely be mentioned in the neutral section, or an important combo move will be mentioned in the combo theory.j.K
j.K

What is going on with this frame data


| Damage | Guard | Startup | Active | Recovery | On-Block | On-Hit | Invuln |
|---|---|---|---|---|---|---|---|
| 16 | Overhead | 10 | 4 | 26 | N/A | N/A | none |
Add a description to this move using the |description= field
Describe what the move is used for.
Explain the basics of why the initial purpose of the move is worth knowing or worth doing. Mention downsides that are important to know. If the move is particularly important it might have a spot on the stategy page—an important anti-air will likely be mentioned in the neutral section, or an important combo move will be mentioned in the combo theory.j.S
j.S


| Damage | Guard | Startup | Active | Recovery | On-Block | On-Hit | Invuln |
|---|---|---|---|---|---|---|---|
| 11 | Overhead | 15 | 5 | 11 | N/A | N/A | none |
Giant landing normal with a tiny bit of invuln on startup. Useful for hitting opponents below you. Has a big hurtbox accompanying it so it is whiff punishable and can lose trades to disjoints. Will sometimes win trades against disjointed moves thanks to the startup invincibility.
j.H
j.H


| Damage | Guard | Startup | Active | Recovery | On-Block | On-Hit | Invuln |
|---|---|---|---|---|---|---|---|
| 14 | Overhead | 8 | 11 | 19 | N/A | N/A | none |
Giant dedicated air to air normal. The hitbox is big but so is the hurtbox, so be careful with it.
Universal Mechanics
Dust Attack
S+H


| Damage | Guard | Startup | Active | Recovery | On-Block | On-Hit | Invuln |
|---|---|---|---|---|---|---|---|
| 16 | Overhead | 16 | 5 | 9 | +10 | none |
Fast overhead that whiffs on over half the cast crouching. Useful in the few matchups you can use it in for mixups, little use otherwise.
Throw
4H or 6H

| Damage | Guard | Startup | Active | Recovery | On-Block | On-Hit | Invuln |
|---|---|---|---|---|---|---|---|
| 20 | Throw | 1 | N/A | N/A | N/A | +17 | none |
Add a description to this move using the |description= field
Describe what the move is used for.
Explain the basics of why the initial purpose of the move is worth knowing or worth doing. Mention downsides that are important to know. If the move is particularly important it might have a spot on the stategy page—an important anti-air will likely be mentioned in the neutral section, or an important combo move will be mentioned in the combo theory.Dash Attack
6[6]


| Damage | Guard | Startup | Active | Recovery | On-Block | On-Hit | Invuln |
|---|---|---|---|---|---|---|---|
| 13 | All | +16 | +2 |
Add a description to this move using the |description= field
Describe what the move is used for.
Explain the basics of why the initial purpose of the move is worth knowing or worth doing. Mention downsides that are important to know. If the move is particularly important it might have a spot on the stategy page—an important anti-air will likely be mentioned in the neutral section, or an important combo move will be mentioned in the combo theory.Instant Kill
Fear of the Dark
P+K > 236X


| Damage | Guard | Startup | Active | Recovery | On-Block | On-Hit | Invuln |
|---|---|---|---|---|---|---|---|
| FATAL | All | 6 | 6 | 10 | N/A | N/A | Above Knees 1~11, 15~40 |
Weak instant kill. Crouched by everyone but Potemkin and Justice while still being smaller and slower than some other instant kills. You won't be seeing this one as often as other characters' instant kills.
Specials
Drunkard Shade
214K or 214P


| Damage | Guard | Startup | Active | Recovery | On-Block | On-Hit | Invuln |
|---|---|---|---|---|---|---|---|
| 9 | All | 12 | 40 | 13 | -32 | -32 | Upper Body |
Drunkard Shade is pretty cool. First of all, the move is invulnerable above the knees and has a tall hitbox that extends up from the ground.
The K version will immediately reflect any projectile which contacts it.
The P version will instead absorb the last projectile to contact it. After a couple seconds, that projectile will then automatically fire out of Zato's face, even if he is in hitstun.
Drunkard Shade does not work on the following projectiles:
 Justice's Imperial Ray or Gamma Ray
Climb Darkness
41236H


Followup


| Version | Damage | Guard | Startup | Active | Recovery | On-Block | On-Hit | Invuln |
|---|---|---|---|---|---|---|---|---|
| Climb Darkness | N/A | N/A | 19 | N/A | 3 | N/A | N/A | none |
| Climb Darkness Followup | 15 | Overhead | 2 | 17 | 2 | N/A | N/A | none |
Climb Darkness sends Zato's shadow forwards to the edge of the screen, then calls it back to him. During this time, Zato's only valid actions are the followups to Climb Darkness.
The followups to climb darkness are all the same, but are input with distinct buttons. They are done by pressing H, S, and P in that order. You can use the 3 followup hits at any time that the shadow is away from Zato so long as the order is respected.
Once the first followup is used, the shadow will begin its return to Zato regardless of whether or not it reached the edge of the screen.
- Air Unblockable
- The earliest valid followup input is on the 10th frame of climb darkness, right after the shadow becomes visible on the animation.
- There must be at least 1 frame without an input between the end of one Climb Darkness Followup and the start input of the next.
- After the shadow returns to Zato the recovery of the move is 3 frames.
Invite Hell
22S or 22H
level 1
level 2

level 3


| Version | Damage | Guard | Startup | Active | Recovery | On-Block | On-Hit | Invuln |
|---|---|---|---|---|---|---|---|---|
| Invite Hell | 9x2,1 | All | 17 | 8,60,5 | 15 | +3 | -55 | none |
| Invite Hell Level 2 | All | 17 | 15 | -15 | -27 | none | ||
| Invite Hell Level 3 | All | 17 | 15 | -1 | -41 | none |
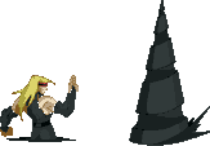
Invite Hell locks Zato in place and produces a drill a set distance away. The S button places the drill near Zato, and the H version places the drill far away.
The drill hits once when coming out of the ground, once when erect, and once more when retracting into the ground. It has enough vertical range to reach the apex of Potemkin's jump arch, which means that some characters will be forced to superjump or double jump to get around it. Invite Hell is a bit awkward as a zoning tool since Zato is immobile for the entire duration, so it is matchup dependent how you use it.
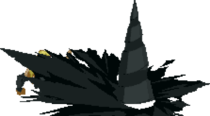
At Level 2 the drill gains massive hitboxes on its sides which make it considerably harder to contest, avoid, and deal with in general.
At Level 3 the move spawns three drills and occupies virtually the entire floor making it borderline uncontestable.Aerial Invite Hell
j.22S or j.22H

level 1 and 2

level 3


| Version | Damage | Guard | Startup | Active | Recovery | On-Block | On-Hit | Invuln |
|---|---|---|---|---|---|---|---|---|
| Aerial Invite Hell | 9x2,1 | All | 1 | 9,59,18 | Until Landing+29 | +16 | -38 | none |
| Aerial Invite Hell Level 2 | 9x2,1 | All | 1 | 9,59,18 | Until Landing+29 | +16 | -38 | none |
| Aerial Invite Hell Level 3 | 9x2,1 | All | 1 | 9,59,18 | Until Landing+29 | +16 | -50 | none |
Aerial Invite hell is similar to the ground version, but with some interesting tweaks. It spawns a drill on the ground a short distance in front of Zato's position when the move is first input. The S button places the drill near Zato, and the H version places the drill far away.
Zato's momentum is preserved which can let you move away from or towards your drill by using backwards or forwards jumps. Because this move is in recovery until landing + 29 frames you want to use it as soon as possible before hitting the ground. this will give you the most actionable time before the drill disappears.
Level 2 is identical to level 1 in all known ways.
Level 3 Aerial Invite Hell spawns 3 level 1 drills, which makes it cover considerably less space than the ground version.Rise and Fall
623P
Cringe nae nae Eddie

"Oh, monkey's paw, how I wish Zato had a reversal"


| Damage | Guard | Startup | Active | Recovery | On-Block | On-Hit | Invuln |
|---|---|---|---|---|---|---|---|
| 9,12 | All,Overhead | 6 | 7(25)28 | 29 | -60 | -58 | Full 1~12, 34~37 |
Invincible on startup DP with a decent hitbox and damage. It has a huge amount of recovery, making it very unsafe on block.
Initially looks like a useful reversal and combo ender, especially considering Zato's status as a zoner, but it has a major flaw. It's fully punishable ON HIT. By teching the second hit of the move, the opponent lands next to Zato fully recovered while he's still going through the move's long recovery. This leaves it fully open to a punish with anything you want, be it an IK or an infinite. This unfortunately renders the move mostly useless.Break the Law
63214S

| Damage | Guard | Startup | Active | Recovery | On-Block | On-Hit | Invuln |
|---|---|---|---|---|---|---|---|
| N/A | N/A | 30 | N/A | 15 | N/A | N/A | Strike 5~30; Full Until Exiting BTL; Strike 1~11 of Recovery |
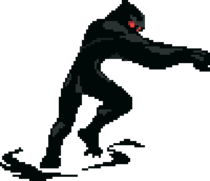
Zato schlorps into the ground making him completely invulnerable. While underground Zato's only valid actions are to move left and right at incredible speeds. Coming out of the ground has a brief animation before Zato becomes actionable.
- Startup represents the time it takes to enter the ground from first input. Recovery represents time that it takes to come out of the ground.
- Zato has 4 frames of vulnerability on either side of the animation. 4 Frames at the start when he goes into the ground, and 4 frames at the end after he comes out of the ground.
- Pressing S will cause Zato to come out of the ground early.
- Pressing P will fake coming out by playing the first 11 frames of the animation.
Supers
Dark Sentinel
412363214H


| Damage | Guard | Startup | Active | Recovery | On-Block | On-Hit | Invuln |
|---|---|---|---|---|---|---|---|
| 63 | All | 39 | Until Reaches Enemy/Wall | 75 | -65 | -65 | none |
An advancing attack with a single hit of huge damage. The startup isn't great and the recovery is incredibly long. As a result this is isn't particularly useful because why try to combo into a weird slow unsafe super when you could go infinite with Charge Cancel.

Axl

Baldhead

Chipp

Kliff

Ky

May

Millia

Potemkin

Sol

Zato

Baiken

Justice

Testament
Systems Pages