You can help by editing it.
Content here can be considered incomplete until expertise is given.
Neutral
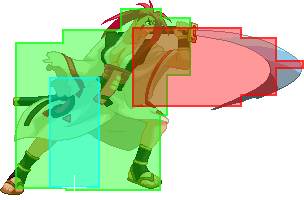
Usually Baiken is called a defensive character. This comes from both her strong options when under attack with her Guard Cancels, but also the way she plays neutral in most match-ups. Fending the opponent off, setting the pace of the match, and forcing the opponent to approach her, primarily with Tatami zoning. However some match-ups force her to be the aggressor, usually long range zoners that have no need to approach her. These characters will probably feel more difficult at first but many of them turn out to be manageable if you pick your spots carefully and can unlock her offensive potential with high damage combos and mixup tools like TK Youzansen.
Long Range
At Full Screen to Half Screen distances her options are mostly a mix of setting up defensive Tatami walls for people to run into, and some very fast Instant Air Dash approaches she can try to sneak in when they aren't expecting it. When setting out Tatami's you'll need a bit of space to get through its startup without getting hit, but once its out it provides a lot of active frames covering your recovery and high reward on hit, specially counter-hit.
Notable Moves
- Air Tatami (j.236K) - Usually done from Back Jump or Neutral Jump. Doing them lower to the ground close to your landing is safest. If you do them too high the opponent may be able to run under the Tatami before it falls and punish you. Hits can often be converted with a dash up far.S>j.D, depending on the screen position and spacing.
- IABD Tatami (754j.236K) - A retreating Air Tatami. Extremely strong and safe, very hard for opponents to approach, but it does give up screen space, putting you closer to cornering yourself. Ideally prepare some kind of plan for gaining ground or escaping again afterwards if they didn't run into it.
- IAD Tatami (956j.236K) - A long range approach tool. Vulnerable to getting hit during startup but covers a lot of ground very fast for chasing people down. High reward potential on hit. Usually -1~ on block.
- Kire Tatami (236956K) - The fastest possible version of an IAD Tatami using a buffered TK motion from the ground. Doesn't travel as far horizontally, which can be good for landing just outside of opponents ranges.
- IAD j.S - An even faster approach tool that doesn't expand her hurtbox as much as Tatami, but only connects against standing characters usually. Can lead to very high reward with either j.SPK or j.S canceled into Air Tatami which combos on Counter-Hit. Good at calling out some characters common neutral tools that put them into a standing state, like Ky's fireballs or Eddie's drills for example.
- Kabari (41236H) - A long range but fairly high commitment poke. Not as good as Tatami at walling off approaches, but can be good at targeting people loitering outside your Tatami castle, specially if they take time to try and set things up there. At longer ranges its difficult to capitalize off its frame advantage on block or convert a normal ground hit but it'll probably still get you closer. Its followup can sometimes bail you out of a whiffed Kabari by catching people jumping/air dashing over it.
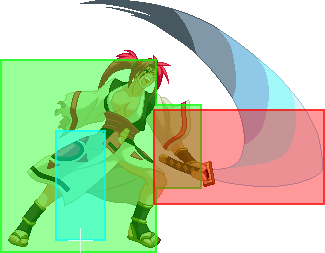
- Suzuran (63214K) - The mid/high Autoguard on Suzuran can let you gain ground and advance straight through some attacks, particularly projectiles. Throwing out GC followups from it is usually very high-risk but Suzuran>Ouren can cover a lot of distance in a pinch. Ouren also has an FRC point during its startup that can fling you across the screen.
- Dash-Block, with a side of Guard Cancel (661FD, 412X) - Though its a simple universal action to dash then Brake your momentum with FD, Baiken's Guard Cancels make even her safest approach a threat. Many players will be hesitant to throw out attacks that are unsafe to Guard Cancels (particularly Sakura) if you're just sitting still waiting to do it, but some movement can convince people to swing at you, or gain you ground if they don't.
Mid-Range
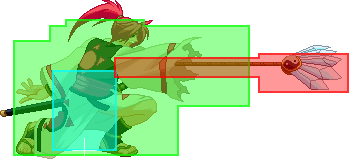
From around round-start distance to about one character-width away are where her amazing sword normals come into play. A lot of these have very disjointed hitbox to hurtbox ratios as well as great startup and long active frames on some them. This suite of pokes can bully a lot of characters at this range, though Baiken does have some difficulty converting most of them into full combos and knockdowns from midscreen, often requiring meter and the difficult Tatami FRC > Kire Tatami route. Some of the tools you would use at longer distances can still work similarly here, such as Jump Back Tatami and IABD Tatami still being good ways to get some distance away from the opponent, and Dash Blocking to bait people into giving you GC punishes. Other tools like Kabari and Suzuran's usages transform as Baiken gets closer to the opponent.
Notable Moves
- far.S - A great all round combination of fast startup (9f) for its range, a good disjointed hitbox, 6 active frames, and low recovery (0 on block). Gatlings to 2S which can be useful for pushing people away. Beware this can be easily low-profiled under by things like Sol 2D, I-no STBT and other similar tools. Combos to Tatami on crouching or counter-hit. Combos to FB Tatami on normal standing hit if you're close enough for the first mat to land. Usually buffering either Tatami or Kabari off this will be your best bet if you're fishing for it to hit but with safe/advantageous outcomes on block. Its also jump cancelable which opens up a suite of other opens like advancing with j.H to retreating with Jump Back/IABD Tatami's.
- 2S - Similar to far.S in a lot of ways, but trades some speed (11f startup) for longer range, a lower hitbox, and better advantage on block (+2). Gatlings back into far.S, so you can alternate back and forth to push people away. Has basically the same combo/pressure options as above, but is not jump cancelable. Not a low, hits mid.
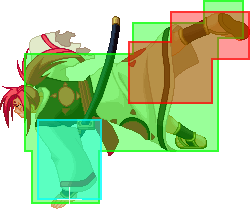
- 5H - Just look at this hitbox first. 9f Startup, very fast for an H button, but has only 1 active frame and quite a lot of recovery. Much riskier to whiff than her S pokes, but brings a lot of damage, that crushing hitbox, and better combo options. Combos into Tatami on normal hit, combos into Kabari on Counter-Hit even at max range! Special Cancelable only, no gatlings, no jump cancel. This is the greedy button.
- 2D - Baiken's long range low poke. Very fast at 8f startup, 9(!!) active frames, its jump cancelable which is very rare for a sweep, and it even combo's into Tatami on normal hit. Usually when you poke at someone with this you're looking to catch them standing up, moving around, so buffering it into Tatami is the default. Learning the Tatami FRC combos massively improves reward midscreen, though it converts easily without those in the corner. Has very unusual hit boxes which move across the active frames. The first hitbox can kinda be an anti-air, or at least a deterrent against some low to ground airborne things like I-no's hoverdash and some other hopping-type moves.
- 6K - 6K doesn't have the range of most the other things listed here, but can have some unique uses at a distance. It has 9 active frames like 2D, but a better horizontal hitbox against things advancing into you, so can function as a bit of a wall, along with its low recovery making it not too bad to whiff. Its hitbox also causes it to crush some low attacks since her lower body only has a hurtbox on her back leg. Staggers on CH so its possible to convert hits from quite far away if they run into the boot.
- Ground Tatami (236K) - Ground Tatami has 15f startup, which is quite a lot when the opponent is pretty close to you, so why would you risk doing this on its own when you could cancel another normal into it instead? One reason is the counter-hit effect. A fully untechable wallbounce that you can dash up and convert meterlessly into insane reward. The other reasons usually come back to the high active frames, blocking off the ground space for a huge 17 frames. For example Anji cannot Fuujin through this, he has less invulnerability than Tatami is active. The same goes for Slayer's forward dash. Lower active frame normals would whiff through these things, but if you've got the time to get it out Tatami will protect you.
- Kabari (41236H) - At midrange Kabari's vacuum effect and +2 on block start to come into play. This can be a way to start or continue pressure by canceling the longer range normals listed above into Kabari. As you get closer to them your pressure options improve, though IB and FD can have a big effect on the frames here. If you can convince the opponent of your frame advantage and to sit still after Kabari you buy yourself opportunities to dash up even closer where all your offensive options open up.
- Suzuran (63214K) - Somewhat gimmicky but usually worth checking an opponents reactions a few times by trying to sneak in to Throw range with Suzuran from poke normals. Its 30 frames total, and just loses if they mash on lows. If they do let you get away with it and/or cant react to it fast enough you either get to Throw them, or if they themselves are trying to throw, specially if they're late, this opens up Suzuran>6K or Suzuran>Neutral Jump j.H>j.236K which leads to a devastating punish on a late whiffed 4H throw mash. If they can react to Suzuran or are predictively mashing against it, you can attempt to call out their attacks with delayed Guard Cancels.
- j.H - Extremely strong Air-to-Ground attack. Takes 17f to reach its good hitbox so you usually have to commit to doing it while rising through your jump arc, but once its there it stays active until you reach the ground and is very hard for a lot of characters to contest from below. Extremely high blockstun so is almost always plus on block unless the opponent Air IB's it or standing IB's it with a tall hurtbox. How effective this normal is depends a lot on the matchup but against some characters with poor anti airs it can be absolutely belligerent as you can force your way back on top of them at advantage repeatedly, both on its own and from jump cancelable normals like far.S and 2D. Combos into j.236K on high hits, ground normals on lower hits, and Youzansen RC routes in a pinch if you're unsure about height and spacing. Canceling to Youzansen also provides a potential mixup both as a counterpart to land>low and against people Instant Blocking j.H and trying to throw your landing.
Defense
Notable Moves
- 2P - 6 frame abare option that can be mashed repeatedly. Surprisingly, it can work as an anti air in some specific situations.
- 2K - 5 frame abare option with a good disjointed hitbox. Dialing in a button such as 5S is necessary to convert off it.
- 6P - 8 frame anti air with 13 frames of upper body invuln (frames 1-13). Leads to good conversions on hit, can also be used to counterpoke some buttons with higher hitboxes.
- 6K - 12 frame normal that's throw invulnerable from frames 1-11. Can be used as a risky callout to throws, though it should only really be used against command grabs because its too slow to beat most throw OS'es, and even then jumping is usually more rewarding. Most notably against Potemkin it covers both Potemkin Buster and Heat Knuckle... but so does backdash.
- j.P - 5 frame aerial, very useful as a reactive air to air option.
- Throw - While defensive throws are especially risky for Baiken due to her poor throw range, throwing an opponent into the corner leads to a conversion that leaves you with a decent bit of meter to work with after. Very strong if you can get it.
- Airthrow - Universal and very powerful anti air option, airthrowing an opponent into the corner will also lead to a decent conversion.
- Suzuran (63214K) - Command dash with high/mid guardpoint that can be used to go through some gaps in pressure before getting close and punishing with a guard cancel, throw or button depending on the situation. Note that the guard point is only active starting on frame 4.
- Zakuro (412P) - Anti air guard cancel, very useful to deal with large buttons that cannot be properly anti aired otherwise.
- Mawarikomi (412K) Evasive guard cancel, strike invuln from frames 1-24 with 10 frames of recovery after but can be FRC'ed to make it fully invulnerable. Can sometimes be used to get close to the opponent and punish their attack with a throw or other button.
- Sakura (412S) - Insanely fast guard cancel that can lead to good conversions and is relatively safe if FRC'ed
- Ouren (412H) - Long range guard cancel that usually hits crossup. It sends you pretty far, so whiffing it to get out of the corner is a strong option. While it does have some invincibility (frame 14-26), you can still get hit early on during startup so be careful when using it. Also very punishable on block, can be made safe with RC but (probably) not on reaction to it being blocked. Good conversions on counterhit.
- Baku (412D) - Invincible guard cancel that costs 25 meter to use. An extra 25 meter can be spent to apply curses, but it leads to full conversions on counterhit and is only -3 on block, so consider skipping out on curses unless you have good reason to go for one.
- Tsurane Sanzu Watashi (236236S) - 7+1 frame reversal super. Costs 50 meter to use, gives decent damage, very difficult to punish unless slashbacked.
Extra notes on guard cancels
(talk about reactive vs rps gc usage) (explain negative edge gc tricks) (perfect guard cancels on wakeup)
Offense
Notable Moves
- 2K
- 6P
- 6K
- 2H
- TK Youzansen (6239S)
Okizeme
(WRITTEN VERSION COMING SOON) Here is a video that goes over baiken's basic okizeme options: https://www.youtube.com/watch?v=WsURuLB-Zis
Execution Hurdles
- IAD/IABD Tatami
- Kire Tatami
- TK Youzansen
Fighting Baiken
Learn how GC's work :)