
An AA, not a jab, but 3F blazing fast
< GGACR
m (→Normals) |
(Massive change. Split all 3 modes into their own tab, and only show the current mode at a given time. Please report if anything is messed up. This was a very big thing to write.) |
||
| Line 33: | Line 33: | ||
}} | }} | ||
<div class="movelist-toggles"> | |||
<div id="movelist-toggle-1" class="movelist-toggle-button">[[File:GGACR_ABA_Normal_Icon.png|link=|32x32px]] Normal</div> | |||
<div id="movelist-toggle-2" class="movelist-toggle-button">[[File:GGACR_ABA_Moroha_Icon.png|link=]] Moroha</div> | |||
<div id="movelist-toggle-3" class="movelist-toggle-button">[[File:GGACR_ABA_Goku_Moroha_Icon.png|link=]] Goku Moroha</div> | |||
</div> | |||
<div id="movelist-1" class="movelist"> | |||
==Normal Moves== | ==Normal Moves== | ||
===<big>{{clr|1|5P}}</big>=== | ===<big>{{clr|1|5P}}</big>=== | ||
<div class="attack-container"> | <div class="attack-container"> | ||
| Line 52: | Line 57: | ||
<div class="attack-info"> | <div class="attack-info"> | ||
{| class="wikitable attack-data" | {| class="wikitable attack-data" | ||
{{CargoHeader-GGACR | {{CargoHeader-GGACR}} | ||
|- | |- | ||
{{#cargo_query:tables=MoveData_GGACR | {{#cargo_query:tables=MoveData_GGACR | ||
|fields= | |fields=damage,guard,startup,active,recovery,onBlock,invuln,level | ||
|where=chara=" | |where=chara="A.B.A" and input="5P" | ||
|format=template|template= | |format=template|template=CargoBody-GGACR|named args=yes|order by=_ID | ||
|delimiter=\n{{!}}-\n | |delimiter=\n{{!}}-\n | ||
}} | }} | ||
| Line 64: | Line 69: | ||
Not much of a jab, but three frames of head invincibility for good reactionary anti air. You can also use it to stuff some higher reaching pokes. | Not much of a jab, but three frames of head invincibility for good reactionary anti air. You can also use it to stuff some higher reaching pokes. | ||
[[GGACR/A.B.A/Frame_Data#Normal_Mode| | [[GGACR/A.B.A/Frame_Data#Normal_Mode|Gatling Options]]: {{clr|1|5P}}, {{clr|1|2P}}, {{clr|1|6P}}, {{clr|2|5K}}, {{clr|2|2K}}, {{clr|3|c.S}}, {{clr|3|f.S}}, {{clr|3|2S}}, {{clr|4|5H}}, {{clr|4|2H}}, {{clr|4|6H}}, {{clr|5|5D}}, {{clr|5|2D}} | ||
</div> | </div> | ||
</div> | </div> | ||
| Line 93: | Line 89: | ||
<div class="attack-info"> | <div class="attack-info"> | ||
{| class="wikitable attack-data" | {| class="wikitable attack-data" | ||
{{CargoHeader-GGACR | {{CargoHeader-GGACR}} | ||
|- | |- | ||
{{#cargo_query:tables=MoveData_GGACR | {{#cargo_query:tables=MoveData_GGACR | ||
|fields= | |fields=damage,guard,startup,active,recovery,onBlock,invuln,level | ||
|where=chara=" | |where=chara="A.B.A" and input="5K" | ||
|format=template|template= | |format=template|template=CargoBody-GGACR|named args=yes|order by=_ID | ||
|delimiter=\n{{!}}-\n | |delimiter=\n{{!}}-\n | ||
}} | }} | ||
|} | |} | ||
==== ==== | ==== ==== | ||
A go-to poke, balancing speed and range amongst Normal Mode's overall slow moveset | A go-to poke, balancing speed and range amongst Normal Mode's overall slow moveset. Being able to self gatling and safe on block very much helps. | ||
All three versions move ABA slightly forwards. | All three versions move ABA slightly forwards. | ||
[[GGACR/A.B.A/Frame_Data#Normal_Mode| | [[GGACR/A.B.A/Frame_Data#Normal_Mode|Gatling Options]]: {{clr|2|5K}}, {{clr|3|c.S}}, {{clr|3|f.S}}, {{clr|3|2S}}, {{clr|4|5H}}, {{clr|4|2H}}, {{clr|4|6H}}, {{clr|5|5D}}, {{clr|5|2D}} | ||
</div> | </div> | ||
</div> | </div> | ||
| Line 122: | Line 114: | ||
<gallery widths="210px" heights="210px" mode="nolines"> | <gallery widths="210px" heights="210px" mode="nolines"> | ||
GGAC_ABA_cS.png|A close combo starter | GGAC_ABA_cS.png|A close combo starter | ||
</gallery> | </gallery> | ||
|-| | |-| | ||
| Line 128: | Line 119: | ||
<gallery widths="210px" heights="210px" mode="nolines"> | <gallery widths="210px" heights="210px" mode="nolines"> | ||
GGXXACPR_ABA_cS-Hitbox.png | GGXXACPR_ABA_cS-Hitbox.png | ||
</gallery> | </gallery> | ||
</tabber> | </tabber> | ||
| Line 134: | Line 124: | ||
<div class="attack-info"> | <div class="attack-info"> | ||
{| class="wikitable attack-data" | {| class="wikitable attack-data" | ||
{{CargoHeader-GGACR | {{CargoHeader-GGACR}} | ||
|- | |- | ||
{{#cargo_query:tables=MoveData_GGACR | {{#cargo_query:tables=MoveData_GGACR | ||
|fields= | |fields=damage,guard,startup,active,recovery,onBlock,invuln,level | ||
|where=chara=" | |where=chara="A.B.A" and input="c.S" | ||
|format=template|template= | |format=template|template=CargoBody-GGACR|named args=yes|order by=_ID | ||
|delimiter=\n{{!}}-\n | |delimiter=\n{{!}}-\n | ||
}} | }} | ||
| Line 146: | Line 136: | ||
Not bad, but {{clr|1|5P}}'s a better combo starter at this range. | Not bad, but {{clr|1|5P}}'s a better combo starter at this range. | ||
[[GGACR/A.B.A/Frame_Data#Normal_Mode|Gatling Options]]: {{clr|1|2P}}, {{clr|4|5H}}, {{clr|4|2H}}, {{clr|4|6H}}, {{clr|5|5D}}, {{clr|5|2D}} | |||
</div> | |||
[[GGACR/A.B.A/Frame_Data#Normal_Mode| | |||
</div> | |||
</div> | </div> | ||
===<big>{{clr|3|f.S}}</big>=== | ===<big>{{clr|3|f.S}}</big>=== | ||
| Line 171: | Line 146: | ||
<gallery widths="210px" heights="210px" mode="nolines"> | <gallery widths="210px" heights="210px" mode="nolines"> | ||
GGAC_ABA_fS.png|A standing low which moves foward | GGAC_ABA_fS.png|A standing low which moves foward | ||
</gallery> | </gallery> | ||
|-| | |-| | ||
| Line 177: | Line 151: | ||
<gallery widths="210px" heights="210px" mode="nolines"> | <gallery widths="210px" heights="210px" mode="nolines"> | ||
GGXXACPR_ABA_fS-Hitbox.png | GGXXACPR_ABA_fS-Hitbox.png | ||
</gallery> | </gallery> | ||
</tabber> | </tabber> | ||
| Line 184: | Line 156: | ||
<div class="attack-info"> | <div class="attack-info"> | ||
{| class="wikitable attack-data" | {| class="wikitable attack-data" | ||
{{CargoHeader-GGACR | {{CargoHeader-GGACR}} | ||
|- | |- | ||
{{#cargo_query:tables=MoveData_GGACR | {{#cargo_query:tables=MoveData_GGACR | ||
|fields= | |fields=damage,guard,startup,active,recovery,onBlock,invuln,level | ||
|where=chara=" | |where=chara="A.B.A" and input="f.S" | ||
|format=template|template= | |format=template|template=CargoBody-GGACR|named args=yes|order by=_ID | ||
|delimiter=\n{{!}}-\n | |delimiter=\n{{!}}-\n | ||
}} | }} | ||
| Line 195: | Line 167: | ||
==== ==== | ==== ==== | ||
Good range and acceptable speed. Will catch opponents off guard due to how far forward it moves. Safe on block. | Good range and acceptable speed. Will catch opponents off guard due to how far forward it moves. Safe on block. | ||
[[GGACR/A.B.A/Frame_Data#Normal_Mode|Gatling Options]]: {{clr|2|2K}}, {{clr|3|c.S}}, {{clr|3|2S}}, {{clr|4|5H}}, {{clr|4|2H}}, {{clr|4|6H}}, {{clr|5|5D}}, {{clr|5|2D}} | |||
[[GGACR/A.B.A/Frame_Data#Normal_Mode| | |||
</div> | </div> | ||
</div> | </div> | ||
| Line 216: | Line 178: | ||
<gallery widths="210px" heights="210px" mode="nolines"> | <gallery widths="210px" heights="210px" mode="nolines"> | ||
GGAC_ABA_5H.png|Spin him around, show him you care | GGAC_ABA_5H.png|Spin him around, show him you care | ||
</gallery> | </gallery> | ||
|-| | |-| | ||
| Line 223: | Line 184: | ||
GGXXACPR_ABA_5H-1-Hitbox.png | GGXXACPR_ABA_5H-1-Hitbox.png | ||
GGXXACPR_ABA_5H-2-Hitbox.png | GGXXACPR_ABA_5H-2-Hitbox.png | ||
</gallery> | </gallery> | ||
</tabber> | </tabber> | ||
| Line 230: | Line 189: | ||
<div class="attack-info"> | <div class="attack-info"> | ||
{| class="wikitable attack-data" | {| class="wikitable attack-data" | ||
{{CargoHeader-GGACR | {{CargoHeader-GGACR}} | ||
|- | |- | ||
{{#cargo_query:tables=MoveData_GGACR | {{#cargo_query:tables=MoveData_GGACR | ||
|fields= | |fields=damage,guard,startup,active,recovery,onBlock,invuln,level | ||
|where=chara=" | |where=chara="A.B.A" and input="5H" | ||
|format=template|template= | |format=template|template=CargoBody-GGACR|named args=yes|order by=_ID | ||
|delimiter=\n{{!}}-\n | |delimiter=\n{{!}}-\n | ||
}} | }} | ||
| Line 241: | Line 200: | ||
==== ==== | ==== ==== | ||
A vital normal for Normal Mode ABA. It's got more range than anything else in her Normal toolkit and it's slow as hell, but it has ridiculous pushback and knocks down on CH. Cancels into bloodpack or combos into keygrab, and generally works in your favor on a trade. | A vital normal for Normal Mode ABA. It's got more range than anything else in her Normal toolkit and it's slow as hell, but it has ridiculous pushback and knocks down on CH. Cancels into bloodpack or combos into keygrab, and generally works in your favor on a trade. | ||
[[GGACR/A.B.A/Frame_Data#Moroha_Mode|Gatling Options]]: {{clr|4|2H}}, {{clr|4|6H}}, {{clr|5|5D}}, {{clr|5|2D}} | [[GGACR/A.B.A/Frame_Data#Moroha_Mode|Gatling Options]]: {{clr|4|2H}}, {{clr|4|6H}}, {{clr|5|5D}}, {{clr|5|2D}} | ||
</div> | </div> | ||
</div> | </div> | ||
| Line 277: | Line 224: | ||
<div class="attack-info"> | <div class="attack-info"> | ||
{| class="wikitable attack-data" | {| class="wikitable attack-data" | ||
{{CargoHeader-GGACR | {{CargoHeader-GGACR}} | ||
|- | |- | ||
{{#cargo_query:tables=MoveData_GGACR | {{#cargo_query:tables=MoveData_GGACR | ||
|fields= | |fields=damage,guard,startup,active,recovery,onBlock,invuln,level | ||
|where=chara=" | |where=chara="A.B.A" and input="6P" | ||
|format=template|template= | |format=template|template=CargoBody-GGACR|named args=yes|order by=_ID | ||
|delimiter=\n{{!}}-\n | |delimiter=\n{{!}}-\n | ||
}} | }} | ||
| Line 289: | Line 236: | ||
A relatively fast {{clr|1|6P}}, good combo starter against jump-ins. Two hits. Gatling into whatever jump cancellable normal you want or just jump cancel this into whatever into Keygrab. | A relatively fast {{clr|1|6P}}, good combo starter against jump-ins. Two hits. Gatling into whatever jump cancellable normal you want or just jump cancel this into whatever into Keygrab. | ||
[[GGACR/A.B.A/Frame_Data#Normal_Mode|Gatling Options]]: {{clr|3|2S}}, {{clr|4|2H}} | |||
[[GGACR/A.B.A/Frame_Data#Normal_Mode| | |||
</div> | </div> | ||
</div> | </div> | ||
| Line 312: | Line 246: | ||
<gallery widths="210px" heights="210px" mode="nolines"> | <gallery widths="210px" heights="210px" mode="nolines"> | ||
GGAC_ABA_6H.png|The Hail Mary | GGAC_ABA_6H.png|The Hail Mary | ||
</gallery> | </gallery> | ||
|-| | |-| | ||
| Line 319: | Line 252: | ||
GGXXACPR_ABA_6H-1-Hitbox.png | GGXXACPR_ABA_6H-1-Hitbox.png | ||
GGXXACPR_ABA_6H-2-Hitbox.png | GGXXACPR_ABA_6H-2-Hitbox.png | ||
</gallery> | </gallery> | ||
</tabber> | </tabber> | ||
| Line 326: | Line 257: | ||
<div class="attack-info"> | <div class="attack-info"> | ||
{| class="wikitable attack-data" | {| class="wikitable attack-data" | ||
{{CargoHeader-GGACR | {{CargoHeader-GGACR}} | ||
|- | |- | ||
{{#cargo_query:tables=MoveData_GGACR | {{#cargo_query:tables=MoveData_GGACR | ||
|fields= | |fields=damage,guard,startup,active,recovery,onBlock,invuln,level | ||
|where=chara=" | |where=chara="A.B.A" and input="6H" | ||
|format=template|template= | |format=template|template=CargoBody-GGACR|named args=yes|order by=_ID | ||
|delimiter=\n{{!}}-\n | |delimiter=\n{{!}}-\n | ||
}} | }} | ||
| Line 339: | Line 270: | ||
Moroha version is exceptional range, two hits, hits like a truck. Mostly sees use against people trying to low profile {{clr|3|f.S}} or {{clr|4|5H}} from far away. Landing it from max range won't combo into much and it has a horrid amount of whiff recovery, but will convert on an air hit into something like Butt/Engorgement. | Moroha version is exceptional range, two hits, hits like a truck. Mostly sees use against people trying to low profile {{clr|3|f.S}} or {{clr|4|5H}} from far away. Landing it from max range won't combo into much and it has a horrid amount of whiff recovery, but will convert on an air hit into something like Butt/Engorgement. | ||
[[GGACR/A.B.A/Frame_Data#Normal_Mode|Gatling Options]]: {{clr|1|6P}}, {{clr|4|5H}} | |||
[[GGACR/A.B.A/Frame_Data#Normal_Mode| | |||
</div> | </div> | ||
</div> | </div> | ||
| Line 368: | Line 290: | ||
<div class="attack-info"> | <div class="attack-info"> | ||
{| class="wikitable attack-data" | {| class="wikitable attack-data" | ||
{{CargoHeader-GGACR | {{CargoHeader-GGACR}} | ||
|- | |- | ||
{{#cargo_query:tables=MoveData_GGACR | {{#cargo_query:tables=MoveData_GGACR | ||
|fields= | |fields=damage,guard,startup,active,recovery,onBlock,invuln,level | ||
|where=chara=" | |where=chara="A.B.A" and input="5D" | ||
|format=template|template= | |format=template|template=CargoBody-GGACR|named args=yes|order by=_ID | ||
|delimiter=\n{{!}}-\n | |delimiter=\n{{!}}-\n | ||
}} | }} | ||
| Line 379: | Line 301: | ||
==== ==== | ==== ==== | ||
Despite its decent nature, you probably won't use this much since you'll mostly be on the defensive in Normal Mode. If you land it, you should do a short air combo into Keygrab. | Despite its decent nature, you probably won't use this much since you'll mostly be on the defensive in Normal Mode. If you land it, you should do a short air combo into Keygrab. | ||
</div> | </div> | ||
</div> | </div> | ||
| Line 402: | Line 320: | ||
<div class="attack-info"> | <div class="attack-info"> | ||
{| class="wikitable attack-data" | {| class="wikitable attack-data" | ||
{{CargoHeader-GGACR | {{CargoHeader-GGACR}} | ||
|- | |- | ||
{{#cargo_query:tables=MoveData_GGACR | {{#cargo_query:tables=MoveData_GGACR | ||
|fields= | |fields=damage,guard,startup,active,recovery,onBlock,invuln,level | ||
|where=chara=" | |where=chara="A.B.A" and input="2P" | ||
|format=template|template= | |format=template|template=CargoBody-GGACR|named args=yes|order by=_ID | ||
|delimiter=\n{{!}}-\n | |delimiter=\n{{!}}-\n | ||
}} | }} | ||
| Line 415: | Line 333: | ||
*Initial prorate 80% | *Initial prorate 80% | ||
[[GGACR/A.B.A/Frame_Data#Normal_Mode| | [[GGACR/A.B.A/Frame_Data#Normal_Mode|Gatling Options]]: {{clr|1|5P}}, {{clr|1|2P}}, {{clr|1|6P}}, {{clr|2|5K}}, {{clr|2|2K}}, {{clr|3|c.S}}, {{clr|3|f.S}}, {{clr|3|2S}}, {{clr|4|5H}}, {{clr|4|2H}}, {{clr|4|6H}}, {{clr|5|5D}}, {{clr|5|2D}} | ||
</div> | </div> | ||
</div> | </div> | ||
| Line 439: | Line 353: | ||
<div class="attack-info"> | <div class="attack-info"> | ||
{| class="wikitable attack-data" | {| class="wikitable attack-data" | ||
{{CargoHeader-GGACR | {{CargoHeader-GGACR}} | ||
|- | |- | ||
{{#cargo_query:tables=MoveData_GGACR | {{#cargo_query:tables=MoveData_GGACR | ||
|fields= | |fields=damage,guard,startup,active,recovery,onBlock,invuln,level | ||
|where=chara=" | |where=chara="A.B.A" and input="2K" | ||
|format=template|template= | |format=template|template=CargoBody-GGACR|named args=yes|order by=_ID | ||
|delimiter=\n{{!}}-\n | |delimiter=\n{{!}}-\n | ||
}} | }} | ||
| Line 451: | Line 365: | ||
A low poke with alright range. Leads to {{clr|5|2D}} > Keygrab on hit. | A low poke with alright range. Leads to {{clr|5|2D}} > Keygrab on hit. | ||
*Initial prorate 70% | |||
*Initial prorate 70% | |||
[[GGACR/A.B.A/Frame_Data# | [[GGACR/A.B.A/Frame_Data#Normal_Mode|Gatling Options]]: {{clr|3|c.S}}, {{clr|3|2S}}, {{clr|4|5H}}, {{clr|4|2H}}, {{clr|4|6H}}, {{clr|5|2D}} | ||
</div> | </div> | ||
</div> | </div> | ||
| Line 469: | Line 377: | ||
<gallery widths="210px" heights="210px" mode="nolines"> | <gallery widths="210px" heights="210px" mode="nolines"> | ||
GGAC_ABA_2S.png|A surprisingly good crouching uppercut | GGAC_ABA_2S.png|A surprisingly good crouching uppercut | ||
</gallery> | </gallery> | ||
|-| | |-| | ||
| Line 476: | Line 383: | ||
GGXXACPR_ABA_2S-1-Hitbox.png | GGXXACPR_ABA_2S-1-Hitbox.png | ||
GGXXACPR_ABA_2S-2-Hitbox.png | GGXXACPR_ABA_2S-2-Hitbox.png | ||
</gallery> | </gallery> | ||
</tabber> | </tabber> | ||
| Line 482: | Line 388: | ||
<div class="attack-info"> | <div class="attack-info"> | ||
{| class="wikitable attack-data" | {| class="wikitable attack-data" | ||
{{CargoHeader-GGACR | {{CargoHeader-GGACR}} | ||
|- | |- | ||
{{#cargo_query:tables=MoveData_GGACR | {{#cargo_query:tables=MoveData_GGACR | ||
|fields= | |fields=damage,guard,startup,active,recovery,onBlock,invuln,level | ||
|where=chara=" | |where=chara="A.B.A" and input="2S" | ||
|format=template|template= | |format=template|template=CargoBody-GGACR|named args=yes|order by=_ID | ||
|delimiter=\n{{!}}-\n | |delimiter=\n{{!}}-\n | ||
}} | }} | ||
| Line 494: | Line 400: | ||
Fantastic hitbox makes this amazing anti-air, which leads to jump combo > Keygrab. Gains enough histun on CH, that it goes straight into Keygrab for an effortless transform. A pretty good Anti-Air even against ones with upper body invul, but having a crouching AA is a good utility. Moves ABA forward when used. | Fantastic hitbox makes this amazing anti-air, which leads to jump combo > Keygrab. Gains enough histun on CH, that it goes straight into Keygrab for an effortless transform. A pretty good Anti-Air even against ones with upper body invul, but having a crouching AA is a good utility. Moves ABA forward when used. | ||
*Untechable on air hit for 18F | *Untechable on air hit for 18F | ||
[[GGACR/A.B.A/Frame_Data# | [[GGACR/A.B.A/Frame_Data#Normal_Mode|Gatling Options]]: {{clr|2|5K}}, {{clr|4|2H}}, {{clr|5|5D}}, {{clr|5|2D}} | ||
</div> | </div> | ||
</div> | </div> | ||
| Line 517: | Line 411: | ||
<gallery widths="210px" heights="210px" mode="nolines"> | <gallery widths="210px" heights="210px" mode="nolines"> | ||
GGAC_ABA_2H.png|Stop Exhibitioning | GGAC_ABA_2H.png|Stop Exhibitioning | ||
</gallery> | </gallery> | ||
|-| | |-| | ||
| Line 526: | Line 419: | ||
GGXXACPR_ABA_2H-3-Hitbox.png | GGXXACPR_ABA_2H-3-Hitbox.png | ||
GGXXACPR_ABA_2H-4-Hitbox.png | GGXXACPR_ABA_2H-4-Hitbox.png | ||
</gallery> | </gallery> | ||
</tabber> | </tabber> | ||
| Line 535: | Line 424: | ||
<div class="attack-info"> | <div class="attack-info"> | ||
{| class="wikitable attack-data" | {| class="wikitable attack-data" | ||
{{CargoHeader-GGACR | {{CargoHeader-GGACR}} | ||
|- | |- | ||
{{#cargo_query:tables=MoveData_GGACR | {{#cargo_query:tables=MoveData_GGACR | ||
|fields= | |fields=damage,guard,startup,active,recovery,onBlock,invuln,level | ||
|where=chara=" | |where=chara="A.B.A" and input="2H" | ||
|format=template|template= | |format=template|template=CargoBody-GGACR|named args=yes|order by=_ID | ||
|delimiter=\n{{!}}-\n | |delimiter=\n{{!}}-\n | ||
}} | }} | ||
| Line 547: | Line 436: | ||
A slow attack with an oddly good hitbox, which stuffs things unexpectedly and will sometimes win against jump ins and moves behind her. Since it floats on hit, you can cancel into air combos > Keygrab. | A slow attack with an oddly good hitbox, which stuffs things unexpectedly and will sometimes win against jump ins and moves behind her. Since it floats on hit, you can cancel into air combos > Keygrab. | ||
*1st floats and pulls opponent in on hit (untechable for 19F) | *1st floats and pulls opponent in on hit (untechable for 19F) | ||
[[GGACR/A.B.A/Frame_Data#Normal_Mode| | [[GGACR/A.B.A/Frame_Data#Normal_Mode|Gatling Options]]: {{clr|1|6P}} | ||
'''Supplemental Frame Data:''' | '''Supplemental Frame Data:''' | ||
| Line 571: | Line 452: | ||
<gallery widths="210px" heights="210px" mode="nolines"> | <gallery widths="210px" heights="210px" mode="nolines"> | ||
GGAC_ABA_2D.png|Your only other low | GGAC_ABA_2D.png|Your only other low | ||
</gallery> | </gallery> | ||
|-| | |-| | ||
| Line 577: | Line 457: | ||
<gallery widths="210px" heights="210px" mode="nolines"> | <gallery widths="210px" heights="210px" mode="nolines"> | ||
GGXXACPR_ABA_2D-Hitbox.png | GGXXACPR_ABA_2D-Hitbox.png | ||
</gallery> | </gallery> | ||
</tabber> | </tabber> | ||
| Line 583: | Line 462: | ||
<div class="attack-info"> | <div class="attack-info"> | ||
{| class="wikitable attack-data" | {| class="wikitable attack-data" | ||
{{CargoHeader-GGACR | {{CargoHeader-GGACR}} | ||
|- | |- | ||
{{#cargo_query:tables=MoveData_GGACR | {{#cargo_query:tables=MoveData_GGACR | ||
|fields= | |fields=damage,guard,startup,active,recovery,onBlock,invuln,level | ||
|where=chara=" | |where=chara="A.B.A" and input="2D" | ||
|format=template|template= | |format=template|template=CargoBody-GGACR|named args=yes|order by=_ID | ||
|delimiter=\n{{!}}-\n | |delimiter=\n{{!}}-\n | ||
}} | }} | ||
| Line 594: | Line 473: | ||
==== ==== | ==== ==== | ||
Pretty typical. You'll usually end ground strings with this, whatever they started with, into Keygrab. {{clr|2|2K}} is generally preferred for poking. | Pretty typical. You'll usually end ground strings with this, whatever they started with, into Keygrab. {{clr|2|2K}} is generally preferred for poking. | ||
</div> | </div> | ||
</div> | </div> | ||
| Line 622: | Line 493: | ||
{| class="wikitable attack-data" | {| class="wikitable attack-data" | ||
|- | |- | ||
{{CargoHeader-GGACR | {{CargoHeader-GGACR}} | ||
|- | |- | ||
{{#cargo_query:tables=MoveData_GGACR | {{#cargo_query:tables=MoveData_GGACR | ||
|fields= | |fields=damage,guard,startup,active,recovery,onBlock,invuln,level | ||
|where=chara=" | |where=chara="A.B.A" and input="j.P" | ||
|format=template|template= | |format=template|template=CargoBody-GGACR|named args=yes|order by=_ID | ||
|delimiter=\n{{!}}-\n | |delimiter=\n{{!}}-\n | ||
}} | }} | ||
| Line 634: | Line 505: | ||
Standard speed air jab with pretty piss poor range. Outside of air pressure or trying to win air exchanges, you won't see or use much of this. | Standard speed air jab with pretty piss poor range. Outside of air pressure or trying to win air exchanges, you won't see or use much of this. | ||
[[GGACR/A.B.A/Frame_Data#Normal_Mode|Gatling Options]]: {{clr|1|j.P}}, {{clr|2|j.K}}, {{clr|3|j.S}}, {{clr|4|j.H}}, {{clr|5|j.D}} | |||
</div> | |||
[[GGACR/A.B.A/Frame_Data#Normal_Mode| | |||
</div> | |||
</div> | </div> | ||
===<big>{{clr|2|j.K}}</big>=== | ===<big>{{clr|2|j.K}}</big>=== | ||
| Line 661: | Line 526: | ||
{| class="wikitable attack-data" | {| class="wikitable attack-data" | ||
|- | |- | ||
{{CargoHeader-GGACR | {{CargoHeader-GGACR}} | ||
|- | |- | ||
{{#cargo_query:tables=MoveData_GGACR | {{#cargo_query:tables=MoveData_GGACR | ||
|fields= | |fields=damage,guard,startup,active,recovery,onBlock,invuln,level | ||
|where=chara=" | |where=chara="A.B.A" and input="j.K" | ||
|format=template|template= | |format=template|template=CargoBody-GGACR|named args=yes|order by=_ID | ||
|delimiter=\n{{!}}-\n | |delimiter=\n{{!}}-\n | ||
}} | }} | ||
| Line 674: | Line 539: | ||
*Floats opponent on hit (untechable on ground hit for 28F) | *Floats opponent on hit (untechable on ground hit for 28F) | ||
[[GGACR/A.B.A/Frame_Data#Normal_Mode|Gatling Options]]: {{clr|1|j.P}}, {{clr|3|j.S}}, {{clr|4|j.H}}, {{clr|5|j.D}} | |||
[[GGACR/A.B.A/Frame_Data#Normal_Mode| | |||
</div> | </div> | ||
</div> | </div> | ||
| Line 692: | Line 549: | ||
<gallery widths="210px" heights="210px" mode="nolines"> | <gallery widths="210px" heights="210px" mode="nolines"> | ||
GGAC_ABA_jS.png|Your best friend | GGAC_ABA_jS.png|Your best friend | ||
</gallery> | </gallery> | ||
|-| | |-| | ||
| Line 699: | Line 555: | ||
GGXXACPR_ABA_jS-1-Hitbox.png | GGXXACPR_ABA_jS-1-Hitbox.png | ||
GGXXACPR_ABA_jS-2-Hitbox.png | GGXXACPR_ABA_jS-2-Hitbox.png | ||
</gallery> | </gallery> | ||
</tabber> | </tabber> | ||
| Line 706: | Line 560: | ||
<div class="attack-info"> | <div class="attack-info"> | ||
{| class="wikitable attack-data" | {| class="wikitable attack-data" | ||
{{CargoHeader-GGACR | {{CargoHeader-GGACR}} | ||
|- | |- | ||
{{#cargo_query:tables=MoveData_GGACR | {{#cargo_query:tables=MoveData_GGACR | ||
|fields= | |fields=damage,guard,startup,active,recovery,onBlock,invuln,level | ||
|where=chara=" | |where=chara="A.B.A" and input="j.S" | ||
|format=template|template= | |format=template|template=CargoBody-GGACR|named args=yes|order by=_ID | ||
|delimiter=\n{{!}}-\n | |delimiter=\n{{!}}-\n | ||
}} | }} | ||
| Line 718: | Line 572: | ||
Excellent move, and your best air normal. Works in generally all situations due to its speed and good hitbox. | Excellent move, and your best air normal. Works in generally all situations due to its speed and good hitbox. | ||
[[GGACR/A.B.A/Frame_Data#Normal_Mode|Gatling Options]]: {{clr|1|j.P}}, {{clr|4|j.H}} | |||
</div> | |||
</div> | |||
[[GGACR/A.B.A/Frame_Data#Normal_Mode| | |||
</div> | |||
</div> | |||
===<big>{{clr|4|j.H}}</big>=== | ===<big>{{clr|4|j.H}}</big>=== | ||
<div class="attack-container"> | <div class="attack-container"> | ||
| Line 741: | Line 582: | ||
<gallery widths="210px" heights="210px" mode="nolines"> | <gallery widths="210px" heights="210px" mode="nolines"> | ||
GGAC_ABA_jH.png|Get a Room | GGAC_ABA_jH.png|Get a Room | ||
</gallery> | </gallery> | ||
|-| | |-| | ||
| Line 747: | Line 587: | ||
<gallery widths="210px" heights="210px" mode="nolines"> | <gallery widths="210px" heights="210px" mode="nolines"> | ||
GGXXACPR_ABA_jH-Hitbox.png | GGXXACPR_ABA_jH-Hitbox.png | ||
</gallery> | </gallery> | ||
</tabber> | </tabber> | ||
| Line 754: | Line 592: | ||
<div class="attack-info"> | <div class="attack-info"> | ||
{| class="wikitable attack-data" | {| class="wikitable attack-data" | ||
{{CargoHeader-GGACR | {{CargoHeader-GGACR}} | ||
|- | |- | ||
{{#cargo_query:tables=MoveData_GGACR | {{#cargo_query:tables=MoveData_GGACR | ||
|fields= | |fields=damage,guard,startup,active,recovery,onBlock,invuln,level | ||
|where=chara=" | |where=chara="A.B.A" and input="j.H" | ||
|format=template|template= | |format=template|template=CargoBody-GGACR|named args=yes|order by=_ID | ||
|delimiter=\n{{!}}-\n | |delimiter=\n{{!}}-\n | ||
}} | }} | ||
| Line 767: | Line 605: | ||
''Causes very little knockback/pushback.'' | ''Causes very little knockback/pushback.'' | ||
</div> | </div> | ||
</div> | </div> | ||
| Line 795: | Line 624: | ||
<div class="attack-info"> | <div class="attack-info"> | ||
{| class="wikitable attack-data" | {| class="wikitable attack-data" | ||
{{CargoHeader-GGACR | {{CargoHeader-GGACR}} | ||
|- | |- | ||
{{#cargo_query:tables=MoveData_GGACR | {{#cargo_query:tables=MoveData_GGACR | ||
|fields= | |fields=damage,guard,startup,active,recovery,onBlock,invuln,level | ||
|where=chara=" | |where=chara="A.B.A" and input="j.D" | ||
|format=template|template= | |format=template|template=CargoBody-GGACR|named args=yes|order by=_ID | ||
|delimiter=\n{{!}}-\n | |delimiter=\n{{!}}-\n | ||
}} | }} | ||
| Line 806: | Line 635: | ||
==== ==== | ==== ==== | ||
Nice horizontal range, but very slow. Works mainly as an early Anti-Air, but otherwise seldom used. If you manage to CH, you are gifted a wallbounce > free keygrab for your troubles. | Nice horizontal range, but very slow. Works mainly as an early Anti-Air, but otherwise seldom used. If you manage to CH, you are gifted a wallbounce > free keygrab for your troubles. | ||
</div> | |||
</div> | |||
</div> | </div> | ||
| Line 838: | Line 659: | ||
{{#cargo_query:tables=MoveData_GGACR | {{#cargo_query:tables=MoveData_GGACR | ||
|fields=damage,guard,startup,active,recovery,onBlock,invuln,level | |fields=damage,guard,startup,active,recovery,onBlock,invuln,level | ||
|where=chara=" | |where=chara="A.B.A" and input="Ground Throw" | ||
|format=template|template=CargoBody-GGACR|named args=yes|order by=_ID | |format=template|template=CargoBody-GGACR|named args=yes|order by=_ID | ||
}} | }} | ||
| Line 872: | Line 693: | ||
{{#cargo_query:tables=MoveData_GGACR | {{#cargo_query:tables=MoveData_GGACR | ||
|fields=damage,guard,startup,active,recovery,onBlock,invuln,level | |fields=damage,guard,startup,active,recovery,onBlock,invuln,level | ||
|where=chara=" | |where=chara="A.B.A" and input="Air Throw" | ||
|format=template|template=CargoBody-GGACR|named args=yes|order by=_ID | |format=template|template=CargoBody-GGACR|named args=yes|order by=_ID | ||
}} | }} | ||
| Line 900: | Line 721: | ||
<div class="attack-info"> | <div class="attack-info"> | ||
{| class="wikitable attack-data" | {| class="wikitable attack-data" | ||
{{CargoHeader-GGACR | {{CargoHeader-GGACR}} | ||
|- | |- | ||
{{#cargo_query:tables=MoveData_GGACR | {{#cargo_query:tables=MoveData_GGACR | ||
|fields=input=name,damage,guard,startup,active,recovery,onBlock,invuln,level | |fields=input=name,damage,guard,startup,active,recovery,onBlock,invuln,level | ||
|where=chara=" | |where=chara="A.B.A" and input="DAA" | ||
|format=template|template= | |format=template|template=CargoBody-GGACR|named args=yes|order by=_ID | ||
|delimiter=\n{{!}}-\n | |delimiter=\n{{!}}-\n | ||
}} | }} | ||
| Line 911: | Line 732: | ||
==== ==== | ==== ==== | ||
Though it has lengthy recovery and an unspectacular startup, it has a lot more invulnerabilty than usual and knocks down the opponent. A Dead Angle should always be in your mind considering ABA's nature for volatility. Never forget if you need to get them off of you. On regular hit, you can keygrab out of the knockdown. Curiously, keygrab seems to whiff when the Dead Angle counterhits. | Though it has lengthy recovery and an unspectacular startup, it has a lot more invulnerabilty than usual and knocks down the opponent. A Dead Angle should always be in your mind considering ABA's nature for volatility. Never forget if you need to get them off of you. On regular hit, you can keygrab out of the knockdown. Curiously, keygrab seems to whiff when the Dead Angle counterhits. | ||
</div> | </div> | ||
</div> | </div> | ||
| Line 945: | Line 756: | ||
<div class="attack-info"> | <div class="attack-info"> | ||
{| class="wikitable attack-data" | {| class="wikitable attack-data" | ||
{{CargoHeader-GGACR | {{CargoHeader-GGACR}} | ||
|- | |- | ||
{{#cargo_query:tables=MoveData_GGACR | {{#cargo_query:tables=MoveData_GGACR | ||
|fields= | |fields=damage,guard,startup,active,recovery,onBlock,invuln,level | ||
|where=chara=" | |where=chara="A.B.A" and input="236S" | ||
|format=template|template= | |format=template|template=CargoBody-GGACR|named args=yes|order by=_ID | ||
|delimiter=\n{{!}}-\n | |delimiter=\n{{!}}-\n | ||
}} | }} | ||
| Line 959: | Line 770: | ||
;Supplemental Frame Data: | ;Supplemental Frame Data: | ||
* | *Can cancel into followup from 21F onwards on hit or block. | ||
</div> | </div> | ||
</div> | </div> | ||
| Line 983: | Line 792: | ||
<div class="attack-info"> | <div class="attack-info"> | ||
{| class="wikitable attack-data" | {| class="wikitable attack-data" | ||
{{CargoHeader-GGACR | {{CargoHeader-GGACR}} | ||
|- | |- | ||
{{#cargo_query:tables=MoveData_GGACR | {{#cargo_query:tables=MoveData_GGACR | ||
|fields=damage,guard,startup,active,recovery,onBlock,invuln,level | |fields=damage,guard,startup,active,recovery,onBlock,invuln,level | ||
|where=chara=" | |where=chara="A.B.A" and input="236S > 46S" | ||
|format=template|template=CargoBody-GGACR|named args=yes|order by=_ID | |format=template|template=CargoBody-GGACR|named args=yes|order by=_ID | ||
}} | }} | ||
|} | |||
==== ==== | |||
Possible to frame trap after a blocked first Rekka, but the gap is bigger than one frame, so exercise caution. Staggers on hit, but it’s pretty wimpy in Normal Mode and requires an RC to take advantage of with anything other than 3rd Rekka unless they’re asleep, and spending 50% on something they can probably still shake out of is a big gamble. | |||
;Supplemental Frame Data: | |||
*forces crouching state on ground hit and staggers (Max 30F) | |||
|} | |||
==== ==== | |||
Possible to frame trap after a blocked first Rekka, but the gap is bigger than one frame, so exercise caution. Staggers on hit, but it’s pretty wimpy in Normal Mode and requires an RC to take advantage of with anything other than 3rd Rekka unless they’re asleep, and spending 50% on something they can probably still shake out of is a big gamble | |||
;Supplemental Frame Data: | |||
* | |||
*Untechable for 35F on air hit | *Untechable for 35F on air hit | ||
*Can cancel into followup from 10F onwards | *Can cancel into followup from 10F onwards | ||
</div> | </div> | ||
</div> | </div> | ||
| Line 1,038: | Line 827: | ||
<div class="attack-info"> | <div class="attack-info"> | ||
{| class="wikitable attack-data" | {| class="wikitable attack-data" | ||
{{CargoHeader-GGACR | {{CargoHeader-GGACR}} | ||
}} | |||
|- | |- | ||
{{#cargo_query:tables=MoveData_GGACR | {{#cargo_query:tables=MoveData_GGACR | ||
|fields=damage,guard,startup,active,recovery,onBlock,invuln,level | |fields=damage,guard,startup,active,recovery,onBlock,invuln,level | ||
|where=chara=" | |where=chara="A.B.A" and input="236S > 46S > 63214S" | ||
|format=template|template=CargoBody-GGACR|named args=yes|order by=_ID | |format=template|template=CargoBody-GGACR|named args=yes|order by=_ID | ||
}} | }} | ||
| Line 1,072: | Line 846: | ||
*FRC timing 14~15F (Goku Moroha version 14~17F) | *FRC timing 14~15F (Goku Moroha version 14~17F) | ||
*Slides opponent on hit (untechable for 60F, slides for 40F) | *Slides opponent on hit (untechable for 60F, slides for 40F) | ||
*Opponent's Burst is disabled on hit | *Opponent's Burst is disabled on hit | ||
</div> | </div> | ||
</div> | </div> | ||
| Line 1,100: | Line 872: | ||
{{#cargo_query:tables=MoveData_GGACR | {{#cargo_query:tables=MoveData_GGACR | ||
|fields=input=name,damage,guard,startup,active,recovery,onBlock,invuln,level | |fields=input=name,damage,guard,startup,active,recovery,onBlock,invuln,level | ||
|where=chara=" | |where=chara="A.B.A" and (input="63214H" or input="j.63214H") | ||
|format=template|template=CargoBodyWithName-GGACR|named args=yes|order by=_ID | |format=template|template=CargoBodyWithName-GGACR|named args=yes|order by=_ID | ||
|delimiter=\n{{!}}-\n | |delimiter=\n{{!}}-\n | ||
| Line 1,110: | Line 882: | ||
This move acts as both a command throw and a strike. If from anywhere from frames 6-9, the opponent is in a throwable state and the move is in range, it will grab them. Afterwards, it will turn into a strike for the remainder of its active frames, meaning that the move can also be combo'd into. If the strike is blocked, however, it becomes very unsafe. | This move acts as both a command throw and a strike. If from anywhere from frames 6-9, the opponent is in a throwable state and the move is in range, it will grab them. Afterwards, it will turn into a strike for the remainder of its active frames, meaning that the move can also be combo'd into. If the strike is blocked, however, it becomes very unsafe. | ||
If the move initially lands as a throw, ABA can follow up with another keygrab, meaning that going into a raw throw keygrab will let you OTG another and go right back into Moroha mode if you were in it to start with. However, this double pickup doesn't work if the first lands as a strike, but ABA can instead do some combos that lead into Bloodpack FRC > re-Keygrab. | If the move initially lands as a throw, ABA can follow up with another keygrab, meaning that going into a raw throw keygrab will let you OTG another and go right back into Moroha mode if you were in it to start with. However, this double pickup doesn't work if the first lands as a strike, but ABA can instead do some combos that lead into Bloodpack FRC > re-Keygrab. | ||
*Listed Recovery is for when the move is blocked. On hit the recovery is 38F. | *Listed Recovery is for when the move is blocked. On hit the recovery is 38F. | ||
*Listed Startup and Active frames is for the strike portion. | *Listed Startup and Active frames is for the strike portion. | ||
*The throw part has Damage 10, Startup 9F, active 1F. | *The throw part has Damage 10, Startup 9F, active 1F. | ||
*Changes ABA's mode on hit (Normal changes to Moroha, Moroha and Goku Moroha change back to Normal). | *Changes ABA's mode on hit (Normal changes to Moroha, Moroha and Goku Moroha change back to Normal). | ||
*Knocks down opponent on hit. | *Knocks down opponent on hit. | ||
*ABA in CH state during move. | *ABA in CH state during move. | ||
| Line 1,127: | Line 895: | ||
</div> | </div> | ||
</div> | </div> | ||
===<big>Dragging</big> (Ken'in)=== | ===<big>Dragging</big> (Ken'in)=== | ||
<span class="input-badge">'''{{clr|1|236P}}'''</span> | <span class="input-badge">'''{{clr|1|236P}}'''</span> | ||
| Line 1,157: | Line 924: | ||
{{#cargo_query:tables=MoveData_GGACR | {{#cargo_query:tables=MoveData_GGACR | ||
|fields=damage,guard,startup,active,recovery,onBlock,invuln,level | |fields=damage,guard,startup,active,recovery,onBlock,invuln,level | ||
|where=chara=" | |where=chara="A.B.A" and input="236P" | ||
|format=template|template=CargoBody-GGACR|named args=yes|order by=_ID | |format=template|template=CargoBody-GGACR|named args=yes|order by=_ID | ||
}} | }} | ||
| Line 1,165: | Line 932: | ||
;Supplemental Frame Data: | ;Supplemental Frame Data: | ||
* | *FRC timing 11~13F. | ||
</div> | </div> | ||
</div> | </div> | ||
| Line 1,191: | Line 958: | ||
{{#cargo_query:tables=MoveData_GGACR | {{#cargo_query:tables=MoveData_GGACR | ||
|fields=damage,guard,startup,active,recovery,onBlock,invuln,level | |fields=damage,guard,startup,active,recovery,onBlock,invuln,level | ||
|where=chara=" | |where=chara="A.B.A" and input="236K" | ||
|format=template|template=CargoBody-GGACR|named args=yes|order by=_ID | |format=template|template=CargoBody-GGACR|named args=yes|order by=_ID | ||
}} | }} | ||
| Line 1,200: | Line 967: | ||
;Supplemental Frame Data: | ;Supplemental Frame Data: | ||
*Staggers opponent on CH (Max 69F) | *Staggers opponent on CH (Max 69F) | ||
* | *FRC timing 28~30F. | ||
</div> | </div> | ||
</div> | </div> | ||
| Line 1,226: | Line 992: | ||
{{#cargo_query:tables=MoveData_GGACR | {{#cargo_query:tables=MoveData_GGACR | ||
|fields=damage,guard,startup,active,recovery,onBlock,invuln,level | |fields=damage,guard,startup,active,recovery,onBlock,invuln,level | ||
|where=chara=" | |where=chara="A.B.A" and input="236H" | ||
|format=template|template=CargoBody-GGACR|named args=yes|order by=_ID | |format=template|template=CargoBody-GGACR|named args=yes|order by=_ID | ||
}} | }} | ||
| Line 1,236: | Line 1,002: | ||
;Supplemental Frame Data: | ;Supplemental Frame Data: | ||
*FRC timing 23~24F; | *FRC timing 23~24F; | ||
*Attack is guaranteed to activate after 23F. | *Attack is guaranteed to activate after 23F. | ||
| Line 1,262: | Line 1,027: | ||
{{#cargo_query:tables=MoveData_GGACR | {{#cargo_query:tables=MoveData_GGACR | ||
|fields=damage,guard,startup,active,recovery,onBlock,invuln,level | |fields=damage,guard,startup,active,recovery,onBlock,invuln,level | ||
|where=chara=" | |where=chara="A.B.A" and input="63214P" | ||
|format=template|template=CargoBody-GGACR|named args=yes|order by=_ID | |format=template|template=CargoBody-GGACR|named args=yes|order by=_ID | ||
}} | }} | ||
| Line 1,271: | Line 1,036: | ||
;Supplemental Frame Data: | ;Supplemental Frame Data: | ||
*Consumes a blood pack on 20F and changes ABA to Moroha mode. | *Consumes a blood pack on 20F and changes ABA to Moroha mode. | ||
</div> | </div> | ||
</div> | </div> | ||
== | |||
===<big> | ==Force Breaks== | ||
<span class="input-badge">'''{{clr| | ===<big>FB Dragging</big> (Ken'in)=== | ||
<span class="input-badge">'''{{clr|5|236D}}'''</span> | |||
<div class="attack-container"> | <div class="attack-container"> | ||
<div class="attack-gallery"> | <div class="attack-gallery"> | ||
| Line 1,283: | Line 1,048: | ||
Images = | Images = | ||
<gallery widths="210px" heights="210px" mode="nolines"> | <gallery widths="210px" heights="210px" mode="nolines"> | ||
GGAC_ABA_kenin.png|Just Leave It | |||
</gallery> | </gallery> | ||
|-| | |-| | ||
Hitboxes = | Hitboxes = | ||
<gallery widths="210px" heights="210px" mode="nolines"> | <gallery widths="210px" heights="210px" mode="nolines"> | ||
</gallery> | </gallery> | ||
</tabber> | </tabber> | ||
| Line 1,298: | Line 1,063: | ||
{{#cargo_query:tables=MoveData_GGACR | {{#cargo_query:tables=MoveData_GGACR | ||
|fields=damage,guard,startup,active,recovery,onBlock,invuln,level | |fields=damage,guard,startup,active,recovery,onBlock,invuln,level | ||
|where=chara=" | |where=chara="A.B.A" and input="236D" | ||
|format=template|template=CargoBody-GGACR|named args=yes|order by=_ID | |format=template|template=CargoBody-GGACR|named args=yes|order by=_ID | ||
}} | }} | ||
|} | |} | ||
==== ==== | ==== ==== | ||
''' | The '''best''' move in Normal Mode. Just like regular slide, except it's entirely invincible for its full duration, and thus completely unpunishable except against those who throw on the first frame it ends. | ||
It will evade oki, including meaty setups. It will slide through moves and supers, even stuff like Raoh’s Bellows Malice, for easy Keygrabs. It has a huge FRC point on 9-23F, which is highly useful in certain situations since you can FRC to choose which side of the opponent A.B.A will appear on, or to buffer into a surprise Keygrab. A 25% "reversal" option never looked so good. | |||
;Supplemental Frame Data: | ;Supplemental Frame Data: | ||
* | *Can pass through opponent from 3F until end of move; | ||
* | *FRC timing 9~23F. | ||
</div> | </div> | ||
</div> | </div> | ||
===<big> | |||
<span class="input-badge">'''{{clr|4| | ==Overdrive Attacks== | ||
===<big>Evidence: Concealment</big> (Shouko: Intoku)=== | |||
<span class="input-badge">'''{{clr|4|632146H}}'''</span> | |||
<div class="attack-container"> | <div class="attack-container"> | ||
<div class="attack-gallery"> | <div class="attack-gallery"> | ||
| Line 1,321: | Line 1,087: | ||
Images = | Images = | ||
<gallery widths="210px" heights="210px" mode="nolines"> | <gallery widths="210px" heights="210px" mode="nolines"> | ||
GGAC_ABA_shoukoIntoku.png|ABA keeps threatening to get a lawyer, but then she conceals evidence | |||
</gallery> | </gallery> | ||
|-| | |-| | ||
Hitboxes = | Hitboxes = | ||
<gallery widths="210px" heights="210px" mode="nolines"> | <gallery widths="210px" heights="210px" mode="nolines"> | ||
</gallery> | </gallery> | ||
</tabber> | </tabber> | ||
| Line 1,334: | Line 1,098: | ||
<div class="attack-info"> | <div class="attack-info"> | ||
{| class="wikitable attack-data" | {| class="wikitable attack-data" | ||
{{CargoHeader-GGACR}} | {{CargoHeader-GGACR|version=yes}} | ||
|- | |||
{{AttackVersion|name=1st hit|subtitle={{clr|4|632146H}}}} | |||
{{#cargo_query:tables=MoveData_GGACR | |||
|fields=damage,guard,startup,active,recovery,onBlock,invuln,level | |||
|where=chara="A.B.A" and input="632146H" | |||
|format=template|template=CargoBody-GGACR|named args=yes|order by=_ID | |||
}} | |||
|- | |||
{{AttackVersion|name=2nd hit|subtitle=1st hit -> {{clr|4|236H}}}} | |||
{{#cargo_query:tables=MoveData_GGACR | |||
|fields=damage,guard,startup,active,recovery,onBlock,invuln,level | |||
|where=chara="A.B.A" and input="632146H > 236H" | |||
|format=template|template=CargoBody-GGACR|named args=yes|order by=_ID | |||
}} | |||
|- | |- | ||
{{AttackVersion|name=3rd hit|subtitle=2nd hit -> {{clr|4|236H}}}} | |||
{{#cargo_query:tables=MoveData_GGACR | {{#cargo_query:tables=MoveData_GGACR | ||
|fields=damage,guard,startup,active,recovery,onBlock,invuln,level | |fields=damage,guard,startup,active,recovery,onBlock,invuln,level | ||
|where=chara=" | |where=chara="A.B.A" and input="632146H > 236H > 236H" | ||
|format=template|template=CargoBody-GGACR|named args=yes|order by=_ID | |format=template|template=CargoBody-GGACR|named args=yes|order by=_ID | ||
}} | }} | ||
|} | |} | ||
==== ==== | ==== ==== | ||
Despite not having full invul until startup, it can kind of work as a reversal, sometimes. Better for damage if you can actually land a kill combo in normal mode, or delay the followup hits into a frametrap. It also has FRC points on every hit, in case you want to extend into pressure or make it safe. Only works in normal mode. | |||
;Supplemental Frame Data: | ;Supplemental Frame Data: | ||
* | *Floats opponent on hit (untechable for 58F) | ||
*FRC timing | *Forced prorate 50% | ||
*Can | *Fully invincible 1F~5F after super flash; Above feet and throw invincible 6-13F after super flash; Low profile 14~33F after super flash; | ||
*Hitstop 7F; | |||
*FRC timing 10~13F after super flash; | |||
*Can cancel into Shouko: Intoku (2nd hit) 1~34F after super flash. | |||
---- | |||
It's probably best to cancel into the followup hit this most of the time since it'll push the opponent back and make the move safer despite being -26. | |||
'''Supplemental Frame Data:''' ''Above feet invincible 22~29F; Low profile 30~49F; Hitstop 7F; FRC timing 26~29F; Can cancel into Shouko: Intoku (3rd hit) 1~26F.'' | |||
---- | |||
No longer unblockable, probably much to your dismay. Be careful as this third hit's startup is particularly slow, which is good for frametraps, but horrible if blocked. | |||
*Floats opponent on hit (untechable for 58F) | |||
*Forced prorate 50% | |||
;Supplemental Frame Data: | |||
*Above feet invincible 35~42F; Low profile 43~62F; | |||
*Hitstop 7F; | |||
*FRC timing 39~42F. | |||
</div> | </div> | ||
</div> | </div> | ||
===<big> | ===<big>Evidence: Destruction</big> (Shouko: Inmetsu)=== | ||
<span class="input-badge">'''{{clr|1| | <span class="input-badge">'''{{clr|1|j.632146P}}'''</span> | ||
<div class="attack-container"> | <div class="attack-container"> | ||
<div class="attack-gallery"> | <div class="attack-gallery"> | ||
| Line 1,367: | Line 1,157: | ||
Images = | Images = | ||
<gallery widths="210px" heights="210px" mode="nolines"> | <gallery widths="210px" heights="210px" mode="nolines"> | ||
GGAC_ABA_ouro.png|Kind of like RTL, except awful. | |||
</gallery> | </gallery> | ||
|-| | |-| | ||
Hitboxes = | Hitboxes = | ||
<gallery widths="210px" heights="210px" mode="nolines"> | <gallery widths="210px" heights="210px" mode="nolines"> | ||
GGXXACPR_ABA_Inmentsu-Hitbox.png | |||
</gallery> | </gallery> | ||
</tabber> | </tabber> | ||
| Line 1,381: | Line 1,172: | ||
{{#cargo_query:tables=MoveData_GGACR | {{#cargo_query:tables=MoveData_GGACR | ||
|fields=damage,guard,startup,active,recovery,onBlock,invuln,level | |fields=damage,guard,startup,active,recovery,onBlock,invuln,level | ||
|where=chara=" | |where=chara="A.B.A" and input="j.632146P" | ||
|format=template|template=CargoBody-GGACR|named args=yes|order by=_ID | |format=template|template=CargoBody-GGACR|named args=yes|order by=_ID | ||
|delimiter=\n{{!}}-\n | |||
}} | }} | ||
|} | |} | ||
==== ==== | ==== ==== | ||
Has two frames of invincible startup, and that's about the only thing this move has going for it. You can end air combos with it if it'll kill, but otherwise save your tension for better things. | |||
* | |||
*Floats opponent on hit (untechable for 34F) | |||
*Can hit up to a maximum of 4 times | |||
</div> | |||
</div> | |||
<!--------------------- MOROHA MODE ---------------------------------> | |||
</div> | </div> | ||
< | <div id="movelist-2" class="movelist"> | ||
=== | |||
< | ==Normal Moves== | ||
===<big>{{clr|1|5P}}</big>=== | |||
<div class="attack-container"> | <div class="attack-container"> | ||
<div class="attack-gallery"> | <div class="attack-gallery"> | ||
| Line 1,404: | Line 1,196: | ||
Images = | Images = | ||
<gallery widths="210px" heights="210px" mode="nolines"> | <gallery widths="210px" heights="210px" mode="nolines"> | ||
GGAC_ABA_5P.png|An AA, not a jab, but 3F blazing fast | |||
</gallery> | </gallery> | ||
|-| | |-| | ||
Hitboxes = | Hitboxes = | ||
<gallery widths="210px" heights="210px" mode="nolines"> | <gallery widths="210px" heights="210px" mode="nolines"> | ||
GGXXACPR_ABA_5P-Hitbox.png | |||
</gallery> | </gallery> | ||
</tabber> | </tabber> | ||
| Line 1,419: | Line 1,211: | ||
{{#cargo_query:tables=MoveData_GGACR | {{#cargo_query:tables=MoveData_GGACR | ||
|fields=damage,guard,startup,active,recovery,onBlock,invuln,level | |fields=damage,guard,startup,active,recovery,onBlock,invuln,level | ||
|where=chara=" | |where=chara="A.B.A" and input="5P[m]" | ||
|format=template|template=CargoBody-GGACR|named args=yes|order by=_ID | |format=template|template=CargoBody-GGACR|named args=yes|order by=_ID | ||
|delimiter=\n{{!}}-\n | |||
}} | }} | ||
|} | |} | ||
==== ==== | ==== ==== | ||
Not much of a jab, but three frames of head invincibility for good reactionary anti air. You can also use it to stuff some higher reaching pokes. | |||
[[GGACR/A.B.A/Frame_Data#Moroha_Mode|Gatling Options]]: {{clr|1|5P}}, {{clr|1|2P}}, {{clr|1|6P}}, {{clr|2|5K}}, {{clr|2|2K}}, {{clr|3|c.S}}, {{clr|3|f.S}}, {{clr|3|2S}}, {{clr|4|5H}}, {{clr|4|2H}}, {{clr|4|6H}}, {{clr|5|5D}}, {{clr|5|2D}} | |||
</div> | |||
</div> | |||
===<big>{{clr|2|5K}}</big>=== | |||
</div> | |||
</div> | |||
===<big> | |||
<div class="attack-container"> | <div class="attack-container"> | ||
<div class="attack-gallery"> | <div class="attack-gallery"> | ||
| Line 1,446: | Line 1,229: | ||
Images = | Images = | ||
<gallery widths="210px" heights="210px" mode="nolines"> | <gallery widths="210px" heights="210px" mode="nolines"> | ||
GGAC_ABA_5K.png|Not much of a dancing queen | |||
</gallery> | </gallery> | ||
|-| | |-| | ||
Hitboxes = | Hitboxes = | ||
<gallery widths="210px" heights="210px" mode="nolines"> | <gallery widths="210px" heights="210px" mode="nolines"> | ||
GGXXACPR_ABA_5K-Hitbox.png | |||
</gallery> | </gallery> | ||
</tabber> | </tabber> | ||
| Line 1,462: | Line 1,244: | ||
{{#cargo_query:tables=MoveData_GGACR | {{#cargo_query:tables=MoveData_GGACR | ||
|fields=damage,guard,startup,active,recovery,onBlock,invuln,level | |fields=damage,guard,startup,active,recovery,onBlock,invuln,level | ||
|where=chara=" | |where=chara="A.B.A" and input="5K[m]" | ||
|format=template|template=CargoBody-GGACR|named args=yes|order by=_ID | |format=template|template=CargoBody-GGACR|named args=yes|order by=_ID | ||
|delimiter=\n{{!}}-\n | |||
}} | }} | ||
|} | |} | ||
==== ==== | ==== ==== | ||
A go-to poke, balancing speed and range amongst Normal Mode's overall slow moveset, but in Moroha loses out a bit to other normals. Being able to self gatling and safe on block very much helps. | |||
All three versions move ABA slightly forwards. | |||
[[GGACR/A.B.A/Frame_Data#Moroha_Mode|Gatling Options]]: {{clr|1|6P}}, {{clr|2|5K}}, {{clr|3|c.S}}, {{clr|3|f.S}}, {{clr|3|2S}}, {{clr|4|5H}}, {{clr|4|2H}}, {{clr|4|6H}}, {{clr|5|5D}}, {{clr|5|2D}} | |||
</div> | </div> | ||
</div> | </div> | ||
===<big> | ===<big>{{clr|3|c.S}}</big>=== | ||
<div class="attack-container"> | <div class="attack-container"> | ||
<div class="attack-gallery"> | <div class="attack-gallery"> | ||
| Line 1,485: | Line 1,265: | ||
Images = | Images = | ||
<gallery widths="210px" heights="210px" mode="nolines"> | <gallery widths="210px" heights="210px" mode="nolines"> | ||
GGAC_ABA_cS_M.png| | |||
</gallery> | </gallery> | ||
|-| | |-| | ||
Hitboxes = | Hitboxes = | ||
<gallery widths="210px" heights="210px" mode="nolines"> | <gallery widths="210px" heights="210px" mode="nolines"> | ||
GGXXACPR_ABA_cS-Moroha-Hitbox.png | |||
</gallery> | </gallery> | ||
</tabber> | </tabber> | ||
| Line 1,499: | Line 1,280: | ||
{{#cargo_query:tables=MoveData_GGACR | {{#cargo_query:tables=MoveData_GGACR | ||
|fields=damage,guard,startup,active,recovery,onBlock,invuln,level | |fields=damage,guard,startup,active,recovery,onBlock,invuln,level | ||
|where=chara=" | |where=chara="A.B.A" and input="c.S[m]" | ||
|format=template|template=CargoBody-GGACR|named args=yes|order by=_ID | |format=template|template=CargoBody-GGACR|named args=yes|order by=_ID | ||
|delimiter=\n{{!}}-\n | |||
}} | }} | ||
|} | |} | ||
==== ==== | ==== ==== | ||
Slightly slower in Moroha, more for filler than pokes into combos, but it gains from foot invul a little before startup and lasts quite a while. Starts cranking the Guard Bar higher, though. Even on block, now. | |||
[[GGACR/A.B.A/Frame_Data#Moroha_Mode|Gatling Options]]: {{clr|1|6P}}, {{clr|3|f.S}}, {{clr|3|2S}}, {{clr|4|5H}}, {{clr|4|2H}}, {{clr|4|6H}}, {{clr|5|5D}}, {{clr|5|2D}} | |||
# | |||
</div> | </div> | ||
</div> | </div> | ||
===<big>{{clr|3|f.S}}</big>=== | |||
===<big> | |||
<div class="attack-container"> | <div class="attack-container"> | ||
<div class="attack-gallery"> | <div class="attack-gallery"> | ||
| Line 1,526: | Line 1,298: | ||
Images = | Images = | ||
<gallery widths="210px" heights="210px" mode="nolines"> | <gallery widths="210px" heights="210px" mode="nolines"> | ||
GGAC_ABA_fS_M.png|Do a little dance | |||
</gallery> | </gallery> | ||
|-| | |-| | ||
Hitboxes = | Hitboxes = | ||
<gallery widths="210px" heights="210px" mode="nolines"> | <gallery widths="210px" heights="210px" mode="nolines"> | ||
GGXXACPR_ABA_fS-Moroha-1-Hitbox.png | |||
GGXXACPR_ABA_fS-Moroha-2-Hitbox.png | |||
</gallery> | </gallery> | ||
</tabber> | </tabber> | ||
| Line 1,541: | Line 1,314: | ||
{{#cargo_query:tables=MoveData_GGACR | {{#cargo_query:tables=MoveData_GGACR | ||
|fields=damage,guard,startup,active,recovery,onBlock,invuln,level | |fields=damage,guard,startup,active,recovery,onBlock,invuln,level | ||
|where=chara=" | |where=chara="A.B.A" and input="f.S[m]" | ||
|format=template|template=CargoBody-GGACR|named args=yes|order by=_ID | |format=template|template=CargoBody-GGACR|named args=yes|order by=_ID | ||
|delimiter=\n{{!}}-\n | |||
}} | }} | ||
|} | |} | ||
==== ==== | ==== ==== | ||
In Moroha, excellent poke that begins to define Moroha's strengths. Two hits will allow it to stuff super armor or familiars that eat hits (Little Eddie, Zappa's Dog, Dizzy's Fish), and leads excellently into {{clr|4|5H}} or Rekka. Great move in neutral and overall. Unlike Normal, it hits mid and doesn't move ABA forward. | |||
''1st hit causes very little knockback/pushback.'' | |||
[[GGACR/A.B.A/Frame_Data#Moroha_Mode|Gatling Options]]: {{clr|3|2S}}, {{clr|4|5H}}, {{clr|4|2H}}, {{clr|4|6H}}, {{clr|5|5D}}, {{clr|5|2D}} | |||
</div> | </div> | ||
</div> | </div> | ||
===<big>{{clr|4|5H}}</big>=== | |||
===<big> | |||
<div class="attack-container"> | <div class="attack-container"> | ||
<div class="attack-gallery"> | <div class="attack-gallery"> | ||
| Line 1,564: | Line 1,334: | ||
Images = | Images = | ||
<gallery widths="210px" heights="210px" mode="nolines"> | <gallery widths="210px" heights="210px" mode="nolines"> | ||
GGAC_ABA_5H_M.png|Like the unsettling opening to a psychological horror | |||
</gallery> | </gallery> | ||
|-| | |-| | ||
Hitboxes = | Hitboxes = | ||
<gallery widths="210px" heights="210px" mode="nolines"> | <gallery widths="210px" heights="210px" mode="nolines"> | ||
GGXXACPR_ABA_5H-1-Hitbox-MM.png | |||
GGXXACPR_ABA_5H-2-Hitbox-MM.png | |||
</gallery> | </gallery> | ||
</tabber> | </tabber> | ||
| Line 1,579: | Line 1,350: | ||
{{#cargo_query:tables=MoveData_GGACR | {{#cargo_query:tables=MoveData_GGACR | ||
|fields=damage,guard,startup,active,recovery,onBlock,invuln,level | |fields=damage,guard,startup,active,recovery,onBlock,invuln,level | ||
|where=chara=" | |where=chara="A.B.A" and input="5H[m]" | ||
|format=template|template=CargoBody-GGACR|named args=yes|order by=_ID | |format=template|template=CargoBody-GGACR|named args=yes|order by=_ID | ||
|delimiter=\n{{!}}-\n | |||
}} | }} | ||
|} | |} | ||
==== ==== | ==== ==== | ||
Moroha version is fantastic. Builds a ridiculous amount of guard bar on block, vacuums on the second hit, and with a gatling into {{clr|4|2H}}, you can keep the opponent close and get their guard bar flashing in about a second. This is excellent for pressure and is safe on block, making it particularly great against opponents without meterless reversals (there is a slight gap from this to {{clr|4|2H}}). However, the second hit will usually end the stagger if the first hit lands as CH. Its slow speed keeps it from being a good poke, but ABA has other options to lead into this. | |||
[[GGACR/A.B.A/Frame_Data#Moroha_Mode|Gatling Options]]: {{clr|4|2H}}, {{clr|4|6H}}, {{clr|5|5D}}, {{clr|5|2D}} | |||
</div> | </div> | ||
</div> | </div> | ||
===<big> | ===<big>{{clr|1|6P}}</big>=== | ||
<div class="attack-container"> | <div class="attack-container"> | ||
<div class="attack-gallery"> | <div class="attack-gallery"> | ||
| Line 1,599: | Line 1,369: | ||
Images = | Images = | ||
<gallery widths="210px" heights="210px" mode="nolines"> | <gallery widths="210px" heights="210px" mode="nolines"> | ||
GGAC_ABA_6P.png|Using your head is key | |||
</gallery> | </gallery> | ||
|-| | |-| | ||
Hitboxes = | Hitboxes = | ||
<gallery widths="210px" heights="210px" mode="nolines"> | <gallery widths="210px" heights="210px" mode="nolines"> | ||
GGXXACPR_ABA_6P-1-Hitbox.png | |||
GGXXACPR_ABA_6P-2-Hitbox.png | |||
GGXXACPR_ABA_6P-3-Hitbox.png | |||
</gallery> | </gallery> | ||
</tabber> | </tabber> | ||
| Line 1,614: | Line 1,386: | ||
{{#cargo_query:tables=MoveData_GGACR | {{#cargo_query:tables=MoveData_GGACR | ||
|fields=damage,guard,startup,active,recovery,onBlock,invuln,level | |fields=damage,guard,startup,active,recovery,onBlock,invuln,level | ||
|where=chara=" | |where=chara="A.B.A" and input="6P[m]" | ||
|format=template|template=CargoBody-GGACR|named args=yes|order by=_ID | |format=template|template=CargoBody-GGACR|named args=yes|order by=_ID | ||
|delimiter=\n{{!}}-\n | |||
}} | }} | ||
|} | |} | ||
==== ==== | ==== ==== | ||
In Moroha, its hitbox is a little altered since the Key's head changes shape, but functions nearly identically to the Normal version. | |||
[[GGACR/A.B.A/Frame_Data#Normal_Mode|Gatling Options]]: {{clr|3|2S}}, {{clr|4|2H}} | |||
</div> | |||
</div> | </div> | ||
===<big>{{clr|4|6H}}</big>=== | |||
===<big> | |||
<div class="attack-container"> | <div class="attack-container"> | ||
<div class="attack-gallery"> | <div class="attack-gallery"> | ||
| Line 1,642: | Line 1,404: | ||
Images = | Images = | ||
<gallery widths="210px" heights="210px" mode="nolines"> | <gallery widths="210px" heights="210px" mode="nolines"> | ||
GGAC_ABA_6H_M.png|Eats up space all day | |||
</gallery> | </gallery> | ||
|-| | |-| | ||
Hitboxes = | Hitboxes = | ||
<gallery widths="210px" heights="210px" mode="nolines"> | <gallery widths="210px" heights="210px" mode="nolines"> | ||
GGXXACPR_ABA_6H-1-Moroha-Hitbox.png | |||
GGXXACPR_ABA_6H-2-Moroha-Hitbox.png | |||
</gallery> | </gallery> | ||
</tabber> | </tabber> | ||
| Line 1,653: | Line 1,416: | ||
<div class="attack-info"> | <div class="attack-info"> | ||
{| class="wikitable attack-data" | {| class="wikitable attack-data" | ||
{{CargoHeader-GGACR | {{CargoHeader-GGACR}} | ||
|- | |- | ||
{{#cargo_query:tables=MoveData_GGACR | {{#cargo_query:tables=MoveData_GGACR | ||
|fields=damage,guard,startup,active,recovery,onBlock,invuln,level | |fields=damage,guard,startup,active,recovery,onBlock,invuln,level | ||
|where=chara=" | |where=chara="A.B.A" and input="6H[m]" | ||
|format=template|template=CargoBody-GGACR|named args=yes|order by=_ID | |format=template|template=CargoBody-GGACR|named args=yes|order by=_ID | ||
|delimiter=\n{{!}}-\n | |||
}} | }} | ||
|} | |||
==== ==== | |||
Has exceptional range, two hits, hits like a truck. Mostly sees use against people trying to low profile {{clr|3|f.S}} or {{clr|4|5H}} from far away. Landing it from max range won't combo into much and it has a horrid amount of whiff recovery, but will convert on an air hit into something like Butt/Engorgement. | |||
[[GGACR/A.B.A/Frame_Data#Normal_Mode|Gatling Options]]: {{clr|1|6P}}, {{clr|4|5H}} | |||
</div> | |||
</div> | |||
===<big>{{clr|5|5D}}</big>=== | |||
<div class="attack-container"> | |||
<div class="attack-gallery"> | |||
<tabber> | |||
Images = | |||
<gallery widths="210px" heights="210px" mode="nolines"> | |||
GGAC_ABA_5D.png|''Nothing Out of The Ordinary'' | |||
</gallery> | |||
|-| | |||
Hitboxes = | |||
<gallery widths="210px" heights="210px" mode="nolines"> | |||
GGXXACPR_ABA_5D-Hitbox.png | |||
</gallery> | |||
</tabber> | |||
</div> | |||
<div class="attack-info"> | |||
{| class="wikitable attack-data" | |||
{{CargoHeader-GGACR}} | |||
|- | |- | ||
{{#cargo_query:tables=MoveData_GGACR | {{#cargo_query:tables=MoveData_GGACR | ||
|fields=damage,guard,startup,active,recovery,onBlock,invuln,level | |fields=damage,guard,startup,active,recovery,onBlock,invuln,level | ||
|where=chara=" | |where=chara="A.B.A" and input="5D[m]" | ||
|format=template|template=CargoBody-GGACR|named args=yes|order by=_ID | |format=template|template=CargoBody-GGACR|named args=yes|order by=_ID | ||
|delimiter=\n{{!}}-\n | |||
}} | }} | ||
|} | |} | ||
==== ==== | ==== ==== | ||
Moroha version is one frame faster and leads to Impossible Dust combos. Sometimes throwing out a slow overhead works. | |||
</div> | |||
</div> | |||
===<big>{{clr|1|2P}}</big>=== | |||
</div> | |||
</div> | |||
===<big> | |||
<div class="attack-container"> | <div class="attack-container"> | ||
<div class="attack-gallery"> | <div class="attack-gallery"> | ||
| Line 1,712: | Line 1,467: | ||
Images = | Images = | ||
<gallery widths="210px" heights="210px" mode="nolines"> | <gallery widths="210px" heights="210px" mode="nolines"> | ||
GGAC_ABA_2P.png|Look, Honey! A real jab! | |||
</gallery> | </gallery> | ||
|-| | |-| | ||
Hitboxes = | Hitboxes = | ||
<gallery widths="210px" heights="210px" mode="nolines"> | <gallery widths="210px" heights="210px" mode="nolines"> | ||
GGXXACPR_ABA_2P-Hitbox.png | |||
</gallery> | </gallery> | ||
</tabber> | </tabber> | ||
</div> | </div> | ||
<div class="attack-info"> | <div class="attack-info"> | ||
{| class="wikitable attack-data" | {| class="wikitable attack-data" | ||
{{CargoHeader-GGACR | {{CargoHeader-GGACR}} | ||
|- | |- | ||
{{#cargo_query:tables=MoveData_GGACR | {{#cargo_query:tables=MoveData_GGACR | ||
|fields= | |fields=damage,guard,startup,active,recovery,onBlock,invuln,level | ||
|where=chara=" | |where=chara="A.B.A" and input="2P[m]" | ||
|format=template|template= | |format=template|template=CargoBody-GGACR|named args=yes|order by=_ID | ||
|delimiter=\n{{!}}-\n | |delimiter=\n{{!}}-\n | ||
}} | }} | ||
| | |} | ||
==== ==== | |||
{{ | When you've got a need for speed, but with more range than {{clr|1|5P}}. Standard. | ||
| | *Initial prorate 80% | ||
| | |||
}} | [[GGACR/A.B.A/Frame_Data#Moroha_Mode|Gatling Options]]: {{clr|1|5P}}, {{clr|1|2P}}, {{clr|1|6P}}, {{clr|2|5K}}, {{clr|2|2K}}, {{clr|3|c.S}}, {{clr|3|f.S}}, {{clr|3|2S}}, {{clr|4|5H}}, {{clr|4|6H}}, {{clr|5|5D}}, {{clr|5|2D}} | ||
|} | </div> | ||
==== ==== | </div> | ||
Has two frames of invincible startup, and that's about the only thing this move has going for it. You can end air combos with it if it'll kill, but otherwise save your tension for better things. | ===<big>{{clr|2|2K}}</big>=== | ||
<div class="attack-container"> | |||
*Floats opponent on hit (untechable for 34F) | <div class="attack-gallery"> | ||
*Can hit up to a maximum of 4 times | <tabber> | ||
</div> | Images = | ||
</div> | <gallery widths="210px" heights="210px" mode="nolines"> | ||
GGAC_ABA_2K.png|Everywoman's low poke | |||
===<big>Altercation</big> (Henshitsu)=== | </gallery> | ||
<span class="input-badge">'''in Moroha Mode: {{clr|3|6321463214S}}'''</span> | |-| | ||
<div class="attack-container"> | Hitboxes = | ||
<div class="attack-gallery"> | <gallery widths="210px" heights="210px" mode="nolines"> | ||
<tabber> | GGXXACPR_ABA_2K-Hitbox.png | ||
Images = | </gallery> | ||
<gallery widths="210px" heights="210px" mode="nolines"> | </tabber> | ||
GGAC_ABA_henshitsu.png|"Time to send you to Hell" | </div> | ||
</gallery> | <div class="attack-info"> | ||
{| class="wikitable attack-data" | |||
{{CargoHeader-GGACR}} | |||
|- | |||
{{#cargo_query:tables=MoveData_GGACR | |||
|fields=damage,guard,startup,active,recovery,onBlock,invuln,level | |||
|where=chara="A.B.A" and input="2K[m]" | |||
|format=template|template=CargoBody-GGACR|named args=yes|order by=_ID | |||
|delimiter=\n{{!}}-\n | |||
}} | |||
|} | |||
==== ==== | |||
A low poke with alright range. Leads to {{clr|5|2D}} > Keygrab on hit. | |||
One of your only low attacks in Moroha, gets a slight damage boost; use it to start midscreen combos. | |||
*Initial prorate 70% | |||
[[GGACR/A.B.A/Frame_Data#Moroha_Mode|Gatling Options]]: {{clr|1|6P}}, {{clr|3|c.S}}, {{clr|3|f.S}}, {{clr|3|2S}}, {{clr|4|6H}}, {{clr|5|5D}}, {{clr|5|2D}} | |||
</div> | |||
</div> | |||
===<big>{{clr|3|2S}}</big>=== | |||
<div class="attack-container"> | |||
<div class="attack-gallery"> | |||
<tabber> | |||
Images = | |||
<gallery widths="210px" heights="210px" mode="nolines"> | |||
GGAC_ABA_2S_M.png|Actually rivaled by the Normal Mode version | |||
</gallery> | |||
|-| | |||
Hitboxes = | |||
<gallery widths="210px" heights="210px" mode="nolines"> | |||
GGXXACPR_ABA_2S-Moroha-Hitbox.png | |||
</gallery> | |||
</tabber> | |||
</div> | |||
<div class="attack-info"> | |||
{| class="wikitable attack-data" | |||
{{CargoHeader-GGACR}} | |||
|- | |||
{{#cargo_query:tables=MoveData_GGACR | |||
|fields=damage,guard,startup,active,recovery,onBlock,invuln,level | |||
|where=chara="A.B.A" and input="2S[m]" | |||
|format=template|template=CargoBody-GGACR|named args=yes|order by=_ID | |||
|delimiter=\n{{!}}-\n | |||
}} | |||
|} | |||
==== ==== | |||
Moroha is 50% slower than Normal Mode, but it has '''big''' range and will probably eat most jump ins that are poorly spaced. On Counter Hit, you get all day to confirm into whatever. A good option. | |||
*Floats opponent, fully untechable on CH. | |||
*Untechable for 23F | |||
[[GGACR/A.B.A/Frame_Data#Moroha_Mode|Gatling Options]]: {{clr|5|5D}}, {{clr|5|2D}} | |||
</div> | |||
</div> | |||
===<big>{{clr|4|2H}}</big>=== | |||
<div class="attack-container"> | |||
<div class="attack-gallery"> | |||
<tabber> | |||
Images = | |||
<gallery widths="210px" heights="210px" mode="nolines"> | |||
GGAC_ABA_2H_M.png|Ruins people who press buttons | |||
</gallery> | |||
|-| | |||
Hitboxes = | |||
<gallery widths="210px" heights="210px" mode="nolines"> | |||
GGXXACPR_ABA_2H-1-Moroha-Hitbox.png | |||
GGXXACPR_ABA_2H-2-Moroha-Hitbox.png | |||
GGXXACPR_ABA_2H-3-Moroha-Hitbox.png | |||
</gallery> | |||
</tabber> | |||
</div> | |||
<div class="attack-info"> | |||
{| class="wikitable attack-data" | |||
{{CargoHeader-GGACR}} | |||
|- | |||
{{#cargo_query:tables=MoveData_GGACR | |||
|fields=damage,guard,startup,active,recovery,onBlock,invuln,level | |||
|where=chara="A.B.A" and input="2H[m]" | |||
|format=template|template=CargoBody-GGACR|named args=yes|order by=_ID | |||
|delimiter=\n{{!}}-\n | |||
}} | |||
|} | |||
==== ==== | |||
One of the most oppressive normals in the game. As ABA is slightly airborne before going active, she is throw invulnerable, making for a good meaty. Guard Bars get ruined, it launches on hit, vacuums, is +2 on block, and has an FRC point just as the axe touches the ground for the 2nd hit, making it sickeningly good for applying pressure or baits. Awesome. | |||
*1st hit forces opponent into crouching state on ground hit | |||
*2nd hit groundbounces opponent (untechable for 35F) | |||
[[GGACR/A.B.A/Frame_Data#Moroha_Mode|Gatling Options]]: {{clr|3|2S}} | |||
'''Supplemental Frame Data:''' | |||
FRC timing 20~22F | |||
</div> | |||
</div> | |||
===<big>{{clr|5|2D}}</big>=== | |||
<div class="attack-container"> | |||
<div class="attack-gallery"> | |||
<tabber> | |||
Images = | |||
<gallery widths="210px" heights="210px" mode="nolines"> | |||
GGAC_ABA_2D_M.png|ABA asks Paracelsus to die for her. He's not really keen on that. | |||
</gallery> | |||
|-| | |||
Hitboxes = | |||
<gallery widths="210px" heights="210px" mode="nolines"> | |||
GGXXACPR_ABA_2D-Moroha-Hitbox.png | |||
</gallery> | |||
</tabber> | |||
</div> | |||
<div class="attack-info"> | |||
{| class="wikitable attack-data" | |||
{{CargoHeader-GGACR}} | |||
|- | |||
{{#cargo_query:tables=MoveData_GGACR | |||
|fields=damage,guard,startup,active,recovery,onBlock,invuln,level | |||
|where=chara="A.B.A" and input="2D[m]" | |||
|format=template|template=CargoBody-GGACR|named args=yes|order by=_ID | |||
|delimiter=\n{{!}}-\n | |||
}} | |||
|} | |||
==== ==== | |||
Meanwhile, in Morohaville, {{clr|5|2D}}'s range grows from standard to absurd. Near the corner, you can confirm into Rekka loops. At max range, you can use it to bait reversals, and include an OS by staggering Rekkas. It will convert on hit, but you'll be safe on whiff as long as you space it properly. Pretty good. | |||
</div> | |||
</div> | |||
===<big>{{clr|1|j.P}}</big>=== | |||
<div class="attack-container"> | |||
<div class="attack-gallery"> | |||
<tabber> | |||
Images = | |||
<gallery widths="210px" heights="210px" mode="nolines"> | |||
GGAC_ABA_jP.png|Kind of a joke, but it's not very funny when it works. | |||
</gallery> | |||
|-| | |||
Hitboxes = | |||
<gallery widths="210px" heights="210px" mode="nolines"> | |||
GGXXACPR_ABA_jP-Hitbox.png | |||
</gallery> | |||
</tabber> | |||
</div> | |||
<div class="attack-info"> | |||
{| class="wikitable attack-data" | |||
|- | |||
{{CargoHeader-GGACR}} | |||
|- | |||
{{#cargo_query:tables=MoveData_GGACR | |||
|fields=damage,guard,startup,active,recovery,onBlock,invuln,level | |||
|where=chara="A.B.A" and input="j.P[m]" | |||
|format=template|template=CargoBody-GGACR|named args=yes|order by=_ID | |||
|delimiter=\n{{!}}-\n | |||
}} | |||
|} | |||
==== ==== | |||
Goku Moroha version is one frame faster, tying it with Order Sol and Justice for the fastest air jabs. Its range and hitbox doesn't rival those two, however. | |||
[[GGACR/A.B.A/Frame_Data#Moroha_Mode|Gatling Options]]: {{clr|1|j.P}}, {{clr|2|j.K}}, {{clr|3|j.S}}, {{clr|4|j.H}}, {{clr|5|j.D}} | |||
</div> | |||
</div> | |||
===<big>{{clr|2|j.K}}</big>=== | |||
<div class="attack-container"> | |||
<div class="attack-gallery"> | |||
<tabber> | |||
Images = | |||
<gallery widths="210px" heights="210px" mode="nolines"> | |||
GGAC_ABA_jK.png|A rising air-to-air, and not much else by itself. | |||
</gallery> | |||
|-| | |||
Hitboxes = | |||
<gallery widths="210px" heights="210px" mode="nolines"> | |||
GGXXACPR_ABA_jK-Hitbox.png | |||
</gallery> | |||
</tabber> | |||
</div> | |||
<div class="attack-info"> | |||
{| class="wikitable attack-data" | |||
|- | |||
{{CargoHeader-GGACR}} | |||
|- | |||
{{#cargo_query:tables=MoveData_GGACR | |||
|fields=damage,guard,startup,active,recovery,onBlock,invuln,level | |||
|where=chara="A.B.A" and input="j.K[m]" | |||
|format=template|template=CargoBody-GGACR|named args=yes|order by=_ID | |||
|delimiter=\n{{!}}-\n | |||
}} | |||
|} | |||
==== ==== | |||
In Moroha, not much better by itself even with a frame faster startup and 4 more points of damage, but works as a fuzzy after {{clr|3|j.S}}, leading to some disgusting results amongst {{clr|3|j.S}}'s other options. | |||
*Floats opponent on hit (untechable on ground hit for 28F) | |||
[[GGACR/A.B.A/Frame_Data#Moroha_Mode|Gatling Options]]: {{clr|1|j.P}}, {{clr|3|j.S}}, {{clr|5|j.D}} | |||
</div> | |||
</div> | |||
===<big>{{clr|3|j.S}}</big>=== | |||
<div class="attack-container"> | |||
<div class="attack-gallery"> | |||
<tabber> | |||
Images = | |||
<gallery widths="210px" heights="210px" mode="nolines"> | |||
GGAC_ABA_jS_M.png|Your best friend on drugs | |||
</gallery> | |||
|-| | |||
Hitboxes = | |||
<gallery widths="210px" heights="210px" mode="nolines"> | |||
GGXXACPR_ABA_jS-1-Moroha-Hitbox.png | |||
GGXXACPR_ABA_jS-2-Moroha-Hitbox.png | |||
</gallery> | |||
</tabber> | |||
</div> | |||
<div class="attack-info"> | |||
{| class="wikitable attack-data" | |||
{{CargoHeader-GGACR}} | |||
|- | |||
{{#cargo_query:tables=MoveData_GGACR | |||
|fields=damage,guard,startup,active,recovery,onBlock,invuln,level | |||
|where=chara="A.B.A" and input="j.S[m]" | |||
|format=template|template=CargoBody-GGACR|named args=yes|order by=_ID | |||
|delimiter=\n{{!}}-\n | |||
}} | |||
|} | |||
==== ==== | |||
Take everything great about Normal Mode {{clr|3|j.S}}. Double it. Give it a bunch of fuzzy guards. Make those fuzzies confirmable off of a safe jump. You now have Moroha {{clr|3|j.S}}. | |||
Your standard setup for fuzzies is [{{clr|3|j.S}} > d{{clr|3|j.S}} > falling {{clr|4|j.H}} > land] and combo. These lead to BIG damage, upwards of 300+ depending on guard bar and available tension. Since it gatlings into {{clr|1|j.P}} or {{clr|2|j.K}}, you can Fuzzy Guard by doing [{{clr|3|j.S}} > {{clr|2|j.K}}] or [{{clr|3|j.S}} > {{clr|1|j.P}}]. The latter isn't as useful since the hitstun on {{clr|1|j.P}} is still so tiny, but the possibilities from {{clr|3|j.S}} > {{clr|2|j.K}} are really gross. Knock an opponent down in the corner do [running {{clr|3|j.S}} > {{clr|2|j.K}} > d{{clr|3|j.S}} > {{clr|4|j.H}}]. Done properly, this is airtight, and if the opponent blocks low at any point, they're getting fuzzied. Other options include land > throw after the fuzzy, or do more {{clr|1|j.P}}s. | |||
Another nice bonus is that {{clr|2|j.K}} CH launches opponents, meaning this setup is especially potent when their guard bar is flashing. Better still, you can autopilot the {{clr|3|j.S}} > {{clr|2|j.K}} > d{{clr|3|j.S}} > {{clr|4|j.H}} variation since it combos! Pretty sick. | |||
[[GGACR/A.B.A/Frame_Data#Moroha_Mode|Gatling Options]]: {{clr|1|j.P}}, {{clr|2|j.K}}, {{clr|4|j.H}}, {{clr|5|j.D}} | |||
</div> | |||
</div> | |||
===<big>{{clr|4|j.H}}</big>=== | |||
<div class="attack-container"> | |||
<div class="attack-gallery"> | |||
<tabber> | |||
Images = | |||
<gallery widths="210px" heights="210px" mode="nolines"> | |||
GGAC_ABA_jH_M.png|Seriously | |||
</gallery> | |||
|-| | |||
Hitboxes = | |||
<gallery widths="210px" heights="210px" mode="nolines"> | |||
GGXXACPR_ABA_jH-1-Moroha-Hitbox.png | |||
GGXXACPR_ABA_jH-2-Moroha-Hitbox.png | |||
</gallery> | |||
</tabber> | |||
</div> | |||
<div class="attack-info"> | |||
{| class="wikitable attack-data" | |||
{{CargoHeader-GGACR}} | |||
|- | |||
{{#cargo_query:tables=MoveData_GGACR | |||
|fields=damage,guard,startup,active,recovery,onBlock,invuln,level | |||
|where=chara="A.B.A" and input="j.H[m]" | |||
|format=template|template=CargoBody-GGACR|named args=yes|order by=_ID | |||
|delimiter=\n{{!}}-\n | |||
}} | |||
|} | |||
==== ==== | |||
Huge hitbox, great for cross-ups, and on CH it ground slides into ludicrous damage despite its prorate. The built-in OS with airthrow doesn't do your opponents any favors either. People hate this move. | |||
[[GGACR/A.B.A/Frame_Data#Moroha_Mode|Gatling Options]]: {{clr|5|j.D}} | |||
</div> | |||
</div> | |||
===<big>{{clr|5|j.D}}</big>=== | |||
<div class="attack-container"> | |||
<div class="attack-gallery"> | |||
<tabber> | |||
Images = | |||
<gallery widths="210px" heights="210px" mode="nolines"> | |||
GGAC_ABA_jD.png|Lay All Your Love on Me | |||
</gallery> | |||
|-| | |||
Hitboxes = | |||
<gallery widths="210px" heights="210px" mode="nolines"> | |||
GGXXACPR_ABA_jD-Hitbox.png | |||
</gallery> | |||
</tabber> | |||
</div> | |||
<div class="attack-info"> | |||
{| class="wikitable attack-data" | |||
{{CargoHeader-GGACR}} | |||
|- | |||
{{#cargo_query:tables=MoveData_GGACR | |||
|fields=damage,guard,startup,active,recovery,onBlock,invuln,level | |||
|where=chara="A.B.A" and input="j.D[m]" | |||
|format=template|template=CargoBody-GGACR|named args=yes|order by=_ID | |||
|delimiter=\n{{!}}-\n | |||
}} | |||
|} | |||
==== ==== | |||
Moroha version is vital ingredient in A.B.A.’s Orb loop BnB. This is faster, has longer range, and better hitstun than Normal Mode. However, it still doesn't have much use in neutral compared to A.B.A.'s other great aerials. This also wallbounces on counterhit, and has enough hitstun to combo into Keygrabs and dashing {{clr|3|j.S}}s for better conversions.</div> | |||
</div> | |||
==Universal Mechanics== | |||
===<big>Ground Throw</big>=== | |||
<div class="attack-container"> | |||
<div class="attack-gallery"> | |||
<tabber> | |||
Images = | |||
<gallery widths="210px" heights="210px" mode="nolines"> | |||
GGAC_ABA_throw.png|Head over Heels | |||
</gallery> | |||
|-| | |||
Hitboxes = | |||
<gallery widths="210px" heights="210px" mode="nolines"> | |||
</gallery> | |||
</tabber> | |||
</div> | |||
<div class="attack-info"> | |||
{| class="wikitable attack-data" | |||
{{CargoHeader-GGACR}} | |||
|- | |||
{{#cargo_query:tables=MoveData_GGACR | |||
|fields=damage,guard,startup,active,recovery,onBlock,invuln,level | |||
|where=chara="A.B.A" and input="Ground Throw" | |||
|format=template|template=CargoBody-GGACR|named args=yes|order by=_ID | |||
}} | |||
|} | |||
==== ==== | |||
Moroha and Goku Moroha version slams into a ground bounce on hit. Standard range, but easily leads into a lot of damage, especially with a raised Guard Bar. Tick throw with any fast normals ({{clr|1|5P}}, {{clr|1|2P}}, {{clr|2|2K}}) or after vacuuming them in with {{clr|4|5H}}. | |||
*Causes ground bounce and knockdown in Moroha/Goku Moroha Mode | |||
*Forced prorate 50% | |||
</div> | |||
</div> | |||
===<big>Air Throw</big>=== | |||
<div class="attack-container"> | |||
<div class="attack-gallery"> | |||
<tabber> | |||
Images = | |||
<gallery widths="210px" heights="210px" mode="nolines"> | |||
GGAC_ABA_airThrow.png|Knocks down; fairly typical | |||
</gallery> | |||
|-| | |||
Hitboxes = | |||
<gallery widths="210px" heights="210px" mode="nolines"> | |||
</gallery> | |||
</tabber> | |||
</div> | |||
<div class="attack-info"> | |||
{| class="wikitable attack-data" | |||
{{CargoHeader-GGACR}} | |||
|- | |||
{{#cargo_query:tables=MoveData_GGACR | |||
|fields=damage,guard,startup,active,recovery,onBlock,invuln,level | |||
|where=chara="A.B.A" and input="Air Throw" | |||
|format=template|template=CargoBody-GGACR|named args=yes|order by=_ID | |||
}} | |||
|} | |||
==== ==== | |||
Pretty average, but knockdowns are always good. | |||
*Knocks down opponent on hit | |||
*Forced prorate 50% | |||
</div> | |||
</div> | |||
===<big>[[GGACR/Defense#Dead Angle Attack (DAA)|Dead Angle Attack]]</big>=== | |||
<div class="attack-container"> | |||
<div class="attack-gallery"> | |||
<tabber> | |||
Images = | |||
<gallery widths="210px" heights="210px" mode="nolines"> | |||
GGAC_ABA_5H.png|Your favorite lifeline | |||
GGAC_ABA_fS_M.png|More of a "you'd better stay in the corner" tactic. | |||
</gallery> | |||
|-| | |||
Hitboxes = | |||
<gallery widths="210px" heights="210px" mode="nolines"> | |||
</gallery> | |||
</tabber> | |||
</div> | |||
<div class="attack-info"> | |||
{| class="wikitable attack-data" | |||
{{CargoHeader-GGACR}} | |||
|- | |||
{{#cargo_query:tables=MoveData_GGACR | |||
|fields=input=name,damage,guard,startup,active,recovery,onBlock,invuln,level | |||
|where=chara="A.B.A" and input="DAA[m]" | |||
|format=template|template=CargoBody-GGACR|named args=yes|order by=_ID | |||
|delimiter=\n{{!}}-\n | |||
}} | |||
|} | |||
==== ==== | |||
The Moroha and Goku Moroha versions are faster than Normal Mode and causes wallbounce on hit. Useful if you're low on Moroha meter and under pressure so you can get them off of you, or to keep them in the corner, but don't go and get it baited. You can't really combo out of it on regular hit, but you can go for a tech trap afterwards. On counterhit, you can easily combo out of it as long as your back isn't to the corner for a nice, albeit heavily prorated, combo. | |||
</div> | |||
</div> | |||
==Specials== | |||
Moves are listed first by their entry in the in-game english move list, then by their Japanese name. | |||
Values in [ ] represent when A.B.A. is in Goku Moroha Mode | |||
===<big>Deletion</big> (Masshou)=== | |||
<span class="input-badge">'''{{clr|3|236S}}'''</span> | |||
<div class="attack-container"> | |||
<div class="attack-gallery"> | |||
<tabber> | |||
Images = | |||
<gallery widths="210px" heights="210px" mode="nolines"> | |||
GGAC_ABA_masshou.png|The Gateway Rekka; get some extra glowing stuff on there in your other mode | |||
</gallery> | |||
|-| | |||
Hitboxes = | |||
<gallery widths="210px" heights="210px" mode="nolines"> | |||
GGXXACPR_ABA_Deletion-Hitbox.png | |||
</gallery> | |||
</tabber> | |||
</div> | |||
<div class="attack-info"> | |||
{| class="wikitable attack-data" | |||
{{CargoHeader-GGACR}} | |||
|- | |||
{{#cargo_query:tables=MoveData_GGACR | |||
|fields=damage,guard,startup,active,recovery,onBlock,invuln,level | |||
|where=chara="A.B.A" and input="236S[m]" | |||
|format=template|template=CargoBody-GGACR|named args=yes|order by=_ID | |||
|delimiter=\n{{!}}-\n | |||
}} | |||
|} | |||
==== ==== | |||
Sometimes works as a poke, but mediocre speed. Hitbox is one of the better ones in NM. On hit, cancel into 2nd Rekka > 3rd Rekka > FRC > (other combo filler >) Keygrab. It's unsafe, but its long range and decent pushback can make it safe-ish if used from afar. | |||
Goku Moroha version gains an FRC and faster startup in exchange for doing less damage. Otherwise the same. | |||
;Supplemental Frame Data: | |||
*Can cancel into followup from 21F onwards on hit or block. | |||
</div> | |||
</div> | |||
===<big>Ruin</big> (Fukumetsu)=== | |||
<span class="input-badge">'''Deletion -> {{clr|3|46S}}'''</span> | |||
<div class="attack-container"> | |||
<div class="attack-gallery"> | |||
<tabber> | |||
Images = | |||
<gallery widths="210px" heights="210px" mode="nolines"> | |||
GGAC_ABA_fukumetsu.png|Not any safer than the first one | |||
</gallery> | |||
|-| | |||
Hitboxes = | |||
<gallery widths="210px" heights="210px" mode="nolines"> | |||
GGXXACPR_ABA_Ruin-Hitbox.png | |||
</gallery> | |||
</tabber> | |||
</div> | |||
<div class="attack-info"> | |||
{| class="wikitable attack-data" | |||
{{CargoHeader-GGACR}} | |||
|- | |||
{{#cargo_query:tables=MoveData_GGACR | |||
|fields=damage,guard,startup,active,recovery,onBlock,invuln,level | |||
|where=chara="A.B.A" and input="236S > 46S[m]" | |||
|format=template|template=CargoBody-GGACR|named args=yes|order by=_ID | |||
}} | |||
|} | |||
==== ==== | |||
Possible to frame trap after a blocked first Rekka, but the gap is bigger than one frame, so exercise caution. Staggers on hit, but it’s pretty wimpy in Normal Mode and requires an RC to take advantage of with anything other than 3rd Rekka unless they’re asleep, and spending 50% on something they can probably still shake out of is a big gamble. | |||
;Supplemental Frame Data: | |||
*forces crouching state on ground hit and staggers (Max 30F) | |||
*Untechable for 35F on air hit | |||
*Can cancel into followup from 10F onwards | |||
</div> | |||
</div> | |||
===<big>Condemnation</big> (Dangoku)=== | |||
<span class="input-badge">'''Ruin -> {{clr|3|63214S}}'''</span> | |||
<div class="attack-container"> | |||
<div class="attack-gallery"> | |||
<tabber> | |||
Images = | |||
<gallery widths="210px" heights="210px" mode="nolines"> | |||
GGAC_ABA_dangoku.png|Stop flirting with all the crazies! | |||
</gallery> | |||
|-| | |||
Hitboxes = | |||
<gallery widths="210px" heights="210px" mode="nolines"> | |||
GGXXACPR_ABA_Condemnation-Hitbox.png | |||
</gallery> | |||
</tabber> | |||
</div> | |||
<div class="attack-info"> | |||
{| class="wikitable attack-data" | |||
{{CargoHeader-GGACR}} | |||
|- | |||
{{#cargo_query:tables=MoveData_GGACR | |||
|fields=damage,guard,startup,active,recovery,onBlock,invuln,level | |||
|where=chara="A.B.A" and input="236S > 46S > 63214S[m]" | |||
|format=template|template=CargoBody-GGACR|named args=yes|order by=_ID | |||
}} | |||
|} | |||
==== ==== | |||
Has a gap from 2nd to 3rd rekka which can be reversal'd through and is horribly unsafe, But on the plus side, this has an FRC just as the key touches the ground, making it safe and able to followup on hit, where it groundslides. | |||
Your standard Normal to Moroha Mode BnB is [xx > Rekkas > FRC > dash > {{clr|4|5H}} > Keygrab]. In the corner, you can substitute {{clr|4|5H}} with {{clr|4|6H}}. The groundslide is long enough that you may be able to combo off of it meterless in given situations, particularly in the corner. | |||
Moroha versions gain even more groundslide time, leading to Rekka Loops [Rekka series, max delay the 3rd Rekka] x (2-3). Gives ABA more conversion options, such as out of corner {{clr|5|2D}}. | |||
;Supplemental Frame Data: | |||
*FRC timing 14~15F (Goku Moroha version 14~17F) | |||
*Slides opponent on hit (untechable for 60F, slides for 40F) | |||
*Opponent's Burst is disabled on hit | |||
</div> | |||
</div> | |||
===<big>Bonding</big> (Ketsugou)=== | |||
<span class="input-badge">'''{{clr|4|63214H}} (Air OK)'''</span> | |||
<div class="attack-container"> | |||
<div class="attack-gallery"> | |||
<tabber> | |||
Images = | |||
<gallery widths="210px" heights="210px" mode="nolines"> | |||
GGAC_ABA_ketsugou.png|Show them your Love | |||
</gallery> | |||
|-| | |||
Hitboxes = | |||
<gallery widths="210px" heights="210px" mode="nolines"> | |||
GGXXACPR_ABA_Normal-Bonding-1-Hitbox.png | |||
GGXXACPR_ABA_Normal-Bonding-2-Hitbox.png | |||
</gallery> | |||
</tabber> | |||
</div> | |||
<div class="attack-info"> | |||
{| class="wikitable attack-data" | |||
{{CargoHeader-GGACR|version=yes}} | |||
|- | |||
{{#cargo_query:tables=MoveData_GGACR | |||
|fields=input=name,damage,guard,startup,active,recovery,onBlock,invuln,level | |||
|where=chara="A.B.A" and (input="63214H" or input="j.63214H") | |||
|format=template|template=CargoBodyWithName-GGACR|named args=yes|order by=_ID | |||
|delimiter=\n{{!}}-\n | |||
}} | |||
|} | |||
==== ==== | |||
Keygrab. The most important move in your arsenal. | |||
Your top priority is to land or combo into this in Normal Mode, as it'll knock down, do some damage, and transform ABA into Moroha Mode. | |||
This move acts as both a command throw and a strike. If from anywhere from frames 6-9, the opponent is in a throwable state and the move is in range, it will grab them. Afterwards, it will turn into a strike for the remainder of its active frames, meaning that the move can also be combo'd into. If the strike is blocked, however, it becomes very unsafe. | |||
When used in Moroha mode, Keygrab will instead heal ABA for 80% of the self inflicted damage she sustained. You'll want to go into this when comboing to end it, but specifically when your Moroha meter is close to empty: generally better to play it safe than sorry. | |||
If the move initially lands as a throw, ABA can follow up with another keygrab, meaning that going into a raw throw keygrab will let you OTG another and go right back into Moroha mode if you were in it to start with. However, this double pickup doesn't work if the first lands as a strike, but ABA can instead do some combos that lead into Bloodpack FRC > re-Keygrab. | |||
*Listed Recovery is for when the move is blocked. On hit the recovery is 38F. | |||
*Listed Startup and Active frames is for the strike portion. | |||
*The throw part has Damage 10, Startup 9F, active 1F. | |||
*Changes ABA's mode on hit (Normal changes to Moroha, Moroha and Goku Moroha change back to Normal). | |||
*Knocks down opponent on hit. | |||
*ABA in CH state during move. | |||
*Opponent's burst is disabled on hit. | |||
*Can only be RC'd on block. | |||
</div> | |||
</div> | |||
===<big>Engorgement</big> (Houshoku)=== | |||
<span class="input-badge">'''{{clr|4|421H}}'''</span> | |||
<div class="attack-container"> | |||
<div class="attack-gallery"> | |||
<tabber> | |||
Images = | |||
<gallery widths="210px" heights="210px" mode="nolines"> | |||
GGAC_ABA_houshoku.png|<big>'''THE NEED FOR BLOOD DOES NOT STOP-KYEEAAAAAAA'''</big> | |||
</gallery> | |||
|-| | |||
Hitboxes = | |||
<gallery widths="210px" heights="210px" mode="nolines"> | |||
GGXXACPR_ABA_Engorgement-Hitbox.png | |||
</gallery> | |||
</tabber> | |||
</div> | |||
<div class="attack-info"> | |||
{| class="wikitable attack-data" | |||
{{CargoHeader-GGACR}} | |||
|- | |||
{{#cargo_query:tables=MoveData_GGACR | |||
|fields=damage,guard,startup,active,recovery,onBlock,invuln,level | |||
|where=chara="A.B.A" and input="421H" | |||
|format=template|template=CargoBody-GGACR|named args=yes|order by=_ID | |||
}} | |||
|} | |||
==== ==== | |||
'''BUTT'''. Works well as a combo ender or in Butt loops. Its long active time can make it safe when it makes contact late, but otherwise it doesn't see much use in neutral. On block, you can RC to double jump or airdash. Can be jump cancelled in Goku Moroha mode. | |||
*Floats opponent on hit (untechable for 34F) | |||
*Auto jump installs | |||
;Supplemental Frame Data: | |||
*ABA is airborne from 12~31F [11~30F]; | |||
*ABA is in CH state from 1~38F [1~35F]. | |||
</div> | |||
</div> | |||
===<big>Judgment</big> (Danzai)=== | |||
<span class="input-badge">'''{{clr|4|623H}}'''</span> | |||
<div class="attack-container"> | |||
<div class="attack-gallery"> | |||
<tabber> | |||
Images = | |||
<gallery widths="210px" heights="210px" mode="nolines"> | |||
GGAC_ABA_danzai.png|The Judge, Jury, and Executioner | |||
</gallery> | |||
|-| | |||
Hitboxes = | |||
<gallery widths="210px" heights="210px" mode="nolines"> | |||
GGXXACPR_ABA_Judgement-1-Hitbox.png | |||
GGXXACPR_ABA_Judgement-2-Hitbox.png | |||
GGXXACPR_ABA_Judgement-3-Hitbox.png | |||
</gallery> | |||
</tabber> | |||
</div> | |||
<div class="attack-info"> | |||
{| class="wikitable attack-data" | |||
{{CargoHeader-GGACR}} | |||
|- | |||
{{#cargo_query:tables=MoveData_GGACR | |||
|fields=damage,guard,startup,active,recovery,onBlock,invuln,level | |||
|where=chara="A.B.A" and input="623H" | |||
|format=template|template=CargoBody-GGACR|named args=yes|order by=_ID | |||
}} | |||
|} | |||
==== ==== | |||
Danzai. One of the best specials in the game. | |||
Throw invincible on the upswing, super armor, big hitbox, launches on hit, and huge pushback on block to help make it pseudo-safe since you’re moved back pretty far. | |||
Danzai will blow up pokes or telegraphed poke out attempts, it can be used as a reversal or to beat throws, it can be used as anti-air, it can be used to eat blue bursts... What’s not to like? Just be sure to keep the following in mind: it only absorbs one hit, so multi-hit or fast attacks will win, it loses to Supers, characters with long range attacks can punish even after blocking the second hit, and characters who don’t can block the first hit and backdash the second. Some characters also have char-specific ways to deal with Danzai as well. Danzai is best used as a defensive option, but can work as an offensive one if used very sparingly. Just note that the super armor won't keep you alive if you're close to death already. | |||
*1st hit floats opponent on hit (untechable for 30F) | |||
*2nd hit groundbounces opponent (untechable for 50F) | |||
*2nd hit forced prorate 70% | |||
*2nd hit disables opponent's burst on hit | |||
;Supplemental Frame Data: | |||
*Throw invincible 1~20F [1~13F]; | |||
*FRC timing 12~14F; | |||
*Can absorb one non-super hit for half damage from 1~24F [1~16F]. | |||
</div> | |||
</div> | |||
===<big>Displacement</big> (Bunri)=== | |||
<span class="input-badge">'''{{clr|1|63214P}}'''</span> | |||
<div class="attack-container"> | |||
<div class="attack-gallery"> | |||
<tabber> | |||
Images = | |||
<gallery widths="210px" heights="210px" mode="nolines"> | |||
GGAC_ABA_bunri.png|He punched out all my blood! | |||
</gallery> | |||
|-| | |||
Hitboxes = | |||
<gallery widths="210px" heights="210px" mode="nolines"> | |||
</gallery> | |||
</tabber> | |||
</div> | |||
<div class="attack-info"> | |||
{| class="wikitable attack-data" | |||
{{CargoHeader-GGACR}} | |||
|- | |||
{{#cargo_query:tables=MoveData_GGACR | |||
|fields=damage,guard,startup,active,recovery,onBlock,invuln,level | |||
|where=chara="A.B.A" and input="63214P[m]" | |||
|format=template|template=CargoBody-GGACR|named args=yes|order by=_ID | |||
}} | |||
|} | |||
==== ==== | |||
Just as important as normal Bloodpack, if not more. Using it will spend one pack and restore 120% of self-inflicted damage. | |||
*Consumes a blood pack and changes ABA to normal mode | |||
*Restores self damage | |||
*some invincibility at the end | |||
;Supplemental Frame Data: | |||
*Full Invincibility 9F; Strike invincibility 10~13F; | |||
*FRC timing 10~13F; | |||
*restores 1.2x of the self inflicted Moroha damage on 10F. | |||
</div> | |||
</div> | |||
===<big>Blunder</big> (Kashitsu)=== | |||
<span class="input-badge">'''{{clr|2|41236K}}'''</span> or <span class="input-badge">'''Ruin -> {{clr|2|236K}}'''</span> | |||
<div class="attack-container"> | |||
<div class="attack-gallery"> | |||
<tabber> | |||
Images = | |||
<gallery widths="210px" heights="210px" mode="nolines"> | |||
GGAC_ABA_kashitsu.png|[https://youtu.be/0yvFNEWWVIU?t=426 See what you started, ArcSys? Now that naming makes sense.] | |||
</gallery> | |||
|-| | |||
Hitboxes = | |||
<gallery widths="210px" heights="210px" mode="nolines"> | |||
GGXXACPR_ABA_Kashitsu-Hitbox.png | |||
</gallery> | |||
</tabber> | |||
</div> | |||
<div class="attack-info"> | |||
{| class="wikitable attack-data" | |||
{{CargoHeader-GGACR}} | |||
|- | |||
{{#cargo_query:tables=MoveData_GGACR | |||
|fields=damage,guard,startup,active,recovery,onBlock,invuln,level | |||
|where=chara="A.B.A" and input="41236K" | |||
|format=template|template=CargoBody-GGACR|named args=yes|order by=_ID | |||
}} | |||
|} | |||
==== ==== | |||
An unthrowable overhead...which is actually unblockable, as it causes stagger if blocked standing. On actual hit, it'll launch the opponent, higher if it landed CH. | |||
In Moroha mode, Flipkick is best used with 50% to cancel into Goku Moroha activation or to RC it--on hit, this gives you better combo options like Flipkick xx Goku Activation > dash {{clr|3|c.S}} > etc, or Flipkick RC > dash {{clr|3|j.S}} > etc, while on block it guarantees you can capitalize on the stagger. Like its Normal Mode counterpart, it too can be used in place of the 3rd rekka. In Goku Moroha mode, Flipkick can be converted off much easier meterless, turning it into an extremely scary and deadly mixup tool and a surprisingly good combo tool. This move is overall extremely potent, but has the weakness of being blockable in the air without FD, and due to its single active frame, has several ways to beat it, just like all of ABA's moves. | |||
One setup is to do FB Bloodball, and most characters will be forced to eat this move unless they have meter to Dead Angle. | |||
;Supplemental Frame Data: | |||
*Staggers opponent when blocked high (Max 55F) | |||
*Groundbounces opponent on hit (untechable for 50F) | |||
*Untechable for 41F | |||
*Lower body invincible 11~24F; foot invincible 25~30F; Throw invincible 11~30F; | |||
*FRC timing 27~29F. | |||
</div> | |||
</div> | |||
===<big>Eradication</big> (Konzetsu)=== | |||
<span class="input-badge">'''{{clr|3|j.41236S}}'''</span> | |||
<div class="attack-container"> | |||
<div class="attack-gallery"> | |||
<tabber> | |||
Images = | |||
<gallery widths="210px" heights="210px" mode="nolines"> | |||
GGAC_ABA_konzetsu.png|Loops, thy name is KONZETSU | |||
</gallery> | |||
|-| | |||
Hitboxes = | |||
<gallery widths="210px" heights="210px" mode="nolines"> | |||
GGXXACPR_ABA_Konzetsu-1-Hitbox.png | |||
GGXXACPR_ABA_Konzetsu-2-Hitbox.png | |||
</gallery> | |||
</tabber> | |||
</div> | |||
<div class="attack-info"> | |||
{| class="wikitable attack-data" | |||
{{CargoHeader-GGACR}} | |||
|- | |||
{{#cargo_query:tables=MoveData_GGACR | |||
|fields=damage,guard,startup,active,recovery,onBlock,invuln,level | |||
|where=chara="A.B.A" and input="j.41236S" | |||
|format=template|template=CargoBody-GGACR|named args=yes|order by=_ID | |||
}} | |||
|} | |||
==== ==== | |||
An integral part in many of A.B.A.’s combos in Moroha mode, specifically her Orb loops. This move is a projectile, meaning sometimes they’ll linger and still trade when you get hit first. It's possible for both orbs to land when very close, which leads to disgusting damage due to the rear hit dealing 1 point shy of 60 damage. E.G., Butt loop, Butt > RC > Orbs (2hit) > PAIN. Because the rear orb appears 1 frame after the front orb, you will also get the increased untech time of the rear orb, should you hit both. | |||
Has an FRC point just as A.B.A. begins to tuck her outstretched leg back in (right when the Orbs become active). Dash jump at downed opponent > Orbs FRC over their body just before they wakeup > {{clr|2|2K}}, {{clr|5|5D}}, begin pressure, etc. If your Orbs are mistimed or if you land too close, you opponent can wakeup throw, but that can be punished with Orbs FRC > Orbs again for HUGE damage as a CH, or you can simply Orbs FRC > land > jump to bait the throw and CH as well. | |||
;Supplemental Frame Data: | |||
*FRC timing 22~23F [15~18F]; | |||
*Attack is guaranteed to activate after 10F [6F]. | |||
*Untechable for (front part: 26F, back part: 36F) | |||
</div> | |||
</div> | |||
===<big>Suka Motion</big>=== | |||
<span class="input-badge">'''Moroha Gauge reaches 0'''</span> | |||
<div class="attack-container"> | |||
<div class="attack-gallery"> | |||
<tabber> | |||
Images = | |||
<gallery widths="210px" heights="210px" mode="nolines"> | |||
GGAC_ABA_sukaMotion.png|9 out of 10 instant kills start with this | |||
</gallery> | |||
|-| | |||
Hitboxes = | |||
<gallery widths="210px" heights="210px" mode="nolines"> | |||
</gallery> | |||
</tabber> | |||
</div> | |||
<div class="attack-info"> | |||
{| class="wikitable attack-data" | |||
{{CargoHeader-GGACR}} | |||
|- | |||
{{#cargo_query:tables=MoveData_GGACR | |||
|fields=damage,guard,startup,active,recovery,onBlock,invuln,level | |||
|where=chara="A.B.A" and input="Suka Motion" | |||
|format=template|template=CargoBody-GGACR|named args=yes|order by=_ID | |||
}} | |||
|} | |||
==== ==== | |||
Occurs when the Moroha gauge hits 0. | |||
If this happens to you, you're probably about to eat shit, especially if someone knocked you down just before this is about to happen. | |||
Suka Motion will not activate while ABA is in the middle of another move's animation. ABA can continue to perform gatlings and special cancels after the Moroha gauge disappears, as long as she: | |||
# Is in the middle of move with gatling/special cancel options when the gauge fully depletes | |||
# Follows regular Moroha's gatling rules (you will not be able to do gatlings that are only possible in Goku Moroha) | |||
# Does not return to an idle state (this includes landing after a jump; you can jump cancel moves after the gauge runs out, but Suka Motion will activate when you land) | |||
If your Moroha gauge runs out mid-combo, end with a cancel into keygrab or Goku Moroha to save yourself from disaster. | |||
</div> | |||
</div> | |||
==Force Breaks== | |||
===<big>FB Avoidance</big> (Kihi)=== | |||
<span class="input-badge">'''{{clr|5|236D}}'''</span> | |||
<div class="attack-container"> | |||
<div class="attack-gallery"> | |||
<tabber> | |||
Images = | |||
<gallery widths="210px" heights="210px" mode="nolines"> | |||
GGAC_ABA_kihi.png|Is it actually mercury? Good lord. | |||
</gallery> | |||
|-| | |||
Hitboxes = | |||
<gallery widths="210px" heights="210px" mode="nolines"> | |||
</gallery> | |||
</tabber> | |||
</div> | |||
<div class="attack-info"> | |||
{| class="wikitable attack-data" | |||
{{CargoHeader-GGACR}} | |||
|- | |||
{{#cargo_query:tables=MoveData_GGACR | |||
|fields=damage,guard,startup,active,recovery,onBlock,invuln,level | |||
|where=chara="A.B.A" and input="236D[m]" | |||
|format=template|template=CargoBody-GGACR|named args=yes|order by=_ID | |||
}} | |||
|} | |||
==== ==== | |||
Normal mode’s Bloodball makes a comeback in Moroha mode for 25% tension. Hits 6 (!!) times. The FRC point on the NM version is the same here, and with the extra hits, this can lead to some really gross setups like meaty FB Bloodball > dash in Flipkick while they’re guarding the Bloodball for a dirty unblockable. For the ultimate in scumbaggery, you can FB Bloodball > FRC > dash in and throw just before the Bloodball goes active, or dash in Command Keygrab > Keygrab for a complete transform. Leads to some pretty nasty stuff for 25-50% tension. | |||
;Supplemental Frame Data: | |||
*Above knees invincible 7~11F and 20~22F; upper body invincible 12~19F; FRC timing 23~24F; | |||
*Attack is guaranteed to activate after 23F. | |||
</div> | |||
</div> | |||
===<big>FB Judgment</big> (Danzai)=== | |||
<span class="input-badge">'''{{clr|5|623D}}'''</span> | |||
<div class="attack-container"> | |||
<div class="attack-gallery"> | |||
<tabber> | |||
Images = | |||
<gallery widths="210px" heights="210px" mode="nolines"> | |||
GGAC_ABA_danzai.png|CONVICTION: YOUR EXECUTIONER, EXECUTIONER, AND IF NEED BE, YOUR EXECUTIONER | |||
</gallery> | |||
|-| | |||
Hitboxes = | |||
<gallery widths="210px" heights="210px" mode="nolines"> | |||
</gallery> | |||
</tabber> | |||
</div> | |||
<div class="attack-info"> | |||
{| class="wikitable attack-data" | |||
{{CargoHeader-GGACR}} | |||
|- | |||
{{#cargo_query:tables=MoveData_GGACR | |||
|fields=damage,guard,startup,active,recovery,onBlock,invuln,level | |||
|where=chara="A.B.A" and input="623D" | |||
|format=template|template=CargoBody-GGACR|named args=yes|order by=_ID | |||
}} | |||
|} | |||
==== ==== | |||
Danzai spent 25 meter and got Hyper Armor for Christmas, which absorbs an unlimited number of (non-Overdrive) hits and will plow through pretty much anything. It launches higher on hit, and while it may screw up some combos on CH, FB Danzai takes one of the best specials in the game from excellent to obscene. | |||
*2nd hit has 80% Forced Prorate | |||
*1st hit floats opponent on hit (untechable for 30F) | |||
*2nd hit groundbounces opponent on hit (untechable for 70F) | |||
*2nd hit removes OTG status from opponent on hit | |||
;Supplemental Frame Data: | |||
*Throw invincible 1~20F [1~13F]; | |||
*[FRC timing 12~14F]; | |||
*Can absorb non-super attacks for half damage 1~24F [1~16F]. | |||
</div> | |||
</div> | |||
==Overdrive Attacks== | |||
===<big>Evidence: Destruction</big> (Shouko: Inmetsu)=== | |||
<span class="input-badge">'''{{clr|1|j.632146P}}'''</span> | |||
<div class="attack-container"> | |||
<div class="attack-gallery"> | |||
<tabber> | |||
Images = | |||
<gallery widths="210px" heights="210px" mode="nolines"> | |||
GGAC_ABA_ouro.png|Kind of like RTL, except awful. | |||
</gallery> | |||
|-| | |||
Hitboxes = | |||
<gallery widths="210px" heights="210px" mode="nolines"> | |||
GGXXACPR_ABA_Inmentsu-Hitbox.png | |||
</gallery> | |||
</tabber> | |||
</div> | |||
<div class="attack-info"> | |||
{| class="wikitable attack-data" | |||
{{CargoHeader-GGACR}} | |||
|- | |||
{{#cargo_query:tables=MoveData_GGACR | |||
|fields=damage,guard,startup,active,recovery,onBlock,invuln,level | |||
|where=chara="A.B.A" and input="j.632146P[m]" | |||
|format=template|template=CargoBody-GGACR|named args=yes|order by=_ID | |||
|delimiter=\n{{!}}-\n | |||
}} | |||
|} | |||
==== ==== | |||
Has two frames of invincible startup, and that's about the only thing this move has going for it. You can end air combos with it if it'll kill, but otherwise save your tension for better things. | |||
*Floats opponent on hit (untechable for 34F) | |||
*Can hit up to a maximum of 4 times | |||
</div> | |||
</div> | |||
===<big>Altercation</big> (Henshitsu)=== | |||
<span class="input-badge">'''in Moroha Mode: {{clr|3|6321463214S}}'''</span> | |||
<div class="attack-container"> | |||
<div class="attack-gallery"> | |||
<tabber> | |||
Images = | |||
<gallery widths="210px" heights="210px" mode="nolines"> | |||
GGAC_ABA_henshitsu.png|"Time to send you to Hell" | |||
</gallery> | |||
|-| | |-| | ||
Hitboxes = | Hitboxes = | ||
| Line 1,769: | Line 2,440: | ||
{{#cargo_query:tables=MoveData_GGACR | {{#cargo_query:tables=MoveData_GGACR | ||
|fields=damage,guard,startup,active,recovery,onBlock,invuln,level | |fields=damage,guard,startup,active,recovery,onBlock,invuln,level | ||
|where=chara=" | |where=chara="A.B.A" and input="6321463214S" | ||
|format=template|template=CargoBody-GGACR|named args=yes|order by=_ID | |format=template|template=CargoBody-GGACR|named args=yes|order by=_ID | ||
}} | }} | ||
| Line 1,778: | Line 2,449: | ||
Goku Moroha's activation is ludicrous in itself. It's invincible from frames 1-15, staggers on grounded hit and wallbounces/knocks down airborne opponents, and it cannot be interrupted. Let them know fear. | Goku Moroha's activation is ludicrous in itself. It's invincible from frames 1-15, staggers on grounded hit and wallbounces/knocks down airborne opponents, and it cannot be interrupted. Let them know fear. | ||
*Staggers opponent on ground hit (Max 32F). | *Staggers opponent on ground hit (Max 32F). | ||
*Wallbounces opponent on air hit (untechable for 50F). | *Wallbounces opponent on air hit (untechable for 50F). | ||
| Line 1,786: | Line 2,456: | ||
*Puts A.B.A into Goku Moroha mode and fills Moroha gauge to 100%. | *Puts A.B.A into Goku Moroha mode and fills Moroha gauge to 100%. | ||
*ABA regains 80% of the self-inflicted damage generated by Moroha mode. | *ABA regains 80% of the self-inflicted damage generated by Moroha mode. | ||
</div> | </div> | ||
</div> | |||
<!--------------------- GOKU MOROHA MODE ---------------------------------> | |||
</div> | |||
<div id="movelist-3" class="movelist"> | |||
<!--------------------- END DON'T MESS WITH ME ---------------------------------> | |||
</div> | </div> | ||
| Line 1,812: | Line 2,490: | ||
{{#cargo_query:tables=MoveData_GGACR | {{#cargo_query:tables=MoveData_GGACR | ||
|fields=damage,guard,startup,active,recovery,onBlock,invuln,level | |fields=damage,guard,startup,active,recovery,onBlock,invuln,level | ||
|where=chara=" | |where=chara="A.B.A" and type="instantkill" and input="236236H" | ||
|format=template|template=CargoBody-GGACR|named args=yes|order by=_ID | |format=template|template=CargoBody-GGACR|named args=yes|order by=_ID | ||
}} | }} | ||
| Line 1,820: | Line 2,498: | ||
</div> | </div> | ||
</div> | </div> | ||
==Colors== | ==Colors== | ||
Revision as of 20:40, 9 October 2021
Overview
ABA has the potential to be downright terrifying.
ABA is a pure Risk/Reward character who switches between two modes: one which might be the worst character in the game, and one which is probably the best. She starts in Normal Mode, as slow, plodding, and generally incapable. When she lands a Keygrab or consumes a bloodpack while in this mode, however, she enters Moroha mode (lit. Double-Edge Mode). Wherein, she gains a massive shift in the strength of her attacks, her overall speed, her pressure and ability to crank the guard bar, and several other bonuses which turn her from listless to livid, making her extremely frightening to deal with. ABA is generally uncommon enough a character that many players have trouble dealing with her overwhelming options.
This comes at a cost, however. In Moroha, ABA's attacks will drain her own health whenever they contact an opponent, on hit or block. She also has an active Moroha meter, which will slowly drain towards empty, and will lose about 30% every time she is knocked down and goes into a wakeup animation. When the meter empties, she exits Moroha mode in a very vulnerable stance, making her quite susceptible to eating a full combo or being Instant Killed, more than any other character. She can avoid this vulnerabilty, and regain some of her self-inflicted damage, by exiting Moroha manually by: landing another keygrab, consuming a bloodpack, or entering Goku Moroha, one of the greatest install supers ever designed which buffs her into an extremely powered up version of regular Moroha. With this many options, ABA can be fairly obtuse to learn, and despite her relatively low execution barrier, she can be crippled by inexperienced hands, but crippling under those who fully understand her risk/reward game.
![]() A.B.A
A.B.A ![]() A.B.A is a character who balances Risk/Reward to manage two modes; Normal Mode, which is slow and weak, and Moroha Mode, which has incredible offensive prowess at the cost of draining her health whenever her attacks hit an opponent.
A.B.A is a character who balances Risk/Reward to manage two modes; Normal Mode, which is slow and weak, and Moroha Mode, which has incredible offensive prowess at the cost of draining her health whenever her attacks hit an opponent.
Pros
Cons
- Polarizing alternate mode: Moroha Mode possesses high mobility, powerful pressure and mixups, decent pokes and solid damage.
- Versatile: Decent utility with her keygrab enabling a free mode switch, and has good meterless conversion with her metered options taking it further.
- Very high defense rating: Able to tank plenty of hits in spite of her HP drain mechanic in Moroha Mode.
- Clutch awakening mode/install: Goku Moroha makes her even stronger and can save her from leaving Moroha mode automatically.
- Danzai: Access to one of the most invalidating and combo-able tools in the game.
- Precarious roundstart: Starts in Normal Mode, which possesses bad mobility and awkward normals in terms of range.
- Name of other mode fits to a tee: Moroha Mode can cripple her life lead if not managed properly enough.
- Limited unique resource: Needs bloodpacks to enter Moroha mode without a combo.
- Meter dependent: Somewhat meter-reliant for more damage/better setups, in spite of being okay without it.
- Moroha Mode exit animation has notable lag: Very susceptible to being Instant Killed if played improperly, making her massively susceptible to planned knockdowns.
A.B.A starts every round in her Normal mode.
A.B.A can switch to her Moroha/Double-Edge Mode by either successfully hitting the opponent with Bonding (keygrab) or by using Injecting (bloodpack). While in Moroha mode, all of A.B.A's normals and specials are significantly changed for the better, but she must manage a constantly depleting unique meter, and she will inflict self damage on hit. A.B.A also has access to an improved version of this mode called Goku Moroha (Extreme Double-Edge) Mode via the use of one of her overdrives.A.B.A starts each round with a limited resource known as Blood Packs.
Blood packs can be used as a supplement to her Moroha modes and allow her to manually enter the mode without a combo. | |
| Damage Received Mod | |
| ×0.89 | |
| Guts Rating | |
| 0/5 | |
| Gravity Mod | |
| ×0.98 | |
| Stun Resistance | |
| 80 | |
| Prejump | |
| 4F | |
| Backdash | |
| 17F (1~8F Strike Invuln) | |
| Forwards Dash | |
| 22F | |
| Wakeup Timing | |
| 32F (Face Up)/ 21F (Face Down) | |
| Number of Jumps: | |
| 2 | |
| Number of Air Dashes: | |
| 1 | |
| Unique Movement Options | |
| Step Dash | |
| Fastest Attack | |
| Reversals | |
Guilty Bits Character Intro
Normal Moves
5P


Not much of a jab, but three frames of head invincibility for good reactionary anti air. You can also use it to stuff some higher reaching pokes.
Gatling Options: 5P, 2P, 6P, 5K, 2K, c.S, f.S, 2S, 5H, 2H, 6H, 5D, 2D
5K

Not much of a dancing queen

- GGXXACPR ABA 5K-Hitbox.png
A go-to poke, balancing speed and range amongst Normal Mode's overall slow moveset. Being able to self gatling and safe on block very much helps.
All three versions move ABA slightly forwards.
Gatling Options: 5K, c.S, f.S, 2S, 5H, 2H, 6H, 5D, 2D
c.S

A close combo starter


Not bad, but 5P's a better combo starter at this range.
Gatling Options: 2P, 5H, 2H, 6H, 5D, 2D
f.S

A standing low which moves foward


Good range and acceptable speed. Will catch opponents off guard due to how far forward it moves. Safe on block.
Gatling Options: 2K, c.S, 2S, 5H, 2H, 6H, 5D, 2D
5H

Spin him around, show him you care


A vital normal for Normal Mode ABA. It's got more range than anything else in her Normal toolkit and it's slow as hell, but it has ridiculous pushback and knocks down on CH. Cancels into bloodpack or combos into keygrab, and generally works in your favor on a trade.
Gatling Options: 2H, 6H, 5D, 2D
6P

Using your head is key


A relatively fast 6P, good combo starter against jump-ins. Two hits. Gatling into whatever jump cancellable normal you want or just jump cancel this into whatever into Keygrab.
Gatling Options: 2S, 2H
6H

The Hail Mary


A move just like ABA: A huge risk to throw out, but it comes with a 2.5x stun modifier, making it inflict CRAZY stun on CH. Land a counter, bloodpack or keygrab, land half a BnB, and watch them get dizzy. Since it hits at a slightly upwards angle, it makes for a ghetto AA and tags opponents out of airdashes. Careful though, you're asking for trouble if you whiff. Moroha version is exceptional range, two hits, hits like a truck. Mostly sees use against people trying to low profile f.S or 5H from far away. Landing it from max range won't combo into much and it has a horrid amount of whiff recovery, but will convert on an air hit into something like Butt/Engorgement.
Gatling Options: 6P, 5H
5D

Nothing Out of The Ordinary


Despite its decent nature, you probably won't use this much since you'll mostly be on the defensive in Normal Mode. If you land it, you should do a short air combo into Keygrab.
2P

Look, Honey! A real jab!


When you've got a need for speed, but with more range than 5P. Standard.
- Initial prorate 80%
Gatling Options: 5P, 2P, 6P, 5K, 2K, c.S, f.S, 2S, 5H, 2H, 6H, 5D, 2D
2K

Everywoman's low poke


A low poke with alright range. Leads to 2D > Keygrab on hit.
- Initial prorate 70%
Gatling Options: c.S, 2S, 5H, 2H, 6H, 2D
2S

A surprisingly good crouching uppercut


Fantastic hitbox makes this amazing anti-air, which leads to jump combo > Keygrab. Gains enough histun on CH, that it goes straight into Keygrab for an effortless transform. A pretty good Anti-Air even against ones with upper body invul, but having a crouching AA is a good utility. Moves ABA forward when used.
- Untechable on air hit for 18F
Gatling Options: 5K, 2H, 5D, 2D
2H

Stop Exhibitioning


A slow attack with an oddly good hitbox, which stuffs things unexpectedly and will sometimes win against jump ins and moves behind her. Since it floats on hit, you can cancel into air combos > Keygrab.
- 1st floats and pulls opponent in on hit (untechable for 19F)
Gatling Options: 6P
Supplemental Frame Data:
Throw invincible 13~18F; FRC timing 20~22F
2D

Your only other low


Pretty typical. You'll usually end ground strings with this, whatever they started with, into Keygrab. 2K is generally preferred for poking.
j.P

Kind of a joke, but it's not very funny when it works.


Standard speed air jab with pretty piss poor range. Outside of air pressure or trying to win air exchanges, you won't see or use much of this.
Gatling Options: j.P, j.K, j.S, j.H, j.D
j.K

A rising air-to-air, and not much else by itself.


Hits directly above A.B.A., which is good for intercepting opponents from below. Its horizontal hitbox is incredibly narrow though, and will probably whiff in most other situations.
- Floats opponent on hit (untechable on ground hit for 28F)
Gatling Options: j.P, j.S, j.H, j.D
j.S

Your best friend


Excellent move, and your best air normal. Works in generally all situations due to its speed and good hitbox.
Gatling Options: j.P, j.H
j.H

Get a Room


Being active until landing makes j.H a good jump-in, and it can cross up as well. Like some air normals that are similar, it can be IB'd and thrown on landing since it can't be gatling'd. The hitbox is tiny which makes it difficult to use in combos and requires good timing to use appropriately.
Causes very little knockback/pushback.
j.D

Lay All Your Love on Me


Nice horizontal range, but very slow. Works mainly as an early Anti-Air, but otherwise seldom used. If you manage to CH, you are gifted a wallbounce > free keygrab for your troubles.
Universal Mechanics
Ground Throw

Head over Heels

Tosses them away a short enough distance to make Throw > (dash) > Keygrab fairly easy. Your best option if you land a grab.
Moroha and Goku Moroha version slams into a ground bounce on hit. Standard range, but easily leads into a lot of damage, especially with a raised Guard Bar. Tick throw with any fast normals (5P, 2P, 2K) or after vacuuming them in with 5H.
- Causes wallbounce and knockdown in Normal Mode
- Causes ground bounce and knockdown in Moroha/Goku Moroha Mode
- Forced prorate 50%
Air Throw

Knocks down; fairly typical

Pretty average, but knockdowns are always good.
- Knocks down opponent on hit
- Forced prorate 50%
Dead Angle Attack
Your favorite lifeline

More of a "you'd better stay in the corner" tactic.

Though it has lengthy recovery and an unspectacular startup, it has a lot more invulnerabilty than usual and knocks down the opponent. A Dead Angle should always be in your mind considering ABA's nature for volatility. Never forget if you need to get them off of you. On regular hit, you can keygrab out of the knockdown. Curiously, keygrab seems to whiff when the Dead Angle counterhits.
Specials
Moves are listed first by their entry in the in-game english move list, then by their Japanese name. Values in [ ] represent when A.B.A. is in Goku Moroha Mode
Deletion (Masshou)
236S

The Gateway Rekka; get some extra glowing stuff on there in your other mode


Sometimes works as a poke, but mediocre speed. Hitbox is one of the better ones in NM. On hit, cancel into 2nd Rekka > 3rd Rekka > FRC > (other combo filler >) Keygrab. It's unsafe, but its long range and decent pushback can make it safe-ish if used from afar. Goku Moroha version gains an FRC and faster startup in exchange for doing less damage. Otherwise the same.
- Supplemental Frame Data
- Can cancel into followup from 21F onwards on hit or block.
Ruin (Fukumetsu)
Deletion -> 46S

Not any safer than the first one


Possible to frame trap after a blocked first Rekka, but the gap is bigger than one frame, so exercise caution. Staggers on hit, but it’s pretty wimpy in Normal Mode and requires an RC to take advantage of with anything other than 3rd Rekka unless they’re asleep, and spending 50% on something they can probably still shake out of is a big gamble.
- Supplemental Frame Data
- forces crouching state on ground hit and staggers (Max 30F)
- Untechable for 35F on air hit
- Can cancel into followup from 10F onwards
Condemnation (Dangoku)
Ruin -> 63214S

Stop flirting with all the crazies!


Has a gap from 2nd to 3rd rekka which can be reversal'd through and is horribly unsafe, But on the plus side, this has an FRC just as the key touches the ground, making it safe and able to followup on hit, where it groundslides.
Your standard Normal to Moroha Mode BnB is [xx > Rekkas > FRC > dash > 5H > Keygrab]. In the corner, you can substitute 5H with 6H. The groundslide is long enough that you may be able to combo off of it meterless in given situations, particularly in the corner.
Moroha versions gain even more groundslide time, leading to Rekka Loops [Rekka series, max delay the 3rd Rekka] x (2-3). Gives ABA more conversion options, such as out of corner 2D.
- Supplemental Frame Data
- FRC timing 14~15F (Goku Moroha version 14~17F)
- Slides opponent on hit (untechable for 60F, slides for 40F)
- Opponent's Burst is disabled on hit
Bonding (Ketsugou)
63214H (Air OK)

Show them your Love


Template:CargoBodyWithName-GGACRTemplate:CargoBodyWithName-GGACR
Keygrab. The most important move in your arsenal. Your top priority is to land or combo into this in Normal Mode, as it'll knock down, do some damage, and transform ABA into Moroha Mode.
This move acts as both a command throw and a strike. If from anywhere from frames 6-9, the opponent is in a throwable state and the move is in range, it will grab them. Afterwards, it will turn into a strike for the remainder of its active frames, meaning that the move can also be combo'd into. If the strike is blocked, however, it becomes very unsafe.
If the move initially lands as a throw, ABA can follow up with another keygrab, meaning that going into a raw throw keygrab will let you OTG another and go right back into Moroha mode if you were in it to start with. However, this double pickup doesn't work if the first lands as a strike, but ABA can instead do some combos that lead into Bloodpack FRC > re-Keygrab.
- Listed Recovery is for when the move is blocked. On hit the recovery is 38F.
- Listed Startup and Active frames is for the strike portion.
- The throw part has Damage 10, Startup 9F, active 1F.
- Changes ABA's mode on hit (Normal changes to Moroha, Moroha and Goku Moroha change back to Normal).
- Knocks down opponent on hit.
- ABA in CH state during move.
- Opponent's burst is disabled on hit.
- Can only be RC'd on block.
Dragging (Ken'in)
236P

A good dodge with a lot of invuln


Vitally useful. An evasive slide, A.B.A. becomes very low-profile when executing this move, making it great for sliding under anticipated pokes for a throw > Keygrab. You can even slide under stuff like 2Ps or Robo-Ky’s knee bazooka! Just beware of lows/being thrown before the slide is over. Has an FRC point just as A.B.A. tucks herself inward, which can be used as a last resort to cancel the slide if baited, or to bait your opponent into attempting a punish.
- Supplemental Frame Data
- FRC timing 11~13F.
Retribution (Shoukyaku)
236K

It's not Millia, but it'll work.


Very long range, hits overhead. Throw and feet invincible mid kick, making for a good meaty. Has a strangely late FRC point, making blocked attempts safe or starting gimmicks. Causes a nice stagger on CH, giving you free Keygrab. Slightly unsafe on block if not FRC’d. Can also be used in place of the 3rd Rekka.
- Supplemental Frame Data
- Staggers opponent on CH (Max 69F)
- FRC timing 28~30F.
Avoidance (Kihi)
236H

Slit your wrist for a projectile...wait, what the hell is this thing made of?

A very slow-starting projectile, its slow movement speed and bulky hitbox make it take up quite a bit of spacing, and make it difficult to avoid. After ending a Moroha combo with an air Keygrab, you can toss this out upon landing for a good oki tool. If you have 25%, you can FRC just as the projectile appears and Bloodpack for an almost entirely safe transformation back into Moroha.
It's not guaranteed to come out if you get hit, but you'll sometimes get away with it in neutral to give your opponent something to deal with while you sneak in a quick Bloodpack.
- Supplemental Frame Data
- FRC timing 23~24F;
- Attack is guaranteed to activate after 23F.
Injecting (Shousei)
63214P

Just like going back to character select, except without restarting the match and with some questionable tastiness

Bloodpack. Burning one bag will put ABA into Moroha Mode without having to land a combo or Keygrab. This is just as important as Keygrab, as it guarantees transformation on frame 23. Don't do this point blank, save it for after you land a far knockdown or blowback, or if you're feeling ballsy and want to use the very late, very short invul to go through something like Slidehead.
- Supplemental Frame Data
- Consumes a blood pack on 20F and changes ABA to Moroha mode.
Force Breaks
FB Dragging (Ken'in)
236D
Just Leave It
The best move in Normal Mode. Just like regular slide, except it's entirely invincible for its full duration, and thus completely unpunishable except against those who throw on the first frame it ends.
It will evade oki, including meaty setups. It will slide through moves and supers, even stuff like Raoh’s Bellows Malice, for easy Keygrabs. It has a huge FRC point on 9-23F, which is highly useful in certain situations since you can FRC to choose which side of the opponent A.B.A will appear on, or to buffer into a surprise Keygrab. A 25% "reversal" option never looked so good.
- Supplemental Frame Data
- Can pass through opponent from 3F until end of move;
- FRC timing 9~23F.
Overdrive Attacks
Evidence: Concealment (Shouko: Intoku)
632146H

ABA keeps threatening to get a lawyer, but then she conceals evidence

Despite not having full invul until startup, it can kind of work as a reversal, sometimes. Better for damage if you can actually land a kill combo in normal mode, or delay the followup hits into a frametrap. It also has FRC points on every hit, in case you want to extend into pressure or make it safe. Only works in normal mode.
- Supplemental Frame Data
- Floats opponent on hit (untechable for 58F)
- Forced prorate 50%
- Fully invincible 1F~5F after super flash; Above feet and throw invincible 6-13F after super flash; Low profile 14~33F after super flash;
- Hitstop 7F;
- FRC timing 10~13F after super flash;
- Can cancel into Shouko: Intoku (2nd hit) 1~34F after super flash.
It's probably best to cancel into the followup hit this most of the time since it'll push the opponent back and make the move safer despite being -26.
Supplemental Frame Data: Above feet invincible 22~29F; Low profile 30~49F; Hitstop 7F; FRC timing 26~29F; Can cancel into Shouko: Intoku (3rd hit) 1~26F.
No longer unblockable, probably much to your dismay. Be careful as this third hit's startup is particularly slow, which is good for frametraps, but horrible if blocked.
- Floats opponent on hit (untechable for 58F)
- Forced prorate 50%
- Supplemental Frame Data
- Above feet invincible 35~42F; Low profile 43~62F;
- Hitstop 7F;
- FRC timing 39~42F.
Evidence: Destruction (Shouko: Inmetsu)
j.632146P

Kind of like RTL, except awful.


Has two frames of invincible startup, and that's about the only thing this move has going for it. You can end air combos with it if it'll kill, but otherwise save your tension for better things.
- Floats opponent on hit (untechable for 34F)
- Can hit up to a maximum of 4 times
Normal Moves
5P
An AA, not a jab, but 3F blazing fast
Not much of a jab, but three frames of head invincibility for good reactionary anti air. You can also use it to stuff some higher reaching pokes.
Gatling Options: 5P, 2P, 6P, 5K, 2K, c.S, f.S, 2S, 5H, 2H, 6H, 5D, 2D
5K
Not much of a dancing queen
- GGXXACPR ABA 5K-Hitbox.png
A go-to poke, balancing speed and range amongst Normal Mode's overall slow moveset, but in Moroha loses out a bit to other normals. Being able to self gatling and safe on block very much helps.
All three versions move ABA slightly forwards.
Gatling Options: 6P, 5K, c.S, f.S, 2S, 5H, 2H, 6H, 5D, 2D
c.S


Slightly slower in Moroha, more for filler than pokes into combos, but it gains from foot invul a little before startup and lasts quite a while. Starts cranking the Guard Bar higher, though. Even on block, now.
Gatling Options: 6P, f.S, 2S, 5H, 2H, 6H, 5D, 2D
f.S
Do a little dance


In Moroha, excellent poke that begins to define Moroha's strengths. Two hits will allow it to stuff super armor or familiars that eat hits (Little Eddie, Zappa's Dog, Dizzy's Fish), and leads excellently into 5H or Rekka. Great move in neutral and overall. Unlike Normal, it hits mid and doesn't move ABA forward.
1st hit causes very little knockback/pushback.
Gatling Options: 2S, 5H, 2H, 6H, 5D, 2D
5H

Like the unsettling opening to a psychological horror


Moroha version is fantastic. Builds a ridiculous amount of guard bar on block, vacuums on the second hit, and with a gatling into 2H, you can keep the opponent close and get their guard bar flashing in about a second. This is excellent for pressure and is safe on block, making it particularly great against opponents without meterless reversals (there is a slight gap from this to 2H). However, the second hit will usually end the stagger if the first hit lands as CH. Its slow speed keeps it from being a good poke, but ABA has other options to lead into this.
Gatling Options: 2H, 6H, 5D, 2D
6P
Using your head is key
In Moroha, its hitbox is a little altered since the Key's head changes shape, but functions nearly identically to the Normal version.
Gatling Options: 2S, 2H
6H

Eats up space all day


Has exceptional range, two hits, hits like a truck. Mostly sees use against people trying to low profile f.S or 5H from far away. Landing it from max range won't combo into much and it has a horrid amount of whiff recovery, but will convert on an air hit into something like Butt/Engorgement.
Gatling Options: 6P, 5H
5D
Nothing Out of The Ordinary
Moroha version is one frame faster and leads to Impossible Dust combos. Sometimes throwing out a slow overhead works.
2P
Look, Honey! A real jab!
When you've got a need for speed, but with more range than 5P. Standard.
- Initial prorate 80%
Gatling Options: 5P, 2P, 6P, 5K, 2K, c.S, f.S, 2S, 5H, 6H, 5D, 2D
2K
Everywoman's low poke
A low poke with alright range. Leads to 2D > Keygrab on hit.
One of your only low attacks in Moroha, gets a slight damage boost; use it to start midscreen combos.
- Initial prorate 70%
Gatling Options: 6P, c.S, f.S, 2S, 6H, 5D, 2D
2S

Actually rivaled by the Normal Mode version


Moroha is 50% slower than Normal Mode, but it has big range and will probably eat most jump ins that are poorly spaced. On Counter Hit, you get all day to confirm into whatever. A good option.
- Floats opponent, fully untechable on CH.
- Untechable for 23F
Gatling Options: 5D, 2D
2H

Ruins people who press buttons


One of the most oppressive normals in the game. As ABA is slightly airborne before going active, she is throw invulnerable, making for a good meaty. Guard Bars get ruined, it launches on hit, vacuums, is +2 on block, and has an FRC point just as the axe touches the ground for the 2nd hit, making it sickeningly good for applying pressure or baits. Awesome.
- 1st hit forces opponent into crouching state on ground hit
- 2nd hit groundbounces opponent (untechable for 35F)
Gatling Options: 2S
Supplemental Frame Data:
FRC timing 20~22F
2D

ABA asks Paracelsus to die for her. He's not really keen on that.


Meanwhile, in Morohaville, 2D's range grows from standard to absurd. Near the corner, you can confirm into Rekka loops. At max range, you can use it to bait reversals, and include an OS by staggering Rekkas. It will convert on hit, but you'll be safe on whiff as long as you space it properly. Pretty good.
j.P
Kind of a joke, but it's not very funny when it works.
Goku Moroha version is one frame faster, tying it with Order Sol and Justice for the fastest air jabs. Its range and hitbox doesn't rival those two, however.
Gatling Options: j.P, j.K, j.S, j.H, j.D
j.K
A rising air-to-air, and not much else by itself.
In Moroha, not much better by itself even with a frame faster startup and 4 more points of damage, but works as a fuzzy after j.S, leading to some disgusting results amongst j.S's other options.
- Floats opponent on hit (untechable on ground hit for 28F)
Gatling Options: j.P, j.S, j.D
j.S

Your best friend on drugs


Take everything great about Normal Mode j.S. Double it. Give it a bunch of fuzzy guards. Make those fuzzies confirmable off of a safe jump. You now have Moroha j.S.
Your standard setup for fuzzies is [j.S > dj.S > falling j.H > land] and combo. These lead to BIG damage, upwards of 300+ depending on guard bar and available tension. Since it gatlings into j.P or j.K, you can Fuzzy Guard by doing [j.S > j.K] or [j.S > j.P]. The latter isn't as useful since the hitstun on j.P is still so tiny, but the possibilities from j.S > j.K are really gross. Knock an opponent down in the corner do [running j.S > j.K > dj.S > j.H]. Done properly, this is airtight, and if the opponent blocks low at any point, they're getting fuzzied. Other options include land > throw after the fuzzy, or do more j.Ps.
Another nice bonus is that j.K CH launches opponents, meaning this setup is especially potent when their guard bar is flashing. Better still, you can autopilot the j.S > j.K > dj.S > j.H variation since it combos! Pretty sick.
Gatling Options: j.P, j.K, j.H, j.D
j.H

Seriously


Huge hitbox, great for cross-ups, and on CH it ground slides into ludicrous damage despite its prorate. The built-in OS with airthrow doesn't do your opponents any favors either. People hate this move.
Gatling Options: j.D
j.D
Lay All Your Love on Me
Moroha version is vital ingredient in A.B.A.’s Orb loop BnB. This is faster, has longer range, and better hitstun than Normal Mode. However, it still doesn't have much use in neutral compared to A.B.A.'s other great aerials. This also wallbounces on counterhit, and has enough hitstun to combo into Keygrabs and dashing j.Ss for better conversions.
Universal Mechanics
Ground Throw
Head over Heels
Moroha and Goku Moroha version slams into a ground bounce on hit. Standard range, but easily leads into a lot of damage, especially with a raised Guard Bar. Tick throw with any fast normals (5P, 2P, 2K) or after vacuuming them in with 5H.
- Causes ground bounce and knockdown in Moroha/Goku Moroha Mode
- Forced prorate 50%
Air Throw
Knocks down; fairly typical
Pretty average, but knockdowns are always good.
- Knocks down opponent on hit
- Forced prorate 50%
Dead Angle Attack
Your favorite lifeline
More of a "you'd better stay in the corner" tactic.
The Moroha and Goku Moroha versions are faster than Normal Mode and causes wallbounce on hit. Useful if you're low on Moroha meter and under pressure so you can get them off of you, or to keep them in the corner, but don't go and get it baited. You can't really combo out of it on regular hit, but you can go for a tech trap afterwards. On counterhit, you can easily combo out of it as long as your back isn't to the corner for a nice, albeit heavily prorated, combo.
Specials
Moves are listed first by their entry in the in-game english move list, then by their Japanese name. Values in [ ] represent when A.B.A. is in Goku Moroha Mode
Deletion (Masshou)
236S
The Gateway Rekka; get some extra glowing stuff on there in your other mode
Sometimes works as a poke, but mediocre speed. Hitbox is one of the better ones in NM. On hit, cancel into 2nd Rekka > 3rd Rekka > FRC > (other combo filler >) Keygrab. It's unsafe, but its long range and decent pushback can make it safe-ish if used from afar. Goku Moroha version gains an FRC and faster startup in exchange for doing less damage. Otherwise the same.
- Supplemental Frame Data
- Can cancel into followup from 21F onwards on hit or block.
Ruin (Fukumetsu)
Deletion -> 46S
Not any safer than the first one
Possible to frame trap after a blocked first Rekka, but the gap is bigger than one frame, so exercise caution. Staggers on hit, but it’s pretty wimpy in Normal Mode and requires an RC to take advantage of with anything other than 3rd Rekka unless they’re asleep, and spending 50% on something they can probably still shake out of is a big gamble.
- Supplemental Frame Data
- forces crouching state on ground hit and staggers (Max 30F)
- Untechable for 35F on air hit
- Can cancel into followup from 10F onwards
Condemnation (Dangoku)
Ruin -> 63214S
Stop flirting with all the crazies!
Has a gap from 2nd to 3rd rekka which can be reversal'd through and is horribly unsafe, But on the plus side, this has an FRC just as the key touches the ground, making it safe and able to followup on hit, where it groundslides.
Your standard Normal to Moroha Mode BnB is [xx > Rekkas > FRC > dash > 5H > Keygrab]. In the corner, you can substitute 5H with 6H. The groundslide is long enough that you may be able to combo off of it meterless in given situations, particularly in the corner.
Moroha versions gain even more groundslide time, leading to Rekka Loops [Rekka series, max delay the 3rd Rekka] x (2-3). Gives ABA more conversion options, such as out of corner 2D.
- Supplemental Frame Data
- FRC timing 14~15F (Goku Moroha version 14~17F)
- Slides opponent on hit (untechable for 60F, slides for 40F)
- Opponent's Burst is disabled on hit
Bonding (Ketsugou)
63214H (Air OK)
Show them your Love
Template:CargoBodyWithName-GGACRTemplate:CargoBodyWithName-GGACR
Keygrab. The most important move in your arsenal. Your top priority is to land or combo into this in Normal Mode, as it'll knock down, do some damage, and transform ABA into Moroha Mode.
This move acts as both a command throw and a strike. If from anywhere from frames 6-9, the opponent is in a throwable state and the move is in range, it will grab them. Afterwards, it will turn into a strike for the remainder of its active frames, meaning that the move can also be combo'd into. If the strike is blocked, however, it becomes very unsafe.
When used in Moroha mode, Keygrab will instead heal ABA for 80% of the self inflicted damage she sustained. You'll want to go into this when comboing to end it, but specifically when your Moroha meter is close to empty: generally better to play it safe than sorry.
If the move initially lands as a throw, ABA can follow up with another keygrab, meaning that going into a raw throw keygrab will let you OTG another and go right back into Moroha mode if you were in it to start with. However, this double pickup doesn't work if the first lands as a strike, but ABA can instead do some combos that lead into Bloodpack FRC > re-Keygrab.
- Listed Recovery is for when the move is blocked. On hit the recovery is 38F.
- Listed Startup and Active frames is for the strike portion.
- The throw part has Damage 10, Startup 9F, active 1F.
- Changes ABA's mode on hit (Normal changes to Moroha, Moroha and Goku Moroha change back to Normal).
- Knocks down opponent on hit.
- ABA in CH state during move.
- Opponent's burst is disabled on hit.
- Can only be RC'd on block.
Engorgement (Houshoku)
421H

THE NEED FOR BLOOD DOES NOT STOP-KYEEAAAAAAA


BUTT. Works well as a combo ender or in Butt loops. Its long active time can make it safe when it makes contact late, but otherwise it doesn't see much use in neutral. On block, you can RC to double jump or airdash. Can be jump cancelled in Goku Moroha mode.
- Floats opponent on hit (untechable for 34F)
- Auto jump installs
- Supplemental Frame Data
- ABA is airborne from 12~31F [11~30F];
- ABA is in CH state from 1~38F [1~35F].
Judgment (Danzai)
623H

The Judge, Jury, and Executioner


Danzai. One of the best specials in the game. Throw invincible on the upswing, super armor, big hitbox, launches on hit, and huge pushback on block to help make it pseudo-safe since you’re moved back pretty far.
Danzai will blow up pokes or telegraphed poke out attempts, it can be used as a reversal or to beat throws, it can be used as anti-air, it can be used to eat blue bursts... What’s not to like? Just be sure to keep the following in mind: it only absorbs one hit, so multi-hit or fast attacks will win, it loses to Supers, characters with long range attacks can punish even after blocking the second hit, and characters who don’t can block the first hit and backdash the second. Some characters also have char-specific ways to deal with Danzai as well. Danzai is best used as a defensive option, but can work as an offensive one if used very sparingly. Just note that the super armor won't keep you alive if you're close to death already.
- 1st hit floats opponent on hit (untechable for 30F)
- 2nd hit groundbounces opponent (untechable for 50F)
- 2nd hit forced prorate 70%
- 2nd hit disables opponent's burst on hit
- Supplemental Frame Data
- Throw invincible 1~20F [1~13F];
- FRC timing 12~14F;
- Can absorb one non-super hit for half damage from 1~24F [1~16F].
Displacement (Bunri)
63214P

He punched out all my blood!

Just as important as normal Bloodpack, if not more. Using it will spend one pack and restore 120% of self-inflicted damage.
- Consumes a blood pack and changes ABA to normal mode
- Restores self damage
- some invincibility at the end
- Supplemental Frame Data
- Full Invincibility 9F; Strike invincibility 10~13F;
- FRC timing 10~13F;
- restores 1.2x of the self inflicted Moroha damage on 10F.
Blunder (Kashitsu)
41236K or Ruin -> 236K


An unthrowable overhead...which is actually unblockable, as it causes stagger if blocked standing. On actual hit, it'll launch the opponent, higher if it landed CH.
In Moroha mode, Flipkick is best used with 50% to cancel into Goku Moroha activation or to RC it--on hit, this gives you better combo options like Flipkick xx Goku Activation > dash c.S > etc, or Flipkick RC > dash j.S > etc, while on block it guarantees you can capitalize on the stagger. Like its Normal Mode counterpart, it too can be used in place of the 3rd rekka. In Goku Moroha mode, Flipkick can be converted off much easier meterless, turning it into an extremely scary and deadly mixup tool and a surprisingly good combo tool. This move is overall extremely potent, but has the weakness of being blockable in the air without FD, and due to its single active frame, has several ways to beat it, just like all of ABA's moves.
One setup is to do FB Bloodball, and most characters will be forced to eat this move unless they have meter to Dead Angle.
- Supplemental Frame Data
- Staggers opponent when blocked high (Max 55F)
- Groundbounces opponent on hit (untechable for 50F)
- Untechable for 41F
- Lower body invincible 11~24F; foot invincible 25~30F; Throw invincible 11~30F;
- FRC timing 27~29F.
Eradication (Konzetsu)
j.41236S

Loops, thy name is KONZETSU


An integral part in many of A.B.A.’s combos in Moroha mode, specifically her Orb loops. This move is a projectile, meaning sometimes they’ll linger and still trade when you get hit first. It's possible for both orbs to land when very close, which leads to disgusting damage due to the rear hit dealing 1 point shy of 60 damage. E.G., Butt loop, Butt > RC > Orbs (2hit) > PAIN. Because the rear orb appears 1 frame after the front orb, you will also get the increased untech time of the rear orb, should you hit both.
Has an FRC point just as A.B.A. begins to tuck her outstretched leg back in (right when the Orbs become active). Dash jump at downed opponent > Orbs FRC over their body just before they wakeup > 2K, 5D, begin pressure, etc. If your Orbs are mistimed or if you land too close, you opponent can wakeup throw, but that can be punished with Orbs FRC > Orbs again for HUGE damage as a CH, or you can simply Orbs FRC > land > jump to bait the throw and CH as well.
- Supplemental Frame Data
- FRC timing 22~23F [15~18F];
- Attack is guaranteed to activate after 10F [6F].
- Untechable for (front part: 26F, back part: 36F)
Suka Motion
Moroha Gauge reaches 0

9 out of 10 instant kills start with this

Occurs when the Moroha gauge hits 0.
If this happens to you, you're probably about to eat shit, especially if someone knocked you down just before this is about to happen.
Suka Motion will not activate while ABA is in the middle of another move's animation. ABA can continue to perform gatlings and special cancels after the Moroha gauge disappears, as long as she:
- Is in the middle of move with gatling/special cancel options when the gauge fully depletes
- Follows regular Moroha's gatling rules (you will not be able to do gatlings that are only possible in Goku Moroha)
- Does not return to an idle state (this includes landing after a jump; you can jump cancel moves after the gauge runs out, but Suka Motion will activate when you land)
If your Moroha gauge runs out mid-combo, end with a cancel into keygrab or Goku Moroha to save yourself from disaster.
Force Breaks
FB Avoidance (Kihi)
236D
Is it actually mercury? Good lord.
Normal mode’s Bloodball makes a comeback in Moroha mode for 25% tension. Hits 6 (!!) times. The FRC point on the NM version is the same here, and with the extra hits, this can lead to some really gross setups like meaty FB Bloodball > dash in Flipkick while they’re guarding the Bloodball for a dirty unblockable. For the ultimate in scumbaggery, you can FB Bloodball > FRC > dash in and throw just before the Bloodball goes active, or dash in Command Keygrab > Keygrab for a complete transform. Leads to some pretty nasty stuff for 25-50% tension.
- Supplemental Frame Data
- Above knees invincible 7~11F and 20~22F; upper body invincible 12~19F; FRC timing 23~24F;
- Attack is guaranteed to activate after 23F.
FB Judgment (Danzai)
623D
CONVICTION: YOUR EXECUTIONER, EXECUTIONER, AND IF NEED BE, YOUR EXECUTIONER
Danzai spent 25 meter and got Hyper Armor for Christmas, which absorbs an unlimited number of (non-Overdrive) hits and will plow through pretty much anything. It launches higher on hit, and while it may screw up some combos on CH, FB Danzai takes one of the best specials in the game from excellent to obscene.
- 2nd hit has 80% Forced Prorate
- 1st hit floats opponent on hit (untechable for 30F)
- 2nd hit groundbounces opponent on hit (untechable for 70F)
- 2nd hit removes OTG status from opponent on hit
- Supplemental Frame Data
- Throw invincible 1~20F [1~13F];
- [FRC timing 12~14F];
- Can absorb non-super attacks for half damage 1~24F [1~16F].
Overdrive Attacks
Evidence: Destruction (Shouko: Inmetsu)
j.632146P
Kind of like RTL, except awful.
Has two frames of invincible startup, and that's about the only thing this move has going for it. You can end air combos with it if it'll kill, but otherwise save your tension for better things.
- Floats opponent on hit (untechable for 34F)
- Can hit up to a maximum of 4 times
Altercation (Henshitsu)
in Moroha Mode: 6321463214S

"Time to send you to Hell"


"Goku Moroha," or just Moroha mode on steroids. At the price of 50% tension and a single bloodpack, A.B.A. will glow blue and replenish her Moroha meter. In this state, her mobility nearly doubles, her gatling limitations get thrown out the window, moves get safer and/or faster, she gets more FRCs, an extra airdash, her FRC windows are widened by ~2 frames, and some moves get jump cancels. You can cancel into this super from anything grounded, gifting ABA a ridiculous frame trap option nearly any time she's on the ground.
Goku Moroha's activation is ludicrous in itself. It's invincible from frames 1-15, staggers on grounded hit and wallbounces/knocks down airborne opponents, and it cannot be interrupted. Let them know fear.
- Staggers opponent on ground hit (Max 32F).
- Wallbounces opponent on air hit (untechable for 50F).
- Cannot be interrupted.
- Can pass through projectiles.
- Can be cancelled from any move except aerial moves, Ketsugou, Houshoku and Konzetsu.
- Puts A.B.A into Goku Moroha mode and fills Moroha gauge to 100%.
- ABA regains 80% of the self-inflicted damage generated by Moroha mode.
Instant Kill
Darkness of Ignorance (Muchi no Yami)
During IK Mode: 236236H

Lock the Door, Throw away the Key

Don't, actually. Nobody likes a divorce.
Colors

Default P

Default K

Default S

Default H

Default D

EX P

EX K

EX S

EX H

EX D

Slash P

Slash K

Slash S

Slash H

Slash D1

Reload P
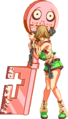
Reload K

Reload S

Reload H

Reload D1


Gold2
Shadow2


To select your color, press the corresponding button while in the designated "color set". Color sets can be toggled through by hitting the Respect button.
- Only selectable on the Arcade and PC-Rollback versions of the game.
- Available on home ports, and are selected by pressing the Rec. Enemy button on the Slash or Reload color sets, respectively. Gold characters are powered up versions, Shadow characters have infinite tension. Both are banned from tournament play.
External References
To edit frame data, edit values in GGACR/A.B.A/Data.
 A.B.A [★]
 Anji Mito [★]
 Axl Low [★]
 Baiken [★]
 Bridget [★]
 Chipp Zanuff [★]
 Dizzy [★]
 Eddie [★]
 Faust [★]
 I-No [★]
 Jam Kuradoberi [★]
 Johnny [★]
 Justice [★]
 Kliff Undersn [★]
 Ky Kiske [★]
 May [★]
 Millia Rage [★]
 Order-Sol [★]
 Potemkin [★]
 Robo-Ky [★]
 Slayer [★]
 Sol Badguy [★]
 Testament [★]
 Venom [★]
 Zappa [★]
Click [★] for character's full frame data
• Starter Guide •
HUD •
Controls •
Frame Data & System Data •
FAQ •
Training Mode •
• Movement/Canceling •
Offense •
Defense •
Damage/Combo System •
Gauges •
Misc •