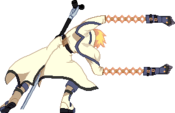
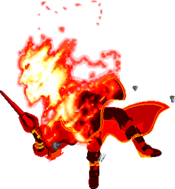
GGAC/Robo-Ky

From Dustloop Wiki
< GGAC
Revision as of 08:58, 18 January 2022 by Shtkn (talk | contribs)
Robo-Ky

Overview

Guts Rating: 0
Defense Modifier: x0.89
Stun Resistance: 80
Strengths:
Weaknesses:
Movement Options: 1 Double Jump/Air Dash, Run-Type Dash

Move List

See also: Robo-Ky Full Frame Data

Note for the Guard section in the tables:

  • H: can block while standing
  • L: can block while crouching
  • F: can block while in the air only with Faultless Defense
  • All: can be blocked however
  • All attacks can be blocked with aerial Faultless Defense unless stated otherwise.

Normal Moves

5P
GGAC RoboKy 5P.png
All around amazing normal.
Damage Tension GB+ GB- Level Guard Cancel Startup Active Recovery Static Diff
25 -- 14 7 3 HLF CR 6 4 3 +7

+7 on block. Great as a meaty, whiff, fakeout, burst bait, timing device & lockdown tool.

Is completely insane in 80% Heat Mode, (more on this later).

Link into 5k/2k/2s on block for mixup.

Great move to raise guard gauge.

Combo into 5s/2s for B&B.

Can be ducked by smaller/certain characters, (Zappa, Faust).

Be aware that is is susceptible to Faultless Defense.

5K
GGAC RoboKy 5K.png
Go to normal for pestering!
Damage Tension GB+ GB- Level Guard Cancel Startup Active Recovery Static Diff
16 -- 3 8 1 LF cCJR 5 7 7 -4

Hits low.

It is -4 upon block so don't end a blockstring with it.

85% prorate.

Not half bad for tick throw setup.

5 frame startup helps it stuff certain low moves.

Link into 5p on block if you don't have tension for other lockdown tools such as ground missile or horse.

Chain into itself to hitconfirm or if you have a reason to (ie kill time during Det Mode).

Combo however you want, based on spacing, into 5s for B&B.

Spam it to try and get them to stand up, or just generally annoy them.

c.S
GGAC RoboKy cS.png
Multipurpose normal.
Damage Tension GB+ GB- Level Guard Cancel Startup Active Recovery Static Diff
30 -- 14 6 4 HLF CJR 9 2 18 -3

It's not very fast but good for stuffing because of its counterhit capabilities.

Best move for jumpcancel purposes.

Chain into 2p, 5s (far) or ground/air missile,for further lockdown/mixup options.

Combo into 2s for B&B.

Combo into Level 3 Horsie for float ~ aircombo.

Combo into 5d on counterhit.

f.S
GGAC RoboKy fS.png
Arms extend for a far poke.
Damage Tension GB+ GB- Level Guard Cancel Startup Active Recovery Static Diff
38 -- 14 6 4 HLF CR 10 5 20 -8

Spamming it will not bring you any closer to the 'Glory Days' of #R.

Try to stay at max range with this move while building meter with 2d.

Most of the time it's safe to chain into 2d on hit/block.

5H
GGAC RoboKy 5H.png
Clutch Normal!
Damage Tension GB+ GB- Level Guard Cancel Startup Active Recovery Static Diff
41 -- 28 6 5 HLF RF 5 7 29 -17

Really fast normal with 5 frames execution so it's excellent to stuff things.

FRC point from frame 5-8.

Is -17 on block and -5 or so on hit so FRC is necessary either way.

Staple of most aircombos.

Ok to use as anti air at a certain angle.

Good stagger on counterhit allows you to followup in many ways.

Use 5hs FRC in pressure strings to keep opponent pinned. Just remember about tension restrictions, if you FRC you won't be getting much tension for a few seconds.

6P
GGAC RoboKy 6P.png
Gun-Arm.
Version Damage Tension GB+ GB- Level Guard Cancel Startup Active Recovery Static Diff
1st Hit 25 -- 20 6 5 HLF -- 11 2 36 -4
2nd, 3rd Hit 25 -- 20 6 5 HLF -- 5 2 36 -4

Each time you hit p, Robo will fire again, to a max of three times.

After the second hit the opponent has the option to tech.

Try alternating your firing patterns/rate of fire to keep opponent guessing.

Longer range than 5s (far) but longer recovery on whiff so use with caution.

Generates TONS of heat.

It's a projectile and can thus cancel others out.

Upper body invincibility makes it a decent anti air, though it tends to have a pretty large blind spot.

Use in pressure strings & combos in corner to maintain your heat level so you can continually annoy opponent with Level 2 Steam. (Ex: 5hs FRC Stagger, 6p once to knockdown, 2d)

6HS
GGAC RoboKy 6H.png
Steam.
Version Damage Tension GB+ GB- Level Guard Cancel Startup Active Recovery Static Diff
Level 1 12 1.44 0 8 1 All F 13 12 12 -6
Level 2 30 2.64 0 7 2 All F 16 14 7 +3
Level 3 50 2.64 0 7 3 All F 19 11 17 -1

6h Lvl 1:

Useless except for cancelling projectiles if you really must.

Very short amount of stagger on counterhit.

FRC point between frames 10-12.


6h Lvl 2 (pictured on left):

Decent range and +3 on block so it's good for poking, early anti-air, anti ground dash and lockdown.

If opponent is cornered, use in conjunction with blocked 2k or 5p for great pressure. If anything staggers (delayed 5hs FRC), 6p once to knockdown/get Heat and keep it going.

A blocked 2k slide into blocked 6h FRC, is a good setup for his command grab. If you have the same opportunity again, ditch the command grab & substitute a Level 2 Bazooka or well-timed Robo-Dash.

Combo into 2k or 5h if nearby.

Enough stagger on counterhit at stagger Lvl 2 to combo into 5d or command throw.

FRC point between frames 13-14.


6h Lvl 3:

Is -1 on block.

Even more stagger on counterhit so easier to combo into.

FRC point between frames 16-17.

5D
GGAC RoboKy 5D.png
Great Dust!
Damage Tension GB+ GB- Level Guard Cancel Startup Active Recovery Static Diff
15 -- 8 20 3 HF R 20 4 22 -12

This is the fastest Dust attack in the game.

Hits high.

Easy to see so not really abusable after a certain time.

Better range than 5s (far) so impossible to punish by many on block at maximum range.

Try using a blocked 2hs FRC explosion to camouflage your attempt at sneaking in a 5d!

Dead Angle Attack
GGAC RoboKy 5H.png
Good DAA to use when their back is to the corner.
Damage Tension GB+ GB- Level Guard Cancel Startup Active Recovery Static Diff
25 -- 10 7 3 HLF R 4 7 29 -22

Causes untechable wallbounce on counterhit and allows for followup without RC'ing near the corner.

50% prorate.

2P
GGAC RoboKy 2P.png
Good poke for smaller characters.
Damage Tension GB+ GB- Level Guard Cancel Startup Active Recovery Static Diff
18 -- 6 7 2 HLF CR 6 4 5 +3

85% prorate.

+3 on block so good for lockdown.

Chain into 5s/2k on block or hit for mixup/pressure/B&B.

Useful as a meaty versus characters who can duck under your 5p, (Zappa, Faust).

Can also be used as a whiff to end pressure strings. Follow up with either 6hs Steam, 6p, or TK Air Missiles.

2K
GGAC RoboKy 2K.png
Combo starter and evasion-based normal.
Damage Tension GB+ GB- Level Guard Cancel Startup Active Recovery Static Diff
12 -- 5 7 2 L R 7 11 9 -8

Hits low.

Prorates 85%.

Is -8 on block but still ok for tick throw, just don't use all that often.

Longest range of all his normals.

Goes under quite a few moves and projectiles. (Ky's fireballs for one)

Combo into 2s for B&B.

Use with Level 2 Steam in corner for pressure and maintaining your Heat level.

2S
GGAC RoboKy 2S.png
Pew-Pew Eye Lasers!
Damage Tension GB+ GB- Level Guard Cancel Startup Active Recovery Static Diff
34 -- 7 8 3 L R 10 3 20 -9

Hits low.

Not a projectile.

Link into 5h frc on block or hit to stuff/continue pressure/B&B.

Doing a late 5h after a blocked 2k~2s is a decent frame trap. If 5h counterhits and staggers, knockdown and keep annoying them. Subsequent attempts can be blocked 2k tick~command grab, blocked 2k~2s~2d and blocked 2k~2hs (FRC optional).

Cancel on hit into 2d for mat on knockdown and then okizeme.

If opponent is blocking ground bazooka, attempt a combo starter with this instead of 2k, as it does not prorate!

2HS
GGAC RoboKy 2H.png
Knee-Rocket Anti-Air.
Damage Tension GB+ GB- Level Guard Cancel Startup Active Recovery Static Diff
50 3.84 0 6 4 HLF F 14 -- 51 -7

Projectile.

Since the Knee-Rocket emanates from Robo-Ky, while he is grounded, the projectile itself MUST be blocked in the air utilizing Faultless Defense! This catches many people off guard!

Good for air control and anti air.

FRC point from frames 19-21.

Horrible on whiff so don't.

Not as horrible on block if opponent is grounded.

Counterhit on grounded opponent makes it untechable for a long time and thus easy to followup with an aircombo (all purpose j.k, j.s, jc, dj.k, dj.d). If it is not a counterhit, you can still hit confirm into FRC then superjump kick, superjump dust, missile if applicable. If opponent is hit in the air however, you usually will not be able to follow up.

After a blocked 2k, throw out a 2h every once an awhile. The delay can catch people off guard. If they block both the 2k and 2h, try FRC'ing into a 5d! This is sneaky as the explosion from the knee rocket quasi-camouflages your 5d, and many times they'll still be blocking low as a result of you starting the whole process with a 2k!

j.P
GGAC RoboKy jP.png
Surprisingly good air-to-air normal.
Damage Tension GB+ GB- Level Guard Cancel Startup Active Recovery Static Diff
20 -- 6 7 2 HA CJR 7 8 4 --

Throw this move out as your begin a jump, it has range actually, if it connects you can hit confirm into generic aircombo.

Use it as a whiff if opponent is blocking a Ground Bazooka. Once they are blocking it normal jump toward them and throw out a j.p, then land and utilize a low.

Alternatively, do a last second IAD into combo if you think/see they're blocking low too early.

Useful to followup with j.s in aircombos.

Combos into every air move including itself so it's good to adjust height in aircombos.

j.K
GGAC RoboKy jK.png
Go to normal for Tiger Knee Force Break shenanigans.
Damage Tension GB+ GB- Level Guard Cancel Startup Active Recovery Static Diff
22 -- 6 7 2 HA CJR 7 12 16 --

Useful to start aircombos

Good to use during his Force Break as an overhead since its active for so long. (Knockdown, Force Break, Steer Down, j.k~whatever)

Good to combo into j.d.

j.S
GGAC RoboKy jS.png
Your combo starter versus grounded opponents.
Damage Tension GB+ GB- Level Guard Cancel Startup Active Recovery Static Diff
30 -- 10 7 3 HA CJR 9 2 23 --

Your main air move.

Best to start aircombos on heavy characters with.

Bounces on counterhit which makes for an easy followup B&B.

Jc'able so it's good for poking.

Good to instant airdash in with.

j.HS
GGAC RoboKy jH.png
Alternative to j.D for ending air combos.
Damage Tension GB+ GB- Level Guard Cancel Startup Active Recovery Static Diff
28 -- 14 6 4 HA CR 8 3 41 -1

Use after activating a TK'd Force Break to punish backdashes/poke.

Best for air to air.

Good to end aircombos with if opponent is too far away for J.d.

Sends opponent flying and wallsticks on counterhit.

You can't jumpcancel it, but you can special cancel it (on block or hit) ex: (air missiles, force break).

Gives a huuuuge amount of Heat, be careful.

j.D
GGAC RoboKy jD.png
Air combo ender when close.
Damage Tension GB+ GB- Level Guard Cancel Startup Active Recovery Static Diff
10×12 -- 10×12 1×12 2 HA CR 10 2×12 12 --

Throws

Throw
GGAC RoboKy throw.png
Damage Tension GB+ GB- Level Guard Cancel Startup Active Recovery Static Diff
60 4.00 -- 6×2 -- 45 pixels RF -- -- -- --
Air Throw
GGAC RoboKy airThrow.png
Damage Tension GB+ GB- Level Guard Cancel Startup Active Recovery Static Diff
60 4.00 -- 6 -- 88 pixels -- -- -- -- --

Special Moves

Overheat Explosion
GGAC RoboKy Overheatexplosion.png
You dun' goofed.
Damage Tension GB+ GB- Level Guard Cancel Startup Active Recovery Static Diff
35 0.4/1.2 -- 7 3 Unblockable -- Upon reaching 100 C Until it hits -- --
Delayed Getup
GGAC RoboKy DelayedGetup.png
Mind Games!
Damage Tension GB+ GB- Level Guard Cancel Startup Active Recovery Static Diff
-- -- -- -- -- -- -- -- -- -- --
Zadan-Ky
2D
GGAC RoboKy 2D.png
Mat
Damage Tension GB+ GB- Level Guard Cancel Startup Active Recovery Static Diff
-- See notes -- -- -- -- -- 38 106 total: 24 --
Kurattoku Ky?
236S
GGAC RoboKy 236S.png
Ground Bazooka.
Version Damage Tension GB+ GB- Level Guard Cancel Startup Active Recovery Static Diff
Level 1 10×3 -- 0 7 2 All -- 24 4×3 total: 57 +22
Level 2 14×4 -- 0 7 2 All -- 24 4×4 total: 57 +38
Level 3 18×5 -- 0 7 2 All -- 24 4×5 total: 57 +54
Ky-Genshou
214S
GGAC RoboKy 214S.png
Horsie.
Version Damage Tension GB+ GB- Level Guard Cancel Startup Active Recovery Static Diff
Level 1 30 -- 6 7 3 HLF R 21 12 7+landing 4 +2
Level 2 40 -- 6 6 5 HLF R 13 19 7+landing 6 +5
Level 3 50 -- 6 6 5 HLF R 11 24 7+landing 3 +8
Ky-Maku Home Run
623H
GGAC RoboKy 623H.png
SRK.
Version Damage Tension GB+ GB- Level Guard Cancel Startup Active Recovery Static Diff
Level 1 30 -- 10 7 3 HLF RF 9 3 38+landing 8 -35
Level 2 30,50 -- 6,14 7,6 2,4 HLF RF 3 2(4)3 35+landing 8 -29
Level 3 16,50 -- 20×2 6×2 5×2 HLF RF 3 4(6)4 29+landing 8 -22
Chounai-Ky Bargain
j.236S
GGAC RoboKy j236S.png
Air Missiles.
Version Damage Tension GB+ GB- Level Guard Cancel Startup Active Recovery Static Diff
Level 1 20 -- 0 7 2 All -- 11 -- total: 47 --
Level 2 60 -- 0 7 3 All -- 7 -- total: 31 --
Level 3 75 -- 0 6 5 All -- 9 -- total: 39 --
Tu-Ky-Geki
66 + Any button besides Dust
GGAC RoboKy 66X.png
Robo-Dash.
Damage Tension GB+ GB- Level Guard Cancel Startup Active Recovery Static Diff
50 -- 20 6 5 HLF RF 13 9 19 ?

Need to be dashing for a good 20 frames before you can activate.

Guaranteed to completely wreck people who don't know much about RK.

Invincible forward dash that beats almost everything.

FRC point window from frame 9-11.

FRC into command grab to terrify opponent.

Dizzy modifier of ZERO. =(

Upon hit Robo-Ky taunts and gains tension during this for a maximum of 60%.

Wallbounces on counterhit.

Frames 1-26 of this taunt are invincible as well, letting you gain meter during say, Dizzy's Flame Waves.

Taunt can be cancelled with FD. You can also special/normal cancel it into a combo or poke as well.

Technique for FD cancelling on hit - just as the move is hitting, press and hold k+s, then immediately hit 646 while holding those buttons down as fast as you can. You will bust out of the opening frames of the taunt with a primed, fast accelarating dash and can combo easier. This is much less effective than it was in #R as a result of the lower float on hit.

Ky-Denpa
63214K
GGAC RoboKy 63214K.png
Command Grab.
Damage Tension GB+ GB- Level Guard Cancel Startup Active Recovery Static Diff
8×n, 35 -- -- 6.0×n, 7 -- 70 pixels R 7 1 -- --

Drains up to 16% tension from the enemy depending on their tension gauge. You'll get as much as 31% tension added to your bar.

Number of hits and thus damage depend on enemies tension.

60% proration, so save that tension unless you can kill.

Executing it on a mat will give you better options.

Force Breaks

Kyou wa Ky-san
air 236D
GGAC RoboKy j236D.png
Excellent mobility for 25% tension.
Damage Tension GB+ GB- Level Guard Cancel Startup Active Recovery Static Diff
-- -25% -- -- -- -- -- -- -- 67 --

Allows you to steer Robot in the air for a max of 67 frames.

Initially decreases heat by 18.0 C degrees, and then slowly decreases more heat the longer you fly.

Resets air options.

CANNOT be canceled into a jump, airdash or block.

CAN be canceled into pretty much everything else.

CAN be Faultless Defense (FD) canceled. This is very important as it enables you to prematurely end the move, which gives you options you DON'T have during the move. Like...blocking.

If you let it expire/FD cancel it, you will have an airdash at your disposal before you land.

Can be TK'd for mixup. (Instant J.s/J.k, quick empty jump into a low, fly toward command grab.) If opponent blocks your mixup attempt, you can spend more tension and try it again. This is especially useful when your opponent is near death.

You can end aircombos with this move, fly towards, and as opponent techs go for an airthrow. (Note if you started a combo with an airdash this will not be possible.)

Overdrives

Dame na Yatsu wa Nani mo Yatte mo Dame
236236S, Sxn
GGAC RoboKy 236236S.png
ORA ORA ORA!
GGAC RoboKy 236236S 2.png
Boing!
Version Damage Tension GB+ GB- Level Guard Cancel Startup Active Recovery Static Diff
SSS... 6×n -50% 3×n 1×n 4 HLF R 2 + after freeze 2 2×n 9 +6
214S 70[95] -- 20 6 5 HLF R 7[3] 3 27[20] -11[-4]

Uses 50% tension.

Robo will begin throwing out punches wildly. For every 5 times you hit Slash, Robo will punch 6 times.

After frame 3 you can input 236s to perform a headbutt attack.

Your heat gauge will be rising fairly fast if you choose to mash slash.

At 80% heat the punch spam will begin to ignite the opponent. (What normally will happen with the majority of his normals at 80%+ Heat.)

You can choose not to mash slash and the move will end rather quickly, this is good for mixup. You can run up and attempt a command grab for example.

If you can put an enemy into juggle state while in Det. Mode, this move is what you want to follow up with. You will not overheat as Det. Mode cools you off, ensuring that the opponent will get hit by your self-destruct. The opponent can also not burst during this move (because it is a super), making their demise that much closer unless you are pushed too far away, or mess up.

If you put your enemy into juggle state with this move, you might want to consider this knockdown option: @ around 80% Heat stop mashing Slash, as soon as the punch spam ends, hit them with a 5p fire punch, dash, 5p fire punch, 5hs. This will knock them down and is sometimes more reliable than going for a headbutt.

Eventually you will get pushed away by mashing slash, so know when to end the super with headbutt.


Follow-up Headbutt (236s for followup)

After frame 3 of the Punch Spam part of the super you can input 236s to perform this headbutt attack. This requires no additional tension.

If you are between 95-99% heat and you do the headbutt, it will wallbounce the opponent and do additional damage (95 as opposed to 70!)

The headbutt removes 27 C degrees from Robot normally. If you do it during 95-99% heat it will take 30 C degrees and you will cool off 4 frames faster than if you had done it before 95% heat.

As stated in the previous section, try to get a feel as to when to input the headbutt followup. You'll want to do it before you get pushed too far away from your opponent during the Punch Spam part of the super.

Ky Sin no Ichigeki
623H
GGAC RoboKy 623H 2.png
SRK.
Damage Tension GB+ GB- Level Guard Cancel Startup Active Recovery Static Diff
30,110 -50% 20 6 5 HLF R 13 + after freeze 0 12(15)20 26+landing 10 --
Gen-Ky Lovers
236236P
GGAC RoboKy 236236P.png
Activate! Hopefully you're near them when this happens.
Version Damage Tension GB+ GB- Level Guard Cancel Startup Active Recovery Static Diff
Activation -- -50% -- -- -- -- -- 10 + after freeze 12 -- -- --
Detonation 12×27 -- 6×27 3×27 2 any -- 1 3×27 total: 134 +118

Instant Kill

13 Ky-Dan
236236HS
GGAC RoboKy IK1.png
GGAC RoboKy IK2.png
Send out the mini-robo-army!
Damage Tension GB+ GB- Level Guard Cancel Startup Active Recovery Static Diff
Fatal -- 20 -- 5 any -- 9+flash 9 4 26 -11

Strategy

Offense

Defense

Combos

Alternate Color Chart

P K S H D
AC
AC Robo normal h.png
AC Robo normal d.png
EX
Robo ex h.png
Robo ex d.png
Slash
Robo slash p.png
Robo slash k.png
Robo slash s.png
Robo slash h.png
Robo slash d.png
#R
Robo reload p.png
Robo reload k.png
Robo reload s.png
Robo reload h.png
Robo reload d.png