< GBVS
No edit summary |
|||
| (21 intermediate revisions by 6 users not shown) | |||
| Line 3: | Line 3: | ||
{{Overview | {{Overview | ||
| overview = <br> | | overview = <br> | ||
| lore = | | quote = It's time... | ||
| lore = Seox, sixth of the Eternals and master of the claw, strikes down his opponents with unrivaled speed. Marred by fate, he dons many masks—both physical and emotional—to obscure his true feelings. But this won’t stop him from pressing forward on his journey of atonement. | |||
He would venture to the ends of the skies, so long as he is one day able to reunite with the person he holds dear. | |||
| voice_actor = English: Griffin Puatu/Japanese: Nobuyuki Hiyama | |||
| summary = ... is an agile rush-down fighter, using a deadly arsenal of swift attacks and afterimages to break his opponent's defenses with an onslaught of mix-ups. | | summary = ... is an agile rush-down fighter, using a deadly arsenal of swift attacks and afterimages to break his opponent's defenses with an onslaught of mix-ups. | ||
| pros = | | pros = | ||
* '''Strong Pressure:''' Moves such as his [[{{PAGENAME}}#5U|5U]] and the rekka followup, [[{{PAGENAME}}#Six-Claw Execution Followups|Snake Bite]] give Seox a lot of | * '''Strong Pressure:''' Moves such as his [[{{PAGENAME}}#5U|5U]] and the rekka followup, [[{{PAGENAME}}#Gate of Demons|EX Gate of Demons]], and [[{{PAGENAME}}#Six-Claw Execution Followups|Snake Bite]] give Seox a lot of advantage to keep up and even loop his pressure. | ||
* '''High Mobility:''' Seox has many options to close the gap on the opponent with his [[{{PAGENAME}}#Empty Hand|Empty Hand]] wall jump, [[{{PAGENAME}}#5U|5U]] teleport, and his [[{{PAGENAME}}#Thunderflash|Thunderflash]] parry which he can hold to dash towards or jump at the opponent. | * '''High Mobility:''' Seox has many options to close the gap on the opponent with his [[{{PAGENAME}}#Empty Hand|Empty Hand]] wall jump, [[{{PAGENAME}}#5U|5U]] teleport, and his [[{{PAGENAME}}#Thunderflash|Thunderflash]] parry which he can hold to dash towards or jump at the opponent. | ||
* '''Fast Normals:''' Lots of Seox's normals start up and recover faster than average, accentuating his pressure and giving him some unique counterhit links. | |||
| cons = | | cons = | ||
* ''' | * '''Restricted Routing:''' Having [[{{PAGENAME}}#Six-Claw Execution|Six Claw Execution]] as his main combo tool can restrict a lot of combo routing especially as it is his main pressure tool as well. | ||
| voice actor = Japanese: [https://en.wikipedia.org/wiki/Nobuyuki_Hiyama Nobuyuki Hiyama] | | voice actor = Japanese: [https://en.wikipedia.org/wiki/Nobuyuki_Hiyama Nobuyuki Hiyama] | ||
}} | }} | ||
| Line 17: | Line 22: | ||
<div class="attack-container"> | <div class="attack-container"> | ||
<div class="attack-gallery"> | <div class="attack-gallery"> | ||
<tabber> | |||
Images = | |||
<gallery widths="210px" heights="210px" mode="nolines"> | <gallery widths="210px" heights="210px" mode="nolines"> | ||
GBVS_Seox_cL.png| | GBVS_Seox_cL.png| | ||
</gallery> | </gallery> | ||
|-| | |||
Hitboxes = | |||
<gallery widths="210px" heights="210px" mode="nolines"> | |||
GBVS_Seox_cL_Hitbox.png | |||
</gallery> | |||
</tabber> | |||
</div> | </div> | ||
<div class="attack-info"> | <div class="attack-info"> | ||
| Line 33: | Line 46: | ||
==== ==== | ==== ==== | ||
* Seox's fastest normal. | * Seox's fastest normal. | ||
Basic, +2 on block {{clr|1|c.L}}. Useful for abare due to its speed as well as pressure due to its frame advantage. Seox can use two of these in a row and still be in range for a {{clr|1|2L}}, making his pressure a bit scarier than average. | |||
{{CloseCard}} | |||
===<big>{{clr| | ===<big>{{clr|2|c.M}}</big>=== | ||
<div class="attack-container"> | <div class="attack-container"> | ||
<div class="attack-gallery"> | <div class="attack-gallery"> | ||
<tabber> | |||
Images = | |||
<gallery widths="210px" heights="210px" mode="nolines"> | <gallery widths="210px" heights="210px" mode="nolines"> | ||
GBVS_Seox_cM.png| | GBVS_Seox_cM.png| | ||
</gallery> | </gallery> | ||
|-| | |||
Hitboxes = | |||
<gallery widths="210px" heights="210px" mode="nolines"> | |||
GBVS_Seox_cM_Hitbox.png | |||
</gallery> | |||
</tabber> | |||
</div> | </div> | ||
<div class="attack-info"> | <div class="attack-info"> | ||
| Line 57: | Line 77: | ||
* Great frametrap button, but frametraps after are difficult. | * Great frametrap button, but frametraps after are difficult. | ||
* Links into {{clr|1|c.L}} on crouching. | * Links into {{clr|1|c.L}} on crouching. | ||
The Granblue c.M. Useful as a frame trap from lights as its more rewarding on counterhit. | * Links into {{clr|3|c.H}} on counterhit. | ||
The Granblue {{clr|2|c.M}}. Useful as a frame trap from lights as its more rewarding on counterhit. | |||
{{CloseCard}} | |||
===<big>{{clr| | ===<big>{{clr|3|c.H}}</big>=== | ||
<div class="attack-container"> | <div class="attack-container"> | ||
<div class="attack-gallery"> | <div class="attack-gallery"> | ||
<tabber> | |||
Images = | |||
<gallery widths="210px" heights="210px" mode="nolines"> | <gallery widths="210px" heights="210px" mode="nolines"> | ||
GBVS_Seox_cH-1.png|1st Hit | GBVS_Seox_cH-1.png|1st Hit | ||
GBVS_Seox_cH-2.png|2nd Hit | GBVS_Seox_cH-2.png|2nd Hit | ||
</gallery> | </gallery> | ||
|-| | |||
Hitboxes = | |||
<gallery widths="210px" heights="210px" mode="nolines"> | |||
GBVS_Seox_cH_Hitbox1.png | |||
GBVS_Seox_cH_Hitbox2.png | |||
</gallery> | |||
</tabber> | |||
</div> | </div> | ||
<div class="attack-info"> | <div class="attack-info"> | ||
| Line 80: | Line 109: | ||
|} | |} | ||
==== ==== | ==== ==== | ||
* Combos into 236M. | * Combos into {{clr|2|236M}}. | ||
High hitstun c.H that allows for combos not possible from Seox's autocombo without a crouch confirm. | High hitstun {{clr|3|c.H}} that allows for combos not possible from Seox's autocombo without a crouch confirm. Quite safe on block and makes for a high damage combo starter. Any {{clr|1|L}} button into {{clr|3|c.H}} will frame trap 6-frame buttons, but keep in mind that it will leave you minus. | ||
{{CloseCard}} | |||
===<big>Auto Combo</big>=== | ===<big>Auto Combo</big>=== | ||
| Line 90: | Line 118: | ||
<gallery widths="210px" heights="210px" mode="nolines"> | <gallery widths="210px" heights="210px" mode="nolines"> | ||
GBVS_Seox_cXX.png| | GBVS_Seox_cXX.png| | ||
GBVS_Seox_cXXX.png| | GBVS_Seox_cXXX.png|Yes, these are two different moves. | ||
</gallery> | </gallery> | ||
</div> | </div> | ||
| Line 105: | Line 133: | ||
|} | |} | ||
==== ==== | ==== ==== | ||
Mostly relegated to combo and blockstring filler. Seox can effectively frametrap from these with {{clr| | Mostly relegated to combo and blockstring filler. Seox can effectively frametrap from these with {{clr|2|236M}}, which in turn can make them useful as pressure reset points once respect is established. | ||
{{CloseCard}} | |||
===<big>{{clr|1|f.L}}</big>=== | ===<big>{{clr|1|f.L}}</big>=== | ||
<div class="attack-container"> | <div class="attack-container"> | ||
<div class="attack-gallery"> | <div class="attack-gallery"> | ||
<tabber> | |||
Images = | |||
<gallery widths="210px" heights="210px" mode="nolines"> | <gallery widths="210px" heights="210px" mode="nolines"> | ||
GBVS_Seox_fL.png| | GBVS_Seox_fL.png| | ||
</gallery> | </gallery> | ||
|-| | |||
Hitboxes = | |||
<gallery widths="210px" heights="210px" mode="nolines"> | |||
GBVS_Seox_fL_Hitbox.png | |||
</gallery> | |||
</tabber> | |||
</div> | </div> | ||
<div class="attack-info"> | <div class="attack-info"> | ||
| Line 128: | Line 163: | ||
==== ==== | ==== ==== | ||
Mostly a punish tool for quick-recovering moves as Seox's plus on block lights have comparable range. Using three {{clr|1|2L}}s will leave Seox out of range. | Mostly a punish tool for quick-recovering moves as Seox's plus on block lights have comparable range. Using three {{clr|1|2L}}s will leave Seox out of range. | ||
{{CloseCard}} | |||
===<big>{{clr| | ===<big>{{clr|2|f.M}}</big>=== | ||
<div class="attack-container"> | <div class="attack-container"> | ||
<div class="attack-gallery"> | <div class="attack-gallery"> | ||
<tabber> | |||
Images = | |||
<gallery widths="210px" heights="210px" mode="nolines"> | <gallery widths="210px" heights="210px" mode="nolines"> | ||
GBVS_Seox_fM.png| | GBVS_Seox_fM.png| | ||
</gallery> | </gallery> | ||
|-| | |||
Hitboxes = | |||
<gallery widths="210px" heights="210px" mode="nolines"> | |||
GBVS_Seox_fM_Hitbox.png | |||
</gallery> | |||
</tabber> | |||
</div> | </div> | ||
<div class="attack-info"> | <div class="attack-info"> | ||
| Line 150: | Line 192: | ||
==== ==== | ==== ==== | ||
Seox's longest poke. Cancel into rekkas for pressure and combos. | Seox's longest poke. Cancel into rekkas for pressure and combos. | ||
{{CloseCard}} | |||
===<big>{{clr| | ===<big>{{clr|3|f.H}}</big>=== | ||
<div class="attack-container"> | <div class="attack-container"> | ||
<div class="attack-gallery"> | <div class="attack-gallery"> | ||
<tabber> | |||
Images = | |||
<gallery widths="210px" heights="210px" mode="nolines"> | <gallery widths="210px" heights="210px" mode="nolines"> | ||
GBVS_Seox_fH.png| | GBVS_Seox_fH.png| | ||
</gallery> | </gallery> | ||
|-| | |||
Hitboxes = | |||
<gallery widths="210px" heights="210px" mode="nolines"> | |||
GBVS_Seox_fH_Hitbox.png | |||
</gallery> | |||
</tabber> | |||
</div> | </div> | ||
<div class="attack-info"> | <div class="attack-info"> | ||
| Line 171: | Line 220: | ||
|} | |} | ||
==== ==== | ==== ==== | ||
* Same startup as {{clr| | * Same startup as {{clr|2|f.M}}. | ||
Comparable startup and range to {{clr| | Comparable startup and range to {{clr|2|f.M}} but with higher damage, clash level, and recovery. Excellent as a whiff punish tool as its higher hitstun gives more time to confirm. | ||
{{CloseCard}} | |||
===<big>{{clr|1|2L}}</big>=== | ===<big>{{clr|1|2L}}</big>=== | ||
<div class="attack-container"> | <div class="attack-container"> | ||
<div class="attack-gallery"> | <div class="attack-gallery"> | ||
<tabber> | |||
Images = | |||
<gallery widths="210px" heights="210px" mode="nolines"> | <gallery widths="210px" heights="210px" mode="nolines"> | ||
GBVS_Seox_2L.png| | GBVS_Seox_2L.png| | ||
</gallery> | </gallery> | ||
|-| | |||
Hitboxes = | |||
<gallery widths="210px" heights="210px" mode="nolines"> | |||
GBVS_Seox_2L_Hitbox.png | |||
</gallery> | |||
</tabber> | |||
</div> | </div> | ||
<div class="attack-info"> | <div class="attack-info"> | ||
| Line 195: | Line 251: | ||
==== ==== | ==== ==== | ||
* Excellent pressure tool. | * Excellent pressure tool. | ||
Seox can fit three of these in a row and still be in range for another frame trap with {{clr| | Seox can fit three of these in a row and still be in range for another frame trap with {{clr|2|f.M}} or {{clr|2|2M}}. Links into {{clr|2|c.M}} on standing opponents and {{clr|2|2M}} on crouching opponents. | ||
{{CloseCard}} | |||
===<big>{{clr| | ===<big>{{clr|2|2M}}</big>=== | ||
<div class="attack-container"> | <div class="attack-container"> | ||
<div class="attack-gallery"> | <div class="attack-gallery"> | ||
<tabber> | |||
Images = | |||
<gallery widths="210px" heights="210px" mode="nolines"> | <gallery widths="210px" heights="210px" mode="nolines"> | ||
GBVS_Seox_2M.png| | GBVS_Seox_2M.png| | ||
</gallery> | </gallery> | ||
|-| | |||
Hitboxes = | |||
<gallery widths="210px" heights="210px" mode="nolines"> | |||
GBVS_Seox_2M_Hitbox.png | |||
</gallery> | |||
</tabber> | |||
</div> | </div> | ||
<div class="attack-info"> | <div class="attack-info"> | ||
| Line 217: | Line 280: | ||
|} | |} | ||
==== ==== | ==== ==== | ||
One frame faster than {{clr| | One frame faster than {{clr|2|f.M}} at the cost of a little reach. Great frame advantage for a {{clr|2|2M}} normal and quite difficult to whiff punish. | ||
{{CloseCard}} | |||
===<big>{{clr| | ===<big>{{clr|3|2H}}</big>=== | ||
<div class="attack-container"> | <div class="attack-container"> | ||
<div class="attack-gallery"> | <div class="attack-gallery"> | ||
<tabber> | |||
Images = | |||
<gallery widths="210px" heights="210px" mode="nolines"> | <gallery widths="210px" heights="210px" mode="nolines"> | ||
GBVS_Seox_2H.png| | GBVS_Seox_2H.png| | ||
</gallery> | </gallery> | ||
|-| | |||
Hitboxes = | |||
<gallery widths="210px" heights="210px" mode="nolines"> | |||
GBVS_Seox_2H_Hitbox1.png | |||
GBVS_Seox_2H_Hitbox2.png | |||
</gallery> | |||
</tabber> | |||
</div> | </div> | ||
<div class="attack-info"> | <div class="attack-info"> | ||
| Line 241: | Line 312: | ||
* Seox's main anti-air. | * Seox's main anti-air. | ||
Converts into good damage on AA CH and decent damage on normal AA connect. | Converts into good damage on AA CH and decent damage on normal AA connect. | ||
{{CloseCard}} | |||
===<big>{{clr| | ===<big>{{clr|4|2U}}</big>=== | ||
<div class="attack-container"> | <div class="attack-container"> | ||
<div class="attack-gallery"> | <div class="attack-gallery"> | ||
<tabber> | |||
Images = | |||
<gallery widths="210px" heights="210px" mode="nolines"> | <gallery widths="210px" heights="210px" mode="nolines"> | ||
GBVS_Seox_2U.png| | GBVS_Seox_2U.png| | ||
</gallery> | </gallery> | ||
|-| | |||
Hitboxes = | |||
<gallery widths="210px" heights="210px" mode="nolines"> | |||
GBVS_Seox_2U_Hitbox.png | |||
</gallery> | |||
</tabber> | |||
</div> | </div> | ||
<div class="attack-info"> | <div class="attack-info"> | ||
| Line 262: | Line 340: | ||
|} | |} | ||
==== ==== | ==== ==== | ||
* Fast, but too slow to use as a crouch confirm. | |||
Primarily a combo tool due to its long recovery and high disadvantage on block. One frame slower than {{clr|2|2M}} and the same speed as {{clr|2|f.M}} and {{clr|3|f.H}} gives it a lot of competition as a poke. | |||
{{CloseCard}} | |||
===<big>{{clr|1|j.L}}</big>=== | ===<big>{{clr|1|j.L}}</big>=== | ||
<div class="attack-container"> | <div class="attack-container"> | ||
<div class="attack-gallery"> | <div class="attack-gallery"> | ||
<tabber> | |||
Images = | |||
<gallery widths="210px" heights="210px" mode="nolines"> | <gallery widths="210px" heights="210px" mode="nolines"> | ||
GBVS_Seox_jL.png| | GBVS_Seox_jL.png| | ||
</gallery> | </gallery> | ||
|-| | |||
Hitboxes = | |||
<gallery widths="210px" heights="210px" mode="nolines"> | |||
GBVS_Seox_jL_Hitbox.png | |||
</gallery> | |||
</tabber> | |||
</div> | </div> | ||
<div class="attack-info"> | <div class="attack-info"> | ||
| Line 283: | Line 370: | ||
|} | |} | ||
==== ==== | ==== ==== | ||
* Active until landing. | |||
* Great horizontal reach. | |||
{{CloseCard}} | |||
===<big>{{clr| | ===<big>{{clr|2|j.M}}</big>=== | ||
<div class="attack-container"> | <div class="attack-container"> | ||
<div class="attack-gallery"> | <div class="attack-gallery"> | ||
<tabber> | |||
Images = | |||
<gallery widths="210px" heights="210px" mode="nolines"> | <gallery widths="210px" heights="210px" mode="nolines"> | ||
GBVS_Seox_jM.png| | GBVS_Seox_jM.png| | ||
</gallery> | </gallery> | ||
|-| | |||
Hitboxes = | |||
<gallery widths="210px" heights="210px" mode="nolines"> | |||
GBVS_Seox_jM_Hitbox.png | |||
</gallery> | |||
</tabber> | |||
</div> | </div> | ||
<div class="attack-info"> | <div class="attack-info"> | ||
| Line 304: | Line 400: | ||
|} | |} | ||
==== ==== | ==== ==== | ||
* | * Seox's crossup normal. | ||
Instant {{clr|2|j.M}} can hit taller standing characters like Katalina and Percival. Other than that, use this when it's hard to tell what side Seox will land on. | |||
{{CloseCard}} | |||
===<big>{{clr| | ===<big>{{clr|3|j.H}}</big>=== | ||
<div class="attack-container"> | <div class="attack-container"> | ||
<div class="attack-gallery"> | <div class="attack-gallery"> | ||
<tabber> | |||
Images = | |||
<gallery widths="210px" heights="210px" mode="nolines"> | <gallery widths="210px" heights="210px" mode="nolines"> | ||
GBVS_Seox_jH.png| | GBVS_Seox_jH.png| | ||
</gallery> | </gallery> | ||
|-| | |||
Hitboxes = | |||
<gallery widths="210px" heights="210px" mode="nolines"> | |||
GBVS_Seox_jH_Hitbox.png | |||
</gallery> | |||
</tabber> | |||
</div> | </div> | ||
<div class="attack-info"> | <div class="attack-info"> | ||
| Line 327: | Line 430: | ||
|} | |} | ||
==== ==== | ==== ==== | ||
* Seox's primary jump-in. | |||
{{clr|3|j.H}} has the most downwards reach of all of Seox's air normals and has decent horizontal range too, making it a great jump-in button for fireball punishes. | |||
{{CloseCard}} | |||
===<big>{{clr| | ===<big>{{clr|4|j.U}}</big>=== | ||
<div class="attack-container"> | <div class="attack-container"> | ||
<div class="attack-gallery"> | <div class="attack-gallery"> | ||
<tabber> | |||
Images = | |||
<gallery widths="210px" heights="210px" mode="nolines"> | <gallery widths="210px" heights="210px" mode="nolines"> | ||
GBVS_Seox_jU.png|Divekick | GBVS_Seox_jU.png|Divekick | ||
</gallery> | </gallery> | ||
|-| | |||
Hitboxes = | |||
<gallery widths="210px" heights="210px" mode="nolines"> | |||
GBVS_Seox_jU_Hitbox.png | |||
</gallery> | |||
</tabber> | |||
</div> | </div> | ||
<div class="attack-info"> | <div class="attack-info"> | ||
| Line 349: | Line 461: | ||
==== ==== | ==== ==== | ||
* Can be advantageous if it hits an opponent's foot area. | * Can be advantageous if it hits an opponent's foot area. | ||
Pretty slow but serves its purpose of throwing off anti-air timings. Leads to a combo if it connects late on a crouching opponent. Part of what makes Seox's approach so good. | |||
{{CloseCard}} | |||
==Unique Action== | ==Unique Action== | ||
===<big>Demon Step/New Perspective</big>=== | ===<big>Demon Step/New Perspective</big>=== | ||
<span class="input-badge">'''{{clr| | <span class="input-badge">'''{{clr|4|5U}}'''</span> or <span class="input-badge">'''{{clr|4|5[U]}}'''</span> | ||
<div class="attack-container"> | <div class="attack-container"> | ||
<div class="attack-gallery"> | <div class="attack-gallery"> | ||
<tabber> | |||
Images = | |||
<gallery widths="210px" heights="210px" mode="nolines"> | <gallery widths="210px" heights="210px" mode="nolines"> | ||
GBVS_Seox_5U-1.png|Clone | GBVS_Seox_5U-1.png|Clone projectile (with hurtboxes) | ||
GBVS_Seox_5U-2.png| | GBVS_Seox_5U-2.png|Hold to teleport | ||
</gallery> | </gallery> | ||
|-| | |||
Hitboxes = | |||
<gallery widths="210px" heights="210px" mode="nolines"> | |||
GBVS_Seox_5U_Hitbox.png | |||
</gallery> | |||
</tabber> | |||
</div> | </div> | ||
<div class="attack-info"> | <div class="attack-info"> | ||
| Line 376: | Line 495: | ||
==== ==== | ==== ==== | ||
Seox sends out a shadow clone of himself as a projectile. Unlike other projectiles in the game, this projectile can be attacked and will disappear if hit. Holding the button will make Seox teleport to wherever the fireball connects, but will also make him take damage if the fireball is hit by an attack. The held version combos into {{clr|1|c.L}}. | Seox sends out a shadow clone of himself as a projectile. Unlike other projectiles in the game, this projectile can be attacked and will disappear if hit. Holding the button will make Seox teleport to wherever the fireball connects, but will also make him take damage if the fireball is hit by an attack. The held version combos into {{clr|1|c.L}}. | ||
{{CloseCard}} | |||
==Universal Mechanics== | ==Universal Mechanics== | ||
| Line 383: | Line 501: | ||
<div class="attack-container"> | <div class="attack-container"> | ||
<div class="attack-gallery"> | <div class="attack-gallery"> | ||
<tabber> | |||
Images = | |||
<gallery widths="210px" heights="210px" mode="nolines"> | <gallery widths="210px" heights="210px" mode="nolines"> | ||
GBVS_Seox_fThrow.png||Forward Throw | GBVS_Seox_fThrow.png||Forward Throw | ||
GBVS_Seox_bThrow.png|Back Throw | GBVS_Seox_bThrow.png|Back Throw | ||
</gallery> | </gallery> | ||
|-| | |||
Hitboxes = | |||
<gallery widths="210px" heights="210px" mode="nolines"> | |||
GBVS_Seox_fThrow_Hitbox.png | |||
</gallery> | |||
</tabber> | |||
</div> | </div> | ||
<div class="attack-info"> | <div class="attack-info"> | ||
| Line 399: | Line 525: | ||
|} | |} | ||
==== ==== | ==== ==== | ||
{{CloseCard}} | |||
===<big>Air Throw</big>=== | ===<big>Air Throw</big>=== | ||
<div class="attack-container"> | <div class="attack-container"> | ||
<div class="attack-gallery"> | <div class="attack-gallery"> | ||
<tabber> | |||
Images = | |||
<gallery widths="210px" heights="210px" mode="nolines"> | <gallery widths="210px" heights="210px" mode="nolines"> | ||
GBVS_Seox_aThrow.png| | GBVS_Seox_aThrow.png| | ||
</gallery> | </gallery> | ||
|-| | |||
Hitboxes = | |||
<gallery widths="210px" heights="210px" mode="nolines"> | |||
GBVS_Seox_aThrow_Hitbox.png | |||
</gallery> | |||
</tabber> | |||
</div> | </div> | ||
<div class="attack-info"> | <div class="attack-info"> | ||
| Line 420: | Line 553: | ||
|} | |} | ||
==== ==== | ==== ==== | ||
{{CloseCard}} | |||
===<big>Overhead Attack</big>=== | ===<big>Overhead Attack</big>=== | ||
<div class="attack-container"> | <div class="attack-container"> | ||
<div class="attack-gallery"> | <div class="attack-gallery"> | ||
<tabber> | |||
Images = | |||
<gallery widths="210px" heights="210px" mode="nolines"> | <gallery widths="210px" heights="210px" mode="nolines"> | ||
GBVS_Seox_uoh.png| | GBVS_Seox_uoh.png| | ||
</gallery> | </gallery> | ||
|-| | |||
Hitboxes = | |||
<gallery widths="210px" heights="210px" mode="nolines"> | |||
GBVS_Seox_UOH_Hitbox1.png | |||
GBVS_Seox_UOH_Hitbox2.png | |||
</gallery> | |||
</tabber> | |||
</div> | </div> | ||
<div class="attack-info"> | <div class="attack-info"> | ||
| Line 441: | Line 582: | ||
|} | |} | ||
==== ==== | ==== ==== | ||
{{CloseCard}} | |||
==Special Moves== | ==Special Moves== | ||
| Line 449: | Line 589: | ||
<div class="attack-container"> | <div class="attack-container"> | ||
<div class="attack-gallery"> | <div class="attack-gallery"> | ||
<tabber> | |||
Images = | |||
<gallery widths="210px" heights="210px" mode="nolines"> | <gallery widths="210px" heights="210px" mode="nolines"> | ||
GBVS_Seox_236L.png|L version is Blue | GBVS_Seox_236L.png|L version is Blue | ||
| Line 454: | Line 596: | ||
GBVS_Seox_236H.png|H Version is Gold | GBVS_Seox_236H.png|H Version is Gold | ||
</gallery> | </gallery> | ||
|-| | |||
Hitboxes = | |||
<gallery widths="210px" heights="210px" mode="nolines"> | |||
GBVS_Seox_236L_Hitbox.png|236L, First hit | |||
GBVS_Seox_236X_Hitbox.png|236X. The second hit of the light version, second and fourth hits of the heavy version, and the one hit of the medium version use this hitbox | |||
GBVS_Seox_236H_Hitbox.png|236H, first and third hit. The second and fourth hit use the previous hitbox | |||
</gallery> | |||
</tabber> | |||
</div> | </div> | ||
<div class="attack-info"> | <div class="attack-info"> | ||
| Line 475: | Line 625: | ||
;236M | ;236M | ||
* Hits once with a red trail. | * Hits once with a red trail. | ||
Situational combo extender and frametrap tool. Combos from autocombo on crouching opponents and {{clr| | Situational combo extender and frametrap tool. Combos from autocombo on crouching opponents and {{clr|3|c.H}} always. Always combos into the 6M follow-up. | ||
---- | ---- | ||
;236H | ;236H | ||
* Yellow effect makes it easy to distinguish. | * Yellow effect makes it easy to distinguish. | ||
Combos from anything and always leads to the 6M follow-up for good damage. Be careful using this as you lose Seox's main combo and pressure tool. | Combos from anything and always leads to the 6M follow-up for good damage. Be careful using this as you lose Seox's main combo and pressure tool. | ||
{{CloseCard}} | |||
===<big>Six-Claw Execution Followups</big>=== | ===<big>Six-Claw Execution Followups</big>=== | ||
| Line 487: | Line 636: | ||
<div class="attack-container"> | <div class="attack-container"> | ||
<div class="attack-gallery"> | <div class="attack-gallery"> | ||
<tabber> | |||
Images = | |||
<gallery widths="210px" heights="210px" mode="nolines"> | <gallery widths="210px" heights="210px" mode="nolines"> | ||
GBVS_Seox_236x6x.png|Archdemon Kick ( | GBVS_Seox_236x6x.png|Archdemon Kick (6X) | ||
GBVS_Seox_236x4x.png|Wolf's Howl ( | GBVS_Seox_236x4x.png|Wolf's Howl (4X) | ||
GBVS_Seox_236x8x.png|Snake bite ( | GBVS_Seox_236x8x.png|Snake bite (8X) | ||
GBVS_Seox_236x6u.png|Shadow Trace Forward (6U) | GBVS_Seox_236x6u.png|Shadow Trace Forward (6U) | ||
GBVS_Seox_236x4u.png|Shadow Trace Backwards (4U) | GBVS_Seox_236x4u.png|Shadow Trace Backwards (4U) | ||
</gallery> | </gallery> | ||
|-| | |||
Hitboxes = | |||
<gallery widths="210px" heights="210px" mode="nolines"> | |||
GBVS_Seox_236x6x_Hitbox1.png|Archdemon Kick (6X) | |||
GBVS_Seox_236x6x_Hitbox2.png|Archdemon Kick (6X) | |||
GBVS_Seox_236x4x_Hitbox.png|Wolf's Howl (4X) | |||
GBVS_Seox_236x8x_Hitbox.png|Snake bite (8X) | |||
</gallery> | |||
</tabber> | |||
</div> | </div> | ||
<div class="attack-info"> | <div class="attack-info"> | ||
| Line 508: | Line 668: | ||
==== ==== | ==== ==== | ||
;Archdemon Kick (6X) | ;Archdemon Kick (6X) | ||
* L version keeps opponent grounded. Blue trail. | * {{clr|1|L}} version keeps opponent grounded. Blue trail. | ||
* M version launches on hit. Red trail. | * {{clr|2|M}} version launches on hit. Red trail. | ||
* Cancels into any other follow-up. | * Cancels into any other follow-up. | ||
Seox's rekka extender. The M version always combos from {{clr| | Seox's rekka extender. The {{clr|2|M}} version always combos from {{clr|2|236M}} and {{clr|3|236H}}, but only combos from {{clr|1|236L}} on crouching opponents. | ||
---- | ---- | ||
;Wolf's Howl (4X) | ;Wolf's Howl (4X) | ||
* L version combos from anything. | * {{clr|1|L}} version combos from anything. | ||
* M version combos from M Archdemon kick. | * {{clr|2|M}} version combos from M Archdemon kick. | ||
* M version wallbounces on counterhit. | * {{clr|2|M}} version wallbounces on counterhit. | ||
A thrusting attack that sends the opponent flying. L version is your standard ground combo ender. M version works as a frametrap and another potential crouch confirm point. | A thrusting attack that sends the opponent flying. {{clr|1|L}} version is your standard ground combo ender. {{clr|2|M}} version works as a frametrap and another potential crouch confirm point. Going for a frametrap with the {{clr|2|M}} version is very dangerous but leads to excellent damage in the corner. | ||
---- | ---- | ||
;Snake Bite (8X) | ;Snake Bite (8X) | ||
* L version has a blue trail and is a little faster. Links into {{clr|1|c.L}}. | * {{clr|1|L}} version has a blue trail and is a little faster. Links into {{clr|1|c.L}}. | ||
* M version has a red trail and links into {{clr| | * {{clr|2|M}} version has a red trail and links into {{clr|2|c.M}}. | ||
Seox's pressure reset option from Six-Claw Execution. Always plus on block and ground bounces from {{clr| | Seox's pressure reset option from Six-Claw Execution. Always plus on block and ground bounces from {{clr|3|236H}} allowing for extended combos. Gives a closer knockdown than {{clr|2|M}} Wolf's Howl on opponents launched from {{clr|2|M}} Archdemon Kick at the cost of damage. | ||
---- | ---- | ||
;Shadow Trace ({{clr|5|4U}}/{{clr|5|6U}}) | ;Shadow Trace ({{clr|5|4U}}/{{clr|5|6U}}) | ||
* Command dash, can phase through opponents. | * Command dash, can phase through opponents. | ||
A movement option off of Six-Claw Execution. Seox can dash forward or backward based on input. The backdash version is useful for | A movement option off of Six-Claw Execution. Seox can dash forward or backward based on input. The backdash version is useful for gaining space and is generally quite safe. The forward version is great for sneaking in a pressure reset on an opponent respecting a potential frame trap or looking for Snake Bite. | ||
{{CloseCard}} | |||
===<big>Thunderflash</big>=== | ===<big>Thunderflash</big>=== | ||
| Line 534: | Line 693: | ||
<div class="attack-container"> | <div class="attack-container"> | ||
<div class="attack-gallery"> | <div class="attack-gallery"> | ||
<tabber> | |||
Images = | |||
<gallery widths="210px" heights="210px" mode="nolines"> | <gallery widths="210px" heights="210px" mode="nolines"> | ||
GBVS_Seox_623x-1.png|Stance | GBVS_Seox_623x-1.png|Stance | ||
GBVS_Seox_623x-2.png|Stance Attack | GBVS_Seox_623x-2.png|Stance Attack | ||
GBVS_Seox_623L.png|L and H Versions Move forward | GBVS_Seox_623L.png|{{clr|1|L}} and {{clr|3|H}} Versions Move forward | ||
GBVS_Seox_623M.png|M version Moves upward | GBVS_Seox_623M.png|{{clr|2|M}} version Moves upward | ||
</gallery> | </gallery> | ||
|-| | |||
Hitboxes = | |||
<gallery widths="210px" heights="210px" mode="nolines"> | |||
GBVS_Seox_623x_Hitbox.png| | |||
</gallery> | |||
</tabber> | |||
</div> | </div> | ||
<div class="attack-info"> | <div class="attack-info"> | ||
| Line 556: | Line 723: | ||
---- | ---- | ||
;623L/623M | ;623L/623M | ||
* L version moves forward if held. | * {{clr|1|L}} version moves forward if held. | ||
* M version moves up if held. | * {{clr|2|M}} version moves up if held. | ||
Not instant but useful to get around predictable things in neutral like fireballs. | Not instant but useful to get around predictable things in neutral like fireballs. | ||
---- | ---- | ||
| Line 564: | Line 731: | ||
* Active from frame 1, but shorter active time than non-EX versions. | * Active from frame 1, but shorter active time than non-EX versions. | ||
Seox's counter reversal. Vulnerable to throws but beats safejumps and has the added benefit of also being a movement tool. | Seox's counter reversal. Vulnerable to throws but beats safejumps and has the added benefit of also being a movement tool. | ||
{{CloseCard}} | |||
===<big>Gate of Demons</big>=== | ===<big>Gate of Demons</big>=== | ||
| Line 571: | Line 737: | ||
<div class="attack-container"> | <div class="attack-container"> | ||
<div class="attack-gallery"> | <div class="attack-gallery"> | ||
<tabber> | |||
Images = | |||
<gallery widths="210px" heights="210px" mode="nolines"> | |||
GBVS_Seox_214L.png|{{clr|1|214L}} | |||
GBVS_Seox_214M.png|{{clr|2|214M}} | |||
GBVS_Seox_214H.png|{{clr|3|214H}} | |||
GBVS_Seox_j214L.png|{{clr|1|j.214L}} | |||
GBVS_Seox_j214M.png|{{clr|2|j.214M}} | |||
GBVS_Seox_j214H.png| {{clr|3|j.214H}} - "Let me win neutral real quick" | |||
</gallery> | |||
|-| | |||
Hitboxes = | |||
<gallery widths="210px" heights="210px" mode="nolines"> | <gallery widths="210px" heights="210px" mode="nolines"> | ||
GBVS_Seox_214L_Hitbox1.png | |||
GBVS_Seox_214L_Hitbox2.png | |||
GBVS_Seox_214M_Hitbox.png | |||
GBVS_Seox_j214X_Hitbox.png | |||
GBVS_Seox_j214H_Hitbox.png | |||
</gallery> | </gallery> | ||
</tabber> | |||
</div> | </div> | ||
<div class="attack-info"> | <div class="attack-info"> | ||
| Line 597: | Line 775: | ||
---- | ---- | ||
;214M | ;214M | ||
* Claw dive. | * Claw dive. | ||
*-1 point blank, even on block at a large range and +1 at max range. Useful for bullying characters without a 5f button. | |||
---- | ---- | ||
;214H | ;214H | ||
* Two-hit projectile like {{clr|1|214L}}. | * Two-hit projectile like {{clr|1|214L}}. | ||
* Combo extender from {{clr| | * Combo extender from {{clr|3|c.H}}. | ||
* Almost always consistent AA combo from {{clr|3|2H}} even on normal hit. | |||
Plus on block and allows for combo and pressure extensions. | Plus on block and allows for combo and pressure extensions. | ||
---- | ---- | ||
| Line 616: | Line 795: | ||
* Air fireball. | * Air fireball. | ||
Just as useful as the ground version. Using it in combos is more difficult but it's a lot more applicable in neutral. | Just as useful as the ground version. Using it in combos is more difficult but it's a lot more applicable in neutral. | ||
{{CloseCard}} | |||
===<big>Empty Hand</big>=== | ===<big>Empty Hand</big>=== | ||
| Line 623: | Line 801: | ||
<div class="attack-container"> | <div class="attack-container"> | ||
<div class="attack-gallery"> | <div class="attack-gallery"> | ||
<tabber> | |||
Images = | |||
<gallery widths="210px" heights="210px" mode="nolines"> | <gallery widths="210px" heights="210px" mode="nolines"> | ||
GBVS_Seox_28x.png|Jumps on wall first | GBVS_Seox_28x.png|Jumps on wall first | ||
GBVS_Seox_28L.png| | GBVS_Seox_28L.png|{{clr|1|[2]8L}}: downward angle | ||
GBVS_Seox_28M.png| | GBVS_Seox_28M.png|{{clr|2|[2]8M}}: more horizontal | ||
GBVS_Seox_28H-1.png| | GBVS_Seox_28H-1.png|{{clr|3|[2]8H}}: homing | ||
GBVS_Seox_28H-2.png| | GBVS_Seox_28H-2.png|{{clr|3|[2]8[H]}}: fakeout | ||
</gallery> | |||
|-| | |||
Hitboxes = | |||
<gallery widths="210px" heights="210px" mode="nolines"> | |||
GBVS_Seox_28L_Hitbox.png | |||
GBVS_Seox_28M_Hitbox.png | |||
</gallery> | </gallery> | ||
</tabber> | |||
</div> | </div> | ||
<div class="attack-info"> | <div class="attack-info"> | ||
| Line 657: | Line 844: | ||
* Can be held. | * Can be held. | ||
Can lead to a combo if it counterhits but is quite spacing-dependant. | Can lead to a combo if it counterhits but is quite spacing-dependant. | ||
{{CloseCard}} | |||
==Skybound Art== | ==Skybound Art== | ||
===<big>Void Claws: Terminus</big>=== | ===<big>Void Claws: Terminus</big>=== | ||
<span class="input-badge">'''{{clr| | <span class="input-badge">'''{{clr|3|236236H}}'''</span> or <span class="input-badge">'''236S'''</span> | ||
<div class="attack-container"> | <div class="attack-container"> | ||
<div class="attack-gallery"> | <div class="attack-gallery"> | ||
<tabber> | |||
Images = | |||
<gallery widths="210px" heights="210px" mode="nolines"> | <gallery widths="210px" heights="210px" mode="nolines"> | ||
GBVS_Seox_VoidClawsTerminus.png| | GBVS_Seox_VoidClawsTerminus.png| | ||
GBVS_Seox_VoidClawsTerminus2.png| | GBVS_Seox_VoidClawsTerminus2.png| | ||
</gallery> | </gallery> | ||
|-| | |||
Hitboxes = | |||
<gallery widths="210px" heights="210px" mode="nolines"> | |||
GBVS_Seox_VoidClawsTerminus_Hitbox1.png| | |||
GBVS_Seox_VoidClawsTerminus_Hitbox2.png| | |||
</gallery> | |||
</tabber> | |||
</div> | </div> | ||
<div class="attack-info"> | <div class="attack-info"> | ||
| Line 681: | Line 876: | ||
|} | |} | ||
==== ==== | ==== ==== | ||
A claw strike with invulnerability. If it hits close, Seox will follow up with a series of cinematic attacks. The range of this super is short compared to other thrust supers and the range that will activate his cinematic is even smaller, around f.M range. | A claw strike with invulnerability. If it hits close, Seox will follow up with a series of cinematic attacks. The range of this super is short compared to other thrust supers and the range that will activate his cinematic is even smaller, around {{clr|2|f.M}} range. | ||
{{CloseCard}} | |||
===<big>Six-Ruin's Enlightenment</big>=== | ===<big>Six-Ruin's Enlightenment</big>=== | ||
<span class="input-badge">'''{{clr| | <span class="input-badge">'''{{clr|3|214214H}}'''</span> or <span class="input-badge">'''214S'''</span> | ||
<div class="attack-container"> | <div class="attack-container"> | ||
<div class="attack-gallery"> | <div class="attack-gallery"> | ||
<gallery widths="210px" heights="210px" mode="nolines"> | <gallery widths="210px" heights="210px" mode="nolines"> | ||
GBVS_Seox_SixRuinsEnlightenment.png|Zero's Sougenmu | |||
GBVS_Seox_SixRuinsEnlightenment2.png| | |||
</gallery> | </gallery> | ||
</div> | </div> | ||
| Line 706: | Line 900: | ||
==== ==== | ==== ==== | ||
Seox creates two shadow clones who will mimic his actions and attack with him. While the Skybound Art is active, Seox's attacks will hit multiple times. | Seox creates two shadow clones who will mimic his actions and attack with him. While the Skybound Art is active, Seox's attacks will hit multiple times. | ||
{{CloseCard}} | |||
==Super Skybound Art== | ==Super Skybound Art== | ||
===<big>Three Thousand and One Talons</big>=== | ===<big>Three Thousand and One Talons</big>=== | ||
<span class="input-badge">'''{{clr| | <span class="input-badge">'''{{clr|4|236236U}}'''</span> or <span class="input-badge">'''236SU'''</span> | ||
<div class="attack-container"> | <div class="attack-container"> | ||
<div class="attack-gallery"> | <div class="attack-gallery"> | ||
<tabber> | |||
Images = | |||
<gallery widths="210px" heights="210px" mode="nolines"> | |||
GBVS Seox ThreeThousandAndOneTalons.png| | |||
GBVS Seox ThreeThousandAndOneTalons2.png|Bionic Arm Super | |||
</gallery> | |||
|-| | |||
Hitboxes = | |||
<gallery widths="210px" heights="210px" mode="nolines"> | <gallery widths="210px" heights="210px" mode="nolines"> | ||
GBVS Seox ThreeThousandAndOneTalons_Hitbox1.png| | |||
GBVS Seox ThreeThousandAndOneTalons_Hitbox2.png| | |||
</gallery> | </gallery> | ||
</tabber> | |||
</div> | </div> | ||
<div class="attack-info"> | <div class="attack-info"> | ||
| Line 731: | Line 933: | ||
==== ==== | ==== ==== | ||
An advancing attack will invulnerability. On a close hit, Seox brings out the shadow clones and unleashes a cinematic beatdown. | An advancing attack will invulnerability. On a close hit, Seox brings out the shadow clones and unleashes a cinematic beatdown. | ||
{{CloseCard}} | |||
==Colors== | ==Colors== | ||
| Line 742: | Line 943: | ||
==Navigation== | ==Navigation== | ||
<center>{{Character Label|GBVS|Seox|58px}}</center> | |||
{{#lst:{{PAGENAME}}/Data|Links}} | {{#lst:{{PAGENAME}}/Data|Links}} | ||
{{notice|To edit frame data, edit values in [[{{PAGENAME}}/Data]].}} | {{notice|To edit frame data, edit values in [[{{PAGENAME}}/Data]].}} | ||
Revision as of 22:51, 19 June 2022
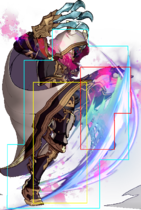
Overview
![]() Seox
Seox ![]() Seox ... is an agile rush-down fighter, using a deadly arsenal of swift attacks and afterimages to break his opponent's defenses with an onslaught of mix-ups.
Seox ... is an agile rush-down fighter, using a deadly arsenal of swift attacks and afterimages to break his opponent's defenses with an onslaught of mix-ups.
Pros
Cons
- Strong Pressure: Moves such as his 5U and the rekka followup, EX Gate of Demons, and Snake Bite give Seox a lot of advantage to keep up and even loop his pressure.
- High Mobility: Seox has many options to close the gap on the opponent with his Empty Hand wall jump, 5U teleport, and his Thunderflash parry which he can hold to dash towards or jump at the opponent.
- Fast Normals: Lots of Seox's normals start up and recover faster than average, accentuating his pressure and giving him some unique counterhit links.
- Restricted Routing: Having Six Claw Execution as his main combo tool can restrict a lot of combo routing especially as it is his main pressure tool as well.
 | |
| Health | |
| 10000 | |
| Prejump | |
| 4f | |
| Backdash | |
| 22f | |
| Backshift | |
| High Recovery (30f) | |
| Unique Movement Options | |
| Empty Hand, Demon Step/New Perspective, Shadow Trace | |
Normal Moves
c.L


- Seox's fastest normal.
Basic, +2 on block c.L. Useful for abare due to its speed as well as pressure due to its frame advantage. Seox can use two of these in a row and still be in range for a 2L, making his pressure a bit scarier than average.
c.M


- Great frametrap button, but frametraps after are difficult.
- Links into c.L on crouching.
- Links into c.H on counterhit.
The Granblue c.M. Useful as a frame trap from lights as its more rewarding on counterhit.
c.H

1st Hit

2nd Hit


- Combos into 236M.
High hitstun c.H that allows for combos not possible from Seox's autocombo without a crouch confirm. Quite safe on block and makes for a high damage combo starter. Any L button into c.H will frame trap 6-frame buttons, but keep in mind that it will leave you minus.
Auto Combo


Yes, these are two different moves.


Mostly relegated to combo and blockstring filler. Seox can effectively frametrap from these with 236M, which in turn can make them useful as pressure reset points once respect is established.
f.L


Mostly a punish tool for quick-recovering moves as Seox's plus on block lights have comparable range. Using three 2Ls will leave Seox out of range.
f.M


Seox's longest poke. Cancel into rekkas for pressure and combos.
f.H


- Same startup as f.M.
Comparable startup and range to f.M but with higher damage, clash level, and recovery. Excellent as a whiff punish tool as its higher hitstun gives more time to confirm.
2L


- Excellent pressure tool.
Seox can fit three of these in a row and still be in range for another frame trap with f.M or 2M. Links into c.M on standing opponents and 2M on crouching opponents.
2M


One frame faster than f.M at the cost of a little reach. Great frame advantage for a 2M normal and quite difficult to whiff punish.
2H


- Seox's main anti-air.
Converts into good damage on AA CH and decent damage on normal AA connect.
2U


- Fast, but too slow to use as a crouch confirm.
Primarily a combo tool due to its long recovery and high disadvantage on block. One frame slower than 2M and the same speed as f.M and f.H gives it a lot of competition as a poke.
j.L


- Active until landing.
- Great horizontal reach.
j.M


- Seox's crossup normal.
Instant j.M can hit taller standing characters like Katalina and Percival. Other than that, use this when it's hard to tell what side Seox will land on.
j.H


- Seox's primary jump-in.
j.H has the most downwards reach of all of Seox's air normals and has decent horizontal range too, making it a great jump-in button for fireball punishes.
j.U

Divekick


- Can be advantageous if it hits an opponent's foot area.
Pretty slow but serves its purpose of throwing off anti-air timings. Leads to a combo if it connects late on a crouching opponent. Part of what makes Seox's approach so good.
Unique Action
Demon Step/New Perspective
5U or 5[U]

Clone projectile (with hurtboxes)

Hold to teleport


Seox sends out a shadow clone of himself as a projectile. Unlike other projectiles in the game, this projectile can be attacked and will disappear if hit. Holding the button will make Seox teleport to wherever the fireball connects, but will also make him take damage if the fireball is hit by an attack. The held version combos into c.L.
Universal Mechanics
Ground Throw

Forward Throw

Back Throw


Air Throw

- GBVS Seox aThrow Hitbox.png
Overhead Attack


Special Moves
Six-Claw Execution
![]() 236X or 5S
236X or 5S

L version is Blue
- GBVS Seox 236M.png
M version is Red
- GBVS Seox 236H.png
H Version is Gold


236L, First hit

236X. The second hit of the light version, second and fourth hits of the heavy version, and the one hit of the medium version use this hitbox

236H, first and third hit. The second and fourth hit use the previous hitbox


Seox's main special move, a rekka that leads into different follow-ups. Each starter can turn into a myriad of frame traps and pressure resets and is his main pressure and combo tool. Think carefully about when you should spend the EX version.
- 236L
- Hits twice with a blue trail.
Seox's main combo ender and pressure extender. Combos from pretty much anything. Leads to the 6M follow-up on crouching opponents, which gives Seox more combo options.
- 236M
- Hits once with a red trail.
Situational combo extender and frametrap tool. Combos from autocombo on crouching opponents and c.H always. Always combos into the 6M follow-up.
- 236H
- Yellow effect makes it easy to distinguish.
Combos from anything and always leads to the 6M follow-up for good damage. Be careful using this as you lose Seox's main combo and pressure tool.
Six-Claw Execution Followups
Six-Claw Execution > X

Archdemon Kick (6X)

Wolf's Howl (4X)

Snake bite (8X)

Shadow Trace Forward (6U)

Shadow Trace Backwards (4U)


Archdemon Kick (6X)

Archdemon Kick (6X)

Wolf's Howl (4X)

Snake bite (8X)


- Archdemon Kick (6X)
- L version keeps opponent grounded. Blue trail.
- M version launches on hit. Red trail.
- Cancels into any other follow-up.
Seox's rekka extender. The M version always combos from 236M and 236H, but only combos from 236L on crouching opponents.
- Wolf's Howl (4X)
- L version combos from anything.
- M version combos from M Archdemon kick.
- M version wallbounces on counterhit.
A thrusting attack that sends the opponent flying. L version is your standard ground combo ender. M version works as a frametrap and another potential crouch confirm point. Going for a frametrap with the M version is very dangerous but leads to excellent damage in the corner.
- Snake Bite (8X)
- L version has a blue trail and is a little faster. Links into c.L.
- M version has a red trail and links into c.M.
Seox's pressure reset option from Six-Claw Execution. Always plus on block and ground bounces from 236H allowing for extended combos. Gives a closer knockdown than M Wolf's Howl on opponents launched from M Archdemon Kick at the cost of damage.
- Shadow Trace (4U/6U)
- Command dash, can phase through opponents.
A movement option off of Six-Claw Execution. Seox can dash forward or backward based on input. The backdash version is useful for gaining space and is generally quite safe. The forward version is great for sneaking in a pressure reset on an opponent respecting a potential frame trap or looking for Snake Bite.
Thunderflash
![]() 623X or 6S
623X or 6S

Stance

Stance Attack
- GBVS Seox 623L.png
L and H Versions Move forward

M version Moves upward


Seox goes into a counter stance. All strikes can be parried and counterattack against. If you hold the button while parrying an attack, Seox will reposition himself depending on the version.
- 623L/623M
- L version moves forward if held.
- M version moves up if held.
Not instant but useful to get around predictable things in neutral like fireballs.
- 623H
- Moves forward if held.
- Active from frame 1, but shorter active time than non-EX versions.
Seox's counter reversal. Vulnerable to throws but beats safejumps and has the added benefit of also being a movement tool.
Gate of Demons
![]() 214X (Air OK) or 4S
214X (Air OK) or 4S

214L

214M
- GBVS Seox 214H.png
214H
- GBVS Seox j214L.png
j.214L
- GBVS Seox j214M.png
j.214M
- GBVS Seox j214H.png
j.214H - "Let me win neutral real quick"


| Version | Damage | GuardHow this attack can be guarded. Throws have their throw range listed instead. | StartupShows how many frame that the corresponding move needs to go through in order to reach its active frames. | ActiveShows how many frames where there is a hurtbox, AKA the hitbox where if the opponent touches it, he/she will take damage. Occurs after Startup. | RecoveryShows how many frames that the character must go through after its active frames to automatically go back to a neutral stance. | On BlockThe difference between the attacker's recovery and the period that the opponent is in blockstun. This Frame Advantage value is based off the fact that the very first active frame touches the opponent. Throws list the amount of Frame Advantage upon successfully throwing the opponent. | On Hit | Invuln |
|---|---|---|---|---|---|---|---|---|
| 214L | 600 | All | 34 | Total 58 | -4 | 0 | ||
| 214M | 800 | Mid | 29 | 5 | 14 | -1 | KD | |
| 214H | 1200 | All | 21 | +3 | +7 | |||
| j.214L | 800 | All | 9 | Until L | ||||
| j.214M | 800 | All | 15 | 12 | Until L+13 | -1 | KD | |
| j.214H | 1200 | All | 9 | Until L+4 |
- 214L
- Fires a projectile.
Hard to zone with as the projectile moves downwards. Useful as a meaty after a tech flipout or as a way to secure a certain part of the screen.
- 214M
- Claw dive.
- -1 point blank, even on block at a large range and +1 at max range. Useful for bullying characters without a 5f button.
- 214H
- Two-hit projectile like 214L.
- Combo extender from c.H.
- Almost always consistent AA combo from 2H even on normal hit.
Plus on block and allows for combo and pressure extensions.
- j.214L
- Claw strike, bounces back on hit/block.
- j.214M
- Claw strike, bounces forward on hit/block.
- Retains air options upon connect, allowing for a followup.
- Opens up combo extensions in the air.
- 214H
- Air fireball.
Just as useful as the ground version. Using it in combos is more difficult but it's a lot more applicable in neutral.
Empty Hand
![]() [2]8X or 2S
[2]8X or 2S

Jumps on wall first
- GBVS Seox 28L.png
[2]8L: downward angle
- GBVS Seox 28M.png
[2]8M: more horizontal
- GBVS Seox 28H-1.png
[2]8H: homing
![[2]8[H]: fakeout](/wiki/images/thumb/c/c5/GBVS_Seox_28H-2.png/210px-GBVS_Seox_28H-2.png)
[2]8[H]: fakeout

![[2]8[H]: fakeout](/w/File:GBVS_Seox_28H-2.png)


Seox's walldive attack. Has projectile invulnerability can be used to read and punish fireballs. Framedata on block varies depending on the height it hits the opponent. The lower it hits the more plus it becomes.
- [2]8L
- Dives at a sharp, downwards angle.
Mostly useful as a fakeout to make your opponent whiff an AA.
- [2]8M
- Dives and travels about halfscreen.
This is the best non-EX version to go over fireballs in neutral, but its speed and input makes this difficult to do on reaction.
- [2]8H
- Dives to opponent.
- Can be held.
Can lead to a combo if it counterhits but is quite spacing-dependant.
Skybound Art
Void Claws: Terminus
236236H or 236S
- GBVS Seox VoidClawsTerminus.png
- GBVS Seox VoidClawsTerminus2.png


A claw strike with invulnerability. If it hits close, Seox will follow up with a series of cinematic attacks. The range of this super is short compared to other thrust supers and the range that will activate his cinematic is even smaller, around f.M range.
Six-Ruin's Enlightenment
214214H or 214S
- GBVS Seox SixRuinsEnlightenment.png
Zero's Sougenmu
- GBVS Seox SixRuinsEnlightenment2.png
Seox creates two shadow clones who will mimic his actions and attack with him. While the Skybound Art is active, Seox's attacks will hit multiple times.
Super Skybound Art
Three Thousand and One Talons
236236U or 236SU
- GBVS Seox ThreeThousandAndOneTalons.png
- GBVS Seox ThreeThousandAndOneTalons2.png
Bionic Arm Super


An advancing attack will invulnerability. On a close hit, Seox brings out the shadow clones and unleashes a cinematic beatdown.
Colors
 |
 |
 |
 |
 |
 |
 |
 |
 |
 |
 |
 |
 |
 |
 |
 |
 |
 |
 |
 |
 |
 |
 |
 |
 |
 |
 |
 |
External References
To edit frame data, edit values in GBVS/Seox/Data.
Click [★] for character's full frame data
Essentials
• HUD •
Controls •
The Basics
• Movement/Canceling •
Offense •
Defense •
Gauges •
Attack Attributes •
Detailed & Advanced Information
• Damage/Combo •
Frame Data & System Data •
Misc •
Archived Information
• Patch Notes •