No edit summary |
No edit summary |
||
| Line 16: | Line 16: | ||
* '''Mediocrity:''' There are too many characters that do the same things as Yamcha but better. Yamcha brings nothing to your team that other characters won't bring as well, and more. | * '''Mediocrity:''' There are too many characters that do the same things as Yamcha but better. Yamcha brings nothing to your team that other characters won't bring as well, and more. | ||
* '''Awful Damage:''' Needs to use a heavy amount of resources to do meaningful damage, and even then it's below par. | * '''Awful Damage:''' Needs to use a heavy amount of resources to do meaningful damage, and even then it's below par. | ||
* '''Mixed Normals:''' Stubby buttons can be awkward to use in pressure, and others are suicidal to use in neutral. His {{clr| | * '''Mixed Normals:''' Stubby buttons can be awkward to use in pressure, and others are suicidal to use in neutral. His {{clr|L|2L}} is one of the shortest ranged in the game with no forward movement while his {{clr|M|5M}}'s strengths as a frametrap are overshadowed by how useless it is everywhere else. | ||
* '''Poor Risk/Reward:''' Tools like {{clr| | * '''Poor Risk/Reward:''' Tools like {{clr|H|5H}} and Flash have extremely high recovery and are easily punished, not helped by Yamcha's low damage. | ||
|difficulty_rating=3 | |difficulty_rating=3 | ||
}} | }} | ||
==Normal Moves== | ==Normal Moves== | ||
===<big>{{clr| | ===<big>{{clr|L|5L}}</big>=== | ||
<div class="attack-container"> | <div class="attack-container"> | ||
<div class="attack-gallery"> | <div class="attack-gallery"> | ||
| Line 43: | Line 43: | ||
|} | |} | ||
==== ==== | ==== ==== | ||
;{{clr| | <!--Insert text below the =s and above the 2 /divs--> | ||
;{{clr|L|5L}} | |||
* Slow but great jab | * Slow but great jab | ||
* Staggers indefinitely into itself, and will connect after nearly all of Yamcha's buttons | * Staggers indefinitely into itself, and will connect after nearly all of Yamcha's buttons | ||
Go-to starter for both pressure and combos thanks to the fact that its speed and range make up for the lack of said traits on his mediums. | Go-to starter for both pressure and combos thanks to the fact that its speed and range make up for the lack of said traits on his mediums. | ||
---- | ---- | ||
;{{clr| | ;{{clr|L|5LL}} | ||
* Vacuums on block or hit. | * Vacuums on block or hit. | ||
Works even in the corner for surprise IAD {{clr| | Works even in the corner for surprise IAD {{clr|M|j.M}} crossup. This button being safe is a godsend since your strings will start having holes from here on out. | ||
---- | ---- | ||
;{{clr| | ;{{clr|L|5LLL}} | ||
* Smash hit wall splats. Combos into SD. | * Smash hit wall splats. Combos into SD. | ||
More often used as a blockstring filler before going into 236X because the only truestring alternative to this button is {{clr| | More often used as a blockstring filler before going into 236X because the only truestring alternative to this button is {{clr|M|2M}}, so using this in your pressure doesn't actually sacrifice much else than a low. This also true string into Z Change, letting you tag in safely. | ||
Also good for corner combos. Yamcha has so much frame advantage on hit that he can dash in {{clr| | Also good for corner combos. Yamcha has so much frame advantage on hit that he can dash in {{clr|L|5L}} or even {{clr|M|2M}}, {{clr|L|5LLL}} by itself also builds a lot of meter. | ||
</div> | </div> | ||
</div> | </div> | ||
===<big>{{clr| | ===<big>{{clr|M|5M}}</big>=== | ||
<div class="attack-container"> | <div class="attack-container"> | ||
<div class="attack-gallery"> | <div class="attack-gallery"> | ||
| Line 78: | Line 79: | ||
|} | |} | ||
==== ==== | ==== ==== | ||
<!--Insert text below the =s and above the 2 /divs--> | |||
* Reels back then strikes. The strike has good forward movement. | * Reels back then strikes. The strike has good forward movement. | ||
* Slow, mid-hitting {{clr| | * Slow, mid-hitting {{clr|M|5M}} intended for frametraps | ||
* Will still reliably connect after {{clr| | * Will still reliably connect after {{clr|M|2M}} and {{clr|L|5LL}} | ||
* Yamcha's {{clr| | * Yamcha's {{clr|L|5L}} is 7f, so you'll need to rely on your stubby {{clr|L|2L}} to reset pressure or risk getting mashed. | ||
A built in frame trap from {{clr| | A built in frame trap from {{clr|L|5LL}} or {{clr|M|2M}} that's 0 on block, making it a good point to reset pressure. In turn, it sacrifices absolutely everything that would make another {{clr|M|5M}} good, failing to truestring from any normal and being horrible as a poke. It doesn't deal any more damage than the average {{clr|M|5M}} despite the startup, which means as a frametrap it's not actually any better than just delaying a regular {{clr|M|5M}}. It being 0 on block also loses luster when other characters can typically use {{clr|S|5S}} and {{clr|H|5H}} in their strings as well, something Yamcha cannot do without additional sacrifices. | ||
The overall weaknesses of this button make it better to not use often in your strings. Learning to do {{clr| | The overall weaknesses of this button make it better to not use often in your strings. Learning to do {{clr|M|2M}} immediately into your rekka series will do you more good. The main upside of {{clr|M|5M}} is its animation being somewhat confusing, and it will strike people incorrectly reacting to it as {{MiniMoveCard|game=DBFZ|chara=Yamcha|input=236M|label=236M}}. This however doesn't work on more seasoned players who know to listen for the teleport sound instead. | ||
</div> | </div> | ||
</div> | </div> | ||
===<big>{{clr| | ===<big>{{clr|H|5H}}</big>=== | ||
<div class="attack-container"> | <div class="attack-container"> | ||
<div class="attack-gallery"> | <div class="attack-gallery"> | ||
| Line 106: | Line 108: | ||
|} | |} | ||
==== ==== | ==== ==== | ||
<!--Insert text below the =s and above the 2 /divs--> | |||
* Performs a sick back flip then lunges forward. | * Performs a sick back flip then lunges forward. | ||
* Smash hit wall splats. Combos into SD. | * Smash hit wall splats. Combos into SD. | ||
This normal exists to bait sparking activations and reversals, and that's about it. {{clr| | This normal exists to bait sparking activations and reversals, and that's about it. {{clr|H|5H}} usually gives you lower reward than {{clr|M|5M}} for even higher startup, making it easily reactable and almost impossible to use in combos. If the opponent jumps, it can be reliably punished. It's always +4 on block so this is more often the best spot for you to cross them up. | ||
Due to {{clr| | Due to {{clr|H|5H}} and {{clr|M|5M}} having such hefty startup, Yamcha's pressure revolves around abusing his light buttons and his rekkas since he won't be quite able to do the same strings as others. In the corner it leads to better damage, but for the effort and risk it's still not worth it. | ||
</div> | </div> | ||
</div> | </div> | ||
===<big>{{clr| | ===<big>{{clr|S|5S}}</big>=== | ||
<div class="attack-container"> | <div class="attack-container"> | ||
<div class="attack-gallery"> | <div class="attack-gallery"> | ||
| Line 132: | Line 135: | ||
|} | |} | ||
==== ==== | ==== ==== | ||
<!--Insert text below the =s and above the 2 /divs--> | |||
* Leaps back while shooting a Ki Blast. | * Leaps back while shooting a Ki Blast. | ||
* No longer whiffs on crouchers and small characters. | * No longer whiffs on crouchers and small characters. | ||
| Line 138: | Line 142: | ||
</div> | </div> | ||
===<big>{{clr| | ===<big>{{clr|L|2L}}</big>=== | ||
<div class="attack-container"> | <div class="attack-container"> | ||
<div class="attack-gallery"> | <div class="attack-gallery"> | ||
| Line 156: | Line 160: | ||
|} | |} | ||
==== ==== | ==== ==== | ||
Mashable, short ranged jab at 6f. Mostly used for contesting pressure or after ±0 situations like blocked {{clr| | <!--Insert text below the =s and above the 2 /divs--> | ||
Mashable, short ranged jab at 6f. Mostly used for contesting pressure or after ±0 situations like blocked {{clr|M|6M}}. | |||
</div> | </div> | ||
</div> | </div> | ||
===<big>{{clr| | ===<big>{{clr|M|2M}}</big>=== | ||
<div class="attack-container"> | <div class="attack-container"> | ||
<div class="attack-gallery"> | <div class="attack-gallery"> | ||
| Line 178: | Line 183: | ||
|} | |} | ||
==== ==== | ==== ==== | ||
<!--Insert text below the =s and above the 2 /divs--> | |||
* Vacuums on hit. | * Vacuums on hit. | ||
While it is his only low and is pretty fast for a {{clr| | While it is his only low and is pretty fast for a {{clr|M|2M}}, it's really only ever used as blockstring filler and for combos. The range is so short that it can even be hard to punish blocked Guard Cancel, and Yamcha mixup game isn't about high/low. | ||
</div> | </div> | ||
</div> | </div> | ||
===<big>{{clr| | |||
===<big>{{clr|H|2H}}</big>=== | |||
<div class="attack-container"> | <div class="attack-container"> | ||
<div class="attack-gallery"> | <div class="attack-gallery"> | ||
| Line 200: | Line 207: | ||
|} | |} | ||
==== ==== | ==== ==== | ||
<!--Insert text below the =s and above the 2 /divs--> | |||
* Smash on the second hit if both hits connect. | * Smash on the second hit if both hits connect. | ||
* Smash hit has longer hitstun and combos into SD. Non-Smash can still combo into SD in the corner. | * Smash hit has longer hitstun and combos into SD. Non-Smash can still combo into SD in the corner. | ||
Puts Yamcha into an airborne state which removes most of his cancel options and makes him vulnerable to anti-airs. The best possible outcome on block is {{clr| | Puts Yamcha into an airborne state which removes most of his cancel options and makes him vulnerable to anti-airs. The best possible outcome on block is {{clr|H|2H}}(1) > {{clr|L|j.214L}}, which true strings up till the final hit of {{clr|L|j.214L}}. | ||
On big, standing characters, Yamcha can land both hits on block and cancel the second hit to {{clr| | On big, standing characters, Yamcha can land both hits on block and cancel the second hit to {{clr|H|j.2H}}. While {{clr|H|2H}}(2) > {{clr|H|j.2H}} in midscreen would whiff completely, in the corner this is a true string that leads to rekka pressure. | ||
</div> | </div> | ||
</div> | </div> | ||
===<big>{{clr| | |||
===<big>{{clr|S|2S}}</big>=== | |||
<div class="attack-container"> | <div class="attack-container"> | ||
<div class="attack-gallery"> | <div class="attack-gallery"> | ||
| Line 225: | Line 234: | ||
|} | |} | ||
==== ==== | ==== ==== | ||
* {{clr| | <!--Insert text below the =s and above the 2 /divs--> | ||
Aside from having increased movement backwards, this move is identical to {{clr| | * {{clr|S|5S}} but leaps higher. | ||
Aside from having increased movement backwards, this move is identical to {{clr|S|5S}} and thus has almost identical usage. Leaps high enough that he can add a {{clr|S|j.S}} before landing. | |||
</div> | </div> | ||
</div> | </div> | ||
===<big>{{clr| | |||
===<big>{{clr|M|6M}}</big>=== | |||
<div class="attack-container"> | <div class="attack-container"> | ||
<div class="attack-gallery"> | <div class="attack-gallery"> | ||
| Line 247: | Line 258: | ||
|} | |} | ||
==== ==== | ==== ==== | ||
<!--Insert text below the =s and above the 2 /divs--> | |||
* Universal overhead. | * Universal overhead. | ||
Abhorrent range like his other buttons. Has high chance of whiffing completely mid-blockstring in midscreen. | Abhorrent range like his other buttons. Has high chance of whiffing completely mid-blockstring in midscreen. | ||
</div> | </div> | ||
</div> | </div> | ||
===<big>{{clr| | |||
===<big>{{clr|L|j.L}}</big>=== | |||
<div class="attack-container"> | <div class="attack-container"> | ||
<div class="attack-gallery"> | <div class="attack-gallery"> | ||
| Line 269: | Line 282: | ||
|} | |} | ||
==== ==== | ==== ==== | ||
<!--Insert text below the =s and above the 2 /divs--> | |||
Tiny jab with some vertical reach. Combo filler. | Tiny jab with some vertical reach. Combo filler. | ||
</div> | </div> | ||
</div> | </div> | ||
===<big>{{clr| | |||
===<big>{{clr|M|j.M}}</big>=== | |||
<div class="attack-container"> | <div class="attack-container"> | ||
<div class="attack-gallery"> | <div class="attack-gallery"> | ||
| Line 290: | Line 305: | ||
|} | |} | ||
==== ==== | ==== ==== | ||
Yamcha's IAD crossup normal. On hit, get used to buffering dash {{clr| | <!--Insert text below the =s and above the 2 /divs--> | ||
Yamcha's IAD crossup normal. On hit, get used to buffering dash {{clr|L|5L}} since a stationary land {{clr|L|5L}} can whiff. | |||
</div> | </div> | ||
</div> | </div> | ||
===<big>{{clr| | |||
===<big>{{clr|H|j.H}}</big>=== | |||
<div class="attack-container"> | <div class="attack-container"> | ||
<div class="attack-gallery"> | <div class="attack-gallery"> | ||
| Line 311: | Line 328: | ||
|} | |} | ||
==== ==== | ==== ==== | ||
<!--Insert text below the =s and above the 2 /divs--> | |||
* Knocks aerial opponents sideways instead of the standard diagonal downward angle. | * Knocks aerial opponents sideways instead of the standard diagonal downward angle. | ||
* Dynamic hit causes a wall bounce. | * Dynamic hit causes a wall bounce. | ||
| Line 319: | Line 337: | ||
</div> | </div> | ||
===<big>{{clr| | ===<big>{{clr|S|j.S}}</big>=== | ||
<div class="attack-container"> | <div class="attack-container"> | ||
<div class="attack-gallery"> | <div class="attack-gallery"> | ||
| Line 337: | Line 355: | ||
|} | |} | ||
==== ==== | ==== ==== | ||
* {{clr| | <!--Insert text below the =s and above the 2 /divs--> | ||
Yamcha has air OK anti-airs so use this like how you would use {{clr| | * {{clr|S|5S}} but in the air. | ||
Yamcha has air OK anti-airs so use this like how you would use {{clr|S|5S}}. | |||
</div> | </div> | ||
</div> | </div> | ||
===<big>{{clr| | |||
===<big>{{clr|H|j.2H}}</big>=== | |||
<div class="attack-container"> | <div class="attack-container"> | ||
<div class="attack-gallery"> | <div class="attack-gallery"> | ||
| Line 359: | Line 379: | ||
|} | |} | ||
==== ==== | ==== ==== | ||
<!--Insert text below the =s and above the 2 /divs--> | |||
* Knockdown airborne opponent. | * Knockdown airborne opponent. | ||
On hit or block against a grounded opponent, can cancel into 236X for combo follow-ups or for left-right mix-ups. | On hit or block against a grounded opponent, can cancel into 236X for combo follow-ups or for left-right mix-ups. | ||
| Line 364: | Line 385: | ||
Since this move is almost always minus (even on hit) when hitting a grounded opponent, get used to canceling into 236X. | Since this move is almost always minus (even on hit) when hitting a grounded opponent, get used to canceling into 236X. | ||
In {{clr| | In {{clr|H|2H}} or DR combos, you can use this to take both you and the opponent to the ground for a grounded Vanish combo. | ||
</div> | </div> | ||
</div> | </div> | ||
| Line 370: | Line 391: | ||
==Special Moves== | ==Special Moves== | ||
===<big>Wolf Fang Fist</big>=== | ===<big>Wolf Fang Fist</big>=== | ||
<span class="input-badge">'''{{clr| | <span class="input-badge">'''{{clr|L|236L}}/{{clr|M|M}}'''</span> | ||
<div class="attack-container"> | <div class="attack-container"> | ||
<div class="attack-gallery"> | <div class="attack-gallery"> | ||
| Line 396: | Line 417: | ||
|} | |} | ||
==== ==== | ==== ==== | ||
;{{clr| | <!--Insert text below the =s and above the 2 /divs--> | ||
;{{clr|L|236L}} | |||
* Regular rekka starter. | * Regular rekka starter. | ||
* Covers 80% of the screen. | * Covers 80% of the screen. | ||
---- | ---- | ||
;{{clr| | ;{{clr|M|236M}} | ||
* Dashes forward for a bit before starts attacking, goes further than full screen. | * Dashes forward for a bit before starts attacking, goes further than full screen. | ||
* Teleports behind enemy to attack if he reaches them during the dash, otherwise it's the same as the L version. | * Teleports behind enemy to attack if he reaches them during the dash, otherwise it's the same as the L version. | ||
| Line 415: | Line 437: | ||
===<big>Pack Attack</big>=== | ===<big>Pack Attack</big>=== | ||
<span class="input-badge">'''Wolf Fang Fist > {{clr| | <span class="input-badge">'''Wolf Fang Fist > {{clr|L|L}}/{{clr|M|M}}'''</span> | ||
<div class="attack-container"> | <div class="attack-container"> | ||
<div class="attack-gallery"> | <div class="attack-gallery"> | ||
| Line 434: | Line 456: | ||
|} | |} | ||
==== ==== | ==== ==== | ||
* [] is when used immediately after {{clr| | <!--Insert text below the =s and above the 2 /divs--> | ||
* [] is when used immediately after {{clr|L|236L}}/{{clr|M|M}}. | |||
* L is the fastest followup without the use of bars. | * L is the fastest followup without the use of bars. | ||
* {{clr| | * {{clr|L|236L}} > L is a true blockstring. | ||
---- | ---- | ||
* M followup is slower than L followup for more damage. | * M followup is slower than L followup for more damage. | ||
* {{clr| | * {{clr|L|236L}} > M has a gap which will catch mashing. | ||
</div> | </div> | ||
</div> | </div> | ||
===<big>Finisher</big>=== | ===<big>Finisher</big>=== | ||
<span class="input-badge">'''Wolf Fang Fist > {{clr| | <span class="input-badge">'''Wolf Fang Fist > {{clr|L|6L}}/{{clr|M|M}}'''</span> or <span class="input-badge">'''Pack Attack > {{clr|L|L}}/{{clr|M|M}}'''</span> | ||
<div class="attack-container"> | <div class="attack-container"> | ||
<div class="attack-gallery"> | <div class="attack-gallery"> | ||
| Line 462: | Line 486: | ||
|} | |} | ||
==== ==== | ==== ==== | ||
<!--Insert text below the =s and above the 2 /divs--> | |||
* L version has a short hitbox in front of Yamcha but has fast recovery frames. | * L version has a short hitbox in front of Yamcha but has fast recovery frames. | ||
* M version causes a sliding knockdown. | * M version causes a sliding knockdown. | ||
| Line 470: | Line 495: | ||
===<big>Flash</big>=== | ===<big>Flash</big>=== | ||
<span class="input-badge">'''Wolf Fang Fist > {{clr| | <span class="input-badge">'''Wolf Fang Fist > {{clr|H|H}}'''</span> | ||
<div class="attack-container"> | <div class="attack-container"> | ||
<div class="attack-gallery"> | <div class="attack-gallery"> | ||
| Line 488: | Line 513: | ||
|} | |} | ||
==== ==== | ==== ==== | ||
<!--Insert text below the =s and above the 2 /divs--> | |||
* Used in metered combos to boost damage by around 500. | * Used in metered combos to boost damage by around 500. | ||
* Crazy high recovery on whiff, Yamcha is visibly stuck in place and punishable. | * Crazy high recovery on whiff, Yamcha is visibly stuck in place and punishable. | ||
* Useful in neutral as a full screen poke thanks to its speed and easy confirms, and after Whiskers for a quick cross-up. | * Useful in neutral as a full screen poke thanks to its speed and easy confirms, and after Whiskers for a quick cross-up. | ||
* Can catch your opponent pressing buttons after a blocked {{clr| | * Can catch your opponent pressing buttons after a blocked {{clr|S|5S}}, and catches opponents after a reflected vanish. It's that fast. | ||
Yamcha's infamous Wolf Fang Fist Flash. One of Yamcha's strongest tools and the butter that holds his kit together. | Yamcha's infamous Wolf Fang Fist Flash. One of Yamcha's strongest tools and the butter that holds his kit together. | ||
With its insanely fast start-up, high priority, and being -5 on block, the move alone commands a ground presence. Flash complements with his {{clr| | With its insanely fast start-up, high priority, and being -5 on block, the move alone commands a ground presence. Flash complements with his {{clr|S|5S}} as it can be confirmed from massive distances while spacing Yamcha out from dangerous ranges. On hit, Flash will bring the opponent up, allowing for extensions that scale like a medium starter, allowing Yamcha to finally get some decent damage. Unfortunately, Flash has terrible recovery, and thanks to it being ground only means the opponent will likely find themselves jumping a lot versus Yamcha, where using the move is a death sentence. | ||
Flash is also Yamcha's go-to for fast cross-ups during his Wolf Fang Fist pressure. Go in with Reverse Wolf Fang Fist or Whiskers and follow up with Flash for a fast cross-up that leads into good reward (for Yamcha, any way). Just once again, take note that if the opponent jumps to avoid it, you're going to be in for some serious hurt. | Flash is also Yamcha's go-to for fast cross-ups during his Wolf Fang Fist pressure. Go in with Reverse Wolf Fang Fist or Whiskers and follow up with Flash for a fast cross-up that leads into good reward (for Yamcha, any way). Just once again, take note that if the opponent jumps to avoid it, you're going to be in for some serious hurt. | ||
| Line 502: | Line 527: | ||
===<big>Whiskers</big>=== | ===<big>Whiskers</big>=== | ||
<span class="input-badge">'''Wolf Fang Fist > {{clr| | <span class="input-badge">'''Wolf Fang Fist > {{clr|S|S}}'''</span> | ||
<div class="attack-container"> | <div class="attack-container"> | ||
<div class="attack-gallery"> | <div class="attack-gallery"> | ||
| Line 520: | Line 545: | ||
|} | |} | ||
==== ==== | ==== ==== | ||
<!--Insert text below the =s and above the 2 /divs--> | |||
* Dashes a short distance forward, passing through the opponent if close. | * Dashes a short distance forward, passing through the opponent if close. | ||
* For a short while after this move, only rekka follow-ups are available. | * For a short while after this move, only rekka follow-ups are available. | ||
</div> | </div> | ||
</div> | </div> | ||
===<big>Tail</big>=== | ===<big>Tail</big>=== | ||
<span class="input-badge">'''Wolf Fang Fist > {{clr| | <span class="input-badge">'''Wolf Fang Fist > {{clr|S|4S}}'''</span> | ||
<div class="attack-container"> | <div class="attack-container"> | ||
<div class="attack-gallery"> | <div class="attack-gallery"> | ||
| Line 543: | Line 570: | ||
|} | |} | ||
==== ==== | ==== ==== | ||
<!--Insert text below the =s and above the 2 /divs--> | |||
* A special backdash, can be used to disengage from a blocked rekka. | * A special backdash, can be used to disengage from a blocked rekka. | ||
* Can use Whiskers to dash back in. | * Can use Whiskers to dash back in. | ||
</div> | </div> | ||
</div> | </div> | ||
===<big>Neo Wolf Fang Fist</big>=== | ===<big>Neo Wolf Fang Fist</big>=== | ||
<span class="input-badge">'''{{clr| | <span class="input-badge">'''{{clr|H|236H}}'''</span> | ||
<div class="attack-container"> | <div class="attack-container"> | ||
<div class="attack-gallery"> | <div class="attack-gallery"> | ||
| Line 566: | Line 595: | ||
|} | |} | ||
==== ==== | ==== ==== | ||
<!--Insert text below the =s and above the 2 /divs--> | |||
* Consumes 1/2 Ki Gauge. | * Consumes 1/2 Ki Gauge. | ||
* A faster version of {{clr| | * A faster version of {{clr|L|236L}} that covers a slightly shorter distance. | ||
* On hit or block, automatically performs Pack Attack > Finisher > Flash. Can use vanish to cancel these followups. | * On hit or block, automatically performs Pack Attack > Finisher > Flash. Can use vanish to cancel these followups. | ||
* On whiff, does not have access to {{clr| | * On whiff, does not have access to {{clr|L|236L}}/{{clr|M|M}} rekka followups. | ||
* Wallbounces, allowing you to squeeze out a bit more damage in your strings. | * Wallbounces, allowing you to squeeze out a bit more damage in your strings. | ||
* Easily combos into {{clr| | * Easily combos into {{clr|M|214M}} for a sliding knockdown. | ||
* Can combo into itself once for a "level 2". | * Can combo into itself once for a "level 2". | ||
* Consumes smash on the final hit. | * Consumes smash on the final hit. | ||
</div> | </div> | ||
</div> | </div> | ||
===<big>Wolf Fang Fist: Gale Claws</big>=== | ===<big>Wolf Fang Fist: Gale Claws</big>=== | ||
<span class="input-badge">'''{{clr| | <span class="input-badge">'''{{clr|L|214L}}/{{clr|M|M}}/{{clr|H|H}} (Air OK)'''</span> | ||
<div class="attack-container"> | <div class="attack-container"> | ||
<div class="attack-gallery"> | <div class="attack-gallery"> | ||
| Line 596: | Line 627: | ||
|} | |} | ||
==== ==== | ==== ==== | ||
<!--Insert text below the =s and above the 2 /divs--> | |||
* Good for its soft knockdown to mixup and surprise the opponent. | * Good for its soft knockdown to mixup and surprise the opponent. | ||
* All versions keep momentum, L keeps the least and H keeps almost all. | * All versions keep momentum, L keeps the least and H keeps almost all. | ||
* M is the classic air combo ender that gives a sliding knockdown. | * M is the classic air combo ender that gives a sliding knockdown. | ||
* H is able to easily followup after {{clr| | * H is able to easily followup after {{clr|H|j.H}} in midscreen due to its very fast startup and snappy movement. | ||
</div> | </div> | ||
</div> | </div> | ||
===<big>Kamehameha</big>=== | ===<big>Kamehameha</big>=== | ||
<span class="input-badge">'''{{clr| | <span class="input-badge">'''{{clr|S|236S}}'''</span> | ||
<div class="attack-container"> | <div class="attack-container"> | ||
<div class="attack-gallery"> | <div class="attack-gallery"> | ||
| Line 621: | Line 654: | ||
|} | |} | ||
==== ==== | ==== ==== | ||
<!--Insert text below the =s and above the 2 /divs--> | |||
* Slower startup than other Kamehamehas. | * Slower startup than other Kamehamehas. | ||
* -4 on block, but links to {{clr| | * -4 on block, but links to {{clr|L|2L}} on hit in the corner. | ||
* Flash will catch the opponent trying to hit buttons after this. | * Flash will catch the opponent trying to hit buttons after this. | ||
Sub par neutral tool due to its speed, but weirdly enough better suited for pressure. Once you have conditioned your opponent to look out for WFF cross ups, this move can be used as a same side option that still converts to a combo in the corner. It's only 2-3 frames slower, so the difference is hardly noticeable if your opponent is simply reacting to the delay. The reward on hit is slightly higher in terms of damage than DR and you have the option to Vanish if it is blocked to continue pressure. | Sub par neutral tool due to its speed, but weirdly enough better suited for pressure. Once you have conditioned your opponent to look out for WFF cross ups, this move can be used as a same side option that still converts to a combo in the corner. It's only 2-3 frames slower, so the difference is hardly noticeable if your opponent is simply reacting to the delay. The reward on hit is slightly higher in terms of damage than DR and you have the option to Vanish if it is blocked to continue pressure. | ||
| Line 648: | Line 682: | ||
|} | |} | ||
==== ==== | ==== ==== | ||
<!--Insert text below the =s and above the 2 /divs--> | |||
* Yamcha dashes forward with a series of claw swipes. | * Yamcha dashes forward with a series of claw swipes. | ||
* Opponent stays grounded on hit. | * Opponent stays grounded on hit. | ||
| Line 674: | Line 709: | ||
|} | |} | ||
==== ==== | ==== ==== | ||
<!--Insert text below the =s and above the 2 /divs--> | |||
* It's a beam assist. Use it for beam things. | * It's a beam assist. Use it for beam things. | ||
Although it is a beam, Yamcha is one of the few characters that has an arguably better and more unique assist in his first one. Nonetheless the beam option is still present. Controls space much better than it's A assist counterpart but loses some speed and frame advantage in return. | Although it is a beam, Yamcha is one of the few characters that has an arguably better and more unique assist in his first one. Nonetheless the beam option is still present. Controls space much better than it's A assist counterpart but loses some speed and frame advantage in return. | ||
| Line 699: | Line 735: | ||
|} | |} | ||
==== ==== | ==== ==== | ||
<!--Insert text below the =s and above the 2 /divs--> | |||
* Very niche. | * Very niche. | ||
Only gives 15 extra frames of lockdown, for 16 more frames of startup and twice the cooldown of his A assist. You can already hitconfirm pretty easily off of his A assist as well. Main benefit is less time between hits for HSD purposes as A drops often at high hitstun decay. | Only gives 15 extra frames of lockdown, for 16 more frames of startup and twice the cooldown of his A assist. You can already hitconfirm pretty easily off of his A assist as well. Main benefit is less time between hits for HSD purposes as A drops often at high hitstun decay. | ||
| Line 706: | Line 743: | ||
==Super Moves== | ==Super Moves== | ||
===<big>Spirit Ball</big>=== | ===<big>Spirit Ball</big>=== | ||
<span class="input-badge">'''{{clr| | <span class="input-badge">'''{{clr|L|236L}}+{{clr|M|M}} or {{clr|H|236H}}+{{clr|S|S}}'''</span> | ||
<div class="attack-container"> | <div class="attack-container"> | ||
<div class="attack-gallery"> | <div class="attack-gallery"> | ||
| Line 725: | Line 762: | ||
|} | |} | ||
==== ==== | ==== ==== | ||
<!--Insert text below the =s and above the 2 /divs--> | |||
* Can only be landed once per combo (unless you have another Yamcha through Body Change). | * Can only be landed once per combo (unless you have another Yamcha through Body Change). | ||
* Pressing L/{{clr| | * Pressing L/{{clr|M|M}}/{{clr|H|H}}/{{clr|S|S}} and a direction after the first ball causes the Spirit Ball to fly in that direction, up to 5 more hits. | ||
* The first hit that lands will always deal 1300, every next hit deals 200. | * The first hit that lands will always deal 1300, every next hit deals 200. | ||
* Minimum damage for all 6 hits: 390, 60*5. | * Minimum damage for all 6 hits: 390, 60*5. | ||
| Line 747: | Line 785: | ||
===<big>Ultimate Wolf Fang Fist</big>=== | ===<big>Ultimate Wolf Fang Fist</big>=== | ||
<span class="input-badge">'''{{clr| | <span class="input-badge">'''{{clr|L|214L}}+{{clr|M|M}} or H+{{clr|S|S}}'''</span> | ||
<div class="attack-container"> | <div class="attack-container"> | ||
<div class="attack-gallery"> | <div class="attack-gallery"> | ||
| Line 766: | Line 804: | ||
|} | |} | ||
==== ==== | ==== ==== | ||
<!--Insert text below the =s and above the 2 /divs--> | |||
* Yamcha dashes fullscreen forward. | * Yamcha dashes fullscreen forward. | ||
* Minimum damage: 1505. | * Minimum damage: 1505. | ||
On hit in midscreen, the opponent will be put a fullscreen away. But on hit in the corner, they'll be pulled slightly out of it while Yamcha will be at +11. From here you can crossup with IAD {{clr| | On hit in midscreen, the opponent will be put a fullscreen away. But on hit in the corner, they'll be pulled slightly out of it while Yamcha will be at +11. From here you can crossup with IAD {{clr|M|j.M}} or {{clr|M|236M}}~{{clr|H|H}}, bait Sparking with {{clr|H|5H}}, or just do something simple like meaty {{clr|M|2M}}, {{clr|M|6M}}, {{clr|L|5L}} > DR. | ||
</div> | </div> | ||
</div> | </div> | ||
Revision as of 00:47, 14 May 2022
Normal Moves
5L


It's not practical, but dammit I'mma do it!


- 5L
- Slow but great jab
- Staggers indefinitely into itself, and will connect after nearly all of Yamcha's buttons
Go-to starter for both pressure and combos thanks to the fact that its speed and range make up for the lack of said traits on his mediums.
- 5LL
- Vacuums on block or hit.
Works even in the corner for surprise IAD j.M crossup. This button being safe is a godsend since your strings will start having holes from here on out.
- 5LLL
- Smash hit wall splats. Combos into SD.
More often used as a blockstring filler before going into 236X because the only truestring alternative to this button is 2M, so using this in your pressure doesn't actually sacrifice much else than a low. This also true string into Z Change, letting you tag in safely.
Also good for corner combos. Yamcha has so much frame advantage on hit that he can dash in 5L or even 2M, 5LLL by itself also builds a lot of meter.
5M

- Reels back then strikes. The strike has good forward movement.
- Slow, mid-hitting 5M intended for frametraps
- Will still reliably connect after 2M and 5LL
- Yamcha's 5L is 7f, so you'll need to rely on your stubby 2L to reset pressure or risk getting mashed.
A built in frame trap from 5LL or 2M that's 0 on block, making it a good point to reset pressure. In turn, it sacrifices absolutely everything that would make another 5M good, failing to truestring from any normal and being horrible as a poke. It doesn't deal any more damage than the average 5M despite the startup, which means as a frametrap it's not actually any better than just delaying a regular 5M. It being 0 on block also loses luster when other characters can typically use 5S and 5H in their strings as well, something Yamcha cannot do without additional sacrifices.
The overall weaknesses of this button make it better to not use often in your strings. Learning to do 2M immediately into your rekka series will do you more good. The main upside of 5M is its animation being somewhat confusing, and it will strike people incorrectly reacting to it as 236M GuardAllStartup32f (sideswap), 25f (no sideswap)Recovery20Advantage-5. This however doesn't work on more seasoned players who know to listen for the teleport sound instead.
5H

Dandy Step Function

- Performs a sick back flip then lunges forward.
- Smash hit wall splats. Combos into SD.
This normal exists to bait sparking activations and reversals, and that's about it. 5H usually gives you lower reward than 5M for even higher startup, making it easily reactable and almost impossible to use in combos. If the opponent jumps, it can be reliably punished. It's always +4 on block so this is more often the best spot for you to cross them up.
Due to 5H and 5M having such hefty startup, Yamcha's pressure revolves around abusing his light buttons and his rekkas since he won't be quite able to do the same strings as others. In the corner it leads to better damage, but for the effort and risk it's still not worth it.
5S

- Leaps back while shooting a Ki Blast.
- No longer whiffs on crouchers and small characters.
Allows Yamcha to disengage from a bad block string and return to neutral with a small frame advantage. Recovery is low enough that if the opponent tries to chase you down with SD, you can easily anti-air on reaction. You can also mash this in neutral to bait them into flinching, then go for a surprise Flash.
2L

where tf is my neck

Mashable, short ranged jab at 6f. Mostly used for contesting pressure or after ±0 situations like blocked 6M.
2M

- Vacuums on hit.
While it is his only low and is pretty fast for a 2M, it's really only ever used as blockstring filler and for combos. The range is so short that it can even be hard to punish blocked Guard Cancel, and Yamcha mixup game isn't about high/low.
2H

Yun, give me strength!

- Smash on the second hit if both hits connect.
- Smash hit has longer hitstun and combos into SD. Non-Smash can still combo into SD in the corner.
Puts Yamcha into an airborne state which removes most of his cancel options and makes him vulnerable to anti-airs. The best possible outcome on block is 2H(1) > j.214L, which true strings up till the final hit of j.214L.
On big, standing characters, Yamcha can land both hits on block and cancel the second hit to j.2H. While 2H(2) > j.2H in midscreen would whiff completely, in the corner this is a true string that leads to rekka pressure.
2S
- 5S but leaps higher.
Aside from having increased movement backwards, this move is identical to 5S and thus has almost identical usage. Leaps high enough that he can add a j.S before landing.
6M
- DBFZ Yamcha 6M.png
- Universal overhead.
Abhorrent range like his other buttons. Has high chance of whiffing completely mid-blockstring in midscreen.
j.L

Tiny jab with some vertical reach. Combo filler.
j.M

Yamcha's IAD crossup normal. On hit, get used to buffering dash 5L since a stationary land 5L can whiff.
j.H

- Knocks aerial opponents sideways instead of the standard diagonal downward angle.
- Dynamic hit causes a wall bounce.
Yamcha has absolutely NO hurtbox below his crotch, so this is his best jump-in.
Used before Wolf Fang Fist: Gale Claws in all of his combos.
j.S
- DBFZ Yamcha jS.png
- 5S but in the air.
Yamcha has air OK anti-airs so use this like how you would use 5S.
j.2H

FOOT DIVE

- Knockdown airborne opponent.
On hit or block against a grounded opponent, can cancel into 236X for combo follow-ups or for left-right mix-ups.
Since this move is almost always minus (even on hit) when hitting a grounded opponent, get used to canceling into 236X.
In 2H or DR combos, you can use this to take both you and the opponent to the ground for a grounded Vanish combo.
Special Moves
Wolf Fang Fist
236L/M

Time to start the claw-fest
- 236L
- Regular rekka starter.
- Covers 80% of the screen.
- 236M
- Dashes forward for a bit before starts attacking, goes further than full screen.
- Teleports behind enemy to attack if he reaches them during the dash, otherwise it's the same as the L version.
- Can work even without corner space.
- Extremely simple and efficient mixup.
- Each of the rekka followups can only be used once.
- All followups can come out on whiff, and can combo into Gale Claws.
- Using Finisher or Flash will end the string.
- Attempting to do Pack Attack after it's been used in the rekka string will give you Finisher instead.
- Flash can be canceled into at any point during the string.
Pack Attack
Wolf Fang Fist > L/M

ATATATATATATATA

- [] is when used immediately after 236L/M.
- L is the fastest followup without the use of bars.
- 236L > L is a true blockstring.
- M followup is slower than L followup for more damage.
- 236L > M has a gap which will catch mashing.
Finisher
Wolf Fang Fist > 6L/M or Pack Attack > L/M

Also a ToD starter for some reason

- L version has a short hitbox in front of Yamcha but has fast recovery frames.
- M version causes a sliding knockdown.
- Surprisingly long range where you even can use Tail and still hit at that distance.
- Pack Attack L > M has a gap that will catch mashing.
Flash
Wolf Fang Fist > H

AWOOOOOO

- Used in metered combos to boost damage by around 500.
- Crazy high recovery on whiff, Yamcha is visibly stuck in place and punishable.
- Useful in neutral as a full screen poke thanks to its speed and easy confirms, and after Whiskers for a quick cross-up.
- Can catch your opponent pressing buttons after a blocked 5S, and catches opponents after a reflected vanish. It's that fast.
Yamcha's infamous Wolf Fang Fist Flash. One of Yamcha's strongest tools and the butter that holds his kit together.
With its insanely fast start-up, high priority, and being -5 on block, the move alone commands a ground presence. Flash complements with his 5S as it can be confirmed from massive distances while spacing Yamcha out from dangerous ranges. On hit, Flash will bring the opponent up, allowing for extensions that scale like a medium starter, allowing Yamcha to finally get some decent damage. Unfortunately, Flash has terrible recovery, and thanks to it being ground only means the opponent will likely find themselves jumping a lot versus Yamcha, where using the move is a death sentence.
Flash is also Yamcha's go-to for fast cross-ups during his Wolf Fang Fist pressure. Go in with Reverse Wolf Fang Fist or Whiskers and follow up with Flash for a fast cross-up that leads into good reward (for Yamcha, any way). Just once again, take note that if the opponent jumps to avoid it, you're going to be in for some serious hurt.
Whiskers
Wolf Fang Fist > S

"Hello There"

- Dashes a short distance forward, passing through the opponent if close.
- For a short while after this move, only rekka follow-ups are available.
Tail
Wolf Fang Fist > 4S

wwWOOP

- A special backdash, can be used to disengage from a blocked rekka.
- Can use Whiskers to dash back in.
Neo Wolf Fang Fist
236H

Either you use this "Shin Rouga Fuufuuken"...or the other one. Ain't Japanese homophones a stinker?

- Consumes 1/2 Ki Gauge.
- A faster version of 236L that covers a slightly shorter distance.
- On hit or block, automatically performs Pack Attack > Finisher > Flash. Can use vanish to cancel these followups.
- On whiff, does not have access to 236L/M rekka followups.
- Wallbounces, allowing you to squeeze out a bit more damage in your strings.
- Easily combos into 214M for a sliding knockdown.
- Can combo into itself once for a "level 2".
- Consumes smash on the final hit.
Wolf Fang Fist: Gale Claws
214L/M/H (Air OK)

Beyblade, Beyblade let it rip

- Good for its soft knockdown to mixup and surprise the opponent.
- All versions keep momentum, L keeps the least and H keeps almost all.
- M is the classic air combo ender that gives a sliding knockdown.
- H is able to easily followup after j.H in midscreen due to its very fast startup and snappy movement.
Kamehameha
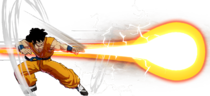
236S

He saved this one just for his pressure game

- Slower startup than other Kamehamehas.
- -4 on block, but links to 2L on hit in the corner.
- Flash will catch the opponent trying to hit buttons after this.
Sub par neutral tool due to its speed, but weirdly enough better suited for pressure. Once you have conditioned your opponent to look out for WFF cross ups, this move can be used as a same side option that still converts to a combo in the corner. It's only 2-3 frames slower, so the difference is hardly noticeable if your opponent is simply reacting to the delay. The reward on hit is slightly higher in terms of damage than DR and you have the option to Vanish if it is blocked to continue pressure.
Z Assists
Assist A
Wolf Fang Fist
- DBFZ Yamcha AssistWolfFangFist.png
BERSERKER BARRAGE
- Yamcha dashes forward with a series of claw swipes.
- Opponent stays grounded on hit.
- Travels forward about 80% of the screen.
A very fast assist, which is useful in blockstrings for pressure, and can extend combos somewhat slightly. Also useful to catch people at certain ranges for pushing buttons. Amazing for scrambles and converting stray attacks into pressure or a combo. Also one of the fastest assists in the game, which lends to it also being amazing in clash situations due to its high priority and multiple hits.
Assist B
Kamehameha
- It's a beam assist. Use it for beam things.
Although it is a beam, Yamcha is one of the few characters that has an arguably better and more unique assist in his first one. Nonetheless the beam option is still present. Controls space much better than it's A assist counterpart but loses some speed and frame advantage in return.
Assist C
Wolf Fang Fist: Pack Attack
Twice the lockdown
Twice the price
- Very niche.
Only gives 15 extra frames of lockdown, for 16 more frames of startup and twice the cooldown of his A assist. You can already hitconfirm pretty easily off of his A assist as well. Main benefit is less time between hits for HSD purposes as A drops often at high hitstun decay.
Super Moves
Spirit Ball
236L+M or 236H+S

"I'll show you somethin' rad!"


- Can only be landed once per combo (unless you have another Yamcha through Body Change).
- Pressing L/M/H/S and a direction after the first ball causes the Spirit Ball to fly in that direction, up to 5 more hits.
- The first hit that lands will always deal 1300, every next hit deals 200.
- Minimum damage for all 6 hits: 390, 60*5.
- Downward directions cause sliding knockdowns, unless the opponent is too high up.
Can force the opponent into different positions for oki or follow-up Supers such as high up, knockdown, close or far away, behind you...
For example, Yamcha can combo Spirit Ball into Ultimate Wolf Fang Fist by pressing buttons with these directions: ![]()
![]()
![]()
![]()
![]()
|
Ultimate Wolf Fang Fist
214L+M or H+S


The OTHER Shin Rouga Fuufuuken


- Yamcha dashes fullscreen forward.
- Minimum damage: 1505.
On hit in midscreen, the opponent will be put a fullscreen away. But on hit in the corner, they'll be pulled slightly out of it while Yamcha will be at +11. From here you can crossup with IAD j.M or 236M~H, bait Sparking with 5H, or just do something simple like meaty 2M, 6M, 5L > DR.
Colors
- DBFZ Yamcha color1.png
Color 1
- DBFZ Yamcha color2.png
Color 2
- DBFZ Yamcha color3.png
Color 3
- DBFZ Yamcha color4.png
Color 4
- DBFZ Yamcha color5.png
Color 5
- DBFZ Yamcha color6.png
Color 6
- DBFZ Yamcha color7.png
Color 7
- DBFZ Yamcha color8.png
Color 8
- DBFZ Yamcha color9.png
Color 9
- DBFZ Yamcha color10.png
Color 10
- DBFZ Yamcha color11.png
Color 11
- DBFZ Yamcha color12.png
Color 12
- DBFZ Yamcha color13.png
Color 131
- DBFZ Yamcha color14.png
Color 141
- DBFZ Yamcha color15.png
Color 151
- DBFZ Yamcha color16.png
Color 161