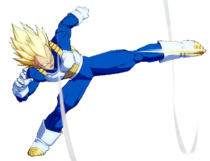
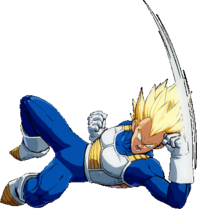
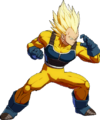
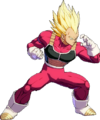
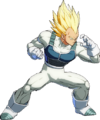
Super Saiyan Vegeta is similar to SS Goku: an honest character with a straightforward skillset that lets him do work at all levels of play. There are many places in which SS Vegeta differs from his rival, too, though. While he lacks a beam, he more than makes up for it with fast, rapid-firing ki blasts, which combine with an array of air-ok DPs and fast lariat moves into a rock-solid neutral presence. His normals, while stubby (a trait shared among all Vegeta incarnations in this game), have great frame data, and he also has a mixup option (needs assist) in his 236L. His supers are straightforward, which makes them easy for DHC, and his assists, specifically A, is stellar in what it can do for your team too. SS Vegeta might not be able to do insane mixes or outrageous damage, but he can most definitely pick up your team's slack, whatever that may be.
- Jack Of All Trades: Well-rounded, allowing him to adapt to nearly every situation.
- Relatively Safe Zoning: Ki blasts 5S and j.S enforce zoning, as they can be canceled into Crushing Knee Kick when the opponent commits to an approach.
- Special Assist: Exceptional support value with his Assist A, among the best for neutral and combo extension while also offering Vanish protection.
- Reversal: 214M/H is an air-ok DP and is the heart of his zoning. 214L is also an anti-air that can lead to great damage/TODs if valuable resources are spent.
- Pressure Beast: Thanks to his buffs, all of Vegeta's normals are safe (excluding heavies), giving him ridiculous pressure.
- Stubby Range: Requires careful footsies game due to short-ranged normals.
- Consecutive Energy Blast: 236S is outclassed by 5S and j.S, while also sharing their weaknesses and is generally one of the worst moves in the game.
- Blockstring Support: A is nonexistent during blockstring pressure if the enemy knows it can be reflected and superdashed on block.
- Master of None: While well-rounded, outclassed by specialist characters.
Normal Moves
5L
| Version | Damage | Guard | Smash | Startup | Active | Recovery | On-Block | Invuln |
|---|---|---|---|---|---|---|---|---|
| 5L | 400 | All | 6 | 3 | 12 | -3 | ||
| 5LL | 700 | All | 10 | 4 | 14 | -2 | ||
| 5LLL | 700 / 1000 | All | U3+ | 12 | 3 | 21 | -2 |
- 5L
- Chains twice with 4L.
- 6-frame startup, good to contest pressure with.
All things accounted for, this is a good jab. If there's a big enough delay between 5L and a follow-up 4L, you can make 6M plus on block to continue pressure.
- 5LL
- Advances Vegeta forwards.
- Vegeta's best combo starter.
- -2 on block, *really* good for stagger pressure.
Blockstring, stagger, and combo tool like most other 5LL's in the game. Its frame advantage allows for a safe backdash during pressure, giving Vegeta safe ways to bait the opponent.
- 5LLL
- Jails into vanish.
- Always results in the cinematic.
Good to use in corner combos after your smash is used, but not much else. You have better combo and blockstring options. Can make an infinite blockstring in sparking with 5LLL > jc.2H > airdash j.LL
5M
| Damage | Guard | Smash | Startup | Active | Recovery | On-Block | Invuln |
|---|---|---|---|---|---|---|---|
| 700 | All | 9 | 6 | 15 | -5 |
- Hitbox shrinks on the fourth active frame.
Blockstring and combo filler. You can attempt pressure resets off of this, but it can be punished outright with 6-frame jabs. Most people will not be ready to do this, but if they pre-emptively mash you will get smoked.
5H
| Damage | Guard | Smash | Startup | Active | Recovery | On-Block | Invuln |
|---|---|---|---|---|---|---|---|
| 850 | All | U1 | 14 | 6 | 18 | -8 |
- Leads to rejump combos with Smash or without in the corner.
- Advances forwards.
This move is used in Vegeta's optimal combos, but not much else. Once again, combo and blockstring filler.
5S
(Hold OK)
| Damage | Guard | Smash | Startup | Active | Recovery | On-Block | Invuln |
|---|---|---|---|---|---|---|---|
| 250×8 | All | 13 | [1(9)] ×8 | 24 | -2 |
- Can be repeated up to eight times.
Amazing repeatable Ki Blast when it comes to the amount he can throw (8). You outclass a lot of other characters' Ki Blasts just by holding down the button. Because it's plus, you can attempt pressure resets with this move, but your options afterwards are far more limited. It's best to attempt a pressure reset with this if you can threaten with a late chain into 5H.
2L
| Damage | Guard | Smash | Startup | Active | Recovery | On-Block | Invuln |
|---|---|---|---|---|---|---|---|
| 400 | Low | 7 | 3 | 13 | -4 |
- Vegeta's primary mixup tool.
- Good for staggers, but not as good as 5L.
You'll be using this move a lot. It's fast and it hits low, which also makes it good for mixups. It has pretty decent range for a light normal, but it's still a Vegeta normal and not as big as some others like A21.
2M
| Damage | Guard | Smash | Startup | Active | Recovery | On-Block | Invuln |
|---|---|---|---|---|---|---|---|
| 700 | Low | 10 | 4 | 17 | -5 |
- Vegeta's best midscreen combo starter.
In pressure, this move has similar uses to 5M, with the subtle difference that it hits low and it's typically a better combo starter. Hit them with this if you want them to explode.
2H
| Damage | Guard | Smash | Startup | Active | Recovery | On-Block | Invuln |
|---|---|---|---|---|---|---|---|
| 850 | All | U1+ | 13 | 3 | 30 | -17 |
- Recovery can be canceled into j.2L, but not j.S.
Vegeta's primary grounded anti-air. While the invincibility kicks in slower compared to 214L, 2H gives him a meterless conversion.
6M
| Damage | Guard | Smash | Startup | Active | Recovery | On-Block | Invuln |
|---|---|---|---|---|---|---|---|
| 850 | High | 24 | 6 | 10 | 0 |
- Universal overhead.
Vegeta has some decent methods to space this out, so it's more useful than most. Watch Fenritti to see exactly how it's done, but there's a rough explanation in the Strategy section.
j.L
| Damage | Guard | Smash | Startup | Active | Recovery | On-Block | Invuln |
|---|---|---|---|---|---|---|---|
| 400 | High | 6 | 3 | 13 |
- Most commonly used as a second overhead.
- Can whiff after a max-range j.M.
It will whiff in a lot more circumstances than you would hope for, but it serves its basic purpose as a mix-up tool. Also makes for a decent rising air-to-air but the short range can make it inconsistent.
j.M
| Damage | Guard | Smash | Startup | Active | Recovery | On-Block | Invuln |
|---|---|---|---|---|---|---|---|
| 700 | High | 10 | 5 | 13 |
- Good air-to-air and jump-in normal.
- Amazing crossup button.
Vegeta's j.M is a great air normal. Where it particularly shines is in crossups, as it's range lends it to being a good crossup tool. This strength is also heightened in Sparking, where Vegeta can Instant Air Dash out of any of his grounded normals.
j.H
| Damage | Guard | Smash | Startup | Active | Recovery | On-Block | Invuln |
|---|---|---|---|---|---|---|---|
| 850 / 1000 | High | D1+ [D3+] | 13 | 6 | 22 |
- Hitbox shrinks on the fourth active frame.
A downward elbow. It doesn't really have much horizontal range so when you use it as a jump in from an air dash, you'll want to make sure to get the spacing right.
j.S
(Hold OK)
| Damage | Guard | Smash | Startup | Active | Recovery | On-Block | Invuln |
|---|---|---|---|---|---|---|---|
| 250×5 | All | 12 | [1(9)] ×5 | 23 |
- Can be repeated up to five times.
- Great offensive angle for zoning.
This is the crux of SSJ Vegeta's defensive play. The fact that it is a Ki Blast means that it is special cancelable, and SSJ Vegeta has an invulnerable air DP. Both of these properties allow SSJ Vegeta to zone safely as long as you, the player, can react to Superdash with 214L.
j.2H
| Damage | Guard | Smash | Startup | Active | Recovery | On-Block | Invuln |
|---|---|---|---|---|---|---|---|
| 850 | All | U1+ | 12 | 3 | 12 |
- Long and strangely disjointed horizontal reach.
- Hits mid but is advantageous on block.
- Good mixup tool, using this after level 3 allows for a 50/50 with airdash j.L/land 2L.
Your go-to combo extender. Combos into superdash with Smash and extends air combos without.
Special Moves
Interceptor Kick
j.2L
| Damage | Guard | Smash | Startup | Active | Recovery | On-Block | Invuln |
|---|---|---|---|---|---|---|---|
| 900 | All | 12 | Until Landing | 13 | -7 ~ -1 |
- Good for baiting anti-air attempts.
- Groundbounces grounded opponents.
- Useful for assist combos as it sends you and the opponent downwards without using SKD.
A divekick that has Vegeta do a downward kick at a 45-degree angle. It's good for stalling your falling momentum to make an opponent mistime their anti-air and punish it. It can also be good just to make your movement less predictable.
Super Dash Kick
236L/M/H (Air OK)
| Version | Damage | Guard | Smash | Startup | Active | Recovery | On-Block | Invuln |
|---|---|---|---|---|---|---|---|---|
| 236L | 900 | All | 11 | 6 | 26 | -5 | ||
| 236M | 300×2, 500 | All | U1+ | 11 | 4(10)4(11)8 | 17 | -5 | |
| 236H | 1000 | All | U1+ | 11 | 12 | 23 | -19 | |
| j.236L | 900 | All | 10 | 6 | 26 | -5 | ||
| j.236M | 300×2, 500 | All | U1+ | 11 | 4(10)4(11)8 | 27 | ||
| j.236H | 1000 | All | U1+ | 10 | 12 | 15 |
- 236L
- Bounces off the opponent on hit or block.
- Can cancel recovery into an air option such as double jump or air dash.
- Gives Vegeta a high/low in the corner with [3] superjump float.
When covered with an assist, this can be an efficient mixup tool in the corner. Traditionally you'd need an assist with 38 frames or more to do a j.2H mixup, but not anymore thanks to 236L leaving Vegeta in superjump state. Floating down and towards the opponent lets his stubby 2L connect and makes his airdash mixup real.
- 236M
- Wall bounces in the corner with Smash.
- Combo extender.
- Has niche uses in blockstrings with assists, but less versatile than 236L.
The M version of this move is 3 hits and the third hit will bounce in the corner. On block, the last hit crosses up behind the opponent. You can extend your combo off of this wall bounce by linking a normal. Most of this move's usage will be for combos as 236L is a better mixup tool.
- 236H
- Passes through the opponent.
- Launches the opponent directly upward in a tailspin.
- Hold or tap 2 (down) on hit for hit stop to combo easier.
This is an improved version of the L version. It's fast and goes full screen, making it great for punishing an opponent trying to do something on the ground when they're on the other side of the screen. The H version will launch the opponent directly upward in a tailspin on hit so when you space it well (about fullscreen distance), you can easily juggle the opponent to get a full combo. Good as a movement tool too now that EX moves cost .5 bars.
Crushing Knee Kick
214L/M/H (Air OK)
| Version | Damage | Guard | Smash | Startup | Active | Recovery | On-Block | Invuln |
|---|---|---|---|---|---|---|---|---|
| 214L | 900 | All | 9 | 9 | 31 | -28 | 1- | |
| 214M | 800,300 | All | D1 | 16 | 12 | 30 | -30 | Full 1-19 |
| 214H | 800,100×5,300 | All | D1 | 9 | 22 | 37 | -47 | Full 1-11 |
| j.214L | 900 | All | 9 | 9 | 27 | Head 1- | ||
| j.214M | 800,300 | All | D1 | 12 | 12 | 33 | Full 1-15 | |
| j.214H | 800,100×5,300 | All | D1 | 9 | 12 | 27 | Full 1-11 |
- 214L
- Frame 1 head invincibility.
One hit, does a single rising knee kick. Doesn't lead to much damage without resources, but what it does for Vegeta's neutral game is staggering. Vegeta is no longer a sitting duck to Superdash while he's in the air or throwing Ki Blasts because he can consistently pop it with j.214L.
- 214M
- Vegeta's invincible reversal.
- Second hit gives sliding knockdown.
Rising Knee Kick. On hit, Vegeta follows up with a downward kick to send the opponent back down to the ground. Fully invincible but quite slow, meaning it is quite easy to safejump. It's better used when challenging after an opponent is plus.
- 214H
- Much faster than 214M.
- Switches sides and gives a sliding knockdown.
EX version. The rising knee portion does more hits before knocking the opponent back down to the ground. Does a sliding knockdown and switches sides. Much faster than the meterless version but still is quite easy to safejump.
Consecutive Energy Blast
236S (Air OK)
| Version | Damage | Guard | Smash | Startup | Active | Recovery | On-Block | Invuln |
|---|---|---|---|---|---|---|---|---|
| 236S | 100×16 | All | 9 | [1(5)] ×15, 1 | 26 | -7 | ||
| j.236S | 100×16 | All | 9 | 1(5), [1(4)1(5)]×7, 1 | 21 |
- Opponent can guard cancel superdash on block.
- Doesn't sound that bad until you realize this is a special move and your only options are supers or vanish.
- Mostly relegated to a combo tool because of the above point;
- Amazing as a combo tool.
You should never be using this in neutral or blockstrings. This move is heavily unsafe in neutral and on block as it requires meter to make opponents respect it, and even if you use meter you do not get anything meaningful. What it is good at is adding damage to combos with assists. Using the ground or air version will depend on what assists you have, but Special Tagging in another character from either version gives a ton of hitstun to work with.
Z Assists
Assist A
Consecutive Energy Blast
| Damage | Guard | Smash | Startup | Active | Recovery | On-Block | Invuln |
|---|---|---|---|---|---|---|---|
| 130×8 | All | 37 | [1(4)]×8 | 69 | +86 |
- Good for hindering an opponent's approach in neutral.
- One of the best assists to extend combos.
- Can be super-dashed through and reflected even on block.
Super Vegeta's assist is the air version of his Consecutive Energy Blast special. The angle that it fires at makes it hard for your opponent to approach if they find themselves on the other side of it. Not good on block but extremely easy to convert into a combo. Also protects you from Vanish.
This assist is by far one of the most interesting and useful assists in the game. It's long active frames and angle of attack turns it into a projectile wall for its duration. While your opponent can still reflect it, you are distinctly still at the advantage on block at +20. It is also really easy to sniff out superdashes with 2H, as low-level players will try to use it to go through the assist.
Assist B
Super Dash Kick
| Damage | Guard | Smash | Startup | Active | Recovery | On-Block | Invuln |
|---|---|---|---|---|---|---|---|
| 800 | All | 20 | 6 | Total 82~116 | +31 |
- Bounces off the opponent on hit/block like the point version.
Don't use this. Vegeta's A Assist is still one of the best assists in the game. This assist, while it is fast and has 30 frames of blockstun, has no range and has comparatively little use in combos.
Assist C
Crushing Knee Kick
| Damage | Guard | Smash | Startup | Active | Recovery | On-Block | Invuln |
|---|---|---|---|---|---|---|---|
| 180×6, 400 | All | 40 [20] | 22 | Total 126~177 | +18 ~ +24 | 36-? Full |
- Invincible(!), can plow through level 3s.
- Teleports on frame 22.
- Vegeta stops his assault if the point character is hit, but not if they block.
- Completely circumnavigates neutral if blocked while airborne.
Vegeta teleports to the opponent and DP's them in the face, possibly the most Vegeta thing he could do. The kick sends the opponent back to you to continue the combo. Good as a pre-emptive tool but generally poor on block. If your opponent happens to jump and block this assist, the blockstun is extended immensely.
Super Moves
Big Bang Attack
236L+M (Air OK) or 236H+S (Air OK)
| Version | Damage | Guard | Smash | Startup | Active | Recovery | On-Block | Invuln |
|---|---|---|---|---|---|---|---|---|
| 236L+M | 2200 | All | UDV | 9+4 | Total 69 | -27 | 9-21 All | |
| 236H+S | 2200 | All | UDV | 9+4 | Total 69 | -41 | 9-21 All | |
| j.236L+M | 2200 | All | UDV | 9+4 | Total 69 | -26 | 9-21 All |
- Air H+S version will aim downwards and groundbounce opponents, setting up for DHCs.
- Minimum damage: sideways: 814, downward: 770.
A great way to counter superdashes if his opponent is in sparking with low health, as all the damage will be done at once. With the new patch, it can now be used to bring opponents to the ground for DHCs. Some characters that can be Z Changed into from H+S Big Bang Attack include: Literally anyone with a beam super (you might want to delay it to increase damage if you're too high), Gotenks, 18, and many others. Feel free to experiment with your team!
Final Flash
214L+M (Air OK) or 214H+S (Air OK)
| Version | Damage | Guard | Smash | Startup | Active | Recovery | On-Block | Invuln |
|---|---|---|---|---|---|---|---|---|
| 214L+M | 220×20 | All | UDV | 12+3 | 85 | 50 | -34 | 1-28 All |
| j.214L+M | 220×20 | All | UDV | 12+3 | 85 | Until Landing | 1-28 All |
- Minimum damage: 83*20 (1660)
- Slower than average, as well as below-average damage.
- +42 on ground hit, but air version has less advantage the higher Vegeta is.
Vegeta's Level 3. Because the beam goes fullscreen and is air OK, it's fairly easy to combo into. Even when used high up in the air, there's enough plus frames to hold [9] when you land and have a meaty j.H waiting for your opponent. Vegeta can also go for a Superjump IAD mixup, which is more difficult but more rewarding and harder for your opponent to block.
Colors


