| Disclaimer This section is still being written. It may be wildly inaccurate or missing significant data. Please feel free to make edits, but include edit summaries and sources where applicable. |
Normal Moves
5L
Standard jab, and Goku's fastest normal.
4LL > 2M or 2LL > 2M are really strong stagger string.
- Launches on hit.
Strong normal in pressure thanks to the fact that it hits low and can cancel into another low, an overhead, a grab, or even sides switches.
The large amount of hitstun combined with a low hitbox also allow SSB Goku to go for more unique combo routes.
Strong stagger normal after 4LL
- 5LL > 5LLL has a massive gap in between.
- Combos into SD midsceen or even links to air normals in the corner.
Very slow, highly telegraphed, and the reward isn't so big. Since the threat of 214X exists, the opponent will be more likely to mash and they'll punish 5LLL outright if it's not covered with assists.
5M
- Holding
 during startup will reduce forward momentum and recovery.
 - Values in [ ] are for 5M[4] version.
5M has extremely good range, even longer reach than 2M. 5M with dash momentum is very scary.
5M[4] (or simply 4M) is the safest normal he has that also pushes the opponent just far enough that he can safely backdash out of almost every 5L/2L. 2M > 4M also auto spaces him for another 2M.
5H
- Wall splats on Smash hit. Combos into SD.
- Non-Smash only combos into SD in the corner.
Used for block string and combo filler.
5S
- Mash or hold S to shoot all 6 Ki blasts.
- Last Ki blast launches on hit.
This is his only grounded projectile, making it vital for his neutral game.
You should always only use 2 Ki blasts. Shooting less is safer overall, shooting more is easier to confirm, 2 is the perfect amount to react with 2H punish or Vanish confirm.
2L
Fast low with short range, making it his go to low for mix-ups out of jump-ins or assists.
2M
- Great range and very active hitbox.
- Launches on hit.
- Can anti-reflect from 5L, 2L, 4M or 5M.
- From max range it can be spaced to be -3 on block.
His third low. IAD j.S ▷ 2M has deceptively long range and can fully true string in the corner.
Get ready to explode.
Arguably the best 2M in the game with its combination of fast startup, low profile, massive reach and high reward, making it a force to be reckoned with during neutral and offense. When using it in conjunction with his 4M, it can serve as a great way to space out the opponent and reset pressure.
2H
- Puts Goku airborne.
- Smash hit has more hitstun and combos into SD.
Go to anti-air, though since it has a firmly vertical hitbox and a large amount of recovery it should be used carefully.
Smash hit can also combo into j.236S for a quick sides switch into SKD.
On block, cancel into j.236L to stay safe (-2) or j.214H with an assist for mixups.
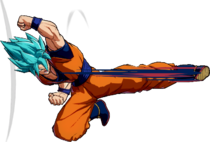
6M
- DBFZ SSBGoku 6M.png
- Counts as airborne.
- Uses the same hitboxes and hurtboxes as Goku's j.M as of version 1.28.
- Tied with Janemba for the biggest 6M in the game.
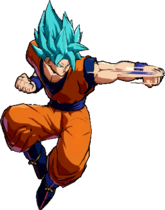
j.L
Standard air jab.
j.M
Great air-to-air. IAD j.M is also Goku's best cross-up option. On hit, confirms with 2M or microdash 5L, depending on the height.
j.H
- 5LLLLLLL Smash hit can wall bounce.
- j.H Smash hit causes sliding knockdown.
Go-to jump in.
j.S
- Doesn't halt air momentum like most j.S.
- Doesn't launches airborne opponent like most j.S, instead it pushes them down.
Forward IAD j.S beats anti-airs and puts Goku +10 at minimum.
Due to maintaining full momentum, IAD j.X > j.S will make Goku visually pulls out the Ki blast, but it would almost never come out before he lands and there would be no landing recovery. Mean while, IAD j.M(L)2H > delay j.S would always connect. j.S ▷ 214L coincidentally is also a true tickthrow in the corner. So not only is GC reflecting a pure gamble due to the tickthrow and can be baited into 2M punish, but the thought of reflecting j.S at all is a gamble because the Ki blast might not even come out.
j.2H
- Smash hit has more hitstun and combos into SD.
Basic air launcher. Similar to 2H, Smash j.2H can also combo into j.236S.
Special Moves
Divine Void Strike
236L/M/H (Air OK)
- All Versions
- Removes other landing recovery.
- Deflects Ki blasts from frame 4 (H version from frame 1).
- 236L
- Goes almost half screen.
- General purpose blockstring ender.
236L is a safe blockstring ender and a great combo filler, used in Goku's advanced combos. The air version has much better frame advantage if done close to the ground, which forms the basis of his corner loops.
- 236M
- Goes 75% of the screen.
- Smash hit wall splats, Smash 5MMM wall bounces.
Cancelling into move from ANY normal will have a small gap that beats mashing, or in the case of 2H > j.236M, it beats even counter 2H.
236M is used in corner BnBs. Smash j.236M also link into j.DR in the corner for an easy snapback.
- 236H
- Teleports toward to the other wall, then charges backward.
- Goes fullscreen. Air version has slight vertical tracking.
- Wall bounces on Smash hit.
- Air version on ground block (2H > j.236H + assist) leaves Goku at -5 in the air.
- 236H is faster at fullscreen.
- A fullscreen 5S can now confirm to 236H
236H is a good neutral check that can be solo converted anywhere on screen.
Not a good idea to use as a reversal as the invul from teleporting comes in too late.
Super God Shock Flash
214L/M/H
- All Versions
- Smash on the throw.
- Values in [] is if the throw whiffs.
- Can only grab grounded or "grounded-by-proximity" opponents.
- D Smash grab has identical effect to 214L.
- After the grab has landed in the combo, not only can't Goku grab a second time, the followup punch also won't connect anymore.
- 214L
- Stays in place. If the grab whiffs, does a short ranged punch as followup.
- On hit, the grab knocks the opponent away into a SKD, while the punch only launches them.
- It tick throws from 5H if its delayed.
At 17f of startup, it's the only unreactable command grab in the game that not only gives you SKD oki, but also can be converted with assists. While the range is pretty short, Goku can do microdash 214L or microdash 2L > delay 214L to land it during stagger pressure.
- 214M
- Teleports a short distance forward before the grab.
- U Smash hit wall bounces.
The initial warp gives this more range. When used mid blockstring, even in midscreen, the opponent cannot hold ![]() and walk out of the grab.
and walk out of the grab.
Though, it's almost half the speed of 214L and the lack of a follow-up makes it incredibly unsafe.
- 214H
- Has the range of 214M and the safe punch of 214L.
- U Smash hit wall bounces.
Can be converted meterlessly even in midscreen, though it's still easily reactable and doesn't do much more damage than 214M.
† Currently bugged: On D Smash hit, deals regular amount of blue health (instead of no blue health) and builds a tiny bit of meter unlike other EX specials.
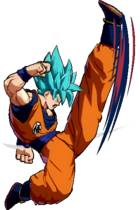
Dragon Flash Kick
j.214L/M/H
- j.214L
- Reels back a tiny bit before diving 45 degree downward.
- Advantage ranges from -1 to -6. 2H > j.214L is a true blockstring that leaves Goku at -3 on the ground.
One of the fastest divekicks in the game. Can be used to get in and out of pressure. Also good as a crossup fakeout as on hit it keeps the opponent grounded for assist extension.
Does slightly more damage than j.H and can combo from j.S, making this move slightly more preferable to j.H in assisted and Vanish combos.
- j.214M
- Smash hit causes sliding knockdown.
- Advantage ranges from -1 to -6. 2H > j.214M has a gap that beats counter 2H, leaves Goku at -3 on the ground.
Goku's anywhere meterless SKD. It's almost always better than j.H as a solo combo ender.
- j.214H
- On hit, follows the opponent down to the ground before doing a quick sideswitching 2-hit combo. Smash on the last hit, causes sliding knockdown.
- On block, after touching the ground, switches sides and teleports up in the air. Can steal corner and is at a height where he can airdash over anybody for a double sideswitch.
- Advantage ranges from -3 to -7. 2H > j.214H is a true blockstring that leaves Goku at -1 in the air.
j.S > j.214H is an okay solo combo ender in case you can't use j.214M, but where this move really shines is as a mixup tool covered by assists.
After a blocked j.214H, Goku can do a 4-way mixup with empty 2L, empty 214L, airdash cross j.S, late airdash same side j.L. However, late airdash j.L while universal is rather hard to pull off, the entire setup requires good blockstun assists and a 2H in the string, so it's susceptible to GC.
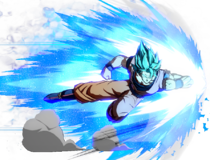
Instant Transmission
236S or 214S (Air OK)
- Teleporting kick that tracks anywhere on screen. 236S goes behind the opponent, 214S goes in front. Uses the direction Goku's facing to determine how he teleports.
- After teleporting, the move still has some vertical tracking to make sure it connects.
- Smash hit causes sliding knockdown.
High risk, decent reward neutral check if used on reaction to certain moves. It's easily 2H-able if the opponent is ready, but you get some oki if it hits. Useful for side-switching off of 2H as well. You can combo off of this if it hits them against the corner, but you won't be able to get sliding knockdown easily.
Z Assists
Assist A
Dragon Flash Kick
- DBFZ SSBGoku AssistDragonFlashKick.png
Actually does something now
- Has fullscreen horizontal tracking.
- Ground bounce into sliding knockdown on hit.
A screen control assist, fantastic when used in conjunction with ki blasts in neutral. On hit, the ground bounce also enables unique air-to-ground extension unlike most other pop-up assists.
Can also be used right before a low recovery Super like Bardock and AGohan's 236L+M for a SKD they otherwise wouldn't get.
Assist B
Divine Void Strike
- Deflects Ki Blasts.
- Launches on hit.
Basic strike assist. Good for raw Super Dash + assist. His A assist is a bit better due to the groundbounce, but this is still a good assist and can be used if you'd rather have something more barebones and easier to convert off of. It's also a smidge better in neutral situations, though both fulfill about the same roles.
Assist C
Instant Transmission
- Tracks the opponent anywhere on screen.
- On hit, teleports behind the opponent and knocks them down into a ground bounce SKD.
Super Moves
Extreme Speed Kamehameha
236L+M or 236H+S (Air OK)
- Doing raw, ground version will slightly adjust position for that it hits, air version stays still.
- Mid-combo, both version teleports to the opponent instead, though the angle isn't always the best. Always shows up from the direction Goku's facing.
- Last hit causes sliding knockdown.
- Minimum damage: 75*10 (750).
Similar to SS Goku, he does have safe jump setup from this with j.LL2H > j.236L+M into airdash j.H, but it's not universal.
x10 Kaioken Kamehameha
214L+M or 214H+S
- Hits fullscreen.
- There are 2 spots where you can hold a button for a sideswitch or double sideswitches. A "free" one before the upward kick, and one that cost 2 extra Ki gauges after the kick.
- Minimum damage: 1759, add 900 if 5 bars are used for a new total of 2659.
Has enough frame advantage in the corner for a superjump IAD float or fastfall high/low 50/50. Only do the 2 bar extension if you wanna see the cool animation (or if it kills) because it obliterates your oki otherwise.


