(Stones) |
|||
| (6 intermediate revisions by the same user not shown) | |||
| Line 11: | Line 11: | ||
* '''Zoning Tools:''' Versatile projectiles with controllable ki blasts and chargeable Kamehameha gives Krillin a decent ranged game. | * '''Zoning Tools:''' Versatile projectiles with controllable ki blasts and chargeable Kamehameha gives Krillin a decent ranged game. | ||
* '''Healer:''' Can be annoying to deal with due to his infinite Senzu Beans, allowing him to constantly heal his teammates' blue life or even his own. | * '''Healer:''' Can be annoying to deal with due to his infinite Senzu Beans, allowing him to constantly heal his teammates' blue life or even his own. | ||
* '''Pressure Tools:''' Multiple tools to reset pressure with tools like Stone Throw, Afterimage feints, and {{clr| | * '''Pressure Tools:''' Multiple tools to reset pressure with tools like Stone Throw, Afterimage feints, and {{clr|S|2S}}. | ||
* '''Mid-screen Solo Damage:''' By using j5S to solo rejump in mid-screen combos, Krillin can deal heavy damage without the use of any assists | * '''Mid-screen Solo Damage:''' By using j5S to solo rejump in mid-screen combos, Krillin can deal heavy damage without the use of any assists | ||
* '''Okizeme:''' Excellent okizeme tools. Solar Flare and Stone Throw both being immune to reflect push-back allowing him cover all tech options when paired with an assist. | * '''Okizeme:''' Excellent okizeme tools. Solar Flare and Stone Throw both being immune to reflect push-back allowing him cover all tech options when paired with an assist. | ||
* '''Fast Normals:''' Has some of the best normals in terms of frame data, {{clr| | * '''Fast Normals:''' Has some of the best normals in terms of frame data, {{clr|M|5M}} in particular having amazing range and low recovery making him very hard to whiff punish on top of his short stature. | ||
*'''Jesus, but with faster respawn time:''' With his Senzu Bean no longer only healing blue health, he can literally revive himself if he falls on a Senzu after dying. | *'''Jesus, but with faster respawn time:''' With his Senzu Bean no longer only healing blue health, he can literally revive himself if he falls on a Senzu after dying. | ||
|cons= | |cons= | ||
* '''Stubby normals:''' Ground normals move him very far forward as compensation, but his air normals have no such blessing and severely lack range. | * '''Stubby normals:''' Ground normals move him very far forward as compensation, but his air normals have no such blessing and severely lack range. | ||
* '''Anti-Air Reward:''' Krillin's {{clr| | * '''Anti-Air Reward:''' Krillin's {{clr|H|2H}} is small, forcing him to use Solar Flare as his anti-air which gives little reward. | ||
* '''Assist Reliant:''' Solo-pressure is extremely gimmicky. Assist are a necessity for opening up good turtles. | * '''Assist Reliant:''' Solo-pressure is extremely gimmicky. Assist are a necessity for opening up good turtles. | ||
* '''High commitment projectiles:''' Most of his projectiles are highly committal with high recovery and don't convert into pressure in most cases making them high risk/low reward. | * '''High commitment projectiles:''' Most of his projectiles are highly committal with high recovery and don't convert into pressure in most cases making them high risk/low reward. | ||
| Line 25: | Line 25: | ||
==Normal Moves== | ==Normal Moves== | ||
===<big>{{clr| | ===<big>{{clr|L|5L}}</big>=== | ||
<div class="attack-container"> | <div class="attack-container"> | ||
<div class="attack-gallery"> | <div class="attack-gallery"> | ||
| Line 46: | Line 46: | ||
|} | |} | ||
==== ==== | ==== ==== | ||
;{{clr| | <!--Insert text below the =s and above the 2 /divs--> | ||
;{{clr|L|5L}} | |||
* Good frame advantage. | * Good frame advantage. | ||
* Deceptive range. | * Deceptive range. | ||
Krillin scoots forwards during his {{clr| | Krillin scoots forwards during his {{clr|L|5L}}, giving it roughly the same range as SSJ Goku's. | ||
---- | ---- | ||
;{{clr| | ;{{clr|L|5LL}} | ||
* Counts as grounded. Teen Gohan this ain't. | * Counts as grounded. Teen Gohan this ain't. | ||
Moves him forward a decent amount, good for pressure | Moves him forward a decent amount, good for pressure | ||
---- | ---- | ||
;{{clr| | ;{{clr|L|5LLL}} | ||
* Counts as grounded. | * Counts as grounded. | ||
Can be followed up with JL, generally not used in optimal routing. | Can be followed up with JL, generally not used in optimal routing. | ||
| Line 61: | Line 62: | ||
</div> | </div> | ||
===<big>{{clr| | ===<big>{{clr|M|5M}}</big>=== | ||
<div class="attack-container"> | <div class="attack-container"> | ||
<div class="attack-gallery"> | <div class="attack-gallery"> | ||
| Line 79: | Line 80: | ||
|} | |} | ||
==== ==== | ==== ==== | ||
<!--Insert text below the =s and above the 2 /divs--> | |||
* Great range thanks to high forward momentum. | * Great range thanks to high forward momentum. | ||
* Tied with Zamasu for fastest {{clr| | * Tied with Zamasu for fastest {{clr|M|5M}} in the game. | ||
* Fixed frame advantage. No matter how meaty, it will always be -5. | * Fixed frame advantage. No matter how meaty, it will always be -5. | ||
* When you are point blank with the opponent, this can actually be used as an anti reflect after {{clr| | * When you are point blank with the opponent, this can actually be used as an anti reflect after {{clr|L|5L}} or {{clr|L|2L}}. | ||
Crazy powerful normal and a staple of Krillin's ground game. It doesn't quite catch backdash, but it's good at just about everything else. | Crazy powerful normal and a staple of Krillin's ground game. It doesn't quite catch backdash, but it's good at just about everything else. | ||
</div> | </div> | ||
</div> | </div> | ||
===<big>{{clr| | ===<big>{{clr|H|5H}}</big>=== | ||
<div class="attack-container"> | <div class="attack-container"> | ||
<div class="attack-gallery"> | <div class="attack-gallery"> | ||
| Line 105: | Line 107: | ||
|} | |} | ||
==== ==== | ==== ==== | ||
* Amazing forward movement, similar to {{clr| | <!--Insert text below the =s and above the 2 /divs--> | ||
* Amazing forward movement, similar to {{clr|M|5M}}. | |||
Another very far reaching normal despite the pathetic hitbox, this one goes about as far as a lariat would. Very handy for catching backdashes or baiting Sparking. | Another very far reaching normal despite the pathetic hitbox, this one goes about as far as a lariat would. Very handy for catching backdashes or baiting Sparking. | ||
</div> | </div> | ||
</div> | </div> | ||
===<big>{{clr| | ===<big>{{clr|S|5S}}</big>=== | ||
<div class="attack-container"> | <div class="attack-container"> | ||
<div class="attack-gallery"> | <div class="attack-gallery"> | ||
| Line 128: | Line 131: | ||
|} | |} | ||
==== ==== | ==== ==== | ||
<!--Insert text below the =s and above the 2 /divs--> | |||
* Fires two Ki Blasts, one right after another. | * Fires two Ki Blasts, one right after another. | ||
* Pressing S again causes them to angle upwards, coming back down to hit the ground after 60~ frames. | * Pressing S again causes them to angle upwards, coming back down to hit the ground after 60~ frames. | ||
* Pressing {{clr| | * Pressing {{clr|S|4S}} redirects the second Ki Blast only. | ||
** A linear hit will keep the opponent standing. | ** A linear hit will keep the opponent standing. | ||
** Falling Ki blasts will pop opponent up in the air. | ** Falling Ki blasts will pop opponent up in the air. | ||
| Line 138: | Line 142: | ||
</div> | </div> | ||
===<big>{{clr| | ===<big>{{clr|L|2L}}</big>=== | ||
<div class="attack-container"> | <div class="attack-container"> | ||
<div class="attack-gallery"> | <div class="attack-gallery"> | ||
| Line 156: | Line 160: | ||
|} | |} | ||
==== ==== | ==== ==== | ||
<!--Insert text below the =s and above the 2 /divs--> | |||
* Very short range. | * Very short range. | ||
Pressure and mixup extrordinare. Not good for pressure resetting into thanks to its poor reach. | Pressure and mixup extrordinare. Not good for pressure resetting into thanks to its poor reach. | ||
| Line 161: | Line 166: | ||
</div> | </div> | ||
===<big>{{clr| | ===<big>{{clr|M|2M}}</big>=== | ||
<div class="attack-container"> | <div class="attack-container"> | ||
<div class="attack-gallery"> | <div class="attack-gallery"> | ||
| Line 179: | Line 184: | ||
|} | |} | ||
==== ==== | ==== ==== | ||
<!--Insert text below the =s and above the 2 /divs--> | |||
* Krillin's main low normal. | * Krillin's main low normal. | ||
Very safe on block and can be spaced out to gain much better advantage, making it excellent for pressure. Use {{clr| | Very safe on block and can be spaced out to gain much better advantage, making it excellent for pressure. Use {{clr|M|5M}} or {{clr|H|5H}} instead for neutral since they have more range. | ||
</div> | </div> | ||
</div> | </div> | ||
===<big>{{clr| | ===<big>{{clr|H|2H}}</big>=== | ||
<div class="attack-container"> | <div class="attack-container"> | ||
<div class="attack-gallery"> | <div class="attack-gallery"> | ||
| Line 202: | Line 208: | ||
|} | |} | ||
==== ==== | ==== ==== | ||
<!--Insert text below the =s and above the 2 /divs--> | |||
* The range speaks for itself. | * The range speaks for itself. | ||
Standard anti-air option with Krillin. Has short range so you need to let the opponent get deep before throwing it out. Has low recovery making it hard to whiff punish. | Standard anti-air option with Krillin. Has short range so you need to let the opponent get deep before throwing it out. Has low recovery making it hard to whiff punish. | ||
* Due to its poor range, this means that the majority of the cast is allowed to crossup Krillin, with him being unable to actually 2h the crossup. | * Due to its poor range, this means that the majority of the cast is allowed to crossup Krillin, with him being unable to actually 2h the crossup. | ||
Landing this correctly means you could probably land {{clr|H|2H}} with every character. | |||
Landing this correctly means you could probably land {{clr| | |||
</div> | </div> | ||
</div> | </div> | ||
===<big>{{clr| | |||
===<big>{{clr|S|2S}}</big>=== | |||
<div class="attack-container"> | <div class="attack-container"> | ||
<div class="attack-gallery"> | <div class="attack-gallery"> | ||
| Line 227: | Line 234: | ||
|} | |} | ||
==== ==== | ==== ==== | ||
<!--Insert text below the =s and above the 2 /divs--> | |||
* Causes an explosion on the ground that launches Krillin to the same height of a normal neutral jump. | * Causes an explosion on the ground that launches Krillin to the same height of a normal neutral jump. | ||
* If it hits the opponent on the ground, they too are launched to the same height as Krillin. | * If it hits the opponent on the ground, they too are launched to the same height as Krillin. | ||
| Line 234: | Line 242: | ||
</div> | </div> | ||
</div> | </div> | ||
===<big>{{clr| | |||
===<big>{{clr|M|6M}}</big>=== | |||
<div class="attack-container"> | <div class="attack-container"> | ||
<div class="attack-gallery"> | <div class="attack-gallery"> | ||
| Line 252: | Line 261: | ||
|} | |} | ||
==== ==== | ==== ==== | ||
<!--Insert text below the =s and above the 2 /divs--> | |||
* Universal overhead. | * Universal overhead. | ||
</div> | </div> | ||
</div> | </div> | ||
===<big>{{clr| | |||
===<big>{{clr|L|j.L}}</big>=== | |||
<div class="attack-container"> | <div class="attack-container"> | ||
<div class="attack-gallery"> | <div class="attack-gallery"> | ||
| Line 273: | Line 284: | ||
|} | |} | ||
==== ==== | ==== ==== | ||
<!--Insert text below the =s and above the 2 /divs--> | |||
* Has short range. | * Has short range. | ||
Mostly used during an aerial blockstring. | Mostly used during an aerial blockstring. | ||
</div> | </div> | ||
</div> | </div> | ||
===<big>{{clr| | |||
===<big>{{clr|M|j.M}}</big>=== | |||
<div class="attack-container"> | <div class="attack-container"> | ||
<div class="attack-gallery"> | <div class="attack-gallery"> | ||
| Line 295: | Line 308: | ||
|} | |} | ||
==== ==== | ==== ==== | ||
<!--Insert text below the =s and above the 2 /divs--> | |||
* Good air to air normal. | * Good air to air normal. | ||
Hits twice, but getting both hits to connect in combos can be finnicky depending on the juggle height. | Hits twice, but getting both hits to connect in combos can be finnicky depending on the juggle height. | ||
</div> | </div> | ||
</div> | </div> | ||
===<big>{{clr| | |||
===<big>{{clr|H|j.H}}</big>=== | |||
<div class="attack-container"> | <div class="attack-container"> | ||
<div class="attack-gallery"> | <div class="attack-gallery"> | ||
| Line 317: | Line 332: | ||
|} | |} | ||
==== ==== | ==== ==== | ||
<!--Insert text below the =s and above the 2 /divs--> | |||
* Sends the opponent downwards. | * Sends the opponent downwards. | ||
</div> | </div> | ||
</div> | </div> | ||
===<big>{{clr| | |||
===<big>{{clr|S|j.S}}</big>=== | |||
<div class="attack-container"> | <div class="attack-container"> | ||
<div class="attack-gallery"> | <div class="attack-gallery"> | ||
<gallery widths="210px" heights="210px" mode="nolines"> | <gallery widths="210px" heights="210px" mode="nolines"> | ||
DBFZ_Krillin_jS.png |YOUR {{clr| | DBFZ_Krillin_jS.png |YOUR {{clr|H|2H}} MEANS NOTHING TO MY KI BLASTS | ||
</gallery> | </gallery> | ||
</div> | </div> | ||
| Line 339: | Line 355: | ||
|} | |} | ||
==== ==== | ==== ==== | ||
<!--Insert text below the =s and above the 2 /divs--> | |||
* Stops Krillin's air momentum | * Stops Krillin's air momentum | ||
* Pressing S again or {{clr| | * Pressing S again or {{clr|S|2S}} after the Ki blasts have been fired will make them curve downward towards the ground. | ||
* Pressing {{clr| | * Pressing {{clr|S|8S}} will curve the Ki blasts up, then they will fall back to the ground slightly further forward. | ||
* These can be combined with left or right inputs to also give Krillin air momentum: {{clr| | * These can be combined with left or right inputs to also give Krillin air momentum: {{clr|S|4S}}/{{clr|S|1S}} moves left and curves down, {{clr|S|3S}}/{{clr|S|6S}} moves right and curves down, {{clr|S|7S}} moves left and curves up, {{clr|S|9S}} moves right and curves up. | ||
* Has very high hitstun, granting Krillin rare privilege of comboing into super dash, both from the corner and midscreen, giving him extra damage for post-vanish or midscreen rejump combos. | * Has very high hitstun, granting Krillin rare privilege of comboing into super dash, both from the corner and midscreen, giving him extra damage for post-vanish or midscreen rejump combos. | ||
* Great tool in neutral, as if Krillin is low to the ground it allows him to get a 2h if an opponent attempts to disrespect with a fullscreen super dash. | * Great tool in neutral, as if Krillin is low to the ground it allows him to get a 2h if an opponent attempts to disrespect with a fullscreen super dash. | ||
| Line 349: | Line 366: | ||
</div> | </div> | ||
===<big>{{clr| | ===<big>{{clr|H|j.2H}}</big>=== | ||
<div class="attack-container"> | <div class="attack-container"> | ||
<div class="attack-gallery"> | <div class="attack-gallery"> | ||
| Line 367: | Line 384: | ||
|} | |} | ||
==== ==== | ==== ==== | ||
<!--Insert text below the =s and above the 2 /divs--> | |||
* Sends the opponent upwards. | * Sends the opponent upwards. | ||
</div> | </div> | ||
</div> | </div> | ||
===<big>{{clr| | |||
===<big>{{clr|S|j.2S}}</big>=== | |||
<div class="attack-container"> | <div class="attack-container"> | ||
<div class="attack-gallery"> | <div class="attack-gallery"> | ||
| Line 388: | Line 407: | ||
|} | |} | ||
==== ==== | ==== ==== | ||
<!--Insert text below the =s and above the 2 /divs--> | |||
* Fires a Ki blast directly down below Krillin. | * Fires a Ki blast directly down below Krillin. | ||
Good for beating anti-air attempts directly below Krillin, and is especially useful in the corner. Can also be used for gimmicky, although very ambiguous cross-up mix, as it will combo directly into super-dash. This however, does not grant very high reward on hit without resources. | Good for beating anti-air attempts directly below Krillin, and is especially useful in the corner. Can also be used for gimmicky, although very ambiguous cross-up mix, as it will combo directly into super-dash. This however, does not grant very high reward on hit without resources. | ||
| Line 395: | Line 415: | ||
==Special Moves== | ==Special Moves== | ||
===<big>Afterimage</big>=== | ===<big>Afterimage</big>=== | ||
<span class="input-badge">'''{{clr| | <span class="input-badge">'''{{clr|L|236L}}/{{clr|M|M}}/{{clr|H|H}} (Air OK)'''</span> | ||
<div class="attack-container"> | <div class="attack-container"> | ||
<div class="attack-gallery"> | <div class="attack-gallery"> | ||
| Line 415: | Line 435: | ||
|} | |} | ||
==== ==== | ==== ==== | ||
<!--Insert text below the =s and above the 2 /divs--> | |||
* Krillin creates an afterimage of himself, one above that goes for an overhead, and one below that stays the regular Krillin. This move always gives sliding knockdown anywhere on screen and is one of his main combo enders after a 5h rejump combo or after a vanish combo. Holding the button keeps Krillin below and allows him to go for a lot of conditioning. | * Krillin creates an afterimage of himself, one above that goes for an overhead, and one below that stays the regular Krillin. This move always gives sliding knockdown anywhere on screen and is one of his main combo enders after a 5h rejump combo or after a vanish combo. Holding the button keeps Krillin below and allows him to go for a lot of conditioning. | ||
---- | ---- | ||
| Line 426: | Line 447: | ||
</div> | </div> | ||
</div> | </div> | ||
===<big>Senzu Bean</big>=== | ===<big>Senzu Bean</big>=== | ||
<span class="input-badge">'''{{clr| | <span class="input-badge">'''{{clr|L|214L}}/{{clr|M|M}}/{{clr|H|H}} (Air OK)'''</span> | ||
<div class="attack-container"> | <div class="attack-container"> | ||
<div class="attack-gallery"> | <div class="attack-gallery"> | ||
| Line 446: | Line 468: | ||
|} | |} | ||
==== ==== | ==== ==== | ||
<!--Insert text below the =s and above the 2 /divs--> | |||
* Krillin auto jumps if used on the ground, has enough height to airdash before he lands. | * Krillin auto jumps if used on the ground, has enough height to airdash before he lands. | ||
* Beans will heal all blue health for Krillin and his teammates, but will only heal 1000 blue health for the opponent. | * Beans will heal all blue health for Krillin and his teammates, but will only heal 1000 blue health for the opponent. | ||
| Line 462: | Line 485: | ||
* If you miss, it will stay on the ground for about 5 seconds. During this time your assists, the opponent, and their assists can also pick it up. | * If you miss, it will stay on the ground for about 5 seconds. During this time your assists, the opponent, and their assists can also pick it up. | ||
* If you fall on one during your death animation, you revive yourself and get switched out. | * If you fall on one during your death animation, you revive yourself and get switched out. | ||
</div> | |||
</div> | |||
===<big>Stone Throw</big>=== | |||
<span class="input-badge">'''{{clr|L|22L}}/{{clr|M|M}}/{{clr|H|H}} (Air OK)'''</span> | |||
<div class="attack-container"> | |||
<div class="attack-gallery"> | |||
<gallery widths="210px" heights="210px" mode="nolines"> | |||
DBFZ_Krillin_SenzuBean-2.png | | |||
</gallery> | |||
</div> | |||
<div class="attack-info"> | |||
{| class="wikitable attack-data" | |||
{{FrameDataHeader-DBFZ|version=yes}} | |||
|- | |||
{{#cargo_query:tables=MoveData_DBFZ | |||
|fields=input=name,damage,guard,smash,startup,active,recovery,onBlock,invuln | |||
|where=chara="{{SUBPAGENAME}}" and (input="22L" or input="22M" or input="22H" or input="j.22L" or input="j.22M" or input="j.22H") | |||
|format=template|template=AttackData-DBFZ|named args=yes|order by=_ID | |||
|delimiter=\n{{!}}-\n | |||
}} | |||
|} | |||
==== ==== | |||
<!--Insert text below the =s and above the 2 /divs--> | |||
* Krillin auto jumps if used on the ground, but doesn't gain enough height to do anything afterward. | |||
* Stones can bounce off the corner. Hitbox will be disabled if Krillin gets hit. | |||
* One of Krillins' best oki tools. | |||
---- | |||
* L throws a stone right in front of him. | |||
* If L stone is thrown after a {{clr|H|j.H}} or {{clr|H|236H}} knockdown, the stone will beat Vanish, Uptech, mashing, normal tech, and will allow krillin to keep his pressure. Very scary move to have to hold in the corner. | |||
---- | |||
* M throws a stone full screen. | |||
---- | |||
* H throws both L and M stones at the same time. | |||
* If this is used after a {{clr|L|236L}} or {{clr|M|236M}} knockdown, will set up the same oki as the L stone after a normal {{clr|H|j.H}} knockdown from a 2h or j.2h smash combo. | |||
</div> | </div> | ||
</div> | </div> | ||
===<big>Kamehameha</big>=== | ===<big>Kamehameha</big>=== | ||
<span class="input-badge">'''{{clr| | <span class="input-badge">'''{{clr|S|236S}} (Air OK)'''</span> | ||
<div class="attack-container"> | <div class="attack-container"> | ||
<div class="attack-gallery"> | <div class="attack-gallery"> | ||
<gallery widths="210px" heights="210px" mode="nolines"> | <gallery widths="210px" heights="210px" mode="nolines"> | ||
DBFZ_Krillin_Kamehameha.png |screen_control.png | DBFZ_Krillin_Kamehameha.png | | ||
DBFZ_Krillin_Kamehameha2.png |screen_control.png | |||
</gallery> | </gallery> | ||
</div> | </div> | ||
| Line 485: | Line 544: | ||
|} | |} | ||
==== ==== | ==== ==== | ||
<!--Insert text below the =s and above the 2 /divs--> | |||
* [] is holding down S. | * [] is holding down S. | ||
* Wall bounces. | * Wall bounces. | ||
| Line 493: | Line 553: | ||
</div> | </div> | ||
</div> | </div> | ||
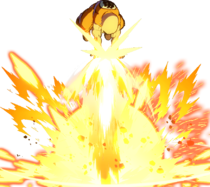
===<big>Solar Flare</big>=== | ===<big>Solar Flare</big>=== | ||
<span class="input-badge">'''{{clr| | <span class="input-badge">'''{{clr|S|214S}}'''</span> | ||
<div class="attack-container"> | <div class="attack-container"> | ||
<div class="attack-gallery"> | <div class="attack-gallery"> | ||
| Line 512: | Line 573: | ||
|} | |} | ||
==== ==== | ==== ==== | ||
<!--Insert text below the =s and above the 2 /divs--> | |||
* Has a large hitbox both vertically and horizontally, and long hitstun. | * Has a large hitbox both vertically and horizontally, and long hitstun. | ||
* Has anti-air properties. | * Has anti-air properties. | ||
* Hold the button to prevent the automatic follow-up on hit. | * Hold the button to prevent the automatic follow-up on hit. | ||
Safe on block and can be plus on air block. Good move to frame trap with at the end of a string, ideally with an assist behind it to continue pressure on block and pick up a combo on hit. Gives a lot of Ki on hit. If you can react to delay tech well, solar flare can actually meaty and be plus +1 to +4 and above. | Safe on block and can be plus on air block. Good move to frame trap with at the end of a string, ideally with an assist behind it to continue pressure on block and pick up a combo on hit. Gives a lot of Ki on hit. If you can react to delay tech well, solar flare can actually meaty and be plus +1 to +4 and above. | ||
</div> | </div> | ||
</div> | </div> | ||
| Line 559: | Line 588: | ||
<gallery widths="210px" heights="210px" mode="nolines"> | <gallery widths="210px" heights="210px" mode="nolines"> | ||
DBFZ_Krillin_SenzuBean-2.png | | DBFZ_Krillin_SenzuBean-2.png | | ||
DBFZ_Krillin_AssistSenzuBean.png | | DBFZ_Krillin_AssistSenzuBean.png |T W O S T O N E S | ||
</gallery> | </gallery> | ||
</div> | </div> | ||
| Line 581: | Line 610: | ||
|} | |} | ||
==== ==== | ==== ==== | ||
<!--Insert text below the =s and above the 2 /divs--> | |||
;Stones | ;Stones | ||
* Stays in front of the point character and throws 2 stones like {{clr| | * Stays in front of the point character and throws 2 stones like {{clr|H|22H}}. | ||
* Tied for fastest assist in the game with Adult Gohan's A assist. | * Tied for fastest assist in the game with Adult Gohan's A assist. | ||
Unbelievably good for its extremely fast startup. Point blank blockstun can be an issue, but the stones' insane hitstun, freezing and coverage of the screen render this one of the best assists in the entire game. You can oftentimes just throw this assist out in neutral and watch as an opponent gets hit by it, there's very little it isn't good for. | Unbelievably good for its extremely fast startup. Point blank blockstun can be an issue, but the stones' insane hitstun, freezing and coverage of the screen render this one of the best assists in the entire game. You can oftentimes just throw this assist out in neutral and watch as an opponent gets hit by it, there's very little it isn't good for. | ||
| Line 600: | Line 630: | ||
<div class="attack-gallery"> | <div class="attack-gallery"> | ||
<gallery widths="210px" heights="210px" mode="nolines"> | <gallery widths="210px" heights="210px" mode="nolines"> | ||
DBFZ_Krillin_Kamehameha2.png | | |||
</gallery> | </gallery> | ||
</div> | </div> | ||
| Line 614: | Line 644: | ||
|} | |} | ||
==== ==== | ==== ==== | ||
<!--Insert text below the =s and above the 2 /divs--> | |||
* Krillin performs a basic beam assist. | * Krillin performs a basic beam assist. | ||
It's a beam assist for beam things. Compared to A, it's a more standard and practical assist as well as friendlier in blockstrings, but loses out on speed, aerial coverage and healing. | It's a beam assist for beam things. Compared to A, it's a more standard and practical assist as well as friendlier in blockstrings, but loses out on speed, aerial coverage and healing. | ||
| Line 638: | Line 669: | ||
|} | |} | ||
==== ==== | ==== ==== | ||
* Teleports to the opponent and does {{clr| | <!--Insert text below the =s and above the 2 /divs--> | ||
* Teleports to the opponent and does {{clr|S|214S}}. | |||
* On hit, teleports again behind them and knocks them down into a ground bounce SKD. | * On hit, teleports again behind them and knocks them down into a ground bounce SKD. | ||
Has a large hitbox but really isn't worth it compared to Krillin's other options. A is already better for anti-airs given its speed and two angles all the while still beating superdash. | Has a large hitbox but really isn't worth it compared to Krillin's other options. A is already better for anti-airs given its speed and two angles all the while still beating superdash. | ||
| Line 646: | Line 678: | ||
==Super Moves== | ==Super Moves== | ||
===<big>Destructo-Disc</big>=== | ===<big>Destructo-Disc</big>=== | ||
<span class="input-badge">'''{{clr| | <span class="input-badge">'''{{clr|L|236L}}+{{clr|M|M}}'''</span> or <span class="input-badge">'''{{clr|H|236H}}+{{clr|S|S}}'''</span> | ||
<div class="attack-container"> | <div class="attack-container"> | ||
<div class="attack-gallery"> | <div class="attack-gallery"> | ||
| Line 661: | Line 693: | ||
{{#cargo_query:tables=MoveData_DBFZ | {{#cargo_query:tables=MoveData_DBFZ | ||
|fields=damage,guard,smash,startup,active,recovery,onBlock,invuln | |fields=damage,guard,smash,startup,active,recovery,onBlock,invuln | ||
|where=chara="{{SUBPAGENAME}}" and input=" | |where=chara="{{SUBPAGENAME}}" and input="236L+M" | ||
|format=template|template=AttackData-DBFZ|named args=yes|order by=_ID | |format=template|template=AttackData-DBFZ|named args=yes|order by=_ID | ||
}} | }} | ||
|- | |- | ||
{{AttackVersion|name=Chain Destructo-Disc Barrage|subtitle=Destructo-Disc > L/ | {{AttackVersion|name=Chain Destructo-Disc Barrage|subtitle=Destructo-Disc > L/M/H/S}} | ||
{{#cargo_query:tables=MoveData_DBFZ | {{#cargo_query:tables=MoveData_DBFZ | ||
|fields=damage,guard,smash,startup,active,recovery,onBlock,invuln | |fields=damage,guard,smash,startup,active,recovery,onBlock,invuln | ||
|where=chara="{{SUBPAGENAME}}" and input=" | |where=chara="{{SUBPAGENAME}}" and input="236L+M > X" | ||
|format=template|template=AttackData-DBFZ|named args=yes|order by=_ID | |format=template|template=AttackData-DBFZ|named args=yes|order by=_ID | ||
}} | }} | ||
|} | |} | ||
==== ==== | ==== ==== | ||
<!--Insert text below the =s and above the 2 /divs--> | |||
* Invulnerable from frames 9 to 15. | * Invulnerable from frames 9 to 15. | ||
* Each additional button press throws one more disc for one extra meter. Can throw a total of 5 discs. | * Each additional button press throws one more disc for one extra meter. Can throw a total of 5 discs. | ||
* Deals significant chip damage on block. | * Deals significant chip damage on block. | ||
* Minimum damage: 800, 330*3, 550. | * Minimum damage: 800, 330*3, 550. | ||
* Can be curved by holding up just like Android 18's and Base Vegeta's {{clr| | * Can be curved by holding up just like Android 18's and Base Vegeta's {{clr|S|236S}} discs. | ||
* Immediate solar flare meaties all techs in the corner, though it will lose to downtech -> F4 reversals outside of vanish | * Immediate solar flare meaties all techs in the corner, though it will lose to downtech -> F4 reversals outside of vanish | ||
Mashing additional discs is less efficient damage for meter than using a DHC or level 3, but it can be good to do if one super just barely won't kill and you want to keep Krillin in. | Mashing additional discs is less efficient damage for meter than using a DHC or level 3, but it can be good to do if one super just barely won't kill and you want to keep Krillin in. | ||
| Line 684: | Line 717: | ||
===<big>Scattering Energy Wave</big>=== | ===<big>Scattering Energy Wave</big>=== | ||
<span class="input-badge">'''{{clr| | <span class="input-badge">'''{{clr|L|214L}}+{{clr|M|M}}'''</span> or <span class="input-badge">'''{{clr|H|214H}}+{{clr|S|S}}'''</span> | ||
<div class="attack-container"> | <div class="attack-container"> | ||
<div class="attack-gallery"> | <div class="attack-gallery"> | ||
| Line 698: | Line 731: | ||
{{#cargo_query:tables=MoveData_DBFZ | {{#cargo_query:tables=MoveData_DBFZ | ||
|fields=damage,guard,smash,startup,active,recovery,onBlock,invuln | |fields=damage,guard,smash,startup,active,recovery,onBlock,invuln | ||
|where=chara="{{SUBPAGENAME}}" and input=" | |where=chara="{{SUBPAGENAME}}" and input="214L+M" | ||
|format=template|template=AttackData-DBFZ|named args=yes|order by=_ID | |format=template|template=AttackData-DBFZ|named args=yes|order by=_ID | ||
}} | }} | ||
|} | |} | ||
==== ==== | ==== ==== | ||
<!--Insert text below the =s and above the 2 /divs--> | |||
* Invulnerable from frames 1 to 21 | * Invulnerable from frames 1 to 21 | ||
* Costs 3 bars. | * Costs 3 bars. | ||
Revision as of 17:47, 19 May 2022
Normal Moves
5L


"He shoots on the net! And"

"GOOOOOOOOAAAAAAALLL"


- 5L
- Good frame advantage.
- Deceptive range.
Krillin scoots forwards during his 5L, giving it roughly the same range as SSJ Goku's.
- 5LL
- Counts as grounded. Teen Gohan this ain't.
Moves him forward a decent amount, good for pressure
- 5LLL
- Counts as grounded.
Can be followed up with JL, generally not used in optimal routing.
5M

Allow us to introduce ourselves~

- Great range thanks to high forward momentum.
- Tied with Zamasu for fastest 5M in the game.
- Fixed frame advantage. No matter how meaty, it will always be -5.
- When you are point blank with the opponent, this can actually be used as an anti reflect after 5L or 2L.
Crazy powerful normal and a staple of Krillin's ground game. It doesn't quite catch backdash, but it's good at just about everything else.
5H

- Amazing forward movement, similar to 5M.
Another very far reaching normal despite the pathetic hitbox, this one goes about as far as a lariat would. Very handy for catching backdashes or baiting Sparking.
5S

The Last Kibender

- Fires two Ki Blasts, one right after another.
- Pressing S again causes them to angle upwards, coming back down to hit the ground after 60~ frames.
- Pressing 4S redirects the second Ki Blast only.
- A linear hit will keep the opponent standing.
- Falling Ki blasts will pop opponent up in the air.
- Every version has the same hitstun.
Krillin's best neutral tool outside his beam. Firing the Ki Blasts and angling them up is often enough to make opponents freeze up out of fear of getting hit, letting Krillin run in freely and be plus when they impact.
2L

- Very short range.
Pressure and mixup extrordinare. Not good for pressure resetting into thanks to its poor reach.
2M

- Krillin's main low normal.
Very safe on block and can be spaced out to gain much better advantage, making it excellent for pressure. Use 5M or 5H instead for neutral since they have more range.
2H

"YA LIKE THAT?!"

- The range speaks for itself.
Standard anti-air option with Krillin. Has short range so you need to let the opponent get deep before throwing it out. Has low recovery making it hard to whiff punish.
- Due to its poor range, this means that the majority of the cast is allowed to crossup Krillin, with him being unable to actually 2h the crossup.
Landing this correctly means you could probably land 2H with every character.
2S
"18 taught me this one."

- Causes an explosion on the ground that launches Krillin to the same height of a normal neutral jump.
- If it hits the opponent on the ground, they too are launched to the same height as Krillin.
- Krillin can hold forward or back during his launch to move in that direction near the apex of the jump with better lateral speed than a normal jump.
- Allowing him to jump during a blockstring, Krillin can always attempt an escape and a variety of mixups.
- On hit, Krillin can follow up immediately with buttons if he moves forward towards the launched opponent.
6M
- DBFZ Krillin 6M.png
- Universal overhead.
j.L

- Has short range.
Mostly used during an aerial blockstring.
j.M

- Good air to air normal.
Hits twice, but getting both hits to connect in combos can be finnicky depending on the juggle height.
j.H

YA LIKE THAT?

- Sends the opponent downwards.
j.S

YOUR 2H MEANS NOTHING TO MY KI BLASTS

- Stops Krillin's air momentum
- Pressing S again or 2S after the Ki blasts have been fired will make them curve downward towards the ground.
- Pressing 8S will curve the Ki blasts up, then they will fall back to the ground slightly further forward.
- These can be combined with left or right inputs to also give Krillin air momentum: 4S/1S moves left and curves down, 3S/6S moves right and curves down, 7S moves left and curves up, 9S moves right and curves up.
- Has very high hitstun, granting Krillin rare privilege of comboing into super dash, both from the corner and midscreen, giving him extra damage for post-vanish or midscreen rejump combos.
- Great tool in neutral, as if Krillin is low to the ground it allows him to get a 2h if an opponent attempts to disrespect with a fullscreen super dash.
- Due to the move having low recovery, it can be cancelled into beam when at a mid range away from the opponent to act as a frame trap not allowing them to jump if they blocked the downward ki blasts.
j.2H

- Sends the opponent upwards.
j.2S

- Fires a Ki blast directly down below Krillin.
Good for beating anti-air attempts directly below Krillin, and is especially useful in the corner. Can also be used for gimmicky, although very ambiguous cross-up mix, as it will combo directly into super-dash. This however, does not grant very high reward on hit without resources.
Special Moves
Afterimage
236L/M/H (Air OK)
- DBFZ Krillin AfterimageStrikeL.png
Zanzoken
- DBFZ Krillin AfterimageStrikeH.png
- Krillin creates an afterimage of himself, one above that goes for an overhead, and one below that stays the regular Krillin. This move always gives sliding knockdown anywhere on screen and is one of his main combo enders after a 5h rejump combo or after a vanish combo. Holding the button keeps Krillin below and allows him to go for a lot of conditioning.
- Hold the button to make the Krillin that jumps forward into an afterimage instead.
The M version goes further and is more suited for neutral than pressure. Used from up close this move will likely whiff over your opponent's head.
- Feinting the ground version makes Krillin run in below the afterimage.
- Feinting the air version makes Krillin fall to the ground.
A tricky tool, but the ground feint is risky since it moves you close. The air version is very fast and done immediately from a jump attacks very low to the ground.
- With assists however, this lets you set up a very tricky 50/50 as the ex afterimage recovers very quickly. While there is not very much reward off the overhead, with some asissts that are active for a longer time such as Cell A, Gotenks B, Ui B, etc., this lets you combo after his overhead or low mixup and still be true string.
Senzu Bean
214L/M/H (Air OK)

"SENZU BEAN!"

- Krillin auto jumps if used on the ground, has enough height to airdash before he lands.
- Beans will heal all blue health for Krillin and his teammates, but will only heal 1000 blue health for the opponent.
- Heals around 1000 normal health if you don't have blue health thanks to the new patch.
Sets up an assist mixup in the corner that can be completely gapless with assists that have 40 frames of blockstun or more.
- L
Turns around and throws a bean offscreen, heals Assist 1 if they're still alive, even if they're on screen.
- M
Turns around and throws a bean offscreen, heals Assist 2 if they're still alive, even if they're on screen.
- H
- Turns around and bounces a bean off the wall back to him.
- Bean can only be picked up once it's on the ground.
- If you miss, it will stay on the ground for about 5 seconds. During this time your assists, the opponent, and their assists can also pick it up.
- If you fall on one during your death animation, you revive yourself and get switched out.
Stone Throw
22L/M/H (Air OK)
- DBFZ Krillin SenzuBean-2.png
- Krillin auto jumps if used on the ground, but doesn't gain enough height to do anything afterward.
- Stones can bounce off the corner. Hitbox will be disabled if Krillin gets hit.
- One of Krillins' best oki tools.
- L throws a stone right in front of him.
- If L stone is thrown after a j.H or 236H knockdown, the stone will beat Vanish, Uptech, mashing, normal tech, and will allow krillin to keep his pressure. Very scary move to have to hold in the corner.
- M throws a stone full screen.
- H throws both L and M stones at the same time.
- If this is used after a 236L or 236M knockdown, will set up the same oki as the L stone after a normal j.H knockdown from a 2h or j.2h smash combo.
Kamehameha
236S (Air OK)


screen_control.png


- [] is holding down S.
- Wall bounces.
- Holding the button will allow Krillin to jump around while charging. Can't superjump nor airdash.
- Can only charge for a limited amount of time if he stays on the ground.
- While in air, can be hold indefinitely and released on demand. However, the instant Krillin touches the ground he will shoots it out.
Standard tool for zoning that beats super dash. The ability to hold a charge as well as use it in the air makes it a bit more versatile than some other beams.
Solar Flare
214S

"SO-FLAH!!!"

- Has a large hitbox both vertically and horizontally, and long hitstun.
- Has anti-air properties.
- Hold the button to prevent the automatic follow-up on hit.
Safe on block and can be plus on air block. Good move to frame trap with at the end of a string, ideally with an assist behind it to continue pressure on block and pick up a combo on hit. Gives a lot of Ki on hit. If you can react to delay tech well, solar flare can actually meaty and be plus +1 to +4 and above.
Z Assists
Assist A
Senzu Bean
- DBFZ Krillin SenzuBean-2.png

T W O S T O N E S

- Stones
- Stays in front of the point character and throws 2 stones like 22H.
- Tied for fastest assist in the game with Adult Gohan's A assist.
Unbelievably good for its extremely fast startup. Point blank blockstun can be an issue, but the stones' insane hitstun, freezing and coverage of the screen render this one of the best assists in the entire game. You can oftentimes just throw this assist out in neutral and watch as an opponent gets hit by it, there's very little it isn't good for.
This assist is seriously strong competition for the beam. Use the beam if you want better and more consistent blockstun, otherwise this is the way to go.
- Senzu Bean
- Inputting 4A1/A2 will cause him to stay behind the point character and throw a Senzu Bean at them.
- Senzu Bean appears at the 34th frame.
- Opponent only heals about 1000 health if they pick up the bean.
Senzu Bean is the second part of what makes this assist so good, although its higher startup and weird input can be a detriment if you tried to call the assist while blocking. Still, there's little price to using this as long as you can make sure the opponent doesn't also pick up the bean.
Assist B
Kamehameha
- Krillin performs a basic beam assist.
It's a beam assist for beam things. Compared to A, it's a more standard and practical assist as well as friendlier in blockstrings, but loses out on speed, aerial coverage and healing.
Assist C
Solar Flare
Being bald has its benefits
- Teleports to the opponent and does 214S.
- On hit, teleports again behind them and knocks them down into a ground bounce SKD.
Has a large hitbox but really isn't worth it compared to Krillin's other options. A is already better for anti-airs given its speed and two angles all the while still beating superdash.
Super Moves
Destructo-Disc
236L+M or 236H+S

"I'm not dying today!"

"Barrage!"


- Invulnerable from frames 9 to 15.
- Each additional button press throws one more disc for one extra meter. Can throw a total of 5 discs.
- Deals significant chip damage on block.
- Minimum damage: 800, 330*3, 550.
- Can be curved by holding up just like Android 18's and Base Vegeta's 236S discs.
- Immediate solar flare meaties all techs in the corner, though it will lose to downtech -> F4 reversals outside of vanish
Mashing additional discs is less efficient damage for meter than using a DHC or level 3, but it can be good to do if one super just barely won't kill and you want to keep Krillin in.
Scattering Energy Wave
214L+M or 214H+S

"That's it! I can't take it anymore! I can only be pushed so far!"

"KRILLIN LIMIT BREAK!"


- Invulnerable from frames 1 to 21
- Costs 3 bars.
- First half of the move is a Lv3 beam, but the second half is only Lv1 projectiles.
- The projectile cloud can be used for unreactable mixups with the correct setups. It is very difficult to see like Piccolo's Hellzone Grenade, albeit at thrice the cost.
- No matter which part hits first, using this raw will always deal 100% recoverable health and doesn't give Krillin any followup opportunity.
- Minimum damage: 1660.
After Krillin sends the beam upward the projectiles will stay on top of his opponent's current location. If this is blocked at close range, the opponent will have a hard time landing a full combo punish.
Colors
- DBFZ Krillin color1.png
Color 1
- DBFZ Krillin color2.png
Color 2
- DBFZ Krillin color3.png
Color 3
- DBFZ Krillin color4.png
Color 4
- DBFZ Krillin color5.png
Color 5
- DBFZ Krillin color6.png
Color 6
- DBFZ Krillin color7.png
Color 7
- DBFZ Krillin color8.png
Color 8
- DBFZ Krillin color9.png
Color 9
- DBFZ Krillin color10.png
Color 10
- DBFZ Krillin color11.png
Color 11
- DBFZ Krillin color12.png
Color 12
- DBFZ Krillin color13.png
Color 131
- DBFZ Krillin color14.png
Color 141
- DBFZ Krillin color15.png
Color 151
- DBFZ Krillin color16.png
Color 161