| Overview | Combos | Strategy/Counter Strategy | Full Frame Data | Discord |
Fitting for the legendary hitman from Universe 6, Hit is an oppressive offense-heavy neutral character with a wide variety of options for closing the gap and putting on the pressure. He has a number of powerful offensive techniques, like a fullscreen ground-based command grab and an unconventional focus on Stances for his special moves that allow Hit to attack from all ranges. He also has a good amount of defensive options as well, such as a counter for his Special move and a good series of dashes with Deadly Intent and Mark of an Assassin. All of these tools make it so that Hit can own the neutral game like few others on the roster, especially if backed with assists. Despite his oppressive tools, Hit's approach isn't completely sure-kill, as his damage is rather low without assists. As well, his entire kit is ground based, meaning aerial zoning can stuff him. His focus on stances makes him odd to play as well, and learning how to effectively use the options said stances give you for comboing and pressure require some practice. If you want an unconventional but scarily effective ground-based fighter who rewards smart play, foresight and grappling with unconventional techniques, consider hiring this assassin to do business on your enemies.
| "My time skip is unbeatable." | |
| Lore: | The Legendary Assassin from Universe 6, Hit is infamous for his successes; once he is given a target, he will execute them without fail. He would go on to fight Goku in a tournament between Universes 6 and 7, where he pushed Goku's powers to their very limits and beyond with his time-skip, an ability that allows hit to skip to the future for 1/10th of a second (which would gradually decrease to indefinitely). |
- Deadly Range: 5LL, 5M, 5H, and all stance follow-ups have very wide reach and are resistant to reflect.
- Command Movement: Deadly Intent and Mark of an Assassin give him unparalleled ground maneuverability and make any normal safe on block.
- Screen Presence: Extremely fast teleporting attacks Instant Blow and Guard Breaker are both safe on block. The latter is invincible on start-up.
- Left/Right: Stance follow-ups double as left/right weapons and easy frametraps in conjunction with the command dashes and full-screen unblockable, Icy Glare.
- Combo Parry: Unique airborne parry j.S makes you think twice before using Superdash against Hit.
- Extraordinary Neutral: All of these factors amalgamate Hit into having an unmatched grounded neutral.
- Aerial Game: Almost all his special moves are ground-only, limiting him in the air despite his j.S parry.
- High/Low: Has only one low in 2M, and it's the slowest low in the game, weakening on otherwise great mix-up game.
- Low Damage: Hit's damage is on the lower end of the cast without the corner.
- Anomaly: Initially hard character to play due to how different he is to everybody, and has a high skill floor.
| Hit | |
|---|---|
 |
Normal Moves
5L

2

fast

2 furious


| 5L |
|---|
| 5LL |
| 5LLL |
- 5L is Hit's fastest button at 6f.
Fastest attack Hit has making it his go-to for punishes and abare. Can be risky in certain gaps since the short range can be baited, and with his longer reaching moves being much slower.
- 5LL teleports Hit decently far giving it a very long range.
- Comes out even if first jab whiffs. Commonly used mid-combo after a vanish.
- Surprisingly good anti-air, as it has a very high vertical hitbox and tracks. Easy confirm to j.L.
This is Hit's first line of offense against Reflect. It also shines after a Vanish, as it catches both reflect > mash AND backdash which will discourage your opponent from trying to take their turn or disengage.
- 5LLL hits 3 times if it connects, with Hit teleporting behind the opponent for the second hit.
- All 3 hits can be special-cancelled, so it's possible to side-switch after the second with a special.
All 3 hits are always guaranteed, making this an essential part of his combos. First two hits and the third scale seperately. Like with all L-autocombos it can give a wallbounce even if wallbounce was used earlier in the combo. It will always combo into superdash or 236L stance follow-ups.
5M
Nyoom Punch

- Hit swiftly moves forward about 45% of the screen before the attack.
- -2, the magic number: allows Hit to safely backdash.
- Arguably the best 5M in the game. Use it and use it a lot.
A simple punch with some invisibility that has quite good reach. Be careful though, as you can be hit out of it even if it looks like Hit is teleporting. This normal shines as Hit's main way of sticking to an opponent even if they reflected.
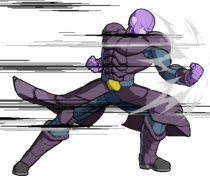
5H

ZOOM PUNCH

- Hit moves forward invisibly about 75% of the screen before the attack.
- As with 5M, can be struck out of.
- Hit's 5M autocombo uses this instead of 2M because of how slow 2M is.
You're more likely to use 5M than this, but it also makes a great poke. You won't actually be using this normal a lot because of how difficult it is for hit to keep his Smash sliding knockdown, but it still shines as an anti-reflect tool. As with other 5H normals, it's great for corner carry and works well with assists to secure the corner where Hit can sustain his offense.
5S

Come at me bro


| Catch |
|---|
| Attack |
- Can parry physical attacks, ki-blasts and projectiles.
- Can not parry grabs or supers.
- The punch is not guaranteed - if an assist is parried the opponent can still block the followup, or even avoid it if he's in movement.
- Can be followed up midscreen with 236L~L or 236L~M.
- Wallbounces if the opponent hits a wall, allowing meterless followups.
- Like other 5S-specials you can vanish-cancel it on whiff, and even option-select it to reduce the risk.
Hit poses with an aura around him. If he's hit with an attack he stops time and teleports in front of the opponent with an attack.
This unique parry is one of the things that really separates him from the rest of the cast. His neutral can be played around this, making the opponent hesitant about how to approach Hit. The long recovery also makes it very risky if it's baited, especially since the punish can be much more brutal than the reward for successfully parrying an attack.
2L

"I can't crouch down for some reason...!"

- Standing overhead.
- Forces a tech on hit. No combos :'(
At 20 frames, it is not the common abare button most characters can use. On hit, it's impossible to combo afterwards, even with the use of assists or supers. Being a command normal you can still gatling into other normals on block or hit. This makes it more useful in combos rather as a mixup, as it doesn't knock down on air hit.
2M

ew a spider

- Standing low. Hit's only low, and one of the slowest lows in the game.
- Can gatling both to and from with other normals.
With such a slow low it's hard to open up anyone with this without having an assist or previously establishing strong conditioning. Being the only low threat from Hit it's a generally strong strategy to avoid crouching against him and rather try to react to the low. Because Hit has so many overheads, people will just get caught by this.
2H

“Ya like that?”

Hit's universal anti air. With assists and bar for vanish, it has strong potential for super dash punishes. The launching smash effect allows hit to confirm into M Stance > Projectiles, making it a very strong combo tool, even if the range is rather poor compared to other 2Hs.
Essentially, 5M > 2H is Hit's go-to damage combo route most of the time, especially when he has the opponent in the corner. However, at certain ranges 2H might whiff, making 5M > 5H the better choice for confirming it but losing a bit of damage.
Due to Hit's difficulties scoring a hard knockdown, it is recommended to go for the standard super dash after a 2H if you want to keep proper pressure without assists available after the combo.
6M
- DBFZ Hit 6M.png
- Universal overhead.
1F more active than other 6M, allowing Hit to do 2L (hit) > 6M or 2M as a soft knockdown mixup in the corner. From this setup, 6M will hit so meaty that:
- On block, can truestring into 5L
- On hit, can solo extend with 5L against forward/back tech or 2H against up tech
j.L

- Incredible reach, can stuff Superdash on reaction but j.S is better served for that purpose.
- Cannot gatling into itself like most other characters.
Amazing air to air button, which can also be used as a IAD meaty to cover uptech. Unlike other characters, Hit cannot do jump M > jump L > jump L as a combo, with only the first L normal coming out. This is actually good for hit, as j.LL~M will option select an L auto combo on hit and a j.M on block.
j.M

- Good downward range.
- Weirdly enough, also a good crossup button.
Since it has higher hitstun and blockstun than j.L, this is Hit's primary crossup normal despite j.L having better range. You'll either be converting with microdash 5L or 5M.
j.H

| 5LLLLLLL |
|---|
| j.H |
- [] is on Smash hit.
- Stalls Hit's air momentum for a brief moment. The opponent can tech immediately after getting hit, limiting the move's uses as a jump-in.
- Due to it stalling air momentum, it can be used as a surprise overhead when pressuring the opponent via jMLH
j.S

STOP RIGHT THERE CRIMINAL SCUM!

Your stolen goods are now forfeit.


| Catch |
|---|
| Attack |
- Invincible for a few frames after teleporting, but not enough to guarantee any air normals afterwards.
- Doesn't stop opponent characters gatlings, if they are pressing buttons they will automatically autocorrect to turn and face Hit before attacking.
Aerial version of his parry. Doesn't attack afterwards but rather teleports behind the opponent. Doesn't freeze time as much either making it more or less a very different move from the grounded counterpart. It can give better meterless rewards if used against slower attacks like beam attacks but a punish after a countered superdash is almost guaranteed. Although you might be tempted to punish super dashes with this at close ranges, you must press L very fast after parrying it since the opponent can actually block rather quickly. Nevertheless, it's a strong punish with the proper air combo. Be careful countering assists as countering things like GT A might end up with you inside the beam.
j.2H

- Jump cancellable.
Entirely combo filler. Situational, but vital to Hit's post-j.S combos as it allows for j.H's sliding knockdown.
Special Moves
Vital Point Attack
236L

ゴゴゴゴゴゴ...

This stance might look like a taunt as Hit puts his hands into his pockets. Essential to a lot of his gameplay.
- Stance can be cancelled by pressing S. Stance cancel recovery lasts 19f.
- If holding 4 when doing any followups, they will not come out.
Direct Hit
Vital Point Attack > L
ゴゴゴゴゴゴ...


Yare, yare daze...


| Direct Hit > L |
|---|
Fast long-ranged attack.
- Does not spend the wallbounce.
- Has the same Re-center property as Smash! attacks, meaning the opponent is put in the same position on hit every time
- Can be comboed from midscreen with the help of assists.
- Hit's main combo extender in the corner with assists. It also acts as his most solid regular combo ender, as it causes a forced soft knockdown and can lead into any of his supers.
Can be used to frametrap people during a blockstring. Mostly used in conjunction with 214L to mixup. is also plus on block if the opponent is in the air when blocked. Being -2, it's also safe to backdash after, a property that is made even more potent by 5M's massive range to punish whiffs.
Template:AttackDataHeader-DBFZ| Instant Blow > M |
|---|
Longer range and harder hitting.
- On hit will cause a sliding knockdown.
- If Hit combos after the attack, he can still use his smash attack for the likes of a 2H.
- After using it once and spending the sliding knockdown, any other hits will not cause sliding knockdown.
| Guard Breaker > H |
|---|
Hit teleports towards the opponent and kicks upwards where it hurts the most.
- Appears in front of the opponent, range is around 75% of the screen length.
- Launches, allowing followups on successful hit.
- Fully invincible against anything from frame 1 making this a huge threat in the neutral game.
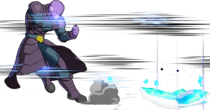
Tides of Time
236M/H
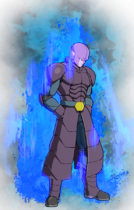
ゴゴゴゴゴゴ...
Hope you've practiced your Yamcha Spirit Balls


| M Stance |
|---|
| H Stance |
- Hit goes into a stance which causes his body to emit blue flames after a few frames.
- M Version has a small start up, while H Version is a lot faster. Both of them do the same amount of damage.
- Once blue flames are active (17f), Hit is projectile and strike invulnerable. He also becomes immaterial, allowing his opponent to walk right through him.
- L and M followups do not carry invincibility. Hit can be struck out of them before they come out.
- H followup will carry invincibility.
- S stance cancel for both L and M stances are 20f, but H stance recovers faster at 15f:
- L and M stances S earliest cancel window is 10f, whereas H stance cancel window is 8f.
| Time Release > L |
|---|
- Can be repeated up to three times.
- 2L is an overhead, L and 8L are mids.
- Counts as strikes. Broly's powered shell ain't got no shit on Hit
- Highly unsafe on block, so be sure to cover failed attempts with an assist or a vanish.
Fires sharp lines towards the opponent, with deceptively large hitboxes. Unlike Direct hit, this can be followed up with 3 slashes. Cannot be superdashed through, but the tracking isn't the best. Hit's main combo extension tool when going for good damage.
Template:AttackDataHeader-DBFZ| Instant Blow > M |
|---|
- Causes a sliding knockdown.
- Very similar to the Instant Blow from Vital Point Attack with the small exception that when you do it from this stance, it'll "teleport" you behind your opponent before doing the attack.
- Not a true teleport; Hit can be interrupted if there are projectiles or any other long actives in his path.
- Good move for short conversions where it takes little damage to kill an opponent. Death Blow is an excellent move in tandem with this.
In terms of mix-up, Instant Blow is no where near as potent as Guard Breaker due to it being slower, being vulerable to mashing, and requiring the use of vanish to combo off of.
Template:AttackDataHeader-DBFZ| Guard Breaker > H |
|---|
- Fully invincible until Hit enters recovery
- Launches enemy directly up on hit
- Very similar to the Guard Breaker from Vital Point Attack with the small exception that when you do it from this stance, it'll teleport you behind your opponent before doing the attack
- Because of the property of the move, 236H-H can be used as a 1-bar reversal that is safe on block.
Contender for the best move in the game. Guard Breaker has it all; It's combination of full invincibility, fast start-up, and safeness on block make it a force to be reckoned with in neutral and on offense. In neutral, Guard Breaker can be used to snuff out opponents from doing anything on the ground. On block, Guard Breaker is safe and Hit can call his assists to take his turn. On offense, the start-up is signifcantly faster when Hit is in close proximity to the opponent, so it can be used as a fast cross-up that leads into good reward.
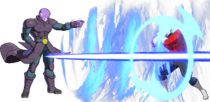
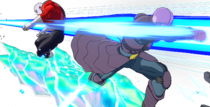
Icy Glare
214L/M/H


Ice, ice, baby...


| L |
|---|
| M |
| H |
- L version has ice originates from Hit himself.
- On hit, you can convert it into a combo by using an assist or vanish.
- M version has ice originates from slightly less than fullscreen distance.
- Can combo into from midscreen after a 5H.
- H version has ice originates from about ¾ screen distance.
- Pops the opponent up. Can follow up without the need of a vanish or assist.
- Hit's command grab. Button can be held to extend the move's range.
- Important tool for opening people up.
Deadly Intent
236S
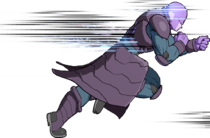
ZOOOOM

- Hit does 3 short dashes (2 if first dash bypasses opponent), can pass through opponent, projectile, and any Super projectile type attacks.
- Hit enters Vital Point Attack stance after finishing his dashes.
- If M or H is pressed while dashing, he goes into his Tides of Time stance.
- If S is pressed while dashing, will cancel stance. Cancel recovery is 20f
Mark of an Assassin
214S
MOOOOZ

- Projectile invincible from 5f forward
- Hit quickly dashes away from his opponent, moving about as far as a backdash.
- You are safe coming out of this teleport, meaning that if you teleport into a meaty projectile attack you can block it.
- Special cancellable into any other special move or 5S. Earliest cancel can occur at 14f
Z Assists
Assist A
Guard Breaker
Horizontal DP assist gang
- Invincible from 17f to 31f
- Comes out fast and launches the opponent on hit to allow for additional combos. Pretty good in blockstrings too, allowing some characters to go for high / low mixups.
Assist B
Instant Blow
You pressing buttons?
- Hit launches forward and strikes the opponent with an attack similar to his medium attack from light stance.
- Causes a wall bounce on hit.
- Unlike his A assist will attack the opponent even from full screen.
- Has the exact same blockstun as his A-Assist but takes longer to come out.
This assist trades Hit's A Assist's invincible and fast start-up for a slightly slower attack that will now reach full-screen, allowing for some new conversions thanks to the wallbounce as well as a nice assist to throw out in neutral as a way to catch some opponents mashing or using certain moves.
Assist C
Time Release
- Plays out all three hits on hit, two hits on block, only one on whiff.
- Tracks the opponent.
Arguably one of the better C-Assists in the game due to it's ability to track the opponent anywhere and Hit's safety when using it. Since Hit doesn't approach the opponent, Hit is usually safe when doing this assist, making it a C-assist you can throw out without much worry. Also because of it's ability to track and it's safety, it can be really good for neutral. It's only downside is that it whiffs if the opponent manages to get behind Hit.
Super Moves
Realized Power
236L+M (Air OK)

"You won't be able to block this."
"My time skip is unbeatable."


| Ground |
|---|
| Air |
- Ground version pops the opponent up. Can DHC another super before or after the animation, allowing you to either stay or switch sides with the opponent.
- Air version dumps the opponent straight down. Hit also teleports on the ground afterwards.
- Minimum damage: 203*4.
- Hit's main air combo ender for when you won't get a knockdown and you just want the damage. Can now DHC into most supers on air hit.
- If blocked, Hit will bounce off the opponent, which can grant them a punish.
- Optimal metered followup after a succesful ground counter. Although you might be tempted to vanish, do it only if it will get your opponent in the corner, since the scaling as well as Hit's poor air options will remove most of the route's effectiveness.
Death Blow
236H+S

"Now then, it's time for me to make the donuts."

SNIPED!


- Combo ender and metered beam.
- Scales poorly and consumes ALL of your meter. At 4 levels it becomes more damaging than his level 3.
Consumes all of your meter for extra damage, up to 6564 damage raw if you spend 7 bars. 2564 for 1 bar scaling 1,000 dmg per bar up to 4 bars and 500 dmg per bar every bar after 4. This is great damage, however its meterburn capabilities can make it tricky to use, and if it doesn't kill the situation afterwards can be a bit messy. It's amazing at finishing off an opponent if Hit is solo, or if the meter you have wouldn't kill an opponent. Or if you just want to burn the meter to look cool, which is also an option.
I keep improving
214L+M or 214H+S

"This is the stance!"

"I continue to improve..."


- Costs 3 Ki Gauges.
- Minimum damage: 1755.
- Advantage on hit: +42.
- Standard level 3 reversal.
High damage combo ender. Its main utility lies in the fact that it ignores sparking blast's healing effect, making it a very good choice for killing characters that would otherwise survive the combo. Since it also gives a hard knockdown and the animation takes fairly long, it is a very good combo ender all around.
External References
move and the move Full sections. One is shown on the character page, while the other is shown on the frame data page.