(Changing to current color format) |
No edit summary |
||
| Line 23: | Line 23: | ||
==Normal Moves== | ==Normal Moves== | ||
===<big>{{clr| | ===<big>{{clr|L|5L}}</big>=== | ||
<div class="attack-container"> | <div class="attack-container"> | ||
<div class="attack-gallery"> | <div class="attack-gallery"> | ||
| Line 44: | Line 44: | ||
|} | |} | ||
==== ==== | ==== ==== | ||
<!--Insert text below the =s and above the 2 /divs--> | |||
* Pushes Goku forward a bit, giving it deceptive range. | * Pushes Goku forward a bit, giving it deceptive range. | ||
* Has next to zero knockback on air hit, allowing him to convert into {{clr| | * Has next to zero knockback on air hit, allowing him to convert into {{clr|L|5LL}}. | ||
* {{clr| | * {{clr|L|4LL}} is available on clash only. | ||
Very strong button, but it has its weaknesses. It advances very far forwards for how small it looks, but the vertical range leaves a lot to be desired. Challenging with this after {{clr| | Very strong button, but it has its weaknesses. It advances very far forwards for how small it looks, but the vertical range leaves a lot to be desired. Challenging with this after {{clr|M|6M}} is likely to get stuffed because of this. | ||
---- | ---- | ||
* Not an anti-reflect string after {{clr| | * Not an anti-reflect string after {{clr|L|5L}} anymore. Very punishable on whiff, especially because {{clr|L|5LLL}} is a grab. | ||
* Has next to zero knockback on air hit. On some characters it requires a delay to combo into {{clr| | * Has next to zero knockback on air hit. On some characters it requires a delay to combo into {{clr|M|2M}}, but {{clr|M|5M}} is universal. | ||
Better than most {{clr| | Better than most {{clr|L|5LL}} on block, since it locks down the opponent for longer as Goku stalls for his assist to regen. Scales combos like a medium button but eats up the combo timer. | ||
---- | ---- | ||
* Switches sides on hit. | * Switches sides on hit. | ||
* Cancelling into this from a blocked {{clr| | * Cancelling into this from a blocked {{clr|L|5LL}} always leaves the opponent in too much blockstun for the throw to work. | ||
Very commonly used for back-to-corner combos and to combo into Spirit Bomb. Good for sideswaps in general, but will always lead to less damage than the same-side combo. | Very commonly used for back-to-corner combos and to combo into Spirit Bomb. Good for sideswaps in general, but will always lead to less damage than the same-side combo. | ||
Like the other {{clr| | Like the other {{clr|L|5LLL}} grabs, Goku can also tick throw with low-blockstun assists, though this isn't crucial for him as he has numerous other options to open opponents up. | ||
</div> | </div> | ||
</div> | </div> | ||
===<big>{{clr| | ===<big>{{clr|M|5M}}</big>=== | ||
<div class="attack-container"> | <div class="attack-container"> | ||
<div class="attack-gallery"> | <div class="attack-gallery"> | ||
| Line 79: | Line 80: | ||
|} | |} | ||
==== ==== | ==== ==== | ||
<!--Insert text below the =s and above the 2 /divs--> | |||
* Advances forward a respectable distance. | * Advances forward a respectable distance. | ||
* Fixed frame disadvantage. No matter how meaty, it will always be -7. | * Fixed frame disadvantage. No matter how meaty, it will always be -7. | ||
| Line 85: | Line 87: | ||
</div> | </div> | ||
===<big>{{clr| | ===<big>{{clr|H|5H}}</big>=== | ||
<div class="attack-container"> | <div class="attack-container"> | ||
<div class="attack-gallery"> | <div class="attack-gallery"> | ||
| Line 103: | Line 105: | ||
|} | |} | ||
==== ==== | ==== ==== | ||
<!--Insert text below the =s and above the 2 /divs--> | |||
* Leads to a rejump in the corner, with or without Smash. | * Leads to a rejump in the corner, with or without Smash. | ||
Essentially a less useful {{clr| | Essentially a less useful {{clr|M|5M}}. Mostly blockstring/combo filler, he has better options for neutral. | ||
</div> | </div> | ||
</div> | </div> | ||
===<big>{{clr| | ===<big>{{clr|S|5S}}</big>=== | ||
<div class="attack-container"> | <div class="attack-container"> | ||
<div class="attack-gallery"> | <div class="attack-gallery"> | ||
| Line 126: | Line 129: | ||
|} | |} | ||
==== ==== | ==== ==== | ||
<!--Insert text below the =s and above the 2 /divs--> | |||
* Near-fullscreen physical strike that does not have any hurtbox. | * Near-fullscreen physical strike that does not have any hurtbox. | ||
* The pole's hitbox is at the tip and travels forward like a projectile. | * The pole's hitbox is at the tip and travels forward like a projectile. | ||
| Line 135: | Line 139: | ||
</div> | </div> | ||
===<big>{{clr| | ===<big>{{clr|L|2L}}</big>=== | ||
<div class="attack-container"> | <div class="attack-container"> | ||
<div class="attack-gallery"> | <div class="attack-gallery"> | ||
| Line 153: | Line 157: | ||
|} | |} | ||
==== ==== | ==== ==== | ||
* {{clr| | <!--Insert text below the =s and above the 2 /divs--> | ||
While the slide sounds pretty good, from a blockstring into {{clr| | * {{clr|L|2L}} slides forwards, but {{clr|L|2LL}} does not. | ||
While the slide sounds pretty good, from a blockstring into {{clr|L|214L}} airdash high/land low, even in the corner, {{clr|L|2L}} will whiff against most of the cast. You'll mostly be using {{clr|M|2M}} for the mix even if it's slower. | |||
</div> | </div> | ||
</div> | </div> | ||
===<big>{{clr| | ===<big>{{clr|M|2M}}</big>=== | ||
<div class="attack-container"> | <div class="attack-container"> | ||
<div class="attack-gallery"> | <div class="attack-gallery"> | ||
| Line 176: | Line 181: | ||
|} | |} | ||
==== ==== | ==== ==== | ||
* Shorter range than {{clr| | <!--Insert text below the =s and above the 2 /divs--> | ||
Not something you can throw out in neutral, as it's small and low to the ground. GT's highest damage midscreen starter, but usually leads to less than {{clr| | * Shorter range than {{clr|M|5M}}, but goes further than {{clr|L|2L}}. | ||
Not something you can throw out in neutral, as it's small and low to the ground. GT's highest damage midscreen starter, but usually leads to less than {{clr|M|5M}} in the corner. Makes a decent stagger tool but keep in mind that it's jab punishable by most of the cast. | |||
</div> | </div> | ||
</div> | </div> | ||
===<big>{{clr| | ===<big>{{clr|H|2H}}</big>=== | ||
<div class="attack-container"> | <div class="attack-container"> | ||
<div class="attack-gallery"> | <div class="attack-gallery"> | ||
| Line 199: | Line 205: | ||
|} | |} | ||
==== ==== | ==== ==== | ||
* Universal anti-air, faster than the average {{clr| | <!--Insert text below the =s and above the 2 /divs--> | ||
* Universal anti-air, faster than the average {{clr|H|2H}}. | |||
* Puts Goku in the air. | * Puts Goku in the air. | ||
* On Smash hit, combos into SD. | * On Smash hit, combos into SD. | ||
About the same as all of the other Goku's {{clr| | About the same as all of the other Goku's {{clr|H|2H}}. It's not fantastic, but it'll do. Make it safe with {{clr|L|214L}}. | ||
</div> | </div> | ||
</div> | </div> | ||
===<big>{{clr| | ===<big>{{clr|S|2S}}</big>=== | ||
<div class="attack-container"> | <div class="attack-container"> | ||
<div class="attack-gallery"> | <div class="attack-gallery"> | ||
| Line 224: | Line 231: | ||
|} | |} | ||
==== ==== | ==== ==== | ||
<!--Insert text below the =s and above the 2 /divs--> | |||
* Vaults almost fullscreen. Hold {{Ni|4}} during startup to leap half as far. | * Vaults almost fullscreen. Hold {{Ni|4}} during startup to leap half as far. | ||
* Recovers in mid-air and has access to air options. | * Recovers in mid-air and has access to air options. | ||
* Whiff cancellable into {{clr| | * Whiff cancellable into {{clr|S|j.S}}, {{clr|H|j.2H}}, {{clr|S|j.2S}}, specials and supers. | ||
* On block or hit, can be cancelled early into grounded attacks. | * On block or hit, can be cancelled early into grounded attacks. | ||
Because of its landing recovery you won't be using it by itself. Sets up a 50/50 with {{clr| | Because of its landing recovery you won't be using it by itself. Sets up a 50/50 with {{clr|S|2S}} > {{clr|S|j.2S}} with high-blockstun assists. | ||
</div> | </div> | ||
</div> | </div> | ||
===<big>{{clr| | ===<big>{{clr|M|6M}}</big>=== | ||
<div class="attack-container"> | <div class="attack-container"> | ||
<div class="attack-gallery"> | <div class="attack-gallery"> | ||
| Line 250: | Line 258: | ||
|} | |} | ||
==== ==== | ==== ==== | ||
* Universal overhead. Uses hit and hurtboxes of {{clr| | <!--Insert text below the =s and above the 2 /divs--> | ||
GT Goku's terrible ground normals make it difficult to challenge if your opponent blocks {{clr| | * Universal overhead. Uses hit and hurtboxes of {{clr|H|j.H}}. | ||
GT Goku's terrible ground normals make it difficult to challenge if your opponent blocks {{clr|M|6M}}. If the opponent jumps, they'll escape his {{clr|L|5L}} and {{clr|L|2L}}. | |||
</div> | </div> | ||
</div> | </div> | ||
===<big>{{clr| | ===<big>{{clr|L|j.L}}</big>=== | ||
<div class="attack-container"> | <div class="attack-container"> | ||
<div class="attack-gallery"> | <div class="attack-gallery"> | ||
| Line 273: | Line 282: | ||
|} | |} | ||
==== ==== | ==== ==== | ||
<!--Insert text below the =s and above the 2 /divs--> | |||
It's a tiny jab. Has enough range to beat Super Dash if timed correctly. | It's a tiny jab. Has enough range to beat Super Dash if timed correctly. | ||
</div> | </div> | ||
</div> | </div> | ||
===<big>{{clr| | ===<big>{{clr|M|j.M}}</big>=== | ||
<div class="attack-container"> | <div class="attack-container"> | ||
<div class="attack-gallery"> | <div class="attack-gallery"> | ||
| Line 295: | Line 305: | ||
|} | |} | ||
==== ==== | ==== ==== | ||
It's a tiny kick. Better than {{clr| | <!--Insert text below the =s and above the 2 /divs--> | ||
It's a tiny kick. Better than {{clr|H|j.H}} in terms of mix-up potential because of its chain into {{clr|L|j.L}}, but in terms of a single hit {{clr|H|j.H}} is better. | |||
</div> | </div> | ||
</div> | </div> | ||
===<big>{{clr| | ===<big>{{clr|H|j.H}}</big>=== | ||
<div class="attack-container"> | <div class="attack-container"> | ||
<div class="attack-gallery"> | <div class="attack-gallery"> | ||
| Line 308: | Line 319: | ||
<div class="attack-info"> | <div class="attack-info"> | ||
{| class="wikitable attack-data" | {| class="wikitable attack-data" | ||
{{FrameDataHeader-DBFZ | {{FrameDataHeader-DBFZ}} | ||
|- | |- | ||
{{#cargo_query:tables=MoveData_DBFZ | {{#cargo_query:tables=MoveData_DBFZ | ||
|fields= | |fields=damage,guard,smash,startup,active,recovery,onBlock,invuln | ||
|where=chara="{{SUBPAGENAME}}" and | |where=chara="{{SUBPAGENAME}}" and input="j.H" | ||
|format=template|template=AttackData-DBFZ|named args=yes|order by=_ID | |format=template|template=AttackData-DBFZ|named args=yes|order by=_ID | ||
}} | }} | ||
|} | |} | ||
==== ==== | ==== ==== | ||
* {{clr| | <!--Insert text below the =s and above the 2 /divs--> | ||
* {{clr|L|5LLLLLLL}} Dynamic hit can wall bounce. | |||
* {{clr| | * {{clr|H|j.H}} launches forward instead of down. | ||
Faster than most {{clr| | Faster than most {{clr|H|j.H}} makes this the preferred jump-in compared to {{clr|M|j.M}}, since {{clr|H|j.H}} does more damage, has more range, and is almost equally as fast. | ||
</div> | </div> | ||
</div> | </div> | ||
===<big>{{clr| | ===<big>{{clr|S|j.S}}</big>=== | ||
<div class="attack-container"> | <div class="attack-container"> | ||
<div class="attack-gallery"> | <div class="attack-gallery"> | ||
| Line 343: | Line 353: | ||
|} | |} | ||
==== ==== | ==== ==== | ||
<!--Insert text below the =s and above the 2 /divs--> | |||
* Temporarily stalls momentum. | * Temporarily stalls momentum. | ||
* Similar traits to {{clr| | * Similar traits to {{clr|S|5S}} but hits with the entire pole instead of extending it out. | ||
* Smash hit can confirm into Super Dash. | * Smash hit can confirm into Super Dash. | ||
This is Goku's main air combo extender. As a neutral tool, it shares some of the same downsides with {{clr| | This is Goku's main air combo extender. As a neutral tool, it shares some of the same downsides with {{clr|S|5S}}, though it's slightly better since the entire pole has a hitbox. Not an answer towards Super Dash, but at times can catch it depending on distance and if the move is already out. | ||
</div> | </div> | ||
</div> | </div> | ||
===<big>{{clr| | ===<big>{{clr|H|j.2H}}</big>=== | ||
<div class="attack-container"> | <div class="attack-container"> | ||
<div class="attack-gallery"> | <div class="attack-gallery"> | ||
| Line 368: | Line 379: | ||
|} | |} | ||
==== ==== | ==== ==== | ||
<!--Insert text below the =s and above the 2 /divs--> | |||
* Stops all air momentum. | * Stops all air momentum. | ||
* Smash on air-to-air, gives SKD. | * Smash on air-to-air, gives SKD. | ||
As a blockstring, {{clr| | As a blockstring, {{clr|S|2S}} > {{clr|H|j.2H}} is a low > high that can be used really late into the string. It's not a true blockstring (12f gap) and {{clr|H|j.2H}} can be easily anti-aired, but if they choose to block, then this leaves Goku at +4 at minimum. | ||
As a combo ender, it's mostly used when Goku doesn't have any assists backing him up. The oki is better than {{clr| | As a combo ender, it's mostly used when Goku doesn't have any assists backing him up. The oki is better than {{clr|M|j.214M}}, and he can connect any super upon landing. | ||
</div> | </div> | ||
</div> | </div> | ||
===<big>{{clr| | ===<big>{{clr|S|j.2S}}</big>=== | ||
<div class="attack-container"> | <div class="attack-container"> | ||
<div class="attack-gallery"> | <div class="attack-gallery"> | ||
| Line 394: | Line 406: | ||
|} | |} | ||
==== ==== | ==== ==== | ||
<!--Insert text below the =s and above the 2 /divs--> | |||
* Falls straight down and then recovers in the air. Only hits once he touches the ground. | * Falls straight down and then recovers in the air. Only hits once he touches the ground. | ||
* Can be aimed with {{clr| | * Can be aimed with {{clr|S|j.1S}} or {{clr|S|j.3S}}. | ||
* After touching the ground, is whiff cancellable to {{clr| | * After touching the ground, is whiff cancellable to {{clr|S|j.S}}, {{clr|H|j.2H}}, specials and supers, and can also choose the direction he hops to with {{Ni|4}} or {{Ni|6}}. {{clr|S|j.1S}} and {{clr|S|j.2S}} default to hopping backward, {{clr|S|j.3S}} hops forward. | ||
Since all of Goku's air normals are either stubby or incredibly slow, he won't be doing typical IAD cross-ups like most characters (without set-ups). So instead, he'll be mixing left/right with this move. It's still rather slow, but is really ambiguous. | Since all of Goku's air normals are either stubby or incredibly slow, he won't be doing typical IAD cross-ups like most characters (without set-ups). So instead, he'll be mixing left/right with this move. It's still rather slow, but is really ambiguous. | ||
{{clr| | {{clr|S|2S}} > {{clr|S|j.3S}} covered with the assist is a high/low set-up with delay airdash high and land low. {{clr|S|2S}} > delay {{clr|S|j.3S}} is also a cross-up. | ||
</div> | </div> | ||
</div> | </div> | ||
==Special Moves== | ==Special Moves== | ||
===<big>Dragon Flurry Fist</big>=== | ===<big>Dragon Flurry Fist</big>=== | ||
<span class="input-badge">'''{{clr| | <span class="input-badge">'''{{clr|L|236L}}/{{clr|M|M}}/{{clr|H|H}} (Air OK)'''</span> | ||
<div class="attack-container"> | <div class="attack-container"> | ||
<div class="attack-gallery"> | <div class="attack-gallery"> | ||
| Line 425: | Line 437: | ||
|} | |} | ||
==== ==== | ==== ==== | ||
<!--Insert text below the =s and above the 2 /divs--> | |||
; All Versions | ; All Versions | ||
* Auto-followup only comes out on hit. | * Auto-followup only comes out on hit. | ||
* Frame advantage on block is fixed. | * Frame advantage on block is fixed. | ||
* M/{{clr| | * M/{{clr|H|H}} versions will cause friendly assist characters to leave. | ||
---- | ---- | ||
; {{clr| | ; {{clr|L|236L}} | ||
* Relatively short range. | * Relatively short range. | ||
* {{clr| | * {{clr|M|5MMM}} wall bounces. | ||
Mostly useful for ending blockstrings, particularly with Kid Buu A backing him up. If you're solo it's generally better to end your blockstrings with {{clr| | Mostly useful for ending blockstrings, particularly with Kid Buu A backing him up. If you're solo it's generally better to end your blockstrings with {{clr|L|214L}} as it lets you backdash away to safety. Excellent for Special Tag combos as the second hit activates after the superdash connects, leaving your tagged character heavily advantageous. | ||
---- | ---- | ||
; {{clr| | ; {{clr|M|236M}} | ||
* Pauses for a bit before charging just over halfscreen. | * Pauses for a bit before charging just over halfscreen. | ||
* Smash hit wall splats. Will re-center the opponent without Smash. | * Smash hit wall splats. Will re-center the opponent without Smash. | ||
* Essential combo extender in the corner. | * Essential combo extender in the corner. | ||
Unlike {{clr| | Unlike {{clr|L|236L}}, {{clr|M|236M}} has a property where it will launch the opponent the same way every time. Usually this is only used when you have Smash left, but {{clr|M|236M}} will always re-center the opponent, making it amazing for combos into supers. It's also great for assist extensions, but it only works with faster assists. | ||
---- | ---- | ||
; {{clr| | ; {{clr|H|236H}} | ||
* Range of M version with speed of L version. | * Range of M version with speed of L version. | ||
* Smash hit wall bounces. Can be followed up with dash {{clr| | * Smash hit wall bounces. Can be followed up with dash {{clr|L|5LL}}. | ||
Extremely fast and low commitment, always -3 on block regardless of distance, beats any form of challenge since it's a hitgrab, and leads to a corner carry combo on hit. Amazing lariat that shines as both a movement tool and whiff punisher. It's both hard to challenge and hard to punish. | Extremely fast and low commitment, always -3 on block regardless of distance, beats any form of challenge since it's a hitgrab, and leads to a corner carry combo on hit. Amazing lariat that shines as both a movement tool and whiff punisher. It's both hard to challenge and hard to punish. | ||
| Line 451: | Line 464: | ||
===<big>Dragon Flash Fist</big>=== | ===<big>Dragon Flash Fist</big>=== | ||
<span class="input-badge">'''{{clr| | <span class="input-badge">'''{{clr|L|214L}}/{{clr|M|M}}/{{clr|H|H}} (Air OK)'''</span> | ||
<div class="attack-container"> | <div class="attack-container"> | ||
<div class="attack-gallery"> | <div class="attack-gallery"> | ||
| Line 470: | Line 483: | ||
|} | |} | ||
==== ==== | ==== ==== | ||
<!--Insert text below the =s and above the 2 /divs--> | |||
; All Versions | ; All Versions | ||
* Bounces back and recovers in the air after attacking. | * Bounces back and recovers in the air after attacking. | ||
| Line 476: | Line 490: | ||
Excellent as a post-superdash option as it's not technically a Head property move. | Excellent as a post-superdash option as it's not technically a Head property move. | ||
---- | ---- | ||
; {{clr| | ; {{clr|L|214L}} | ||
* Stays mostly in place. | * Stays mostly in place. | ||
* Last hit causes a ground bounce that also forces soft knockdown. | * Last hit causes a ground bounce that also forces soft knockdown. | ||
Filler for assisted combos since it doesn't Smash. Okay in neutral since it's a fast big orb right in front of Goku, stopping most approaches. | Filler for assisted combos since it doesn't Smash. Okay in neutral since it's a fast big orb right in front of Goku, stopping most approaches. | ||
{{clr| | {{clr|H|2H}} > {{clr|L|j.214L}} is a true string that leaves you completely safe. | ||
---- | ---- | ||
; {{clr| | ; {{clr|M|214M}} | ||
* Leaps forward farther than {{clr| | * Leaps forward farther than {{clr|L|214L}}. | ||
* Last hit on Smash causes a ground bounce SKD, non-Smash is similar to L version. | * Last hit on Smash causes a ground bounce SKD, non-Smash is similar to L version. | ||
Alternate combo ender to {{clr| | Alternate combo ender to {{clr|H|j.2H}}, though it's almost always a better ender in the corner. | ||
Since all versions always give an identical ground bounce, Goku can always end his corner combos with 214X or j.214X into assist and {{clr| | Since all versions always give an identical ground bounce, Goku can always end his corner combos with 214X or j.214X into assist and {{clr|L|5LLL}} for Spirit Bomb setups. | ||
---- | ---- | ||
; {{clr| | ; {{clr|H|214H}} | ||
* {{clr| | * {{clr|H|214H}} tracks the opponent's horizontal position, goes fullscreen and won't overshoot. | ||
* Last hit on Smash causes a ground bounce SKD, non-Smash is similar to L versions. | * Last hit on Smash causes a ground bounce SKD, non-Smash is similar to L versions. | ||
Combined with an assist, this is a risk-free approach since it cannot be anti-aired unless Goku is hit before he pulls his orb out, though the reward on block or hit is not that great compared to similar tracking attacks. Try to confirm Vanish before the last hit so you can keep your sliding knockdown if you're solo. | Combined with an assist, this is a risk-free approach since it cannot be anti-aired unless Goku is hit before he pulls his orb out, though the reward on block or hit is not that great compared to similar tracking attacks. Try to confirm Vanish before the last hit so you can keep your sliding knockdown if you're solo. | ||
| Line 498: | Line 512: | ||
===<big>Kamehameha</big>=== | ===<big>Kamehameha</big>=== | ||
<span class="input-badge">'''{{clr| | <span class="input-badge">'''{{clr|S|236S}} (Air OK)'''</span> | ||
<div class="attack-container"> | <div class="attack-container"> | ||
<div class="attack-gallery"> | <div class="attack-gallery"> | ||
| Line 517: | Line 531: | ||
|} | |} | ||
==== ==== | ==== ==== | ||
; {{clr| | <!--Insert text below the =s and above the 2 /divs--> | ||
; {{clr|S|236S}} | |||
* Angled slightly upward. | * Angled slightly upward. | ||
* Hold S to charge and start running (data in [] refers to maximum charge without running back). | * Hold S to charge and start running (data in [] refers to maximum charge without running back). | ||
* Hold {{Ni|4}} during the charge to shimmy backward. | * Hold {{Ni|4}} during the charge to shimmy backward. | ||
* Jails into Vanish. | * Jails into Vanish. | ||
Not all that great without having an assist to cover its recovery. Jailing into Vanish is unreliable against airborne opponents, so you'll mostly be using this on the ground and up close to keep your turn. Frametraps out of M/{{clr| | Not all that great without having an assist to cover its recovery. Jailing into Vanish is unreliable against airborne opponents, so you'll mostly be using this on the ground and up close to keep your turn. Frametraps out of M/{{clr|H|H}} normals, but doesn't catch frame 4 reversals like Vanish. Punishable gap if used from a light normal other than {{clr|L|5LL}}. | ||
---- | ---- | ||
; {{clr| | ; {{clr|S|j.236S}} | ||
* Stops all air momentum. | * Stops all air momentum. | ||
* Slightly angled downward. | * Slightly angled downward. | ||
Can be used the same way as SS Goku's j.236S2. Controls a giant part of the screen which is great since GT Goku does not have any other projectiles. {{clr| | Can be used the same way as SS Goku's j.236S2. Controls a giant part of the screen which is great since GT Goku does not have any other projectiles. {{clr|H|2H}} (blocked) > {{clr|S|j.236S}} has a 3f gap so it can't be challenged without invincible reversals. This is another way for GT Goku to get in if he has meter, and his main way of doing so without assists. However, the beam doesn't cover right underneath him. Since his hurtbox is tiny, the opponent can run under it and punish if it's being thrown out willy-nilly. | ||
</div> | </div> | ||
</div> | </div> | ||
===<big>Reverse Kamehameha</big>=== | ===<big>Reverse Kamehameha</big>=== | ||
<span class="input-badge">'''{{clr| | <span class="input-badge">'''{{clr|S|214S}} (Air OK)'''</span> | ||
<div class="attack-container"> | <div class="attack-container"> | ||
<div class="attack-gallery"> | <div class="attack-gallery"> | ||
| Line 551: | Line 566: | ||
|} | |} | ||
==== ==== | ==== ==== | ||
<!--Insert text below the =s and above the 2 /divs--> | |||
* Pauses for a bit, shoots a blast behind him and then dashes forward. | * Pauses for a bit, shoots a blast behind him and then dashes forward. | ||
* Blast does more damage and hitstun/blockstun than headbutt. | * Blast does more damage and hitstun/blockstun than headbutt. | ||
* On block, blast jails into Vanish, while headbutt makes Goku recover in the air. | * On block, blast jails into Vanish, while headbutt makes Goku recover in the air. | ||
* Direction + S allows 2 extra dashes even on whiff or block. | * Direction + S allows 2 extra dashes even on whiff or block. | ||
* No direction + S does {{clr| | * No direction + S does {{clr|S|j.236S}}, if Goku hasn't used all of his air options yet. | ||
* Can be aimed diagonally. The first hit can only be {{Ni|9}}, {{Ni|6}}, {{Ni|3}}, while the next 2 can be all 6 directions beside {{Ni|8}} and {{Ni|2}}. | * Can be aimed diagonally. The first hit can only be {{Ni|9}}, {{Ni|6}}, {{Ni|3}}, while the next 2 can be all 6 directions beside {{Ni|8}} and {{Ni|2}}. | ||
:* Upward: Blast ground bounces | :* Upward: Blast ground bounces | ||
| Line 561: | Line 577: | ||
:* Downward: Headbutt ground bounces | :* Downward: Headbutt ground bounces | ||
* First dash of grounded version does not have Head property. | * First dash of grounded version does not have Head property. | ||
Incredibly useful combo tool, allowing Goku to convert from {{clr| | Incredibly useful combo tool, allowing Goku to convert from {{clr|S|j.2S}}, raw SD, and of course, solo combo into Spirit Bomb. | ||
Can be used as frame trap since it doesn't Smash, cannot be {{clr| | Can be used as frame trap since it doesn't Smash, cannot be {{clr|H|2H}}'d, and Goku can solo convert off of this without meter if he's in the corner. | ||
In neutral, Goku can use this to escape the corner, or even use the downward dive to approach. | In neutral, Goku can use this to escape the corner, or even use the downward dive to approach. | ||
| Line 589: | Line 605: | ||
|} | |} | ||
==== ==== | ==== ==== | ||
<!--Insert text below the =s and above the 2 /divs--> | |||
* Ground beam, runs slightly forward before charging in place. | * Ground beam, runs slightly forward before charging in place. | ||
* Cuts off the far upper corner of the screen, preventing superjumps completely. | * Cuts off the far upper corner of the screen, preventing superjumps completely. | ||
| Line 618: | Line 635: | ||
|} | |} | ||
==== ==== | ==== ==== | ||
<!--Insert text below the =s and above the 2 /divs--> | |||
* Causes a ground bounce. | * Causes a ground bounce. | ||
* Very fast for the amount of hitstun and blockstun it has. | * Very fast for the amount of hitstun and blockstun it has. | ||
| Line 645: | Line 663: | ||
|} | |} | ||
==== ==== | ==== ==== | ||
<!--Insert text below the =s and above the 2 /divs--> | |||
* Average blockstun. Range is worthless given it tracks. | * Average blockstun. Range is worthless given it tracks. | ||
* It's a C assist alright. | * It's a C assist alright. | ||
| Line 653: | Line 672: | ||
==Super Moves== | ==Super Moves== | ||
===<big>Super Kamehameha</big>=== | ===<big>Super Kamehameha</big>=== | ||
<span class="input-badge">'''{{clr| | <span class="input-badge">'''{{clr|L|236L}}+{{clr|M|M}} or {{clr|H|236H}}+{{clr|S|S}}'''</span> | ||
<div class="attack-container"> | <div class="attack-container"> | ||
<div class="attack-gallery"> | <div class="attack-gallery"> | ||
| Line 671: | Line 690: | ||
|} | |} | ||
==== ==== | ==== ==== | ||
<!--Insert text below the =s and above the 2 /divs--> | |||
* Costs 1 Ki gauge. | * Costs 1 Ki gauge. | ||
* Damage is increased when a teammate is downed. | * Damage is increased when a teammate is downed. | ||
| Line 679: | Line 699: | ||
===<big>Dragon Fist Explosion</big>=== | ===<big>Dragon Fist Explosion</big>=== | ||
<span class="input-badge">'''{{clr| | <span class="input-badge">'''{{clr|L|214L}}+{{clr|M|M}} (Air OK)'''</span> | ||
<div class="attack-container"> | <div class="attack-container"> | ||
<div class="attack-gallery"> | <div class="attack-gallery"> | ||
| Line 701: | Line 721: | ||
|} | |} | ||
==== ==== | ==== ==== | ||
<!--Insert text below the =s and above the 2 /divs--> | |||
* Costs 3 Ki gauges. | * Costs 3 Ki gauges. | ||
* Goes halfscreen. Switches sides on hit. | * Goes halfscreen. Switches sides on hit. | ||
* Damage is increased when a teammate is downed, but oki is unchanged. | * Damage is increased when a teammate is downed, but oki is unchanged. | ||
* Minimum damage: 1659 [1859] | * Minimum damage: 1659 [1859] | ||
GT Goku's main level 3 now that Ultra Spirit Bomb no longer has a hard knockdown. He doesn't exactly get wizardry off this, but it still has more than enough advantage to maintain pressure. Your only real pressure option is to do an IAD, but there's still plenty of trickery, as IAD {{clr| | GT Goku's main level 3 now that Ultra Spirit Bomb no longer has a hard knockdown. He doesn't exactly get wizardry off this, but it still has more than enough advantage to maintain pressure. Your only real pressure option is to do an IAD, but there's still plenty of trickery, as IAD {{clr|L|j.L}} will whiff (allowing for land {{clr|L|2L}} or DR to be visually confusing). Adding a delay will allow it to connect, and {{clr|L|j.LL}} is a double overhead. Otherwise, you have {{clr|M|j.M}} for another double overhead setup and {{clr|H|j.H}} for frame advantage. | ||
</div> | </div> | ||
</div> | </div> | ||
===<big>Super Ultra Spirit Bomb</big>=== | ===<big>Super Ultra Spirit Bomb</big>=== | ||
<span class="input-badge">'''{{clr| | <span class="input-badge">'''{{clr|H|214H}}+{{clr|S|S}} (Air OK)'''</span> | ||
<div class="attack-container"> | <div class="attack-container"> | ||
<div class="attack-gallery"> | <div class="attack-gallery"> | ||
| Line 729: | Line 750: | ||
|} | |} | ||
==== ==== | ==== ==== | ||
<!--Insert text below the =s and above the 2 /divs--> | |||
* Costs 3 Ki gauges. | * Costs 3 Ki gauges. | ||
* Minimum damage: 39*31, 159 (1368) | * Minimum damage: 39*31, 159 (1368) | ||
| Line 734: | Line 756: | ||
* Recovers in the air almost immediately after he throws it. Bomb only disappears if Goku is hit. | * Recovers in the air almost immediately after he throws it. Bomb only disappears if Goku is hit. | ||
* Combos afterward don't receive Super Scaling. Soft knockdown if the opponent is left falling to the ground. | * Combos afterward don't receive Super Scaling. Soft knockdown if the opponent is left falling to the ground. | ||
There are 2 common ways to combo into this super. Both require the corner, though he can combo into it midsceen as well. First is {{clr| | There are 2 common ways to combo into this super. Both require the corner, though he can combo into it midsceen as well. First is {{clr|L|5LLL}} > {{clr|S|214S}}[8]~{{clr|S|1S}} > {{clr|H|j.214H}}+{{clr|S|S}}, the second is anything > Vanish > delay {{clr|S|j.214S}}~{{clr|S|1S}} > {{clr|H|j.214H}}+{{clr|S|S}}. Afterward, you can either airdash j.DR for a sliding knockdown (if you still have air options), or land, dash DR > {{clr|M|236M}} for optimal bar dump, though it's slightly harder. | ||
</div> | </div> | ||
</div> | </div> | ||
Revision as of 23:08, 13 May 2022
Normal Moves
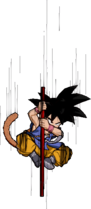
5L


Very bad hitboxes, but good forward movement


- Pushes Goku forward a bit, giving it deceptive range.
- Has next to zero knockback on air hit, allowing him to convert into 5LL.
- 4LL is available on clash only.
Very strong button, but it has its weaknesses. It advances very far forwards for how small it looks, but the vertical range leaves a lot to be desired. Challenging with this after 6M is likely to get stuffed because of this.
- Not an anti-reflect string after 5L anymore. Very punishable on whiff, especially because 5LLL is a grab.
- Has next to zero knockback on air hit. On some characters it requires a delay to combo into 2M, but 5M is universal.
Better than most 5LL on block, since it locks down the opponent for longer as Goku stalls for his assist to regen. Scales combos like a medium button but eats up the combo timer.
- Switches sides on hit.
- Cancelling into this from a blocked 5LL always leaves the opponent in too much blockstun for the throw to work.
Very commonly used for back-to-corner combos and to combo into Spirit Bomb. Good for sideswaps in general, but will always lead to less damage than the same-side combo.
Like the other 5LLL grabs, Goku can also tick throw with low-blockstun assists, though this isn't crucial for him as he has numerous other options to open opponents up.
5M

Knee of justice, kids version

- Advances forward a respectable distance.
- Fixed frame disadvantage. No matter how meaty, it will always be -7.
If you get tagged by this in the corner, you're going to die. Makes for a decent stagger tool every once and a while, but being -7 means it's riskier than normal.
5H

- Leads to a rejump in the corner, with or without Smash.
Essentially a less useful 5M. Mostly blockstring/combo filler, he has better options for neutral.
5S

Niche

- Near-fullscreen physical strike that does not have any hurtbox.
- The pole's hitbox is at the tip and travels forward like a projectile.
- Wall splats on Smash hit, can confirm into SD.
Rather slow, loses to projectiles, controls a very limited space, reward on hit is rather lacking. Don't whiff this.
Is not seen often due to GT Goku already having better neutral tools, but good to throw out from time to time.
2L

- 2L slides forwards, but 2LL does not.
While the slide sounds pretty good, from a blockstring into 214L airdash high/land low, even in the corner, 2L will whiff against most of the cast. You'll mostly be using 2M for the mix even if it's slower.
2M

- Shorter range than 5M, but goes further than 2L.
Not something you can throw out in neutral, as it's small and low to the ground. GT's highest damage midscreen starter, but usually leads to less than 5M in the corner. Makes a decent stagger tool but keep in mind that it's jab punishable by most of the cast.
2H

- Universal anti-air, faster than the average 2H.
- Puts Goku in the air.
- On Smash hit, combos into SD.
About the same as all of the other Goku's 2H. It's not fantastic, but it'll do. Make it safe with 214L.
2S

Leap past neutral and into mixups

- Vaults almost fullscreen. Hold
 during startup to leap half as far.
 - Recovers in mid-air and has access to air options.
- Whiff cancellable into j.S, j.2H, j.2S, specials and supers.
- On block or hit, can be cancelled early into grounded attacks.
Because of its landing recovery you won't be using it by itself. Sets up a 50/50 with 2S > j.2S with high-blockstun assists.
6M
- DBFZ GTGoku 6M.png
- Universal overhead. Uses hit and hurtboxes of j.H.
GT Goku's terrible ground normals make it difficult to challenge if your opponent blocks 6M. If the opponent jumps, they'll escape his 5L and 2L.
j.L

It's a tiny jab. Has enough range to beat Super Dash if timed correctly.
j.M

It's a tiny kick. Better than j.H in terms of mix-up potential because of its chain into j.L, but in terms of a single hit j.H is better.
j.H

- 5LLLLLLL Dynamic hit can wall bounce.
- j.H launches forward instead of down.
Faster than most j.H makes this the preferred jump-in compared to j.M, since j.H does more damage, has more range, and is almost equally as fast.
j.S

The Compensator
- Temporarily stalls momentum.
- Similar traits to 5S but hits with the entire pole instead of extending it out.
- Smash hit can confirm into Super Dash.
This is Goku's main air combo extender. As a neutral tool, it shares some of the same downsides with 5S, though it's slightly better since the entire pole has a hitbox. Not an answer towards Super Dash, but at times can catch it depending on distance and if the move is already out.
j.2H

PLUS 4

- Stops all air momentum.
- Smash on air-to-air, gives SKD.
As a blockstring, 2S > j.2H is a low > high that can be used really late into the string. It's not a true blockstring (12f gap) and j.2H can be easily anti-aired, but if they choose to block, then this leaves Goku at +4 at minimum.
As a combo ender, it's mostly used when Goku doesn't have any assists backing him up. The oki is better than j.214M, and he can connect any super upon landing.
j.2S
Pogo Pole

- Falls straight down and then recovers in the air. Only hits once he touches the ground.
- Can be aimed with j.1S or j.3S.
- After touching the ground, is whiff cancellable to j.S, j.2H, specials and supers, and can also choose the direction he hops to with or
 . j.1S and j.2S default to hopping backward, j.3S hops forward.
Since all of Goku's air normals are either stubby or incredibly slow, he won't be doing typical IAD cross-ups like most characters (without set-ups). So instead, he'll be mixing left/right with this move. It's still rather slow, but is really ambiguous.
2S > j.3S covered with the assist is a high/low set-up with delay airdash high and land low. 2S > delay j.3S is also a cross-up.
Special Moves
Dragon Flurry Fist
236L/M/H (Air OK)

Basic lariat

- All Versions
- Auto-followup only comes out on hit.
- Frame advantage on block is fixed.
- M/H versions will cause friendly assist characters to leave.
- 236L
- Relatively short range.
- 5MMM wall bounces.
Mostly useful for ending blockstrings, particularly with Kid Buu A backing him up. If you're solo it's generally better to end your blockstrings with 214L as it lets you backdash away to safety. Excellent for Special Tag combos as the second hit activates after the superdash connects, leaving your tagged character heavily advantageous.
- 236M
- Pauses for a bit before charging just over halfscreen.
- Smash hit wall splats. Will re-center the opponent without Smash.
- Essential combo extender in the corner.
Unlike 236L, 236M has a property where it will launch the opponent the same way every time. Usually this is only used when you have Smash left, but 236M will always re-center the opponent, making it amazing for combos into supers. It's also great for assist extensions, but it only works with faster assists.
- 236H
- Range of M version with speed of L version.
- Smash hit wall bounces. Can be followed up with dash 5LL.
Extremely fast and low commitment, always -3 on block regardless of distance, beats any form of challenge since it's a hitgrab, and leads to a corner carry combo on hit. Amazing lariat that shines as both a movement tool and whiff punisher. It's both hard to challenge and hard to punish.
After a DR tech in the corner, Goku can throw this out to regain advantage. If it hits he gets a combo, if it's blocked the opponent is forced onto the ground and he's +1 in the air.
Dragon Flash Fist
214L/M/H (Air OK)

Skipping neutral, literally

- All Versions
- Bounces back and recovers in the air after attacking.
- All hits besides the last one launch.
- Considered a beam projectile.
Excellent as a post-superdash option as it's not technically a Head property move.
- 214L
- Stays mostly in place.
- Last hit causes a ground bounce that also forces soft knockdown.
Filler for assisted combos since it doesn't Smash. Okay in neutral since it's a fast big orb right in front of Goku, stopping most approaches.
2H > j.214L is a true string that leaves you completely safe.
- 214M
- Leaps forward farther than 214L.
- Last hit on Smash causes a ground bounce SKD, non-Smash is similar to L version.
Alternate combo ender to j.2H, though it's almost always a better ender in the corner.
Since all versions always give an identical ground bounce, Goku can always end his corner combos with 214X or j.214X into assist and 5LLL for Spirit Bomb setups.
- 214H
- 214H tracks the opponent's horizontal position, goes fullscreen and won't overshoot.
- Last hit on Smash causes a ground bounce SKD, non-Smash is similar to L versions.
Combined with an assist, this is a risk-free approach since it cannot be anti-aired unless Goku is hit before he pulls his orb out, though the reward on block or hit is not that great compared to similar tracking attacks. Try to confirm Vanish before the last hit so you can keep your sliding knockdown if you're solo.
Kamehameha
236S (Air OK)

- 236S
- Angled slightly upward.
- Hold S to charge and start running (data in [] refers to maximum charge without running back).
- Hold during the charge to shimmy backward.
- Jails into Vanish.
Not all that great without having an assist to cover its recovery. Jailing into Vanish is unreliable against airborne opponents, so you'll mostly be using this on the ground and up close to keep your turn. Frametraps out of M/H normals, but doesn't catch frame 4 reversals like Vanish. Punishable gap if used from a light normal other than 5LL.
- j.236S
- Stops all air momentum.
- Slightly angled downward.
Can be used the same way as SS Goku's j.236S2. Controls a giant part of the screen which is great since GT Goku does not have any other projectiles. 2H (blocked) > j.236S has a 3f gap so it can't be challenged without invincible reversals. This is another way for GT Goku to get in if he has meter, and his main way of doing so without assists. However, the beam doesn't cover right underneath him. Since his hurtbox is tiny, the opponent can run under it and punish if it's being thrown out willy-nilly.
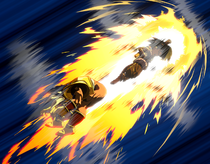
Reverse Kamehameha
214S (Air OK)

Character defining

- Pauses for a bit, shoots a blast behind him and then dashes forward.
- Blast does more damage and hitstun/blockstun than headbutt.
- On block, blast jails into Vanish, while headbutt makes Goku recover in the air.
- Direction + S allows 2 extra dashes even on whiff or block.
- No direction + S does j.236S, if Goku hasn't used all of his air options yet.
- Can be aimed diagonally. The first hit can only be
 , ,
, ,  , while the next 2 can be all 6 directions beside
  and
and  .
.
- Upward: Blast ground bounces
- Sideways: Blast wall bounces
- Downward: Headbutt ground bounces
- First dash of grounded version does not have Head property.
Incredibly useful combo tool, allowing Goku to convert from j.2S, raw SD, and of course, solo combo into Spirit Bomb.
Can be used as frame trap since it doesn't Smash, cannot be 2H'd, and Goku can solo convert off of this without meter if he's in the corner.
In neutral, Goku can use this to escape the corner, or even use the downward dive to approach.
Z Assists
Assist A
Kamehameha

R.I.P 2019-2021
- Ground beam, runs slightly forward before charging in place.
- Cuts off the far upper corner of the screen, preventing superjumps completely.
- Ridiculous hitstun. Almost always combos into Super Dash.
- Very low blockstun for a beam assist. Advantage is better on air block, but they can still act before they hit the ground.
Although with very poor startup, it is a phenomenal anti-air once it actually fires thanks to the excellent angle the beam covers, and its hitstun. Unfortunately, that's all it's good for thanks to its blockstun being bad both for tick throw characters and pressure characters, as well as immense startup. Another weakness is its inability to hit grounded opponents beyond close range. Unlike every other beam assist, opponents can sit below the beam, and are free to challenge your point character if they decide to run under it.
If your team desperately needs an anti-air, this can still be a good choice.
Assist B
Dragon Flash Fist
"Leave my friend alone!"
- Causes a ground bounce.
- Very fast for the amount of hitstun and blockstun it has.
GT Goku's B assist is an incredible pressure assist, an area his A assist is generally weak in. The combination of fast startup, high blockstun and large hitbox make it great at pinning down the opponent, allowing the point character to go for their most potent mix-ups. Its high hitstun also makes it a very reliable combo filler for pretty much any grounded or air-to-ground combo.
In neutral, it's generally limited to defensive strategies due to its lack of range. It makes up for that with its incredibly fast startup however, and careless opponents may find themselves running straight into it.
Assist C
Power Pole
Use B instead
- Average blockstun. Range is worthless given it tracks.
- It's a C assist alright.
Using this will have the same impact as seeing SF4 Ryu pick Metsu Shoryuken or +R Sol use Dragon Install in neutral - your opponent will know immediately that you just don't care. There is no reason to use this assist.
Super Moves
Super Kamehameha
236L+M or 236H+S

Original Attack no Jutsu

- Costs 1 Ki gauge.
- Damage is increased when a teammate is downed.
- Minimum damage: 72*10 [87*10]
GT Goku's DHC super. Since you're most likely to run him mid or anchor, you're more likely to see the enhanced version than not. The 150 additional damage makes a huge difference.
Dragon Fist Explosion
214L+M (Air OK)

With all teammates alive
- DBFZ GTGoku SS4DragonFistExplosion1.png
- DBFZ GTGoku SS4DragonFistExplosion2.png
SS4: With one teammate down


- Costs 3 Ki gauges.
- Goes halfscreen. Switches sides on hit.
- Damage is increased when a teammate is downed, but oki is unchanged.
- Minimum damage: 1659 [1859]
GT Goku's main level 3 now that Ultra Spirit Bomb no longer has a hard knockdown. He doesn't exactly get wizardry off this, but it still has more than enough advantage to maintain pressure. Your only real pressure option is to do an IAD, but there's still plenty of trickery, as IAD j.L will whiff (allowing for land 2L or DR to be visually confusing). Adding a delay will allow it to connect, and j.LL is a double overhead. Otherwise, you have j.M for another double overhead setup and j.H for frame advantage.
Super Ultra Spirit Bomb
214H+S (Air OK)

they weren't ready

- Costs 3 Ki gauges.
- Minimum damage: 39*31, 159 (1368)
- Teleports backward in midscreen before throwing the bomb. If he's cornered and the opponent is less than halfscreen away from the corner, will teleport out and throw the bomb back in.
- Recovers in the air almost immediately after he throws it. Bomb only disappears if Goku is hit.
- Combos afterward don't receive Super Scaling. Soft knockdown if the opponent is left falling to the ground.
There are 2 common ways to combo into this super. Both require the corner, though he can combo into it midsceen as well. First is 5LLL > 214S[8]~1S > j.214H+S, the second is anything > Vanish > delay j.214S~1S > j.214H+S. Afterward, you can either airdash j.DR for a sliding knockdown (if you still have air options), or land, dash DR > 236M for optimal bar dump, though it's slightly harder.
Colors
- DBFZ GT Goku color1.png
Color 1
- DBFZ GT Goku color2.png
Color 2
- DBFZ GT Goku color3.png
Color 3
- DBFZ GT Goku color4.png
Color 4
- DBFZ GT Goku color5.png
Color 5
- DBFZ GT Goku color6.png
Color 6
- DBFZ GT Goku color7.png
Color 7
- DBFZ GT Goku color8.png
Color 8
- DBFZ GT Goku color9.png
Color 9
- DBFZ GT Goku color10.png
Color 10
- DBFZ GT Goku color11.png
Color 11
- DBFZ GT Goku color12.png
Color 12
- DBFZ GT Goku color13.png
Color 131,2
- DBFZ GT Goku color14.png
Color 141,2
- DBFZ GT Goku color15.png
Color 151,2
- DBFZ GT Goku color16.png
Color 161