No edit summary |
|||
| Line 49: | Line 49: | ||
|} | |} | ||
==== ==== | ==== ==== | ||
<!--Insert text below the =s and above the | <!--Insert text below the =s and above the {{CloseCard}}--> | ||
* {{clr|L|5L}} is very short range. | * {{clr|L|5L}} is very short range. | ||
* Sends Cataclysmic Orbs a short distance forward. | * Sends Cataclysmic Orbs a short distance forward. | ||
| Line 60: | Line 60: | ||
* {{clr|L|5LLL}} slides about half screen forward before attacking, crossing the opponent up if they are in range. | * {{clr|L|5LLL}} slides about half screen forward before attacking, crossing the opponent up if they are in range. | ||
Can be punished by a fast normal as Beerus is crossing over, so don't use this move predictably. | Can be punished by a fast normal as Beerus is crossing over, so don't use this move predictably. | ||
{{CloseCard}} | |||
===<big>{{clr|M|5M}}</big>=== | ===<big>{{clr|M|5M}}</big>=== | ||
| Line 81: | Line 80: | ||
|} | |} | ||
==== ==== | ==== ==== | ||
<!--Insert text below the =s and above the | <!--Insert text below the =s and above the {{CloseCard}}--> | ||
* Headbutt, good for pressure and can be jump-cancelled on hit. | * Headbutt, good for pressure and can be jump-cancelled on hit. | ||
* Sends Cataclysmic Orbs down and forwards, making them groundbounce. | * Sends Cataclysmic Orbs down and forwards, making them groundbounce. | ||
Due to the short dash before the hitbox comes out, hitting orbs with it can be awkward. | Due to the short dash before the hitbox comes out, hitting orbs with it can be awkward. | ||
{{CloseCard}} | |||
===<big>{{clr|H|5H}}</big>=== | ===<big>{{clr|H|5H}}</big>=== | ||
| Line 106: | Line 104: | ||
|} | |} | ||
==== ==== | ==== ==== | ||
<!--Insert text below the =s and above the | <!--Insert text below the =s and above the {{CloseCard}}--> | ||
* Considerably short range for a {{clr|H|5H}}. | * Considerably short range for a {{clr|H|5H}}. | ||
* If used in the corner, it will push Beerus back a set distance. | * If used in the corner, it will push Beerus back a set distance. | ||
* Sends Cataclysmic Orbs a long distance forward very quickly. | * Sends Cataclysmic Orbs a long distance forward very quickly. | ||
Because you can special cancel into more orbs with this, {{clr|H|5H}} can be used to rapid fire orbs. | Because you can special cancel into more orbs with this, {{clr|H|5H}} can be used to rapid fire orbs. | ||
{{CloseCard}} | |||
===<big>{{clr|S|5S}}</big>=== | ===<big>{{clr|S|5S}}</big>=== | ||
| Line 132: | Line 129: | ||
|} | |} | ||
==== ==== | ==== ==== | ||
<!--Insert text below the =s and above the | <!--Insert text below the =s and above the {{CloseCard}}--> | ||
* Sends Cataclysmic Orbs a short distance up and forward. | * Sends Cataclysmic Orbs a short distance up and forward. | ||
* Whiffs against small characters. | * Whiffs against small characters. | ||
{{CloseCard}} | |||
===<big>{{clr|L|2L}}</big>=== | ===<big>{{clr|L|2L}}</big>=== | ||
| Line 156: | Line 152: | ||
|} | |} | ||
==== ==== | ==== ==== | ||
<!--Insert text below the =s and above the | <!--Insert text below the =s and above the {{CloseCard}}--> | ||
* Solid crouching normal, good for pressure with {{clr|L|5L}}. | * Solid crouching normal, good for pressure with {{clr|L|5L}}. | ||
{{CloseCard}} | |||
===<big>{{clr|M|2M}}</big>=== | ===<big>{{clr|M|2M}}</big>=== | ||
| Line 179: | Line 174: | ||
|} | |} | ||
==== ==== | ==== ==== | ||
<!--Insert text below the =s and above the | <!--Insert text below the =s and above the {{CloseCard}}--> | ||
* Slides about 3/4s of the screen '''VERY''' quickly. | * Slides about 3/4s of the screen '''VERY''' quickly. | ||
* Can be used in conjunction with assists for cross under setups when the opponent air-techs. | * Can be used in conjunction with assists for cross under setups when the opponent air-techs. | ||
* Tracks the opponent BEFORE attacking, meaning the hurtbox comes out long before the hitbox. | * Tracks the opponent BEFORE attacking, meaning the hurtbox comes out long before the hitbox. | ||
Phenomenal combo tool, but suicide in neutral. | Phenomenal combo tool, but suicide in neutral. | ||
{{CloseCard}} | |||
===<big>{{clr|H|2H}}</big>=== | ===<big>{{clr|H|2H}}</big>=== | ||
| Line 205: | Line 199: | ||
|} | |} | ||
==== ==== | ==== ==== | ||
<!--Insert text below the =s and above the | <!--Insert text below the =s and above the {{CloseCard}}--> | ||
* Does a handstand for an anti-air. Moves forward an extremely tiny distance before going backwards. | * Does a handstand for an anti-air. Moves forward an extremely tiny distance before going backwards. | ||
* Short horizontal range. | * Short horizontal range. | ||
| Line 211: | Line 205: | ||
* Keeps him on the ground which allows for better cancel options as well. | * Keeps him on the ground which allows for better cancel options as well. | ||
* Sends orbs a long distance up and forward. | * Sends orbs a long distance up and forward. | ||
{{CloseCard}} | |||
===<big>{{clr|S|2S}}</big>=== | ===<big>{{clr|S|2S}}</big>=== | ||
| Line 232: | Line 225: | ||
|} | |} | ||
==== ==== | ==== ==== | ||
<!--Insert text below the =s and above the | <!--Insert text below the =s and above the {{CloseCard}}--> | ||
* Beerus sneezes up a Cataclysmic Orb. | * Beerus sneezes up a Cataclysmic Orb. | ||
* Contrary to other orb summons, this one sends the orb floating up and forwards in a zigzagging manner. | * Contrary to other orb summons, this one sends the orb floating up and forwards in a zigzagging manner. | ||
| Line 238: | Line 231: | ||
* Hitting the orb will increase orb damage to 700 and increase size for just an instant. | * Hitting the orb will increase orb damage to 700 and increase size for just an instant. | ||
Can be useful during blockstrings, such as to bait Super Dash. Best to use Vanish to cancel the recovery if the enemy is about to throw out a beam. Can be used after {{clr|H|5H}} in a blockstring to safely leave an orb on the field for Beerus shenanigans. | Can be useful during blockstrings, such as to bait Super Dash. Best to use Vanish to cancel the recovery if the enemy is about to throw out a beam. Can be used after {{clr|H|5H}} in a blockstring to safely leave an orb on the field for Beerus shenanigans. | ||
{{CloseCard}} | |||
===<big>{{clr|M|6M}}</big>=== | ===<big>{{clr|M|6M}}</big>=== | ||
| Line 259: | Line 251: | ||
|} | |} | ||
==== ==== | ==== ==== | ||
<!--Insert text below the =s and above the | <!--Insert text below the =s and above the {{CloseCard}}--> | ||
* Universal standing overhead. Can start combos if you have an orb set near the opponent. | * Universal standing overhead. Can start combos if you have an orb set near the opponent. | ||
{{CloseCard}} | |||
===<big>{{clr|L|j.L}}</big>=== | ===<big>{{clr|L|j.L}}</big>=== | ||
| Line 282: | Line 273: | ||
|} | |} | ||
==== ==== | ==== ==== | ||
<!--Insert text below the =s and above the | <!--Insert text below the =s and above the {{CloseCard}}--> | ||
* Jumping downward jab. | * Jumping downward jab. | ||
* Sends orbs a short distance forward. | * Sends orbs a short distance forward. | ||
Good as an air-to-air and jump-in. | Good as an air-to-air and jump-in. | ||
{{CloseCard}} | |||
===<big>{{clr|M|j.M}}</big>=== | ===<big>{{clr|M|j.M}}</big>=== | ||
| Line 307: | Line 297: | ||
|} | |} | ||
==== ==== | ==== ==== | ||
<!--Insert text below the =s and above the | <!--Insert text below the =s and above the {{CloseCard}}--> | ||
* Upward kick. | * Upward kick. | ||
* Sends orbs a medium distance up and forward. | * Sends orbs a medium distance up and forward. | ||
Decent air-to-air and combo filler. | Decent air-to-air and combo filler. | ||
{{CloseCard}} | |||
===<big>{{clr|H|j.H}}</big>=== | ===<big>{{clr|H|j.H}}</big>=== | ||
| Line 332: | Line 321: | ||
|} | |} | ||
==== ==== | ==== ==== | ||
<!--Insert text below the =s and above the | <!--Insert text below the =s and above the {{CloseCard}}--> | ||
* Hitbox extends behind Beerus. | * Hitbox extends behind Beerus. | ||
* {{clr|H|j.H}} Smash hit causes a sliding knockdown. | * {{clr|H|j.H}} Smash hit causes a sliding knockdown. | ||
* Sends orbs a long distance down and forward. | * Sends orbs a long distance down and forward. | ||
Downward kick, great for jump-ins and IAD pressure. Also good for cross-ups thanks to it's extended hitbox. | Downward kick, great for jump-ins and IAD pressure. Also good for cross-ups thanks to it's extended hitbox. | ||
{{CloseCard}} | |||
===<big>{{clr|S|j.S}}</big>=== | ===<big>{{clr|S|j.S}}</big>=== | ||
| Line 358: | Line 346: | ||
|} | |} | ||
==== ==== | ==== ==== | ||
<!--Insert text below the =s and above the | <!--Insert text below the =s and above the {{CloseCard}}--> | ||
* Hold down the button to fire all 4 blasts. | * Hold down the button to fire all 4 blasts. | ||
* Can combo into j.214X in midscreen combos. | * Can combo into j.214X in midscreen combos. | ||
* In Sparking!, can cancel {{clr|S|j.S}} (3 ki blasts) into airdash for more damage. | * In Sparking!, can cancel {{clr|S|j.S}} (3 ki blasts) into airdash for more damage. | ||
{{CloseCard}} | |||
===<big>{{clr|H|j.2H}}</big>=== | ===<big>{{clr|H|j.2H}}</big>=== | ||
| Line 383: | Line 370: | ||
|} | |} | ||
==== ==== | ==== ==== | ||
<!--Insert text below the =s and above the | <!--Insert text below the =s and above the {{CloseCard}}--> | ||
* Dragon kicks through the sky. | * Dragon kicks through the sky. | ||
* Great in the corner for knockdown into {{clr|M|214M}}. | * Great in the corner for knockdown into {{clr|M|214M}}. | ||
| Line 389: | Line 376: | ||
* Sends orbs flying forward and slightly upward. | * Sends orbs flying forward and slightly upward. | ||
* When canceled into j.236X, Beerus will keep his momentum and be sent forward fairly fast afterwards. | * When canceled into j.236X, Beerus will keep his momentum and be sent forward fairly fast afterwards. | ||
{{CloseCard}} | |||
==Special Moves== | ==Special Moves== | ||
| Line 414: | Line 400: | ||
|} | |} | ||
==== ==== | ==== ==== | ||
<!--Insert text below the =s and above the | <!--Insert text below the =s and above the {{CloseCard}}--> | ||
Either used for neutral or combos because of their launch properities. | Either used for neutral or combos because of their launch properities. | ||
* Cataclysmic Orbs are the same as basic ki-blasts, meaning they will be beaten by superdash. | * Cataclysmic Orbs are the same as basic ki-blasts, meaning they will be beaten by superdash. | ||
| Line 432: | Line 418: | ||
* {{clr|H|236H}} is +2 if blocked standing, but if blocked crouching becomes +5, can also be converted off like {{clr|H|236H}}[2] mid-screen but awkward in the corner. | * {{clr|H|236H}} is +2 if blocked standing, but if blocked crouching becomes +5, can also be converted off like {{clr|H|236H}}[2] mid-screen but awkward in the corner. | ||
* {{clr|H|236H}}[8] deals the most damage and launches the enemy very high upward, like {{clr|M|236M}} Beerus recovers in the air on block allowing for mix. | * {{clr|H|236H}}[8] deals the most damage and launches the enemy very high upward, like {{clr|M|236M}} Beerus recovers in the air on block allowing for mix. | ||
{{CloseCard}} | |||
===<big>Sphere of Destruction (Held)</big>=== | ===<big>Sphere of Destruction (Held)</big>=== | ||
| Line 455: | Line 440: | ||
|} | |} | ||
==== ==== | ==== ==== | ||
<!--Insert text below the =s and above the | <!--Insert text below the =s and above the {{CloseCard}}--> | ||
The version of {{clr|L|236L}}/{{clr|M|M}}/{{clr|H|H}} where the button is held, preventing the kick from coming out. This version of the move is mainly used for setting up orbs during oki to pressure the opponent and enhance Beerus's mix-ups, as well as leaving traps around that pressure superdashing at Beerus. | The version of {{clr|L|236L}}/{{clr|M|M}}/{{clr|H|H}} where the button is held, preventing the kick from coming out. This version of the move is mainly used for setting up orbs during oki to pressure the opponent and enhance Beerus's mix-ups, as well as leaving traps around that pressure superdashing at Beerus. | ||
{{CloseCard}} | |||
===<big>God of Destruction's Rampage</big>=== | ===<big>God of Destruction's Rampage</big>=== | ||
| Line 480: | Line 464: | ||
|} | |} | ||
==== ==== | ==== ==== | ||
<!--Insert text below the =s and above the | <!--Insert text below the =s and above the {{CloseCard}}--> | ||
* First hit ground bounces. Smash on the splash. | * First hit ground bounces. Smash on the splash. | ||
* Leaves Beerus airborne afterwards, allowing for any air option available. | * Leaves Beerus airborne afterwards, allowing for any air option available. | ||
| Line 496: | Line 480: | ||
* You can combo with {{clr|H|214H}}/{{clr|H|j.214H}} solo if you've saved your air action, making this a pretty good combo tool. | * You can combo with {{clr|H|214H}}/{{clr|H|j.214H}} solo if you've saved your air action, making this a pretty good combo tool. | ||
H version can be used as a surprise "in your face" due to its speed; on block, you can get a 50/50 high/low situation with an assist. | H version can be used as a surprise "in your face" due to its speed; on block, you can get a 50/50 high/low situation with an assist. | ||
{{CloseCard}} | |||
===<big>Spheres of Destruction</big>=== | ===<big>Spheres of Destruction</big>=== | ||
| Line 518: | Line 501: | ||
|} | |} | ||
==== ==== | ==== ==== | ||
<!--Insert text below the =s and above the | <!--Insert text below the =s and above the {{CloseCard}}--> | ||
* Despawns all current orbs and spawns 6 new ones. | * Despawns all current orbs and spawns 6 new ones. | ||
* Every new orbs will despawn at most two of {{clr|S|236S}}, starting from the top row to the bottom. | * Every new orbs will despawn at most two of {{clr|S|236S}}, starting from the top row to the bottom. | ||
Best used on a cornered opponent to limit their options on wake-up. Very susceptible to beams otherwise. | Best used on a cornered opponent to limit their options on wake-up. Very susceptible to beams otherwise. | ||
{{CloseCard}} | |||
===<big>God of Destruction's Wrath</big>=== | ===<big>God of Destruction's Wrath</big>=== | ||
| Line 545: | Line 527: | ||
|} | |} | ||
==== ==== | ==== ==== | ||
<!--Insert text below the =s and above the | <!--Insert text below the =s and above the {{CloseCard}}--> | ||
* Invincible during startup. Guard point during active. Can beat beams on reaction. | * Invincible during startup. Guard point during active. Can beat beams on reaction. | ||
* Shoots 5 Ki blasts in front of Beerus and 5 behind him. | * Shoots 5 Ki blasts in front of Beerus and 5 behind him. | ||
| Line 552: | Line 534: | ||
* Damage and advantage vary with position. | * Damage and advantage vary with position. | ||
Among the fastest reversals in the game at 9 frame start-up, but has weaknesses due to losing to options a regular DP would not. | Among the fastest reversals in the game at 9 frame start-up, but has weaknesses due to losing to options a regular DP would not. | ||
{{CloseCard}} | |||
==Z Assists== | ==Z Assists== | ||
| Line 575: | Line 556: | ||
|} | |} | ||
==== ==== | ==== ==== | ||
<!--Insert text below the =s and above the | <!--Insert text below the =s and above the {{CloseCard}}--> | ||
* Very fast start-up. | * Very fast start-up. | ||
* Uses something like {{clr|H|236H}}. First hitbox is 2 ki blasts, second is a kick. | * Uses something like {{clr|H|236H}}. First hitbox is 2 ki blasts, second is a kick. | ||
| Line 586: | Line 567: | ||
Not the best tool for neutral, as the orb can be easily bypassed. | Not the best tool for neutral, as the orb can be easily bypassed. | ||
{{CloseCard}} | |||
===<big>Assist B</big>=== | ===<big>Assist B</big>=== | ||
| Line 608: | Line 588: | ||
|} | |} | ||
==== ==== | ==== ==== | ||
<!--Insert text below the =s and above the | <!--Insert text below the =s and above the {{CloseCard}}--> | ||
* Causes ground bounce on hit. | * Causes ground bounce on hit. | ||
* Blockstun is 27 frames if only the first hit connects, and 24 frames if only the second one does. | * Blockstun is 27 frames if only the first hit connects, and 24 frames if only the second one does. | ||
A reliable combo filler for characters who need the ground bounce in their combo. Not particularly useful otherwise. | A reliable combo filler for characters who need the ground bounce in their combo. Not particularly useful otherwise. | ||
{{CloseCard}} | |||
===<big>Assist C</big>=== | ===<big>Assist C</big>=== | ||
| Line 635: | Line 614: | ||
|} | |} | ||
==== ==== | ==== ==== | ||
<!--Insert text below the =s and above the | <!--Insert text below the =s and above the {{CloseCard}}--> | ||
* Much more range than the point version. | * Much more range than the point version. | ||
* Has invincibility after the teleport. | * Has invincibility after the teleport. | ||
Fills the entire screen, making it an incredible neutral tool. Arguably better than most C assists due to Beerus's indiscriminate and omnidirectional firing. | Fills the entire screen, making it an incredible neutral tool. Arguably better than most C assists due to Beerus's indiscriminate and omnidirectional firing. | ||
{{CloseCard}} | |||
==Super Moves== | ==Super Moves== | ||
| Line 671: | Line 649: | ||
|} | |} | ||
==== ==== | ==== ==== | ||
<!--Insert text below the =s and above the | <!--Insert text below the =s and above the {{CloseCard}}--> | ||
* Minimum damage: 30*15, 360. | * Minimum damage: 30*15, 360. | ||
* In the air, use {{clr|L|L}}+{{clr|M|M}} to shoot straight forward or {{clr|H|H}}+{{clr|S|S}} to shoot downward. | * In the air, use {{clr|L|L}}+{{clr|M|M}} to shoot straight forward or {{clr|H|H}}+{{clr|S|S}} to shoot downward. | ||
| Line 681: | Line 659: | ||
* Minimum damage: 800. | * Minimum damage: 800. | ||
In order to maximize damage, try to get as many hits as possible before activating. | In order to maximize damage, try to get as many hits as possible before activating. | ||
{{CloseCard}} | |||
===<big>God of Destruction's Judgment</big>=== | ===<big>God of Destruction's Judgment</big>=== | ||
| Line 704: | Line 681: | ||
|} | |} | ||
==== ==== | ==== ==== | ||
<!--Insert text below the =s and above the | <!--Insert text below the =s and above the {{CloseCard}}--> | ||
* Minimum damage: 1824. | * Minimum damage: 1824. | ||
Beerus flicks the opponent with incredible force. Fundamentally similar to Trunks's Heat Dome Attack, being a command grab with very high damage, but also being very easy to avoid (can be evaded by jumping during the superflash). | Beerus flicks the opponent with incredible force. Fundamentally similar to Trunks's Heat Dome Attack, being a command grab with very high damage, but also being very easy to avoid (can be evaded by jumping during the superflash). | ||
| Line 711: | Line 688: | ||
'''Note:''' Training Mode display will show Hakai doing an extra 50000 damage after they're downed, this doesn't affect any actual gameplay, as damage dealt during transitions aren't applied and doesn't give any extra meter. | '''Note:''' Training Mode display will show Hakai doing an extra 50000 damage after they're downed, this doesn't affect any actual gameplay, as damage dealt during transitions aren't applied and doesn't give any extra meter. | ||
{{CloseCard}} | |||
==Colors== | ==Colors== | ||
Revision as of 23:53, 19 June 2022
Please feel free to make edits, but include edit summaries and sources where applicable.
Beerus can summon purple Ki Blast-property projectiles called Sphere of Destruction (colloquially known as Cataclysmic Orbs or simply Orbs) onto the screen that explode when they collide with the opponent. The orbs don't interact with one another, but can be knocked around with normals and specials (excluding Vanish). When hitting an orb with any normal attack that's not 6M, 5S, j.S, Beerus can cancel it into specials or Supers, even if neither the orb nor the normal made contact with the opponent.
- Orbs slowly descend and will disappear after 300F (315F if they've been hit), or if they touch the ground, if Beerus blocks, gets hit, tags out, triggers a cinematic with Dragon Rush or Supers
- Only 3 orbs can be on screen at the same time (except from 236S), spawning a new one will despawn the earliest one
- While traveling after being hit, orbs have bigger hitbox, higher damage (500 → 700), and will bounce against the ground and walls
Normal Moves
5L


Baby's first crossup.


- 5L is very short range.
- Sends Cataclysmic Orbs a short distance forward.
Flicks the opponent, good for pressure.
- 5LL can cancel into 5M or 2M to keep the gatlings going.
- Sends Cataclysmic Orbs upwards.
The clap of doom. Somewhat useful for up-close pressure, but the clap has ridiculous range and an equally ridiculous hitbox, making 5LL in neutral a great way to poke.
- 5LLL slides about half screen forward before attacking, crossing the opponent up if they are in range.
Can be punished by a fast normal as Beerus is crossing over, so don't use this move predictably.
5M

- Headbutt, good for pressure and can be jump-cancelled on hit.
- Sends Cataclysmic Orbs down and forwards, making them groundbounce.
Due to the short dash before the hitbox comes out, hitting orbs with it can be awkward.
5H

- Considerably short range for a 5H.
- If used in the corner, it will push Beerus back a set distance.
- Sends Cataclysmic Orbs a long distance forward very quickly.
Because you can special cancel into more orbs with this, 5H can be used to rapid fire orbs.
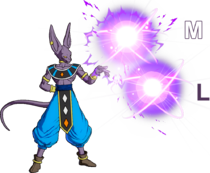
5S

- Sends Cataclysmic Orbs a short distance up and forward.
- Whiffs against small characters.
2L

- Solid crouching normal, good for pressure with 5L.
2M

"2 EMMM!" *Slap*

- Slides about 3/4s of the screen VERY quickly.
- Can be used in conjunction with assists for cross under setups when the opponent air-techs.
- Tracks the opponent BEFORE attacking, meaning the hurtbox comes out long before the hitbox.
Phenomenal combo tool, but suicide in neutral.
2H

Who cares about practicality when you have STYLE?

- Does a handstand for an anti-air. Moves forward an extremely tiny distance before going backwards.
- Short horizontal range.
- Hitbox does not extend behind him despite the animation.
- Keeps him on the ground which allows for better cancel options as well.
- Sends orbs a long distance up and forward.
2S

- Beerus sneezes up a Cataclysmic Orb.
- Contrary to other orb summons, this one sends the orb floating up and forwards in a zigzagging manner.
- Can cancel into itself two additional times on whiff, creating three orbs.
- Hitting the orb will increase orb damage to 700 and increase size for just an instant.
Can be useful during blockstrings, such as to bait Super Dash. Best to use Vanish to cancel the recovery if the enemy is about to throw out a beam. Can be used after 5H in a blockstring to safely leave an orb on the field for Beerus shenanigans.
6M
- DBFZ Beerus 6M.png
- Universal standing overhead. Can start combos if you have an orb set near the opponent.
j.L

- Jumping downward jab.
- Sends orbs a short distance forward.
Good as an air-to-air and jump-in.
j.M

- Upward kick.
- Sends orbs a medium distance up and forward.
Decent air-to-air and combo filler.
j.H

- Hitbox extends behind Beerus.
- j.H Smash hit causes a sliding knockdown.
- Sends orbs a long distance down and forward.
Downward kick, great for jump-ins and IAD pressure. Also good for cross-ups thanks to it's extended hitbox.
j.S

- Hold down the button to fire all 4 blasts.
- Can combo into j.214X in midscreen combos.
- In Sparking!, can cancel j.S (3 ki blasts) into airdash for more damage.
j.2H

- Dragon kicks through the sky.
- Great in the corner for knockdown into 214M.
- Decent getaway button to run from the opponent.
- Sends orbs flying forward and slightly upward.
- When canceled into j.236X, Beerus will keep his momentum and be sent forward fairly fast afterwards.
Special Moves
Sphere of Destruction
236L/M/H (Air OK)
H summons both orbs.

Kicks orb after summon, hold button to not kick


Either used for neutral or combos because of their launch properities.
- Cataclysmic Orbs are the same as basic ki-blasts, meaning they will be beaten by superdash.
The L version is used for firing out a quick orb in neutral due to it's aggressive angle both on the ground and air, in combos it has use for being slightly more optimal when sending the opponent back down over 214L for assist extensions.
- Hitstun on a launched orb is long enough that you can convert off it anywhere on screen.
The M version is used for mix and as a launch in corner combos.
- On the ground Beerus spikes the orb off the ground back into the air, in the air the bounce depends on the height it's used.
- *If the orb does not hit the opponent as it's created, when beerus kicks the orb and the opponent blocks he will be plus. This does have a gap and can be superdashed
- The kick after the orb is summoned will whiff on any character in the game if the orb is blocked
- The summoned orb will whiff on any croucher or short character in the game.
- Due to Beerus recovering in the air after this move, he can go for easy mix with an assist covering him.
The H version comes in three forms, 236H[2]/236H/236H[8] and their data is listed as such in the table above.
- 236H[2] is the most plus version on block and is used for corner carry because of it's launch sending the enemy bouncing across the ground.
- 236H is +2 if blocked standing, but if blocked crouching becomes +5, can also be converted off like 236H[2] mid-screen but awkward in the corner.
- 236H[8] deals the most damage and launches the enemy very high upward, like 236M Beerus recovers in the air on block allowing for mix.
Sphere of Destruction (Held)
236[L/M/H] (Air OK)
H summons both orbs
The version of 236L/M/H where the button is held, preventing the kick from coming out. This version of the move is mainly used for setting up orbs during oki to pressure the opponent and enhance Beerus's mix-ups, as well as leaving traps around that pressure superdashing at Beerus.
God of Destruction's Rampage
214L/M/H (Air OK)

- First hit ground bounces. Smash on the splash.
- Leaves Beerus airborne afterwards, allowing for any air option available.
- 214X's hitboxes do not match its visuals. Beerus needs to be next to his opponent for the move to connect.
- Has some uses in corner combos.
L version is a true blockstring from M and H normals; this allows Beerus to do a 50/50 high/low by airdashing afterwards. Best used with an assist to leave it gapless.
- Smash hit ground bounces into SKD.
- Air version can be comboed after j.S(1) anywhere on screen.
M version allows SKD oki at the end of every combo.
- Smash hit big ground bounce into SKD.
- Aerial version is the same as 214M, but does not track full screen like 214H.
- You can combo with 214H/j.214H solo if you've saved your air action, making this a pretty good combo tool.
H version can be used as a surprise "in your face" due to its speed; on block, you can get a 50/50 high/low situation with an assist.
Spheres of Destruction
236S

- Despawns all current orbs and spawns 6 new ones.
- Every new orbs will despawn at most two of 236S, starting from the top row to the bottom.
Best used on a cornered opponent to limit their options on wake-up. Very susceptible to beams otherwise.
God of Destruction's Wrath
214S (Air OK)

- Invincible during startup. Guard point during active. Can beat beams on reaction.
- Shoots 5 Ki blasts in front of Beerus and 5 behind him.
- Doesn't protect Beerus from throws and supers.
- Covers almost every position except directly above or underneath him.
- Damage and advantage vary with position.
Among the fastest reversals in the game at 9 frame start-up, but has weaknesses due to losing to options a regular DP would not.
Z Assists
Assist A
Sphere of Destruction
Placeholder image^
- Very fast start-up.
- Uses something like 236H. First hitbox is 2 ki blasts, second is a kick.
- Orbs disappear as soon as Beerus leaves or gets hit.
Mostly used to put opponents on block post-superdash on their way down, much like how DP assists are used but doesn't share the anti-air invulnerability they have. Best used this way as the opponent cannot guard cancel/reflect on their way down to the ground. This virtually makes the assist keep the opponent in significantly more blockstun than it actually has, because of its 2 hits with their own individual blockstun. The opponent can always reflect after they block the ki blasts if they're grounded, even if the CPU doesn't GC reflect properly for some reason.
Even though the opponent can reflect out of the ki blasts, you can override this by A) doing any physical hitting move, removing their ability to reflect (eg blockstring > Assist + SD, cannot be reflected) or B) doing a throw in anticipation of their reflect.
With the addition of 2 orbs in season 3.5, some combos become more difficult due to the orbs sometimes sending people in different directions (eg the opponent can be sent straight up, sideways, or even straight downwards).
Not the best tool for neutral, as the orb can be easily bypassed.
Assist B
God of Destruction's Rampage

I ' M N O T D O N E Y E T
- Causes ground bounce on hit.
- Blockstun is 27 frames if only the first hit connects, and 24 frames if only the second one does.
A reliable combo filler for characters who need the ground bounce in their combo. Not particularly useful otherwise.
Assist C
God of Destruction's Wrath

"I win neutral."
- Much more range than the point version.
- Has invincibility after the teleport.
Fills the entire screen, making it an incredible neutral tool. Arguably better than most C assists due to Beerus's indiscriminate and omnidirectional firing.
Super Moves
Beerus Ball
236L+M (Air OK) or 236H+S (Air OK)


| Version | Damage | GuardHow this attack can be guarded. | SmashWhich type of cinematic this attack can trigger. | StartupShows how many frame that the corresponding move needs to go through in order to reach its active frames. | ActiveShows how many frames where there is an attackbox, AKA the hitbox where if the opponent touches it, they will take damage. Occurs after Startup. | RecoveryShows how many frames that the character must go through after its active frames to automatically go back to a neutral stance. | Frame Adv.The difference between the attacker's recovery and the period that the opponent is in blockstun. This Frame Advantage value is based off the fact that the very first active frame touches the opponent. Throws list the amount of Frame Advantage upon successfully throwing the opponent. | Invul. |
|---|---|---|---|---|---|---|---|---|
| 236L+M | 100×15, 1200 | All | UDV | 11+4 | Total 65 | -19 | 11-23 All | |
| j.236L+M | 100×15, 1200 | All | UDV | 11+4 | Total 63 | 11-23 All | ||
| Beerus Ball of Destruction Beerus Ball > L/M/H/S |
2000 | All | UDV | 1+5 | 3 | 36 | -19 | 1-5 All |
- Minimum damage: 30*15, 360.
- In the air, use L+M to shoot straight forward or H+S to shoot downward.
- Always deals set amount of hits and damage.
- Follow-up can be activated before the 16th hit.
Can set-up Goku's Super Spirit Bomb from anywhere.
- Press another button to explode the ball.
- Minimum damage: 800.
In order to maximize damage, try to get as many hits as possible before activating.
God of Destruction's Judgment
214L+M or 214H+S


- Minimum damage: 1824.
Beerus flicks the opponent with incredible force. Fundamentally similar to Trunks's Heat Dome Attack, being a command grab with very high damage, but also being very easy to avoid (can be evaded by jumping during the superflash).
If done on Goku Black or Zamasu (Fused), he will try to use Hakai instead. Successful Hakai animation plays out if their health is at 1824 or lower, regardless if it's gonna kill or not (It will, as the minimum damage is indeed 1824). Failed Hakai pushes Beerus further out of the corner, but gives him with 3 whole extra frames of advantage (from +41 to +44).
Note: Training Mode display will show Hakai doing an extra 50000 damage after they're downed, this doesn't affect any actual gameplay, as damage dealt during transitions aren't applied and doesn't give any extra meter.
Colors
- DBFZ Beerus color1.png
Color 1
- DBFZ Beerus color2.png
Color 2
- DBFZ Beerus color3.png
Color 3
- DBFZ Beerus color4.png
Color 4
- DBFZ Beerus color5.png
Color 5
- DBFZ Beerus color6.png
Color 6
- DBFZ Beerus color7.png
Color 7
- DBFZ Beerus color8.png
Color 8
- DBFZ Beerus color9.png
Color 9
- DBFZ Beerus color10.png
Color 10
- DBFZ Beerus color11.png
Color 11
- DBFZ Beerus color12.png
Color 12
- DBFZ Beerus color13.png
Color 131
- DBFZ Beerus color14.png
Color 141
- DBFZ Beerus color15.png
Color 151
- DBFZ Beerus color16.png
Color 161