< BBTag
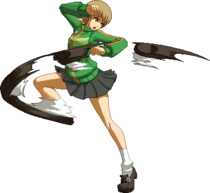
Overview
Chie is an up-close-and-personal heavy-hitting rushdown with good speed and a plethora of multihitting normals that allow for easy active switch shenanigans. Her pressure and mixup are great, with access to powerful resets, baits, punishes, and unorthodox cancels which allow for her to easily open up opponents. She has one of the highest damage outputs in the game via Power Charge, and can very easily down an opponent with just one combo due to it. However, she struggles with the neutral game, having short and stubby normals alongside highly telegraphed distance closers which can make it a struggle for her to get in without the help of an assist or incredible timing.
Nonetheless, Chie is a short, spunky powerhouse who provides a unique playstyle full of personality and is never a bad choice for newcomers and veterans alike.
Pros
Cons
- Great damage potential without meter.
- Highest damage potential in the game with meter.
- Good corner game.
- Strong close range pressure.
- Relatively low skill floor
- Getting in range to actually execute on that pressure and damage potential can be hard.
- Very reliant on assists and meter to use her full potential.
- Stubby normals.
| Chie Satonaka | |
|---|---|
 | |
| Health | |
| 17,000 | |
| Prejump | |
| 4F | |
| Backdash | |
| 22F | |
| Fastest Attack | |
| Reversals | |
| Fastest Ground Abare:This character's fastest attacks for mashing or scrambles. Excludes universal throws. | 4A (5F) |
| Reversal Attacks:Any reversal-esque moves this character has. Excludes universal options. | A+D (Catch 1~25F) 236B+C (14F) |
Normal Moves
4A


| Version | Damage | Guard | Startup | Active | Recovery | On-Block | Attribute | Invuln |
|---|---|---|---|---|---|---|---|---|
| 4A | 1000 | All | 5 | 3 | 11 | -2 | B | |
| 4AA | 400×6 | All | 9 | 2,{(4)2}×5 | 21 | -9 | B | |
| 4AAA | 1000×2 | All | 6 | 3,3 | 15 | -1 | B | |
| 4AAAA | 2040 | All | 13 | 12 | Total: 48 | -5 | P1 |
- 4A is jump cancellable
- 5F start up that hits crouching
This is chie's fastest normal so if you want to mash out of a untrue blockstring or punish a -4 move,this is your go-to.
- Jump cancellable
4AA hits six times and can be cancelled at anytime on block or hit. If 4AA whiffs you will be stuck until the animation finishes and very punishable.
- 4AAA is jump cancellable on second hit only
- It's safe on block
- Can cancel into Cross-Raid
Chie has the rare trait of being able to activate Cross-Raid from both her 4A and 5A auto combo. While her 4A is good, the follow ups are overshadowed by her 5A follow ups. 4A auto combo has a niche use as being a very fast way to activate Cross-Raid.
| Version | Level | P1 | P2 |
|---|---|---|---|
| 4A | 1 | 100 | 70 |
| 4AA | 2 | 100 | 75 |
| 4AAA | 3 | 100 | 80 |
| 4AAAA | 4 | 100 | 85 |
4A:
4AA:
4AAA:
4AAAA:
5A

Trust me, this move is just as scary as it was in P4AU
Thought I'd drop the combo?


| Version | Damage | Guard | Startup | Active | Recovery | On-Block | Attribute | Invuln |
|---|---|---|---|---|---|---|---|---|
| 5A | 1500 | All | 6 | 4 | 18 | -5 | B | |
| 5AA | 950×2 | All | 7 | 3(3)6 | 11 | -3 | B | |
| 5AAA | 750×3 | All | 10 | 2(12)3(1)3 | 19 | -3 | B | |
| 5AAAA | 2040 | All | 13 | 12 | Total: 48 | -5 | P1 |
- 5A is jump cancellable.
This move is one of her most important tools as it goes farther than 4A while being 1 frame slower,is a good combo starter and the follow ups are key to Chie's pressure game.It's also important for power charge combos due to its speed.
- The Second hit of 5AA vacuums, pulling the opponent closer
- Either hit can be jump cancelled, allowing for crossups in the corner in addition to other setups.
This move is a great place to set up j.C mix ups or reset pressure. As it frame traps into 5AAA, it discourages your opponent from trying to hit you out of your jump cancel or pressure reset.
- 5AAA won't true blockstring with 5AA
Can be used for active switches as it being a frame trap and hitting trice gives your partner time to do what they want.
- 5AAAA can cancel into Cross-Raid
Chie has the rare trait of being able to activate Cross-Raid from both her 4A and 5A auto combo. Same ender as 4AAAA, though the other hits are different.
| Version | Level | P1 | P2 |
|---|---|---|---|
| 5A | 3 | 100 | 80 |
| 5AA | 2 | 100 | 75 |
| 5AAA | 4 | 100 | 85 |
| 5AAAA | 4 | 100 | 85 |
5A:
5AA:
5AAA:
5AAAA:
5B


| Version | Damage | Guard | Startup | Active | Recovery | On-Block | Attribute | Invuln |
|---|---|---|---|---|---|---|---|---|
| 5B | 1700 | All | 10 | 3 | 30 | -14 [-2] | B | |
| 5BB | 1100×2 | All | 19 | 3(7)2 | Total: 48 | -1 [-2] | B |
- Dash Cancelable, Dash Cancel frame data within brackets []
5B is Chie's longest reaching ground poke. It's fast and has good reach both horizontally and vertically, being able to stuff opponents trying to approach on the ground and with instant air dashes. Though it can be risky to throw out because of the very long recovery her 5B has. Tomoe can be hit during startup so there is a risk of having your persona broken when challenging your opponents moves in neutral. Aim to stop an opponent from poking, jumping or retreating.
- Dash Cancelable, Dash Cancel frame data within brackets []
- Good for combos
- Isn't a true blockstring
- Total of 2944 Damage.
5BB is an important combo piece for Chie that can allow her to combo into B Herculean Strike when the conditions are met. For more details on 5BB > 214B/C, you can read more in the Combo Theory section of her Combo page. The second hit of 5BB isn't a true blockstring which means it can be used as a frame trap, it also means everyone can reversal action out of it if timed correctly. However, this move not being a true blockstring allows for mixups during sandwich situations, if you active switch just before the second B lands.
| Version | Level | P1 | P2 |
|---|---|---|---|
| 5B | 4 | 90 | 85 |
| 5BB | 4 | 90 | 85 |
5B:
5BB:
5C


| Damage | Guard | Startup | Active | Recovery | On-Block | Attribute | Invuln |
|---|---|---|---|---|---|---|---|
| 800 | High | 22 | 3 | 24 | -10 | B |
Standard overhead. It's fast but punishable on block.
| Level | P1 | P2 |
|---|---|---|
| 3 | 100 | 100 |
2A


| Damage | Guard | Startup | Active | Recovery | On-Block | Attribute | Invuln |
|---|---|---|---|---|---|---|---|
| 1000 | Low | 6 | 2 | 12 | -2 | F |
- Can low profile some standing pokes
- Can be chained into 4A and 5A up to 2 times
- Can chain into itself
Probably Chie's best close range normal. It's fast, hits low, has a fair amount of range, it's good for stagger pressure and yes, it's great at low profiling. All this and it's only 1 frame slower than 4A!
| Level | P1 | P2 |
|---|---|---|
| 1 | 90 | 70 |
2B
"I heard you wanted to jump in. Hah!"


| Damage | Guard | Startup | Active | Recovery | On-Block | Attribute | Invuln |
|---|---|---|---|---|---|---|---|
| 1500 | All | 10 | 2 | 30 | -15 | B | 8~11 H |
- Good Anti-Air
- Moves Chie forward
- Can be jump canceled, even on block!
Can be a bit tricky to use initially if you aren't accustomed to Chie moving forward when the move is used, but it has a shockingly large horizontal hitbox, which makes up for the forward movement. It's also very fast especially given how good the horizontal and vertical range is. Make sure you're putting this move to good use and aren't letting people jump in on you for free
| Level | P1 | P2 |
|---|---|---|
| 3 | 90 | 80 |
2C


| Damage | Guard | Startup | Active | Recovery | On-Block | Attribute | Invuln |
|---|---|---|---|---|---|---|---|
| 1700 | Low | 9 | 3 | 20 | -4 | F |
- Jump cancelable
That's right boys, we can jump cancel our 2C on hit AND on block!
| Level | P1 | P2 |
|---|---|---|
| 4 | 90 | 85 |
j.A


| Version | Damage | Guard | Startup | Active | Recovery | On-Block | Attribute | Invuln |
|---|---|---|---|---|---|---|---|---|
| j.A | 1500 | High | 8 | 3 | 13 | H | ||
| j.AA | 1500 | High | 7 | 5 | 14 | H |
- Good air to air normal
Chie's j.A has a good horizontal hitbox, making jump up j.A a very nice way to catch air approaches. You'll mostly want to use this in situations where the opponent does not have to commit to pushing a button when they're approaching you from the air. In these situations, jump up j.A is less risky to throw out compared to risking whiffing an Anti-Air due to the opponent using additional air options or other things.
j.AA is mostly used in combos and pressure to confirm the opponent got hit or is blocking.
| Version | Level | P1 | P2 |
|---|---|---|---|
| j.A | 3 | 80 | 80 |
| j.AA | 3 | 80 | 80 |
j.A:
j.AA:
j.B


| Damage | Guard | Startup | Active | Recovery | On-Block | Attribute | Invuln |
|---|---|---|---|---|---|---|---|
| 1500 | High | 13 | 6 | 9 | H |
- Good for jump ins and whiff punishing
- Good defensive normal
- On Air Counter Hit, it has a large amount of untech time.
- Reverse beats into j.A
- Can be used as an instant overhead on Tager and Hakumen.
Tomoe swings downward. You can probably already tell that it has good vertical reach but it actually also has decent reach in front of Chie as well. It's a good normal to use for jump ins because of it's long vertical reach. Because you can reverse beat into j.A, it's usual ideal to do j.B > j.A so that you have enough hitstun or blockstun to land and either continue the combo if the opponent got hit or start a blockstring if they blocked. The long vertical reach also comes in handy for when you whiff punish ground pokes by jumping over them.
It's also a good normal to use defensively as you're falling to the ground while an opponent is approaching you, especially since on Counter Hit, j.B has a good amount of untech time to pick it up with a combo. Keep in mind that Tomoe has a hurtbox as it's coming out so don't try to use this defensively against normals that outspace it.
| Level | P1 | P2 |
|---|---|---|
| 3 | 80 | 80 |
j.C


| Damage | Guard | Startup | Active | Recovery | On-Block | Attribute | Invuln |
|---|---|---|---|---|---|---|---|
| 300×6, 1500 | All | 26 | 2×6,(13)3 | Total: 28 | H |
This move got reworked during patch 1.5. Now instead of a combo tool, it's a pressure tool that sets up a gapless high/low mix up and can also be used in neutral to great effect. The move has long start up but you recover before the active frames end! An example block string to set up this mix up point would be 5AA > jump cancel > j.C. If the opponent did not anti air your jump cancel they will be blocking j.C while you're falling to the ground, this gives you the option to either fall down and hit them low with 2A or air dash towards them right before landing and hit them high with j.A. As the move is active after you recover, it's possible to use it in neutral as a sort of wall. Beware though, as Tomoe can still get persona broken and so it is possible for your opponent to force their way through your Tomoe barrier.
| Level | P1 | P2 |
|---|---|---|
| 3 | 80 | 70, 70 |
- Final hit is considered separate hit with P2:70%
Universal Mechanics
Ground Throw


| Damage | Guard | Startup | Active | Recovery | On-Block | Attribute | Invuln |
|---|---|---|---|---|---|---|---|
| 0×2, 2000 | Throw | 7~30 | 3 | 23 | T |
- Can convert it into a combo by linking 2A > 5B
Unlike most throws,Chie's can't be special or super canceled.Is very threatening during power charge as Chie can do 4-8K in a single hit. On certain characters you can do 2B > 5BB which will let you do B Herc loops which will do more damage than using 2A..If your fast enough,you can do throw>214BC(Level 1 power charge)>2A.
| Level | P1 | P2 |
|---|---|---|
| 0, 1, 4 | 100 | 50 |
- Minimum Damage 2000
High Counter
5A+D (Air OK)

COUNTAH

The move everyone expects but still gets hit by it.


| Version | Damage | Guard | Startup | Active | Recovery | On-Block | Attribute | Invuln |
|---|---|---|---|---|---|---|---|---|
| AD | 45 | 1~25 Guard All | ||||||
| AD Attack | 950×5 | Low, Air Unblockable×4 | 5 | 2(7)1(6)2(6)2(6)2 | Until L+8L | B | 1~38 All | |
| j.AD | 1100×4 | All | 6 | 2(6)2(6)2(6)2 | Until L+8L | H | 1~7 All |
- Air version will always have the followup attack come out.
- 11f total startup for air version with jump included.
- Sometimes opponents will fall out of this DP when it hits and may even be able to punish Chie for it. In rare cases it's even possible for the DP activation to completely miss the opponent.
- 1st hit of the grounded version hits low.
Since it's a counter,it will beat safejumps but in exchange can't be used for air unblockable setups
| Version | Level | P1 | P2 |
|---|---|---|---|
| AD | |||
| AD Attack | 2, 4×4 | 80 | 60 |
| j.AD | 4 | 80 | 60 |
AD:
AD Attack:
- Minimum Damage 47×5 (235)
j.AD:
- Minimum Damage 55×4 (220)
Skills
Rampage
236A (Air OK)


Hope you weren't blocking low


| Version | Damage | Guard | Startup | Active | Recovery | On-Block | Attribute | Invuln |
|---|---|---|---|---|---|---|---|---|
| 236A | 800×3 | All | 11 | 5(3)3(6)6 | 17 | -6 | H | |
| 236A > X | 1200×2 | High, All | 6 | 2(9)3 | 20 | -4 | B, F | |
| 236A > X > X | 3000 | All | 18 | 12 | 27+15L | -33 | H |
- You can influence the distance traveled by holding backwards or forwards during the start up of the Rampage
Is very important for her combos as it will let go into Skull Cracker and can help her close the gap mid-combo.
The followup is an overhead. Useful in the corner since it allows her to get loops with 5A.
| Version | Level | P1 | P2 |
|---|---|---|---|
| 236A | 3 | 80 | 80 |
| 236A > X | 4 | 80 | 85 |
| 236A > X > X | 5 | 80 | 90 |
236A:
- Minimum Damage 40×3 (120)
236A > X:
- Minimum Damage 60×2 (120)
236A > X > X:
- Minimum Damage 150
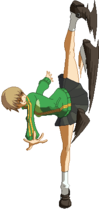
Dragon Kick
236B (Air OK)
| Version | Damage | Guard | Startup | Active | Recovery | On-Block | Attribute | Invuln |
|---|---|---|---|---|---|---|---|---|
| 236B | 3000 | All | 18 | 12 | 27+15L | -33 | H | |
| j.236B | 3000 | All | 14 | 12 | Until L+15L | H |
- This is the stand alone version of Dragon Kick without having to do Rampage and Skull Cracker.
- Shoots you at a 45 degree angle in the air
- Under certain circumstances Chie can combo off this move without an assist
- Does a decent amount of damage
This move can be used in combos and can be a good cross up tool depending on the assist covering it. You can also combo off this move without an assist depending on the angle the kick connects or if it counter hits. Generally, you don't want to risk using this move as an anti-air because you can easily get blocked, hit out of it or just straight up miss completely. But eh, you're a Chie player and this move is the most "Chie" move on God's green earth, so we say let it rip and kick for the stars! (Please note that we at Dustloop will not be held accountable for any lost matches, dropped sets or crushed self-esteems)
| Version | Level | P1 | P2 |
|---|---|---|---|
| 236B | 5 | 80 | 90 |
| j.236B | 5 | 80 | 90 |
236B:
- Minimum Damage 150
j.236B:
- Minimum Damage 150
Herculean Strike
214A/B


| Version | Damage | Guard | Startup | Active | Recovery | On-Block | Attribute | Invuln |
|---|---|---|---|---|---|---|---|---|
| 214A | 1800 | All | 11 | 6 | 23 | -8 | B | |
| 214B | 2200 | All | 25 | 10 | 18 | -4 | B | 1~20 T |
- Good ground combo ender
- B version blows back and gives a small wall bounce, wall splats in the corner
- Can be canceled into Dragon Kick
- The B version travels 90% of the screen and can be used as a long range whiff punish in some situations.
- On neutral hit you can covert into a combo with a Partner attack using the wall bounce or a microdash 5B
- Can be plus on block if spaced correctly
| Version | Level | P1 | P2 |
|---|---|---|---|
| 214A | 3 | 90 | 80 |
| 214B | 5 | 80 | 90 |
214A:
- Minimum Damage 90
214B:
- Minimum Damage 110
Extra Skills
EX Dragon Kick
236C (Air OK)

| Version | Damage | Guard | Startup | Active | Recovery | On-Block | Attribute | Invuln |
|---|---|---|---|---|---|---|---|---|
| 236C | 4500 | All | 30 | 12 | 12 | -3 | H | |
| j.236C | 4500 | All | 13 | 12 | 12 | H |
- Chie does a short run first, making the startup time considerably longer
- Goes further than standard Dragon Kick
- Chie recovers in the air
- Possible to combo into from grounded 5B CH (character specific)
The longer startup makes it harder to connect in combos than standard Dragon Kick, but as it recovers in the air it's much easier to convert from. It's even possible to combo straight into EX Dragon Kick for massive damage. As Chie recovers in the air, this move is also a lot less risky to throw out in neutral than standard Dragon Kick.
- Goes further than standard Dragon Kick
- Chie recovers in the air
- Limited to one use per jump
The air version is identical to the ground version, except that there's no extra run animation making it a lot faster. You can also only use it once per jump but it's possible to use standard Dragon Kick right after using EX Dragon Kick.
Both versions of EX Dragon Kick are useful for combos and can do ludicrous amounts of damage when used with power charge.
| Version | Level | P1 | P2 |
|---|---|---|---|
| 236C | 5 | 80 | 90 |
| j.236C | 5 | 80 | 90 |
236C:
- Minimum Damage 450
j.236C:
- Minimum Damage 450
EX Herculean Strike
214C

| Damage | Guard | Startup | Active | Recovery | On-Block | Attribute | Invuln |
|---|---|---|---|---|---|---|---|
| 2500 | All | 25 | 10,1 | 18 | +7 | B | 1~20 T |
- Wall bounces midscreen, Wall splats in the corner
- Can be canceled into Dragon Kick
| Level | P1 | P2 |
|---|---|---|
| 5 | 70 | 90 |
- Minimum Damage 250
Partner Skills
5P
Herculean Strike > Black Spot


| Damage | Guard | Startup | Active | Recovery | On-Block | Attribute | Invuln |
|---|---|---|---|---|---|---|---|
| 1500, 1700 | All | (18)+13 | 7 [(20)12] | 25 [13] | -12 | B, P1 |
- Followup Black Spot Hit only comes out on hit
As far as 5p's go, this one is average at best, though the follow up that occurs on hit does make the move slightly easier to combo from.
| Level | P1 | P2 |
|---|---|---|
| 3, 4 | 70 | 80, 90 |
- Only does 2nd hit (values in []) on hit
- Minimum Damage 75, 85 (160)
6P
Dragon Kick

| Damage | Guard | Startup | Active | Recovery | On-Block | Attribute | Invuln |
|---|---|---|---|---|---|---|---|
| 2500 | All | (18)+23 | 12 | 26+14L | -31 | H |
- Wall bounces, allowing you to pick it up with a combo
- Great to use for active switch crossups
This move is the same as Dragon Kick, so it will more often than not land on the other side of the opponent setting up sandwich situations. Just be cautious that there is a fair bit of startup time to this assist, so she is very susceptible to being hit.
| Level | P1 | P2 |
|---|---|---|
| 5 | 70 | 90 |
- Minimum Damage 125
4P
P4A 2D


| Damage | Guard | Startup | Active | Recovery | On-Block | Attribute | Invuln |
|---|---|---|---|---|---|---|---|
| 1000×2, 1700 | All | (18)+12 | 2(3)2(10)3 | Total: 68 | -11 | B×3 |
Very strong pressure assist. As this assist attacks with Chie's persona, all the hits will connect even if your opponents try to pushblock it.
| Level | P1 | P2 |
|---|---|---|
| 4 | 70×2, 100 | 85 |
- Minimum Damage 50×2, 85 (185)
Distortion Skills
God's Hand
236B+C

The original Navy Pressure


| Damage | Guard | Startup | Active | Recovery | On-Block | Attribute | Invuln |
|---|---|---|---|---|---|---|---|
| 6000 [5100, 5000] | All | 4+(50 Flash)+10 | 6 [6(27)6] | Total: 88 [Total: 130] | -41 [-50] | P2 | 1~22 All |
Her main combo ender. Can be used as a reversal but has low range so be careful.Also important for power charge combos due to the damage it does.
| Level | P1 | P2 |
|---|---|---|
| 5 | 80 | 60 |
- Values in [] are for Enhanced version
- Minimum Damage: 1920 [1122, 1100 (2222)]
- [If first attack is blocked, second hit has base damage 5100]
Power Charge
214B+C

Congratulations, you're dead

| Damage | Guard | Startup | Active | Recovery | On-Block | Attribute | Invuln |
|---|---|---|---|---|---|---|---|
| 1+(43 Flash)+10 {1+(43 Flash)+56} |
1~1 All [1~1 All 2~End P] |
- Pressing B+C will result in A Power Charge: one level and short recovery.
- Holding B+C will result in B Power Charge: two levels and long recovery.
- Holding B+C during Resonance Blaze or Cross Combo will result in SB Power Charge: three levels and very long recovery.
- Successive power charges will stack the levels
- Power Charge multiplies damage by 2/3/4 at level 1/2/3.
- Power Charge lasts for 120 frames.
- Resonance Power Charge has projectile invulnerability.
Chie gets crazy damage from power charge level 3 cross combos, be sure to learn them with your team as they are super important!The level 1 version can be used mid blockstring due to its short recovery to enhance mixups or just to keep the blockstring going.
| Level | P1 | P2 |
|---|---|---|
- Values in [] are for Enhanced version
- Values in {} are when you hold the buttons
- Increases Power Charge Level by 1 {2} [{3}]
- Base power of all attacks increases when Power Charge is active. Lv1: +100% Lv2: +200% Lv3: +300%
Agneyastra
j.236B+C j.214B+C

Hippity hop you'd better block


| Damage | Guard | Startup | Active | Recovery | On-Block | Attribute | Invuln |
|---|---|---|---|---|---|---|---|
| 740×10 [960×10] | All | 11+(41 Flash)+0 | P(3){P(5)}×8,P | Total: 22 | P2 | 1~10 All |
- j.214B+C results in Meteors going half screen
- j.236B+C results in Meteors going full screen
- Maximum number of hits is 8.
Nice for corner pressure
Only has 11 frames of recovery post flash, making it difficult for many characters to punish if Chie gets some space.
| Level | P1 | P2 |
|---|---|---|
| 5 | 80 | 95×10 |
- Values in [] are for Enhanced version
- Each P in active frames represents a projectile spawned
- Attacks appear at the top of the screen
- Minimum Damage: 111×N [144×N]
Distortion Skill Duo
God's Hand
P during Partner's Distortion Skill

| Damage | Guard | Startup | Active | Recovery | On-Block | Attribute | Invuln |
|---|---|---|---|---|---|---|---|
| 2000 [1000, 1500] | All | 1+(93 Flash)+1 | 6 [6(27)6] | Total: 65 [Total: 107] | -30 [-39] | P2 | 1~9 All |
Through years of deep meditation and intense training, Chie devised the groundbreaking strategy of hitting the opponent twice with a big fist. That's like double the usual amount of fists!
| Level | P1 | P2 |
|---|---|---|
| 5 | 100 | 100 |
- Values in [] are for Enhanced version
- Minimum Damage: 2000 [2500]
Astral Heat
Galactic Punt
222B+C

Trial of the Dragon

"Be water, my friend."


| Damage | Guard | Startup | Active | Recovery | On-Block | Attribute | Invuln |
|---|---|---|---|---|---|---|---|
| All | 11+(41 Flash)+30 | 15 | Total: 110 | -61 | P2 | 1~48 All |
- Doesn't directly combo from grab.
- Can combo into it after 5bb or Skull Cracker
- Fullscreen tracking
This astral is surprisingly limited in terms of what can combo into it. Skull Cracker (236aa) and 5bb are your most consistent options.
| Level | P1 | P2 |
|---|---|---|
| 5 |
External References
To edit frame data, edit values in BBTag/Chie Satonaka/Data.
 Azrael [★]
 Celica A. Mercury [★]
 Es [★]
 Hakumen [★]
 Hazama [★]
 Iron Tager [★]
 Izayoi [★]
 Jin Kisaragi [★]
 Jubei [★]
 Mai Natsume [★]
 Makoto Nanaya [★]
 Naoto Kurogane [★]
 Nine the Phantom [★]
 Noel Vermillion [★]
 Nu-13 [★]
 Platinum the Trinity [★]
 Rachel Alucard [★]
 Ragna the Bloodedge [★]
 Susano'o [★]
Click [★] for character's full frame data
Essentials
• HUD •
Controls •
The Basics
• Movement/Canceling •
Offense •
Defense •
Gauges •
Attack Attributes •
Detailed & Advanced Information
• Damage/Combo •
Frame Data & System Data •
Misc •
Archived Information
• Patch Notes •
- Active Change
- Air Recovery
- Astral Heat
- Clash
- Clash Assault
- Cross Burst
- Cross Combo
- Cross Gauge
- Cross Raid
- Cross Gauge Cooldown
- Delayed Down Entrance
- Distortion Skills
- Distortion Skill Duo
- Duo Change
- Extra Assault
- Extra Skills
- Ground Recovery
- Guard Bonus
- Health
- Minimum Damage
- P1, P2
- Partner Skills
- Rampage Time
- Reject Guard
- Reversal Action
- Resonance Blaze
- Resonance Gauge
- Skill Gauge
- Skills
- Smart Combo
- Throw
- Throw Reject
- Throw Counter
- Throw Reject Miss