
1) Character Portrait

Here is where you see the character you have selected, Player 1's character is displayed on the left, and Player 2's character is displayed on the right. Your portrait will flash if you can use your Astral Finish.
2) Life Gauge
Here is the character's health bar, each character has a different amount of health so damage to the character may result in different visual decrements of their respective health bar. When the character's health depletes to 0, that character (and the player controlling him/her) loses the round. If both characters' health reaches 0 at the same time, it is counted as a Double Down and the victory favors the losing player.
3) Heat Gauge
Here is the character's Heat Gauge. When you hit the opponent, take damage, Block and Instant Block attacks, your Heat Gauge will fill, when the gauge fills to certain amounts, you can perform actions that require heat such as Distortion Drive, Crush Trigger, and Counter Assault.
The bar will change colour based on how much heat is available to indicate at-a-glance which heat-using moves are available:
- Blue: Less than 25%, no heat-using moves are available
- Green: Between 25% and 49%, Crush Triggers are available (And some character-specific moves).
- Red: Between 50% and 99%, Counter Assaults, Rapid Cancels and most Distortion Drives are available
- Gold: 100%, all Distortion Drives are available and Astral Heats are available if other conditions are met.
4) Barrier Gauge
Here is the character's Barrier Gauge, when using Barrier, you are provided added push-back when blocking attacks at the cost of 1 extra frame of block stun and the gradual depletion of your Barrier Gauge. When your Barrier Gauge depletes, you are put in Danger State and cannot use Barrier Block until the gauge refills to half full.
5) Burst Gauge
Your Burst Gauge. Consume a full Burst Gauge to perform Bursts and Overdrive. The number In the center is an approximate percentage (in 10% increments) for how full your Burst Gauge is.
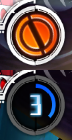
A full Burst Gauge (top), and 1/3 filled gauge (bottom)

6) Character Specific Gauge
If a character has any mechanic that requires their own gauge, this is where that gauge will appear (ex. Arakune's Curse Gauge, Relius' Ignis Gauge, Tager's Spark Bolt, etc), refer to the individual character's page to know what gauges they have and their requirements.
7) Timer
This is the timer, each round starts with 1 minute and 39 seconds (displayed on the timer as 99 seconds), when the timer reaches 0, the character with the most health (relative to health amount, not gauge size) wins. If both characters have the same health when the timer reaches zero, then the game is counted as a "Draw", Draw rounds are treated as "Double Down"s.
8) Round Counter
On default setting, every match is a best 2 out of 3 rounds, a player has to be the sole victor 2 rounds to be winner of the match. When you win a round, one dot below the timer will be covered by a red diamond icon, this shows you won a round. If both dots are covered with the red diamond icons, then you have won the match.
Combo Counter

- The large red number shows how many hits are in this combo so far. This number will turn blue if the combo is invalid. The small yellow number to the right tells you which hit is invalid.
- The small yellow numbers at the bottom shows the amount of damage done in this combo.
Active Flow

- During Active Flow, your side of the HUD will have a purple hue
 Amane Nishiki [★]
 Arakune [★]
 Azrael [★]
 Bang Shishigami [★]
 Bullet [★]
 Carl Clover [★]
 Celica A. Mercury [★]
 Es [★]
 Hakumen [★]
 Hazama [★]
 Hibiki Kohaku [★]
 Iron Tager [★]
 Izanami [★]
 Izayoi [★]
 Jin Kisaragi [★]
 Jubei [★]
 Kagura Mutsuki [★]
 Kokonoe [★]
 Lambda-11 [★]
 Litchi Faye Ling [★]
 Mai Natsume [★]
 Makoto Nanaya [★]
 Mu-12[★]
 Naoto Kurogane [★]
 Nine the Phantom [★]
 Noel Vermillion [★]
 Nu-13 [★]
 Platinum the Trinity [★]
 Rachel Alucard [★]
 Ragna the Bloodedge [★]
 Relius Clover [★]
 Susano'o [★]
 Taokaka [★]
 Tsubaki Yayoi[★]
 Valkenhayn R. Hellsing [★]
 Yuuki Terumi [★]
Click [★] for character's full frame data
Essentials
• HUD •
Controls •
FAQ •
The Basics
• Movement/Canceling •
Offense •
Defense •
Gauges •
Universal Strategy •
Detailed & Advanced Information
• Damage/Combo •
Attack Attributes •
Frame Data & System Data •
Misc •
Archived Information
• Patch Notes • Tier Lists •
- Active Flow
- Advanced Input
- Attack Attributes
- Attack Level
- Astral Heat
- Auto Heat Gain
- Burst
- Barrier Block
- Barrier Gauge
- Bonus Proration
- Clash
- Combo Rate
- Counter Assault
- Counter Hit
- Counter Hit Carry
- Crush Trigger
- Danger State
- Distortion Drive
- Exceed Accel
- Fatal Counter
- Guard Cancel Overdrive
- Guard Crush
- Guard Bonus
- Hard Knockdown
- Heat Gauge Cooldown
- Instant Barrier
- Instant Block
- Negative Penalty
- Overdrive
- Overdrive Cancel
- Purple Throw
- P1, P2
- Rapid Cancel
- Same Move Proration (SMP)
- Starter Rating
- Super Flash Buffer
- Throw Reject Miss (TRM)
- Ukemi/Tech (Air)
- Ukemi/Roll/Emergency Tech
- Untechable State