Overview
Stage 9 Ky is the final boss of Arcade Mode for ![]() Bridget, if you are able to defeat Extreme mode Stage 8 Ky without losing a round. You can however retry as many times as you like to accomplish this by intentionally losing if you lose 1 round. Consequently he is upscaled to be extremely powerful.
Bridget, if you are able to defeat Extreme mode Stage 8 Ky without losing a round. You can however retry as many times as you like to accomplish this by intentionally losing if you lose 1 round. Consequently he is upscaled to be extremely powerful.
Compared to the other Arcade Boss, Ky is fairly simple. With Dragon Install immediately, much of his frame data is permanently stronger. Additionally, several specials have been improved: allowing stronger confirms off Stun Dipper GuardLow, AllStartup7Recovery30Advantage-19 [-14], and overhead Foudre Arc
 GuardAllStartup24Recovery6Advantage-2~+6 [+5~+12], an advantaged Dire Eclat
 GuardAllStartup14Recovery25Advantage-8 [-6], access to a new Aerial Charged Stun Edge, and Sacred Edge
 GuardAll [All (Guard Crush)]Startup4+3RecoveryTotal 38Advantage+10 [+26] has been dramatically buffed.
However, for the most part Ky's moveset is mostly unchanged and still behaves how you would expect. So instead receives enormous stat improvements. Every single normal now deals excessive amounts of Chip Damage. Combined with upgraded frame data Ky is able to remove a signficant amount of health through pressure strings.
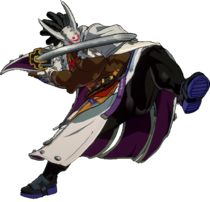
File:Emo Tarquin Ky Kiske (Stage 9) Icon.png Ky Kiske (Stage 9) ![]() Ky Kiske is an all-rounder with tools to compete both on the ground and in the air at most ranges, classified as a Balance type.
Ky Kiske is an all-rounder with tools to compete both on the ground and in the air at most ranges, classified as a Balance type.
Pros
Cons
- Holy Chip Damage: Ky's Specials, Overdrives, and S and H normals have up to 75% chip rate, able to do a third of most character's health in a single blockstring.
- Lightning Speed: With permanent Dragon Install, Ky is one of the fastest characters in the game, with an assortment of moves that greatly benefit from dash momentum.
- Resets Abound: Ky has a wide range of plus-on-block moves and resets, that make it easy to loop pressure, building even more chip damage.
- Aggressive Okizeme: with access to easy hard knockdowns, Ky can frequently set up Charged Stun Edge, for additional mixups and chip.
- A King's Shield: Taking two-thirds less damage, Stage 9 Ky's effective Health is at 1599. This also has a benefit that it's virtually impossible to bypass Guts thresholds, making him even tankier.
- Controlled by AI: If the AI were even slightly aware of its power, it would be incredibly hard to defeat, but it is very dumb and very easy to exploit.
- Not completely game-breaking: Unlike his counterpart, Nagoriyuki, Ky is mostly just a lot stronger, rather than coming with mechanics that outright win the game when used correctly.
Error: No field named "weight" found for any of the specified database tables.
| Ky Kiske | |
|---|---|
| Fastest Ground Abare:This character's fastest attacks for mashing or scrambles. Excludes universal throws. | 5P (5F) |
| Reversal Attacks:Any reversal-esque moves this character has. Excludes universal options. | 214K and 236K 623H (13F) 632146S (9F) 632146H (21F) |
Blood Gauge & Dizzy
The Blood Gauge mechanic is swapped out for a new one. Now, the Blood Gauge never changes from Nagoriyuki's actions. Instead, any time he takes damage, the gauge will be lowered.
Once the gauge is fully empty, Nagoriyuki enters a Dizzy state, completely unable to move, act, or even block, and can therefore be punished and comboed freely. Once his Blood Gauge refills, he returns to normal and the process begins again.
At full the gauge is a total 1500 units. The amount lost is equal to 5 times the received attack's base damage. e.g. a 30 damage attack reduces the gauge by 150 (10%). This does not change during a combo, or on Counter Hit. The gauge does not lower when hit by a Charged Dust Attack, Overdrive, or for any combo started during the Dizzy state.
Stage 9 Boss
As a Stage 9 Arcade Mode boss, some benefits are received:
- 1.2% Tension received per second at all times.
- Receive ⅔ less damage, effectively tripling health.
- All damage increased by 10% (accounted for in move damage).
- Gets the cool song Crawl which you can't listen to normally.
Normal Moves
StartupThe time before an attack is active. Written startup values include the first active frame, so the startup on a frame chart will display one less square than the written value. Frames
Active The active frames of an attack refers to the amount of time an attack can hit the opponent. Frames
InactiveFrames in the middle of multi-hit attacks which cannot hit the opponent, but are after the move has become active at least once. Frames
Recovery The recovery of an attack refers to the amount of time an attacker must wait before they may perform another action, even blocking. Frames
Special RecoveryThe recovery of an attack refers to the amount of time an attacker must wait before they may perform another action.Recovery frames which happen under abnormal conditions, such as after landing. Frames
ProjectileIndicates an entity that exists separately from the character has become active. Usually something like a Fireball A projectile which usually travels slowly across the screen in a horizontal path above the ground.. Active
CancelA window in which to cancel a move. Can be varied in usage. Window
5P


Gatling Options: 5P, 2P, 6P, 6K, 6H
5K


A strong poke with a mixup game.
With very good range for its speed, with a low-crushing hurtbox, it is an easy poke at close-quarters. It is also +0 on block, making it very good for tick throwing off Fukyo's momentum.
With its jump cancel, you can actually run a legitimate mixup, jump cancelling into a rising j.H or linking into 2S sets up an unreactable mixup, and is barely fuzziableRising j.H hits Frame 18 while linked 2S hits Frame 19, giving only a 1F fuzzy gap., allowing you to easily open an opponent, at the risk of opening an 8F/9F gap in your pressure. By frametrapping with 2D, 6K, or other specials it becomes especially scary to deal with on block.
- Jump cancellable
Gatling Options: 6P, 6K, 6H, 5D, 2D
c.S


Fast punish combo starter
On block lacks a jump cancel but does allow 5D as a mixup if you have Tension to Roman Cancel (you will), but this opens a small gap. Ironically its trigger range can easily cause whiff from cross-up Fukyos by preventing f.S from being input, making it a big culprit of accidental whiffing. However, it's a fantastic combo punish starter, being extremely fast and leading into big damage with any number of routes you feel like using.
Gatling Options: 6P, 6K, f.S, 2S, 5H, 2H, 6H, 5D, 2D
f.S


The much faster sister of 5H.
Reaching a little over 50% screen with as much startup as some K nomals, this is a pretty absurd neutral poke and acts as a closer-range 5H. Unfortunately, it is possible to crush with a 6P, and like 5H, it has very bad recovery on whiff, and at this closer spacing it is a lot more likely to get punished. This makes it generally weaker than 2S and 5H, despite its blinding speed-to-range ratio.
Also an extremely useful tool on pressure. This allows Nagoriyuki to easily catch an opponent to set up infinite blockstrings, with extreme resiliance to Faultless Defense.
- Has 4F less startup than regular Nagoriyuki's Blood Rage f.S
Gatling Options: f.SS, 5H, 2H
f.SS


Easy blockstring builder that resists Faultless Defense
While not perfect, using the f.SS gatling makes it extremely hard to get out of Nagoriyuki's pressure as he steps forward, even making Intant Faultless Defense ineffective, with basically zero execution required. Better altneratives will almost certainly use 5H, but demand being close to set it up, assuming the opponent somehow is good enough to Intant Faultless Defense every hit. In short, this only matters in theory, not in reality.
Gatling Options: f.SSS
f.SSS


A completely obsolete frametrap.
Because you can special cancel f.SS there no reason to ever use this, it has less reward on hit than Kamuriyuki and on block it is one of the only moves you have that is actually punishable. Just don't use it.
- Cannot Special cancel.
5H

A perfectly reasonable neutral poke


This move is better than the entirety of anyone else's zoning game
With enough range to cover about 70% of the screen, in 13 frames, while dealing 31 damage on block, jailing into Zarameyuki at anything closer than very far range, and fully comboing on Counter Hit at any distance, this is a cruel zoning tool. It is technically possible to IAD An air dash performed from a standing position as quickly and as low to the ground as possible from a jump. Done by inputting 956 754, and depending on the game, using a dash macro right after a jump. in on prediction to punish this, but only barely, and attempting that is asking to die given his access to 2H. The only saving grace for his opponent is its atrocious recovery on whiff, but even if that happens, you probably can't punish his recovery (let alone the fact its recovery is barely even reactable). Because Fukyo makes full screen distancing painfully easy, getting around this move is difficult.
Also doubles as a nice alternative to f.SS and your main gatling off 2S, with more blockstun and chip damage, but pushes you back a lot further. This is central to Stage 9 Nagoriyuki's infinite blockstring pressure.
- Has 3F less startup than regular Nagoriyuki's Blood Rage 5H.
5D

The AI loves this move.


Universal overhead attack. Tapping ![]() gives a fast but weak overhead, while holding down
gives a fast but weak overhead, while holding down ![]() with give a much slower but much more powerful strike.
with give a much slower but much more powerful strike.
- Uncharged Dust Attack
A fairly standard mixup tool, but completely outclassed by rising j.H, for being slower, and lower reward, while still requiring Tension to Roman Cancel. There's pretty much no reason to use this, except for being easier to use.
- Charged Dust Attack
On-hit, holding ![]() will activate Homing Jump for a large combo opportunity.
will activate Homing Jump for a large combo opportunity.
An alternative to rising j.H, being much slower but can combo without Tension (assuming you got this far without having it anyway).
The AI is extremely likely to use this following a cross-up with Fukyo, attempting to mix-up the opponent. Be ready for it any time the AI uses Fukyo, block, and punish it, giving you very easy reward if you can respond in time.
As a human player, you can set this up with Zarameyuki or on okizeme to avoid the opponent being able to abare any gap without an invincible reversal. Unfortunately on block this move is entirely punishable unless you have that Tension to Roman Cancel, as it cannot special cancel. As a result, there's basically no reason to use this, it's one of the only moves with any inherent risk to it. It's also just very reactable (but it is funny).
2P


Lower-hitting substitute to 5P to catch low-profiles.
Mostly similar, but with slower startup and worse recovery and on-block makes it a far less threatening poke at close-quarters. However, by crouching down Nagoriyuki is able to hit some low profile When a character's hurtbox is entirely beneath an opponent's attack. This can be caused by crouching, certain moves, and being short. attacks, making it useful in some matchup-specifific interactions. Still can lose to some low-profiles, however, and even loses to 6P, making it pretty unimpressive.
Gatling Options: 5P, 2P, 6P, 6K, 6H
2K


Low-hitting substitute to 5K
Nothing particularly special, its lack of low-crush, jump cancel, and slightly shorter range makes it overall outclassed, and most pressure will structure around 2S which is vastly superior for only +1 startup. It doesn't help it is also the single worst combo starter you have. Regardless, it can be staggered and use 2D gatling to pressure an opponent low, if you feel like using gappy, short-range pressure for some reason.
Gatling Options: 6P, 6K, 6H, 5D, 2D
2S

Okizeme on whiff


Single-handedly plays neutral for you.
With Blood Rage range and a startup so short you literally can't react to his recovery until it's no longer punishable, this move is unreasonably good as a neutral poke. Better yet, it hits Low and confirms into Kamuriyiuki even from max range, for easy combo damage on hit and pressure on block. Being only barely minus on block and with a very strong 5H gatling makes it extremely good for safely poking even at close range.
The AI is likely to use this on approaches and blockstrings, forcing you to block low. Simply try to avoid standing up in pressure, unless in response to Charged Dust Attack.
- Has 2F less startup than regular Nagoriyuki's Blood Rage 2S.
Gatling Options: 5H, 2H
2H

Deletes the air

Breathe easy, Potemkin and Goldlewis, this won't hit you crouching.

A god among anti-airs.
With faster startup than some DP Dragon Punch A move that has invulnerability during its startup, long recovery, and a rising motion. or 6P attacks, yet with enough range to reach across over 50% of the screen, there is almost no challenging if he can so much as react to your jump, only realistically losing to decently fast IAD An air dash performed from a standing position as quickly and as low to the ground as possible from a jump. Done by inputting 956 754, and depending on the game, using a dash macro right after a jump. approaches (which are naturally weak to 6P). As a predictive anti-air attack its recovery is bad, giving opponents lots of time to time punish or begin pressure. However, it's 11 Frames, you don't need to predict.
Similar to 6H, it is unable to combo on grounded hits outside of the corner. On Counter Hit, however, leads into some of Nagoriyuki's absolute strongest combos.
- Has 4F less startup than regular Nagoriyuki's Blood Rage 2H.
2D


Standard hitconfirm off K normals and a weak mixup tool.
Its natural combo off K normals while maintaining special cancels allows it to be an easy and simple confirm. From 5K, this acts as the low, paired alongside j.H for a mixup. Unfortunately, it is much faster than j.H, and the cancel window is miniscule, making it actually quite easy to Fuzzy Guard A defensive technique where the defender changes their guard direction rapidly and precisely to cover multiple ways they can be hit such as high/low or left/right..
Nothing particularly special, even on hit. It is entirely outclassed in neutral by their many amazing moves, not least of which 2S.
- Hard Knockdown on hit.
6P

Karate... Guillotine


A very good anti-air and counterpoke, typical of a 6P.
As standard, this has upper-body invulnerability, making it extremely safe against airborne opponents, and can attack through long-range pokes such as f.S attacks. This is also your best hitconfirm from P normals, allowing easy grounded confirms into Kamuriyuki, and frametrapping opponents on block.
Surprisingly, this has better reward on grounded hit than an air hit, due to enabling Kamuriyuki's hard knockdown for better combo extension, even from very far away. By contrast, air Counter Hit is more rewarding than grounded Counter Hit, as it can easily confirm using Fukyo from virtually any distance.
- Hard knockdowns on air Counter Hit.
6K
This one's gonna hurt!

3538 damage


From niche to probably pointless, only really good for calling out a low-hitting move at difficult spacings. As if you ever need to respect neutral.
Unable to combo directly from P or K normls, it is not especially useful to you except as a simple frametrap, and is simply outclassed. While it does have a nice low-crush hurtbox, it is actually fairly slow and commital, making it needlessly risky for such a risk-free character.
- Staggers on Counter Hit.
- Pulls back lower body hurtbox during startup.
6H

Hits harder than some Overdrives.


Comical damage. Best Counter Hit combo starter.
Incapable of comboing at all on hit without Roman Cancel. However, on Counter Hit this leads into Stage 9 Nagoriyuki's best combos, making this your de-facto DP Dragon Punch A move that has invulnerability during its startup, long recovery, and a rising motion. punish. Can also be used as your highest damage meterless Wall Break confirm.
Otherwise, mostly useless. There's better combo confirms from 2D and 214H, making it less useful for OTG The act of hitting the opponent when they are knocked down. Short for "off the ground" or "on the ground.", and does no particular role in pressure, as it has few available gatlings into while pushing Nagoriyuki pretty far back, often opening gaps in pressure if used too much.
j.P


Simple air-to-air defense, but mostly unnessecary.
Tied for Nagoriyuki's fastest aerial attack, alongside j.K, making it good for challenging jump-ins defensively without as much recovery as 6P. However it's somehow slower than 2H, and is pitifuly small compared to j.D, so realistically you will never need this.
Gatling Options: j.P
j.K


Basic air-to-ground for defending against Air Throws.
Tied for Nagoriyuki's fastest aerial attack, alongside j.P, while hitting lower down, making it good for challening Air Throw defensively if you are forced to jump. Hits low enough to catch crouching opponents even at point-blank, making it easier to use than j.S and j.H. However this is so reactable and low reward it's hardly even worth using, and there's no reason to jump in so close.
Gatling Options: j.D
j.S


Long-range air-to-ground poke, nothing too unique.
Surprisingly mostly unchanged from its non-boss version, aside from its increased range. Given Nagoriyuki's already very slow jumps it's not a very threatening approach in most cases, and can easily lose to 6P attacks unless done very low. Even with the absurd speed of 2S it still cannot combo at all unless hitting fairly deep (and thus hitting even later) or as Counter Hit, making it not very impressive at all.
On the upside, a 214H~66.PRC~j.S will hit quite fast from even 100% distance, making for a terrifying low-crushing overhead approach that is advantageous on block.
Gatling Options: j.H, j.D
j.H

An honest 18F overhead


Hits deep enough to catch someone crouching.

Unreactable overhead with huge disjoint and range.
By using it immediately on jump, this acts as an overhead mixup, using its huge range. Cannot combo at all without Roman Cancel (as if you ever won't have that anyway), but with Tension it is an agressively good mixup, doing incredible damage on hit. With its high speed and long, disjointed range, it can even be used in neutral while crushing almost any attack, making it very hard to challenge.
The AI won't actually use jumps much at all, and if it does, it will almost never Roman Cancel, meaning you can just punish it on hit, making this trivial.
- Has 2F less startup than regular Nagoriyuki's Blood Rage j.H.
- Nagoriyuki cannot act Frame 1 off a jump, making the total time for an overhead strike 18F.
Gatling Options: j.D
j.D

Creates a stairway to heaven, and his opponent will be taking it.


Any further and this'll reach into the technical data it's pointing at.

The larger, airborne brother of 2H.
Able to hit an opponent from a disturbingly long, using this as an IAS Instant Air Special
Conceptually includes Tiger KneePerforming a special as soon as possible after becoming airborne. Usually, but not always, involves an input trick.
For Example: 2369S for a j.236S input. prevents any opponent trying to simply space from the air at a distance, going even further than 2H. Unfortunately it lacks much lower reach, making it easy to slip under with IAD An air dash performed from a standing position as quickly and as low to the ground as possible from a jump. Done by inputting 956 754, and depending on the game, using a dash macro right after a jump. approaches, and its recovery is quite bad, making it mostly unnessecary as it's much easier to simply approach with Fukyo. It does, however, do a rather excessive amount of damage.
- Momentarily halts air momentum.
- Has 2F less startup than regular Nagoriyuki's Blood Rage j.D.
Universal Mechanics
Ground Throw
6D or 4D

Universal throw.
Your fastest response to point-blank RPS Rock Paper ScissorsA situation wherein an attacker and a defender have options that only beat certain responses from their opponent. For example, on wakeup a defending opponent may use a reversal to stop an attacker from using an attack, but the attacker can also block to defeat the reversal. If the attacker blocks, the defender can use the opportunity to take the offensive., for its extremely fast speed and priority over strikes. While usable on approach from a Fukyo or as part of Tick Throws where it is a little faster than Bloodsucking Universe but can be Throw Clashed much more easily. Similarly, it can't actually combo without Roman Cancel, and even with will do awful damage, making it generally not a very important tool for you.
- Can throw the opponent either forward or backwards.
Air Throw
j.6D or j.4D

Universal air throw as a fast air-to-air
Generally stronger than j.P as a dedicated air-to-air for its faster speed and better reward on hit. Unfortunately, just like j.P, you probably won't need to use it, for how insanely fast and strong 2H is. Really, jumping is just not nessecary here.
- Can throw the opponent either forward or backwards.
Special Moves
Fukyo
236K or 214K

Now fully invincible
And faster
And crosses up
And travels twice as far
Good luck

I don't know what you expected to see, he literally has no hitboxes or collision on any frame.
The most broken movement tech ever created. And that's not hyperbole.
Travels extremely far, and cannot be hit, allowing Nagoriyuki to close any gap near instantly. The AI will randomly use this in neutral, making it extremely easy to be whiff punished or be hit with an ambiguous cross-up Describes an attack which may cross up, but also may not, depending on extremely subtle and often imperceptible differences in timing or spacing. from extremely far away. Your best bet is to not waste enough time in neutral that this will happen, because it will eventually happen. Thankfully, on cross-ups the AI will usually use a Charged Dust Attack, giving you time to block and punish.
Cannot be hit, grabbed, or even collided with for the entire duration of the movement. Linking into another Fukyo allows an infinitely-long, unharmable state to automatically win off any health lead. In other words, if you like breaking your fingers for 100 seconds you can gaurantee a win without the infinite blockstrings. It also doubles up as a second, unpunishable, invincible reversal. Because he needed that.
- 236K has 3F less duration than regular Nagoriyuki,
- Cannot cancel into itself, or other specials, unlike regular Nagoriyuki.
Zarameyuki
236S

Now hits twice.
Oh no.


This part hits the opponent

This part also hits the opponent


Full-screen poke for free pressure at any moment, that crushes projectiles easily, but can be jumped.
Not a total upgrade, the projectile begins much slower than regular Nagoriyuki's, making it a lot easier to react and jump, particularly from extreme ranges of 5H. That aside, the move is excessively good on block, giving enough time to true blockstring with a Fukyo cancel from literally any distance. This is the core reason Nagoriyuki can actually make an infinite blockstring, where the only gap is created by how long Zarameyuki takes to hit (and Nagoriyuki will be so far, most invincible reversals stand no hope of hitting anyway). The fact it knocks down even if the opponent trades a projectile with it is just cruel.
The first hit applying stagger is completely irrelevant, the second hit automatically combos off it regardless, and there's not time to land a Bloodsucking Universe (nor would you want to anyway).
- First hit clashes with projectiles. If it clashes, only the second hit will strike.
- On hit, first hit staggers, second hit launches. If first hit connects, projectile immediately begins second hit.
- 6F less startup than regular Nagoriyuki.
- Full Counter Hit Recovery.
Stun Dipper
214K

Always knocks down on hit, much to every Ky main's relief


Foudre Arc
214K

An overhead.

Active frames 1~3

Active frames 4~5

Active frames 6~11


Mixup, pressure reset, and a low crush, a bullying tool to push offense even further.
Though very slow on crouching opponents (29F), it is always quite advantaged, and able to overcome any spacing created by pushback, making it your primary pressure reset. If you catch an opponent particularly off-guard it even functions as a weak mixup.
Due to its fantastic range and height, it can also be useful in neutral to approach with Dash momentum, easily catching jumps, and if blocked will lead directly into pressure, while avoiding some low pokes.
- Hits High, unlike regular Ky's Foudre Arc.
- Forced crouching on ground hit. Hard knockdown on air hit.
- First hit is unable to hit a grounded opponent, and can only hit an airborne opponent.
- Second hit is unable to hit a crouching opponent, resulting in a crouching opponent being hit 2F later.
Vapor Thrust
623S or 623H (Air OK)

A surprisingly tame reversal

Check out my cool and original attack


623S

623H

623HH


Remains mostly unchanged, Vapor Thrust remains the slowest of all DPs, but is now very rewarding on hit.
Somewhat unimpressive by EX standards. The S version remains 2F slower than most DPs, and is fairly standard on hit. The H version by comparison can fully combo on hit, and by whiffing the H follow-up immediately you lose the Counter Hit recovery. Unfortunately still throwable, and its slow startup means the H version is realistically possible to safe-meaty with c.S moves, making it very possible to work around.
Contrary to what it might seem the H follow-up does very little as an attack, it can't be used on grounded block to even make the move safer, and even on hit isn't better than regular confirms. Its main use is the aforementioned use of removing the highly punishable recovery for something only grab-punishable, and some funny combo confirms near the corner.
- 623H can cancel into the H on whiff.
- 623HH wall bounces in the corner.
- 623H is somehow, less plus on Counter Hit at +36. Daisuke's Vision.
Dire Eclat
214S

It's plus now.

Overdrives
Ride The Lightning
632146H (Air OK)

Stun Dipper Follow-Up


An Overdrive follow-up from Stun Dipper, entirely relegated as a combo ender from specically Stun Dipper.
From Stun Dipper confirms, it is always cheaper, and more damaging to simply Roman Cancel, and it can't be used for any frametrapping for lack of delayable cancels (not that you'd want to use it for that, anyway). It is also just plain weaker than Ranbu as a reversal and a combo ender if you have the choice, being comically punishable on block, dealing less damage, less chip, for no gain, and doesn't even wall break from further away.
Sacred Edge
236236P

A Roman Cancel but it deals damage.

Ranbu
632146S

Ride The Lightning but better

_Icon.png)