 GuardAllStartup15RecoveryTotal 38Advantage-4 or 214S/H
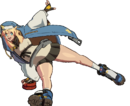
 GuardAllStartup130RecoveryTotal 30Advantage~, Bridget can throw out a yo-yo onto the stage. If the 236 version is used, it will cause some damage as you throw it out, and if the 214 version is used, it will cause damage on the way back. The yo-yo returns to Bridget after a few seconds, or if she gets hit or blocks an attack. The yo-yo is your core tool in mixups, so throw it out after HKD's or in blockstrings.
Normals
- f.S
 GuardAllStartup10Recovery18Advantage-9 - Essential poking tool, useful for controlling space and reacting to opponents.
 - 2S
 GuardLowStartup11Recovery20Advantage-9 - Low-hitting poke, covers many of f.S's weaknesses quite well. Useful for approaches and starting pressure. Has some recovery, but is often decently safe.
 - 2K
 GuardLowStartup5Recovery11Advantage-2 - Your fastest button. Use this to mash out of pressure if you think there's a gap, or to contest in scramble situations.
 - 5H
 GuardAllStartup11Recovery29Advantage-17 - Longest range normal but has huge recovery and is easily whiff punished. Best for counter-pokes and whiff punishing.
Specials
- 236S/H
 GuardAllStartup15RecoveryTotal 38Advantage-4 (Stop and Dash) - Fantastic projectile and poke for controlling space and stuffing approaches, letting you dictate the pace of the match. Also useful as a blockstring ender.
 - 214S/H
 GuardAllStartup130RecoveryTotal 30Advantage~ (Stop and Dash) - Your essential setplay tool, most commonly used after a knockdown. Setting this establishes the presence that really makes Bridget threatening.
 - 214K
 GuardAllStartup20~38Recovery0Advantage+16 (Airborne) (Rolling Movement) - Movement, mixup, and combo extention tool when your yo-yo is out. Causes Bridget to be in the air for overhead moves, and can be cancelled with air actions to form her high/low mix-ups. You can perform any aerial action out of this, making it very powerful in feinting, scouting, and conditioning.
 - 623P
 GuardAllStartup9Recovery39Advantage-28 (Starship) - Invincible reversal for when you don't feel like blocking. Use carefully as you will explode if it fails.
 - 236K
 GuardAllStartup10Recovery9Advantage-20~+4 (Kick Start My Heart) - Fast movement tool that needs no yo-yo. Used to close gaps or end combos with its Brake
 GuardAllStartup7Recovery19Advantage-6 and Shoot
 GuardAllStartup3Recovery29Advantage-35 followups.
Anti-Airs
- 6P
 GuardAllStartup10Recovery20Advantage-12 - Go-to check for jump-ins.
 - 2H
 GuardAllStartup11Recovery24Advantage-18 - Large anti-air that covers a lot of space. Useful for calling out attempts to jump out of the corner, or as a read on air movement.
 - j.H
 GuardHighStartup10Recovery22Advantage+2 (IAD) - Far-reaching air-to-air.
Bridget is a character that will often be converting off of strange hits in many unique situations during gameplay. Developing an intuition for converting out of odd interactions is something that can only come with experience, but included below are some sample combos to help you get an idea of what's possible.
c.S > dl.f.S > 5H > 236K>K
| |
f.S/2S > 5H~H > 236K [6]
| |
| (Near corner) | f.S/2S > 5H~H > (Wallbounce) > 236K>K
|
CH f.S > 5H > 236K>K
| |
| (With a yo-yo out) | CH 5H > 214K > Whatever you want
|
Air hit c.S > 2H > 214S > 5K > dc > c.S > 5[D] > 5K > 236K>K
| |
CH c.S > 5[D] > 5K > dc > 5K > c.S > 2H > 214S
| |
| (In corner) | c.S > 6H > j.236S > 6H, c.S > 6H > j.214K > WS > 5[D]
|
 GuardAllStartup8Recovery14Advantage-6 and 5K to check your opponent's movement, is a smarter choice. While Bridget has access to lots of tricky movement herself, it leaves her quite vulnerable if used recklessly; so being unpredictable with your options and feinting out of approaches to scope out your opponent's reactions and keep them guessing is very important. Meter is also useful for Bridget in neutral, allowing her to make her approaches safe and enforce mix on block.
Bridget's pressure generally consists of pushing opponents away with her long-reaching normals and ending with a special to stay safe; but with a yo-yo out or in the corner, it becomes very dangerous, gaining multiple mix points and being able to loop itself. Though it can be challenged, no defensive option is without counterplay, creating an engaging game of RPS Rock Paper ScissorsA situation wherein an attacker and a defender have options that only beat certain responses from their opponent. For example, on wakeup a defending opponent may use a reversal to stop an attacker from using an attack, but the attacker can also block to defeat the reversal. If the attacker blocks, the defender can use the opportunity to take the offensive..
A simple sequence midscreen with no yo-yo might look like c.S > 2S > 5H~H > (236/214S)/(236K~P) or 5K > 6H > j.236S.
Bridget's strongest pressure will usually follow the pattern of throwing yo-yos and rolling back into them. Remember to mix up your options so your opponent has a hard time choosing the proper counterplay to your move. Some sample sequences include:
c.S/5K > 6H > j.236S into 5H~H > 214K or 2S~S > 214K or f.S > 5H > 214K
Alternate your long pokes and their potential followups to keep you opponent on their toes. c.S and 2S can be cancelled on their first hits to further obfuscate your timing or to reduce pushback and stay closer.
Rolling Movement is the most vulnerable part of Bridget's pressure, and where you are most likely to be counterattacked. It's also where you are most likely to call out your opponent's option and score a hit. Be thoughtful of your options and make the right call.
- Cancelling roll early with a double jump or air backdash is a safe way to call out hard commitments or scout out your opponent's reaction.
- Cancel into spaced j.H is a safe option that can catch your opponent in startup while still giving you time for another roll if they block. It will whiff on most crouching characters, though.
- Close cancel into an aerial will catch slow opponents and those trying to block low to avoid spaced j.H.
- Finally, letting the roll hit will give you a true 50/50 and reset pressure if they do block. Obviously however it is the most easily challenge so don't try this on an unconditioned opponent.
Bridget is very powerful when the opponent is knocked down, because she can start her yo-yoki loops. On knockdown (usually after 2D or 2H), Bridget can throw out a 214S yo-yo and use Rolling Movement. As the opponent is rising, she can do perform a safejump A very well-timed jump attack on a character who is rising from a knockdown. Your goal is to attack extremely close to when you land so that, if the character performs an invincible reversal attack, you will land and be able to block. The opponent is then forced to block your jumping attack, since reversaling doesn't work, which will give you some nice pressure and hopefully an opening. with j.S or j.D, leading to a combo on hit and safe pressure if blocked.
What makes this oki so powerful is not the safejump itself, but rather the potential for mix. By using an aerial early to land sooner Bridget can perform a meaty 2K for an unreactable, unfuzziable A defensive technique where the defender changes their guard direction rapidly and precisely to cover multiple ways they can be hit such as high/low or left/right. high/low 50/50. The low option is not a safejump, and thus will lose to reversals; but it will catch opponents blocking high expecting and overhead and leads to the same potent pressure if they block.
Moves like Baiken's Hiiragi Guard-Startup1Recovery32Advantage- can invalidate the safejump, and slow reverals like Goldlewis' Down With the System
 GuardAllStartup6+(135 Flash)+4Recovery46Advantage-33 can hit you if you autopilot the followup after landing (but this isn't too tough to react to).
