You can help by editing it.
Content here can be considered incomplete until expertise is given.
Matchups
NOTE: Old matchup subforums can be found here: http://www.dustloop.com/forums/index.php?/forums/forum/58-dizzy-matchups/
Things to note when discussing matchups:
-General ratio
-Optimal/inoptimal spacings
-Strong/Weak buttons
-Things to watch out for
-Character specific confirms
-etc etc
Matchups
A.B.A
|
Kill her in Moroha | |||
|---|---|---|---|---|
|
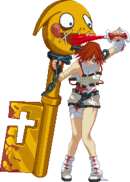
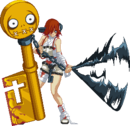
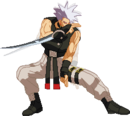
A.B.A is a very volatile matchup in which Dizzy dominates her on both offense and in neutral, but if you get hit once that might be the game. Run circles around her worse modes with your phenomenal mobility and summons and keep her from entering Goku Moroha, lest you get hit once and explode. Neutral A.B.A has three modes with varying neutral abilities, so this section will be split into 3 parts. Normal Mode A.B.A hates being in neutral against Dizzy. She has a bad dash and slow air mobility, so Dizzy can play at what ranges she wants with little difficulty. With all of this said, A.B.A's goal is simple: leave Normal Mode, and get into Moroha Mode. The easiest and fastest way for this to happen vs Dizzy is to use her Bloodpack Moroha Mode makes things a little bit more complicated. A.B.As already pretty good buttons become even stronger, making poking vs A.B.A hard and not recommended without a summon backing Dizzy up. This makes neutral more based around runaway, trying to make space to summon or hitting A.B.A with a fast normal or airdash string. Something that is important to note, is that if A.B.A uses Bloodpack to enter Moroha, it will typically be because you summoned in neutral and gave her time to do so. This means that at the beginning of Moroha Mode, it is not uncommon for you to already be covered by a fish or knife. A.B.As run speed and good buttons lets her kill fish or evade summons effectively, but Dizzy can also take advantage of this to try and get a knockdown. A.B.As phenomenal anti-airs in this mode, being 2S If A.B.A enters Goku Moroha in a situation where you can't punish it, say your prayers. If A.B.A escapes your pressure and has a good amount of Goku Moroha gauge left, say your prayers. Goku Moroha gives A.B.A possibly the best normals in the game for playing neutral, and similar mobility to what Dizzy already has. Dizzy's best strategies are trying to stuff her approach (very risky) or just blocking it out until the gauge runs out or the A.B.A makes a big mistake (very risky). If Dizzy gets hit, she WILL die in that combo almost certainly. The only bright side to neutral vs Goku Moroha is, if she enters Goku Moroha in a situation where you can't punish it, she's probably already pressuring you, so you don't have to play neutral! Offense Dizzy offense is incredible vs A.B.A. This section will also be split into 3 parts, as her defensive options vary depending on mode. Normal Mode, ironically, is where A.B.A's defense is at it's best vs Dizzy. FB Slide Moroha Mode is where A.B.As defense is at its worst vs Dizzy. Danzai is a terrible wakeup tool, as fish will either break the armor or tank the hit, giving Dizzy a free punish. This also applies to FB Danzai, as Dizzy can simply hit her after the first hit is tanked by fish. Goku Moroha Activate, usually being one of the best supers in the game, also gets tanked by fish, leading to another free punish for Dizzy, albeit giving A.B.A much more potential reward for escaping later. Losing FB Slide, A.B.A is required to be far more relient on 5P Goku Moroha does not change much from Moroha Mode. She has the same options (besides for Goku Moroha Activate), all slightly better but still not good enough to beat fish setups. The biggest boon for being in Goku Moroha is that if A.B.A CAN escape, she will most likely kill Dizzy. There's not much to say about offense vs Goku Moroha, besides be safe and clean with your setups, and don't let her escape. Defense Do not coffin on wakeup. Defense against Normal Mode A.B.A isn't something that'll happen often, but it's important to understand nonetheless. Typical she'll start her offense through a jump in (most likely
j.H When A.B.A enters Moroha Mode, things get a bit scarier. She gets access to extremely easy guard bar cranking strings with 2H Blocking against Goku Moroha A.B.A is hell on Earth. The best advice that can be given is "Don't Be There". She gets nigh infinite pressure with her incredibly open gatling chart and the insane guard bar gain will lead to any hit leading to a combo that will most certainly kill. There's nothing much else to say here, Dizzy should do her best to react to flipkicks and punish any big mistakes A.B.A makes, but this all carries insane risk that can end the round. | ||||
Anji Mito
|
Placeholder | |||
|---|---|---|---|---|
|
Placeholder | ||||
Axl Low
|
Placeholder | |||
|---|---|---|---|---|
|
Placeholder | ||||
Baiken
|
Placeholder | |||
|---|---|---|---|---|
|
Placeholder | ||||
Bridget
|
Placeholder | |||
|---|---|---|---|---|
|
Placeholder | ||||
Chipp Zanuff
|
Chipp 6P | |||
|---|---|---|---|---|
|
Very mobility heavy matchup. Chipp boasts very good buttons and movement that rivals Dizzy's own, leading to a matchup where you're forced to chase him around hoping to get a solid hit. Neutral In neutral, you have one goal above all: Get a knockdown. Unfortunately, this is much easier said than done. Chipp 6P Aerial neutral is also a struggle, as Chipp's high degree of mobility and air control and powerful air buttons make it difficult for Dizzy to contest and get a good hit. Even if she does get a hit, her unfortunate lack of real reward from air hits more or less resets to the same situation. Air throw is a game changer for this matchup, allowing Dizzy to get a knockdown from the air and begin her powerful offense. Dizzy's 2S Luckily, despite Chipp neutral being a struggle for Dizzy, his low health and Dizzy's high natural damage makes any hits you can get in neutral do a chunk of his health. Chipp's damage from neutral conversions, excluding strong counterhit conversions with strong starters, is generally low, giving you more chances to get a hit in as well. Offense Chipp has low health. Dizzy does a lot of damage. Fish mixups are very scary for Chipp. Chipp has a few defensive options in his kit, most notably Beta Blade It is important to note that Chipp can also wake up with Zansei Rouga Aside from these options, Chipp has to play honest defense vs Dizzy oki. He has a very good option in 6P Defense Do not coffin on wakeup. Against Chipp, Dizzy is forced to play smart defense, getting in good IBs to allow for abare throws or jump outs. If he tries to reset pressure with teleport FRC, Dizzy can Airthrow Chipp for a knockdown, however this is a dangerous read. As previously mentioned, coffin on wakeup is very unadvised. Chipp will be airborne for the majority of his meaties, and coffin will not be able to hit that, letting him punish easily. The best advice that can be given for defense vs Chipp is to utilize the Replay Takeover feature to experiment with jumping, mashing, and throwing Chipp out of his pressure. A strong familiarity with his tools and options will give Dizzy the best chance she has to escape and punish. | ||||
Dizzy
|
Placeholder | |||
|---|---|---|---|---|
|
Placeholder | ||||
Eddie
|
Placeholder | |||
|---|---|---|---|---|
|
Placeholder | ||||
Faust
|
Placeholder | |||
|---|---|---|---|---|
|
Placeholder | ||||
I-No
|
Placeholder | |||
|---|---|---|---|---|
|
Placeholder | ||||
Jam Kuradoberi
|
Placeholder | |||
|---|---|---|---|---|
|
Placeholder | ||||
Johnny
|
Placeholder | |||
|---|---|---|---|---|
|
Placeholder | ||||
Justice
|
Placeholder | |||
|---|---|---|---|---|
|
Placeholder | ||||
Kliff Undersn
|
Placeholder | |||
|---|---|---|---|---|
|
Placeholder | ||||
Ky Kiske
|
Placeholder | |||
|---|---|---|---|---|
|
Placeholder | ||||
May
|
Placeholder | |||
|---|---|---|---|---|
|
Placeholder | ||||
Millia Rage
|
Placeholder | |||
|---|---|---|---|---|
|
Placeholder | ||||
Order-Sol
|
Placeholder | |||
|---|---|---|---|---|
|
Placeholder | ||||
Potemkin
|
Placeholder | |||
|---|---|---|---|---|
|
Placeholder | ||||
Robo-Ky
|
Placeholder | |||
|---|---|---|---|---|
|
Placeholder | ||||
Slayer
|
Placeholder | |||
|---|---|---|---|---|
|
Placeholder | ||||
Sol Badguy
|
Slippery bag of tricks | |||
|---|---|---|---|---|
|
Placeholder | ||||
Testament
|
Placeholder | |||
|---|---|---|---|---|
|
Placeholder | ||||
Venom
|
Placeholder | |||
|---|---|---|---|---|
|
Placeholder | ||||
Zappa
|
Placeholder | |||
|---|---|---|---|---|
|
Placeholder | ||||
