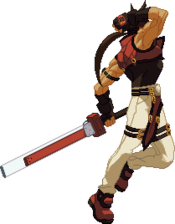
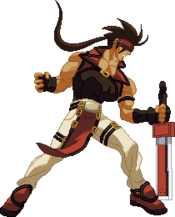
Overview
Guts Rating: 1
Defense Modifier: x1.00
Stun Resistance: 60
Strengths: Wild Throw(Command Grab), Hands down one of the best DPs in the game Volcanic Viper, Very Good 3 frame Anti Air(5K), Midscreen and corner BnBs are damaging.
Weaknesses:Can't deal with good zoning. Telegraphed blockstrings and overheads.
Movement Options: 1 Double Jump/Air Dash, Run-Type Dash
Move List
- See also: Sol Full Frame Data
Note for the Guard section in the tables:
- H: can block while standing
- L: can block while crouching
- F: can block while in the air only with Faultless Defense
- All: can be blocked however
- All attacks can be blocked with aerial Faultless Defense unless stated otherwise.
Note: Data in [] refers to Sol in Dragon Install. Note: Frame data for normals is as follows, x[x] where x is the move normally and [x] is the move in Dragon Install.
Normal Moves
| 5P Poke |
|---|
| 5K AA 5K to 50% |
|---|
| c.S Slash with little blockstun |
|---|
| f.S Footsie tool |
|---|
| 5H Great starter, fish for CH 5H |
|---|
| 6P Good move to beat other pokes out with |
|---|
| 6H Warning: Use as punish only |
|---|
| 5D Unblockable in America? |
|---|
| Dead Angle Attack Get offa me! |
|---|
| 2P Poke |
|---|
| 2K Use in Wild Throw setups |
|---|
| 2S Stops approaches if used well |
|---|
| 2H Relaunch for days |
|---|
| 2D I am one with the earth |
|---|
| j.P An AA option |
|---|
| j.K I've never seen anyone kick like this before |
|---|
| j.S Moon shaped slash |
|---|
| j.H Awkward hitbox |
|---|
| j.D TEYAH |
|---|
Throws
| Throw Headbutt |
|---|
| Air Throw Flame choke |
|---|
Special Moves
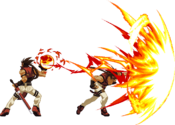
| Gun Flame 236P COME PLAY!? |
|---|
| Gun Flame Feint 214P Sike |
|---|
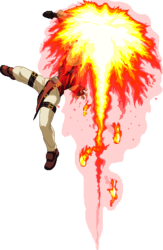
| Volcanic Viper 623S/H It's not your turn yet |
|---|
| Knockdown 214K during Volcanic Viper Not shown:Deceptive hitbox |
|---|
| Grand Viper 214S I am one with the earth once more |
|---|
| Bandit Revolver 236K or j.236K Important for knockdowns or loops for days |
|---|
| Bandit Bringer 236[K] SIT DOWN |
|---|
| Riot Stamp 214K Makes people hate themselves on CH |
|---|
| Wild Throw 623K Take a moment to think about what you've done |
|---|
| Sidewinder j.236H JAMA DA |
|---|
Force Breaks
| Fafnir 41236D I thought I told you... |
|---|
| Tyrant Rave (46D during Fafnir) TO SIT DOWN! |
|---|
Overdrives
| Tyrant Rave v.Beta 632146H Nothing much to say about this move besides unburstable kill |
|---|
| Dragon Install 214214S Please kill me if I use this move |
|---|
| Dragon Install Second 214214214214P+H Managing to use this move should automatically award a round |
|---|
Instant Kill
| Napalm Death 236236H If you got hit with this you deserved to lose the round |
|---|
Strategy
Tactics
As a rushdown character, you excel in close range. Therefore your gameplan is to get in, and stay in, where your normals reach and do their job. You can also play footsies and poke with your farther range normals. You want to be on the offense and use your lows and other normals in combination with Wild Throw to keep the opponent guessing. 5D should be used sparingly, as it ends your momentum if blocked, or have 50% tension to RC. 5K allows you anti air reliably, as well as Volcanic Viper. Since you generally don't need meter for your combos, you can feel free to use it to make unsafe plays safe, or for silly mixups. You can play Sol in a way where you punish your opponent for doing things, or you can play him in a very offensive, rushdown based way. Hell, you could even play him totally randomly, it's not like a Sol playing that way didn't win a major tournament.
- Basic Combos
Midscreen
5K>5S>2D>Bandit Revolver/Volcanic Viper+Knockdown
xx>5H>Grand Viper Clean Hit>SW Loop
xx>2D>Grand Viper Clean Hit>SW Loop (Jam and Bridget only)
5S>2S>5H
2K/2H/2D
dashing 2K>c.S>2D>Bandit Revolver or Volcanic Viper (character specific)
5S>5H/2H>Grand Viper Clean Hit>SW Loop
5K/2K>2H>Grand Viper Clean Hit>SW Loop
6H>Grand Viper>SW loop
6H>Gunflame>(jP)>jK>Sidewinder>SW Loop
5D>j.D(x2)>j.S>j.K>j.S>dj.S>j.D>Volcanic Viper+Knockdown
5D>j.D>dj.D>dash 2H>j.S>Sidewinder>SW Loop
25% Tension Midscreen
5K>5S>2369K FRC>jS>Sidewinder>SW Loop
Airdash jS>jD>Fafnir>SW loop
Gunflame FRC>Sidewinder Loop
Counter Hit Midscreen Combos
CH 5H>Instant Air Dash jS>jD>Sidewinder>SW Loop
CH 5H>Instant Air Dash jS>jH>land 5K/5S>2H/5H>Grand Viper Clean Hit>SW Loop
CH H Volcanic Viper during later active frames>run up 5K relaunch> SW Loop
CH 6P>Gunflame> Instant Air Dash j.H>Sidewinder>SW Loop
CH 6P>Bandit Bringer> Dash 5K/2K/c.S>2H>j.D>Sidewinder>SW Loop
25% Tension Counter Hit Midscreen Combos
5K/5S>TK Bandit Revolver(1) FRC>SW (may need to add an air normal depending on character)
CH 2D>Gunflame>Fafnir>SW Loop
CH 2D>Gunflame FRC> Empty Jump Sidewinder(Add air normals if necessary)>SW Loop
CH/ClH Fafnir>dash c.S>2H>j.S>Sidewinder>SW Loop
50% Tension Combos
xx>2D>Bandit Revolver(1) RC>Sidewinder>SW Loop
xx>2D>Bandit Revolver(1) RC>j.S>j.D/j.H>SW Loop
Volcanic Viper(1) RC>5K>2H>SW Loop
Volcanic Viper RC>Sidewinder>SW Loop
Sidewinder Loop>Tyrant Rave Beta
Corner Combos
5K/5S>6P>5K/5S>2H>Air normal(character dependent)>Sidewinder>SW Loop
5K/5S>6P>Gunflame>(jP)>jK>Sidewinder>SW Loop
5K/5S>6P>Gunflame FRC>Empty Jump Sidewinder>SW Loop
5K/c.S>6P>(delay)Gunflame>(delay)2H>j.D>Sidewinder>SW Loop
Dash 5K/c.S>6P>Gunflame>2H>j.D>dj.Sidewinder>SW Loop
Throw 5K(1)>j.P>j.K/j.S>Sidewinder>SW Loop (works on most characters)
Airthrow 5K/c.S>j.KSD/j.SKD>j.Bandit Revolver>5K(1)>2H>H Volcanic Viper
Sidewinder Loop
Once the opponent is launched you have options depending on where on screen you are and distance to the corner, and what character you're fighting. Most basic loop is forward jump jS>Sidewinder. Other variations include dash 2H>Neutral/Back/Forward Jump Sidewinder (note, not a TK SW), dash 2H>forward jump jH>Sidewinder, Empty Forward (neutral may work once on certain characters after reaching the corner) Jump Sidewinder. jP and jK>Sidewinder also work, but do less damage and prorate badly.
Bandit Revolver Loop
Though it does far less damage than Sidewinder Loop, Bandit Revolver is capable of building insane amounts of meter. Often it's used in conjunction with SW to finish combos and gain a little more Tension than usual. You need to Tiger Knee your Bandit Revolver in order to loop it, though the finishing blow is almost always a regular Bandit Revolver. Your main variations are going to be 5K(1), c.S, or 2H, with the opponent close to the ground, into a TK'd Bandit Revolver, with c.S against lighter, floatier characters, and 5K against mostly everybody else.
Alternate Color Chart
| P | K | S | H | D | |
|---|---|---|---|---|---|
| AC | |||||
| EX | |||||
| Slash | |||||
| #R |
 A.B.A [★]
 Anji Mito [★]
 Axl Low [★]
 Baiken [★]
 Bridget [★]
 Chipp Zanuff [★]
 Dizzy [★]
 Eddie [★]
 Faust [★]
 I-No [★]
 Jam Kuradoberi [★]
 Johnny [★]
- File:GGAC Justice Icon.png Justice [★]
- File:GGAC Kliff Undersn Icon.png Kliff Undersn [★]
 Ky Kiske [★]
 May [★]
 Millia Rage [★]
 Order-Sol [★]
 Potemkin [★]
 Robo-Ky [★]
 Slayer [★]
 Sol Badguy [★]
 Testament [★]
 Venom [★]
 Zappa [★]
Click [★] for character's full frame data
• HUD •
Controls •
Frame Data & System Data
• Movement/Canceling •
Offense •
Defense •
Damage/Combo System •
Gauges •
Misc


