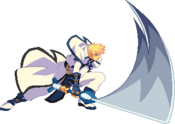
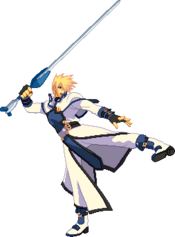
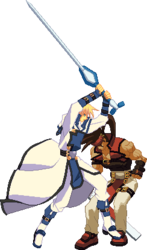
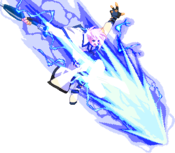
GGAC/Ky Kiske

From Dustloop Wiki
Ky Kiske


Overview

Guts Rating: 2
Defense Modifier: x1.03
Stun Resistance: 60
Strengths: Good pokes, all around fighter
Weaknesses: high damage combos not easily available
Movement Options: 1 Double Jump/Air Dash, Run-Type Dash

Move List

See also: Ky Full Frame Data


Note for the Guard section in the tables:

  • H: can block while standing
  • L: can block while crouching
  • F: can block while in the air only with Faultless Defense
  • All: can be blocked however
  • All attacks can be blocked with aerial Faultless Defense unless stated otherwise.

Normal Moves

5P
GGAC Ky 5P.png
just jump and mash this button, literally what is anyone gonna do about it
Damage Tension GB+ GB- Level Guard Cancel Startup Active Recovery Static Diff
8 1.44 3 8 1 HLF cCJR 5 4 6 ±0

This move is fairly fast (comes out in 5 frames), and is used primarily as a move to help chain together combos. It is also used as an anti air under the right circumstances.

Anti Air
For example, if the opponent is over your head and they're trying to cross you up, a mashing 5P a little can work as an anti air since its hitbox is well suited for this situation (next to Ky's head) and it's fast enough where if you mash it, Ky can generally turn around and hit the opponent if he ends up on the other side of you. Generally, use this move as an anti-air if the opponent is too close for you to do a 6P.
5K
GGAC Ky 5K.png
Damage Tension GB+ GB- Level Guard Cancel Startup Active Recovery Static Diff
12 1.44 3 8 1 LF CJR 5 8 7 -5
  • 80% proration
Zoning
This moves doesn't have much range, but it stays out for a surprising amount of time, and can stuff a few moves (like May's 3K and Robo's 2K, which are both moves that are really low to the ground and move forward).
Attacking
Despite the fact that it prorates 80%, it's a good combo starter simply because people get hit by it occasionally. You can also do the same thing like I mentioned in the zoning section and just pause your block string and do 5K > 5S > combo to try and catch the opponent sticking out a normal and netting a hit to a combo.
Okizeme
examples: empty jump, land, 5K; meaty 5K
c.S
GGAC Ky cS.png
Damage Tension GB+ GB- Level Guard Cancel Startup Active Recovery Static Diff
28 3.84 14 6 4 HLF CJR 7 2 18 -3

Used in combos and block strings, not much else. Does good damage and raises the guard bar a decent amount, but it's hard to use for anything else since it's difficult to time (you have to do it when the opponent is close to you, which is hard to do if they're not already in a combo or a block string). This can be used in a ground throw option select: press H~S and it will option select between a throw and a close slash.

f.S
GGAC Ky fS.png
Damage Tension GB+ GB- Level Guard Cancel Startup Active Recovery Static Diff
28 2.64 10 7 3 HLF CR 10 6 19 -11

Normally used in combos as well as for stuffing enemy jumps. Be careful using this against characters with sliding moves (like Ky's slide, sol's ground viper, etc.), as well as short characters (zappa can run under it and faust can crouch walk forward under it).

Zoning
One common tactic used is to get the opponent in teh corner, and spam this move and stun edges to trap the opponent in the corner while slowly chipping away at him. The 5S.f hits the opponent if they jump, the stun edge allows you to stay close to them after doing a normal hit since doing a projectile attack negates the pushback from normal attacks.
5H
GGAC Ky 5H.png
Damage Tension GB+ GB- Level Guard Cancel Startup Active Recovery Static Diff
42 3.84 20 6 5 HLF CR 10 6 12 +1
  • Staggers on CH (max 47F)
Attacking
This move leaves you at +1 frame advantage on guard so in theory it can be used as a move for resetting a block string and continue attacking, but I've never used it as such since I normally do a stun edge after this (others may disagree with me here though).
Combos
This move is also the primary move used to combo into a Stun Dipper since for some reason, Stun Dipper combos from 5H very easily.
Zoning/Poking
At the right distance (a little over a char length away) it's great at stuffing most moves and netting a counter hit. It's also great if you can hit the opponent with it when they're in the air since you can just run after them and to bait a tech (recovery).
6P
GGAC Ky 6P.png
Damage Tension GB+ GB- Level Guard Cancel Startup Active Recovery Static Diff
30 2.64 10 7 3 HLF CR 9 5 15 -6
  • 1-6 upper body invincibility
  • 7-13 above the knees invincibility
  • Blowback on CH, untechable for 60F on ground hit, 32F on air hit
  • 90% proration

This is Ky's main anti air. Good upper body invincibility, leads into some nice combos, and is a primary setup for his famous 6H loop since 6P causes blowback on counter hit and you can gatling from 6P to 6H. Use 6P on enemies jumping in, but be warned that it doesn't beat everything (for example, it loses to Slayer's j.H and to Baiken's j.S in a lot of situations). If you hit them as anti air, follow up with 5S.c > 2H > combo.

6K
GGAC Ky 6K.png
Damage Tension GB+ GB- Level Guard Cancel Startup Active Recovery Static Diff
36 3.84 14 6 4 HLF CR 17 2 11 +4
  • On air hit, plummets and knocks down

This move has some utility (depending on how tricky/technical you want to be), but the primary use of this is in combos and block strings. This move links to 5K/P and 2K/P, but you should be linking to 2K since it has the most range, does the most damage, and drops the guard bar the same amount as any of the other moves.
Another possible use is that because this move covers distance pretty quickly, some players do something like 6H > 6K in a block string to stay close to teh opponent and keep up pressure. This move leaves you at +4 on block so it's great if you can get the enemy to block it, but since it has so much startup and it brings you close to the opponent, don't do it on its own since the enemy can easily see it coming and hit you before the 6K even comes out.
Random note: if you hit an enemy in hte air with this, it drops them to the ground like a rock.

6H
GGAC Ky 6H.png
when will someone rip AC sprites?...
Damage Tension GB+ GB- Level Guard Cancel Startup Active Recovery Static Diff
34 3.84 20 17 5 HLF CJR 20 4 17 +2
  • Staggers on ground hit (max 50F)
  • Wall bounces on air hit, untechable for 45F
  • Inflicts 22F of blockstun on standing block

This move has considerable range, and it staggers for a long time on hit. However, this move is slow as hell, and the only it combos from a counter hit 6P. This move gatlings into any of the S and H moves (except 6H), and is jump cancelable as well. There's a few situations where you should stick out this move:

Okizeme
although it's backdasable, it scares a lot of people since if they get hit, you get to run in and either combo or do a mixup. If they keep backdashing it, try doing it a little later to catch them after the invincibility frames of their backdash. Also, try to do this from further away so you don't get hit by wakeup invulnerable moves like Volcanic Viper and some supers.
Combos
if you can hit them in the air with 6H and the distance is right (experiment and find out!), you can link a few 6Hs in a row! This isn't THAT hard to do, but you will have to practice to get it. This is known as the 6H loop.
Long range poke
Since this move has good range, you can hit the opponent wit hit from fairly far away, stopping any advancing enemy or giving you an opportunity to jump cancel 6H and advance. Enemies can see this coming from a mile away though, so don't do it all the time.
5D
GGAC Ky 5D.png
Damage Tension GB+ GB- Level Guard Cancel Startup Active Recovery Static Diff
15 2.64 8 20 3 HF HR 23 4 22 -12

Ky's dust has decent range and a lot of people seem to get hit by it (in America). A lot of times against other beginners, doing something simple like 5K > 2S > 5D will work. As you get better in the game (as well as your opponents), using dust will not be as effective since they will be able to block it. That is not to say they are useless at high level, but the occurance of them is much more rare (maybe once in a blue moon). One common way to hit with a dust is to get a counter hit 5H and gatling into 5D.

2P
GGAC Ky 2P.png
Damage Tension GB+ GB- Level Guard Cancel Startup Active Recovery Static Diff
8 1.44 3 8 1 HLF cCJR 4 4 5 +1
  • 80% proration

This comes out in 4 frames, and is Ky's fastest move. Please note that this move prorates to 80% and drops the guard gague quite a bit, so don't expect big combos off this.

Attacking
Also, it leaves you at +1 on block, so use this for tick throw setups. Another common use for this and 2K is to do 2P, run up 2P, run up 2P etc to push them into the corner or go for a tick throw.
Defense
This move is also great for getting out of pressure since it comes out so fast. If you see an opening in an opponent's attack string, do this move and try to just somehow gatling from 2P to 2D somehow and get the knockdown so you can start pressuring the opponent/ keep the pressure up.
2K
GGAC Ky 2K.png
Damage Tension GB+ GB- Level Guard Cancel Startup Active Recovery Static Diff
14 1.44 3 8 1 LF CR 5 4 6 ±0
  • 70% proration

A nice combo starter despite the fact that it prorates to 70%.

Attacking
It also leaves you at +0 on block so it's also another okay way to set up tick throws and what not. It can also be used as an OTG hit (Off The Ground) to nudge opponents towards the corner or to stop characters like Robo-Ky and Bridget from using their delay getup options.
Zoning
I sometimes use it to try and stuff enemy pokes and whatnot as well since it comes out fairly fast and can combo into 2S > 2D.
2S
GGAC Ky 2S.png
Damage Tension GB+ GB- Level Guard Cancel Startup Active Recovery Static Diff
25 2.64 8 7 3 LF CR 9 2 13 -1

This move has a lot of range for a low move.

Zoning and Pressure
Use it to keep the opponent away if they are running in at you. This move is also used in conjunction with 5S.f and stun edge in the \ corner to stop characters from doing low moves to avoid the fireball as well as possibly hitting the opponent if they are not blocking low.
2H
GGAC Ky 2H.png
Damage Tension GB+ GB- Level Guard Cancel Startup Active Recovery Static Diff
40 3.84 14 10 4 HLF CJR 12 4 20 -7
  • Floats on CH, untechable for 46F
  • On air hit, untechable for 19F and pulls in

This move is unique in that on air hit, it brings the opponent closer to you (like Jam's 2H and Potemkin's 2S). It's a great move that does good damage, and is jump cancelable as well. This move has 3 primary uses:

Combos
if you can get the opponent in the air right in front of you (like hitting the enemy with Greed Sever, a throw FRC, a Stun Dipper RC, and more), the most common things to do is 5S > 2H > JC > air combo or 5S > 2H > Vapor Thrust > Lightning Javelin.
Anti Air/Zoning
If you anticipate the opponent air dashing toward you, do a 2H to stop them dead in their tracks. If the 2H hits, jump cancel the 2H and do an air combo if it hits. If they block it, you can choose to just run in and start attacking them (or maybe even throw them!), or jump cancel the 2H and do a air block string (like mashing j.Ps until you both hit the ground).
Abare/Poking
Abare is a Japanese term meaning turning random hits into damage, and this is what 2H is good for. On ground counter hit (or if the opponent is trying to jump away), the opponent is launched into the air, so it's common to see Ky sometimes run up and do 2H to try and catch the opponent sticking out a move, net a counter hit, and follow up with an air combo. Please note that while the opponent is launched into the air, they can tech before they hit the ground (for both air hit and counter hit), so don't just stand there and wait for them to land... start comboing them!
2D
GGAC Ky 2D.png
Damage Tension GB+ GB- Level Guard Cancel Startup Active Recovery Static Diff
30 2.64 8 7 3 LF CJR 7 12 12 -10

This is a very good move with good range (further than 2S I believe), is jump cancelable, comes out pretty quickly, and is also active for a long time. Normally, this move is used to knock down the opponent at the end of a combo, but it is also useful for stopping characters from running in at you (like against Slayer's Mappa Punches) thanks all the active frames it has.
Another common use is after you knock down the opponent with this move, jump cancel it and immediately do an Air Charged Stun Edge (ACSE) or do an j.D as okizeme options.

j.P
GGAC Ky jP.png
Damage Tension GB+ GB- Level Guard Cancel Startup Active Recovery Static Diff
12 1.44 3 8 1 HA cCJR 6 6 6 --

Short range, and Use this in an air block string since you can gatling j.P to j.P and do this till they hit the ground. Also used in most air combos since it combos to and from j.S.

j.K
GGAC Ky jK.png
Damage Tension GB+ GB- Level Guard Cancel Startup Active Recovery Static Diff
16 1.44 3 9 1 HA CR 7 8 8 --

A great air vs. air move since it beats so much stuff in the air and leads to Ky's standard air combo. This is your go-to move under almost all air vs. air circumstances. Use it as a way to stop enemies air dashing in on you or to meet an opponent in the air already.

j.S
GGAC Ky jS.png
Damage Tension GB+ GB- Level Guard Cancel Startup Active Recovery Static Diff
28 2.64 10 8 3 HA CJR 7 3 21 --
Crossup
This move is unique in that it can cross up enemies. Just jump towards the enemy and depending on when you press S, you will cross up the opponent. The concept is exactly the same as Ken's jumping medium kick in Street Fighter 3: Third Strike. Practice it and get a feel for when/where to do it.
Attacking
This is also used to hit crouching enemies, then link into a 2K or something, then ground combo. One common mixup tactic used is to jump, wait until close to the ground, air dash, and hit the opponent with j.S > j.H
j.H
GGAC Ky jH.png
Damage Tension GB+ GB- Level Guard Cancel Startup Active Recovery Static Diff
38 2.64 10 7 3 HA CR 13 4 23 --

This move hits a little above, a little below and a lot in front of Ky.

Zoning
Since j.H covers a lot of space in front of Ky, do it to stop enemies from randomly air dashes in.
Okizeme
I've seen it used on okizeme as a mixup (between doing a j.H and a whiffed j.H into a standing kick).
j.D
GGAC Ky jD.png
get fucked idiot better player always wins
Damage Tension GB+ GB- Level Guard Cancel Startup Active Recovery Static Diff
40 2.64 0 11 3 all -- 38 13 29F Total --
  • Knocks down on ground hit
  • Floats on air hit, untechable for 64F
  • Additional 11F landing recovery
  • In CH state until 16. Remains in place
  • Counts as a projectile
  • If Ky is hit, j.D's hitbox disappears immediately

Ky creates an electric cross in the air that stays out for a little bit. Knocks down the opponent on ground hit and disappears if Ky gets hit. This move also freezes Ky in the air as he does the move and the cross doesn't go active until a little bit afterwards, so don't do it haphazardly. Mind the ground recovery of this move, however, if you double jump after doing this, you don't suffer from the ground recovery! Use j.D as:

Zoning
do it far away from the opponent to stop them from advancing since getting hit by it means you get to do a big damage combo.
Okizeme
Knock the opponent down, jump forward, lay a cross, and jump up or back to do a cross cross-up! It's difficult to do, and I can't explain it with words very well, but believe me, it can be done! Don't do this on short characters like Zappa and Faust though, since they will not get hit by it and you might be get hit/thrown.
Dead Angle Attack
GGAC Ky 6P.png
Damage Tension GB+ GB- Level Guard Cancel Startup Active Recovery Static Diff
25 2.64 10 7 3 HLF R 12 3 24 -13
  • Total length of animation: 38F
  • 1-14 invincible
  • 15-32 throw invincible
  • Wallbounces on hit, untechable for 28F
  • 50% proration

Ky does his 6P animation, and it wallbounces. You might be able to combo after this, but they need to be near the corner. Also of note, DAAs can't kill the opponent and when their life is low, the DAA does 0 damage.


Throws

Ground Throw
GGAC Ky throw.png
Damage Tension GB+ GB- Level Guard Cancel Startup Active Recovery Static Diff
60 4.00 -- 6, 7 -- 43 dots RF -- -- -- --

Basic ground throw. Has FRC when the sword touches the ground. Prorates damage by 50% so you can only do small amounts of damage off this.

Air Throw
GGAC Ky airThrow.png
throws the opponent behind Ky. Wallbounces.
Damage Tension GB+ GB- Level Guard Cancel Startup Active Recovery Static Diff
60 4.00 -- 6, 7 -- 88 dots -- -- -- -- --

Basic air throw that throws the opponent behind Ky. Can wallbounce and lead to a short combo. Prorates damage by 50% so you can only do small amounts of damage off this.


Special Moves

Stun Edge
236S/H
GGAC Ky StunEdge.png
Version Damage Tension GB+ GB- Level Guard Cancel Startup Active Recovery Static Diff
236S 40 2.75/4.80 0 7 3 All F 10 -- Total: 41 -5
236H 40 2.75/4.80 0 6 4 All F 13 -- Total: 52 -9

Your normal street fighter styled fireball, so use it as such, meaning use this move as a zoning tool, a block string finisher, and sometimes at mid range, a poke. Keep in mind that a lot of enemies can IAD over the fireball to punish you, so don't be too predictable. On air counter hit and if they're close enough, it's possible to run in 2P > 5S > 2H > combo (or maybe even without the 2P).

FRC point
is as Ky's cape touches his legs. The FRC is used as a way to continue pressure after something that normally has a lot of recovery, similar to how you sometimes see Sol run up, do a block string, Gunflame, FRC, run up, repeat.
Note that the FRC point on the S Stun Edge is sooner than the H Stun Edge.
Charged Stun Edge
236D
GGAC Ky CSE.png
Damage Tension GB+ GB- Level Guard Cancel Startup Active Recovery Static Diff
20×3 2.50/2.40×3 0 6×3 4 All F 43 -- 49 +18

Big 3 hit fireball that goes across the screen horizontally but disappears before it goes full screen. So if you and your opponent are on opposite sides of the screen, the CSE will disappear before it hits him.

FRC point
is on release (right as Ky flicks his sword away). This move is used as an okizeme option and as a way to start pressuring the opponent.
CSE-FRC glitch
The FRC point for this move is BEFORE the move comes out, so if you jump right after you FRC, the CSE will follow you into the air since it's programmed to come out whever you are, thus creating a CSE that goes across the screen, but high off the ground. To do this, just hold up when you're doing the CSE, then FRC. Use this trick to catch air dashers. This same glitch is used to also to get 2 fireballs on the screen at the same time since although technically, you can only have 1 fireball on the screen at a time, but if you do CSE FRC, then do a second fireball before the first one comes out, you can have 2 fireballs out at the same time. Also note that if you do CSE, then the opponent jumps over you, and then you FRC, the fireball will automatically turn to face the opponent!
Air Stun Edge
j.236S/H
GGAC Ky AirStunEdge.png
Version Damage Tension GB+ GB- Level Guard Cancel Startup Active Recovery Static Diff
j.236S 33 1.50/2.40 0 7 3 All F 15 -- Total: 59 --
j.236H 33 1.50/2.40 0 6 4 All F 13 -- Total: 63 --

Air fireball. S Version goes at about a 30 degree angle and H Version goes at about a 60 degree angle.

FRC point
is right after the fireball comes out. Resets jump options after you FRC it. If you don't, you basically can't do anything until you hit the ground (and there's some recovery once you hit the ground too). Note that this FRC on the S Versions is later than the H Version.
Air Charged Stun Edge
j.236D
GGAC Ky ACSE.png
Damage Tension GB+ GB- Level Guard Cancel Startup Active Recovery Static Diff
20×3 2.50/2.40×3 0 6×3 5 All F 31 -- Total: 63 --

This fireball does 3 hits like CSE and goes at about a 30 degree angle from straight down.
FRC point is on release (right as Ky flicks his sword away). Note that this FRC DOES NOT reset your jump options like the other 2 air fireballs.
The infamous 'shtkn strat' as named by Mike Z: j.236D FRC negative edge a j.236H! If you do this right, Ky will effectively do 2 air fireballs that cover a big part of the playing field. While you won't do much damage off this, I use it to keep the opponent away and catch unsuspecting enemies that try to air dash or jump at me.

Vapor Thrust
623S/H air OK
GGAC Ky VaporThrust.png
You should mostly stick with the H version
Version Damage Tension GB+ GB- Level Guard Cancel Startup Active Recovery Static Diff
623S 32 2.50/4.80 10 7 3 HLF R 9 3 32 + 13 Landing -34
623H 36 2.50/4.80 10 10 3 HLF R 11 4 30 + 13 Landing -33
j.623S/H 32 2.00/4.80 10 7 3 All R 11 3 13 Landing --

A poor reversal special that easily whiffs on opponents doing low attacks. If you must perform a reversal DP, use the H version; the S version isn't invulnerable to the first active frame, so it is possible to trade with the opponent's attacks.
This attack is mostly used as combo filler/ender since the followup attack wallbounces and allows for extended combos midscreen or knockdown. Also note that the S version launches the opponent higher than the H version, so you will need to adjust combo timing appropriately.

Lightning Javelin
H after Vapor Thrust
GGAC Ky LightningJavelin.png
Damage Tension GB+ GB- Level Guard Cancel Startup Active Recovery Static Diff
30 1.00/2.40 20 12 5 All RF 17 6 12 Landing --

Wallbounces the opponent. Normally knocks down, but can also combo afterwards.

FRC Point
is right when Ky is about to perform a backflip.
Stun Dipper
236K
GGAC Ky StunDipper.png
The two hits won't combo if you do it too close to the opponent.
Damage Tension GB+ GB- Level Guard Cancel Startup Active Recovery Static Diff
12, 32 2.00/4.80, 7.20 11, 10 6, 7 4, 3 L , HLF RF 8 14(7)3 26 -15

First hit is low, second is mid. FRC point after the first hit finishes. Practice this! It's a great way to force the opponent to deal with a mixup since after this, you can run up throw, run up continue pressure, run up overhead, whatever. Be wary that the 2nd hit does not always combo from the first hit. This is distance dependent. However, if the first hit is a counter hit, the 2nd hit is guaranteed to hit them. A lot of opponents like to burst on this move, but if you FRC it, you can block the burst and punish them! Another common use for this move is to do a combo that ends in slide then RC, then run up and do 5S.c > 2H > air combo. Another kinda gimmicky use is to do slide, FRC into GS for an overhead which which will surprise first time victims, but they'll catch on pretty quickly.
FRC point is right after the first hit ends.

Greed Sever
214K
GGAC Ky GreedSever.png
Damage Tension GB+ GB- Level Guard Cancel Startup Active Recovery Static Diff
30 2.00/6.00 14 18 4 HA R 18 15 5 + 11 Landing -14

Overhead, also crosses up opponents if done next to them. It's pretty easy to see coming, so don't rely on this too much. It's also good as a zoning move if you can predict that the opponent's going to air dash in at you or stick out a poke with a decent amount of recovery. It can also hop over some low hitting moves as well as over Sol's gunflame! This move gives a lot of tension if it hits, so it's useful for that, but don't use it for big damage since this move prorates 85%. On counter hit, it bounces them really high and is completely untechable, so don't be too surprised if this happens.

Lightning Strike
222H when opponent is down
GGAC Ky LightningStrike.png
Trading oki for damage. Usually not worth it
Damage Tension GB+ GB- Level Guard Cancel Startup Active Recovery Static Diff
30 2.00/-- -- 30 3 -- -- 14 1 53 --

Can be used to deal damage after knocking down the opponent. Normally the damage dealt is minimal due to damage scaling, but it can be used after short combos that end in knockdown to make it worth the sacrifice in oki.

This attack can whiff if the attack is inputted too late, in which you are stuck in recovery for quite a while.


Force Breaks

Lightning Sphere
214D during Charged Stun Edge
GGAC Ky Orb.png
Damage Tension GB+ GB- Level Guard Cancel Startup Active Recovery Static Diff
24×3 -/1.20×3 0 6×3 5 HLF -- 6 34 4 +8

A great attack that must be FDed in the air and leads to great damage.

Combos
2D > Lightning Sphere > c.S > 2H > air combo is a common combo that works on most characters. You must perform this much closer and quicker than usual to get it to work on characters like ABA and Robo-Ky.
Defense
This can work as an anti-rushdown tool because it covers a lot of space in front of Ky. If the opponent blocks, then great! It's +8, but it pushes your opponent far away, so you get a chance to change the momentum of the match if you can force your opponents to block this.
Corner Lockdown
You can use it when your opponent is the corner as a safe blockstring starter because this attack is +8 on block and the pushback is reduced since the opponent is in the corner.
Charge Drive
46D during Lightning Sphere
GGAC Ky ChargeDrive.png
Practically useless.
Damage Tension GB+ GB- Level Guard Cancel Startup Active Recovery Static Diff
130 -- 20 6 5 All R 7+13 15 35 -31

Nearly useless. It does decent damage and is unburstable, but you can most likely do more if you do a standard combo after Lightning Sphere. Use it for a kill, but not much else.

Stun Raising
j.214D
GGAC Ky jD.png
Looks just like j.D, but has a lot of special properties.
Damage Tension GB+ GB- Level Guard Cancel Startup Active Recovery Static Diff
18×2 -/1.20×2 0 7×2 3 HLF -- 45 161 Total: 22F --

A version of Ky's j.D that lasts a long time and remains active even if Ky gets hit. This attack must be FDed in the air.

Zoning
Use this to control space and to effectively block off a section of the screen for the opponent and to stop the opponent from rushing you down.
Okizeme
Lay this down on a knocked-down opponent to limit their wakeup options. Because the cross will stay out no matter what, the opponent must think twice before most reversal options. Do note that one common counter to this is to throw Ky on wakeup, so be sure to space it correctly (or be in the air) when the opponent wakes up.

Overdrives

Ride the Lightning
632146H
GGAC Ky RTL.png
Version Damage Tension GB+ GB- Level Guard Cancel Startup Active Recovery Static Diff
ground 36×5 -- 10×5 7×5 3 HLF R 10+1 42 20 -24
air 36×5 -- 10×5 7×5 3 All R 10+1 42 3 on landing --

The ground one can be used a a wakeup reversal, the air one can be used in combos if done as a low air juggle. Overall, these attacks as not used much.

Sacred Edge
236236P
GGAC Ky SacredEdge.png
Damage Tension GB+ GB- Level Guard Cancel Startup Active Recovery Static Diff
27×5 -- 3×5 6×5 5 All F 5+3 -- Total: 36F +13

Can be used in combos after sweep and while it is +13 on block, it's most likely more meter-effecient to use Lightning Sphere for that purpose.

FRC Point
right after launching the projectile
Semi-Unblockable Glitch
Perform a CSE > FRC > Sacred Edge. The CSE will continue to go forward during the Sacred Edge's super flash. If the opponent is not blocking pre superflash, the CSE will hit them (assuming they are within range).

Instant Kill

Rising Force
236236H, after entering IK Mode
GGAC Ky IK.png
Damage Tension GB+ GB- Level Guard Cancel Startup Active Recovery Static Diff
Fatal -- 20 -- -- All -- 9+8 3 45 -29

Ky's Instant Kill is actually pretty fast and far-reaching. This makes it useful if you are able to Bear Stun the opponent or if you are fighting ABA and can force her to transform out of Moroha Mode via knockdowns.


Strategy

Offense

Defense

Combos

Alternate Color Chart

P K S H D
AC File:Ky normal p.png File:Ky normal k.png File:Ky normal s.png AC Ky normal h.png AC Ky normal d.png
EX File:Ky ex p.png File:Ky ex k.png File:Ky ex s.png File:Ky ex h.png File:Ky ex d.png
Slash File:Ky slash p.png File:Ky slash k.png File:Ky slash s.png File:Ky slash h.png File:Ky slash d.png
#R File:Ky reload p.png File:Ky reload k.png File:Ky reload s.png File:Ky reload h.png File:Ky reload d.png

Navigation