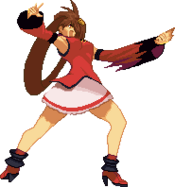
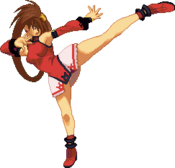
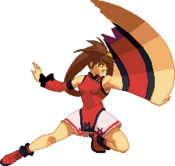
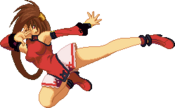
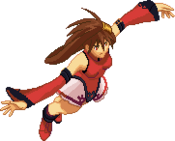
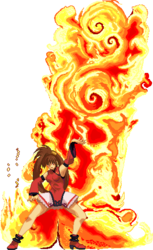
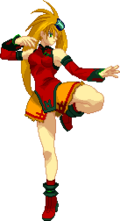
GGAC/Jam Kuradoberi

From Dustloop Wiki
Jam Kuradoberi

Overview

P.W.A.B. Report #7403: Though she is a chef, subject is one of the world's most proficient wielders of Ki force. Of the five occult arts, the field of 'Ki' energy is the least explored and understood. Most of its users are of Eastern descent, aiding the theory that heredity plays a role. Subject's life goal is to discover new and useful cuisines. Control will not be an issue. Although she poses little threat in and of herself, her capture is still desirable. Therefore, she should not be taken lightly.

Guts Rating: 3
Defense Modifier: x 1.06
Stun Resistance: 65
Strengths: High damage potential, Very fast and strong normals, good movement options, Force Break Hyappo Shinshou
Weaknesses: Lower than average defense, extremely short range
Movement Options: 1 Double Jump/Air Dash, Run-Type Dash

Move List

See also: Jam Full Frame Data

Note for the Guard section in the tables:

  • H: can block while standing
  • L: can block while crouching
  • F: can block while in the air only with Faultless Defense
  • All: can be blocked however
  • All attacks can be blocked with aerial Faultless Defense unless stated otherwise.

Normal Moves

5P
GGAC Jam 5P.png
One of the fastest jabs in the game, with 3 Frame startup.
Damage Tension GB+ GB- Level Guard Cancel Startup Active Recovery Static Diff
12 1.44 3 9 1 HLF cCJR 3 3 4 +3

Standard standing jab. Fastest 5P in the game, with a 3 frame startup. Wiffs on a lot of crouching characters, and some standing characters like Zappa. Can catch people trying to jump out or anti-air after a parry.

5K
GGAC Jam 5K.png
Hits low, comes out fast, + on block, what more do you want?
Damage Tension GB+ GB- Level Guard Cancel Startup Active Recovery Static Diff
12 2.64 5 7 2 LF CR 5 4 7 +1

Hits low, comes out fast, gatlings into most of Jam's standing normals, great poke to keep your opponent respectful. Because of the way Jam stands, this move has a deceptively large range. Note that throwing it out randomly is risky, as Jam is in CH state until the move fully recovers, and the move will prorate 90% when used in combos. That said, still a good way to keep people honest. Use the deceptive hitbox to smack them! This move is very useful in the Wall Loop versus certain characters, as it's the only way to catch them right before they hit the ground to keep the loop going. Depending on the matchup, you'll either omit this or use 2S instead however. Special note: 5K is listed as a level 2 attack, but has a unique hitstop of 6 frames. This makes it harder for your opponent to Dead Angle Attack against it!

c.S
GGAC Jam cS.png
Short range, elbow to the gut, only really used when you can't f.S
Damage Tension GB+ GB- Level Guard Cancel Startup Active Recovery Static Diff
28 2.64 10 7 3 HLF CJR 6 5 10 -6

Good anti-air, but suffers from the fact that Jam has no range at all on it. You pretty much have to be right under the opponent for this to work, though it almost always will win. Grounded, if you're within range for this move to come out and hit, you would likely be using 5K or a similar move that comes out faster, unless you wanted to avoid the proration. Using this before f.S makes hitconfirming into TK Ryujin MUCH easier, however.

Good combo filler as well for grabbing the opponent from a wallstick/wallbounce to set up a wall loop. Also jump cancellable making it an air combo starter.

f.S
GGAC Jam fS.png
Farthest standing poke, good to keep people from running in.
Damage Tension GB+ GB- Level Guard Cancel Startup Active Recovery Static Diff
30 2.64 10 7 3 HLF CJR 6 5 10 -1

One of your farthest pokes, which means it's still within other character's close-range zone. Also a decent AA if they're jumping from far away. Should always cancel this with a JC or 2D though to make it safe. Against characters Millia height or taller, you can TK Ryujin for more damage. While this hitconfirm is tough, it is one of Jam's strongest combos and a very threatening starter. Using this as a poke can easily lead into a wall loop this way. In combos, this is your best move to JC from when they're in the air. Occasionally you'll have to JC from c.S, but that depends on the matchup and how far away they are from you.

5H
GGAC Jam 5H.png
The last hit drags the opponent in on hit or block, and is + on block.
Damage Tension GB+ GB- Level Guard Cancel Startup Active Recovery Static Diff
24×3 3.84×3 14×2,20 6×3 4×2,5 HLF CR 13 3(3)3(3)3 15 +1

Cranks up the opponent's guard bar tons if they block it, but shouldn't be used on its own. Jam pretty much becomes a target and any character that outranges her will get an easy CH. If it is blocked, you can go into very punishing mix-up. You can do a special cancel, or go into 6H and run pressure from there. The move is somewhat burst safe/safe against some Dead Angles near the end of the move however, as it has frames of invincibility on frames 22-24 and 34-36, in addition to being in low stance from frames 25-33. On hit, the opponent is forced to crouch, and the last hit will drag in the opponent, making it easier to gatling to other attacks. Also a tricky tick-throw setup. It's +1, and most people will be focusing on blocking 6H, a move you commonly gatling to after this. In addition, the vacuum drags them to be within grab range!

6P
GGAC Jam 6P.png
Not that great of an anti-air, really.
Damage Tension GB+ GB- Level Guard Cancel Startup Active Recovery Static Diff
18×2 2.64×2 10,14 7,6 3,4 HLF CR 7 1(10)3 12 +2

Despite its upper body invincibility from frames 1-20, this move isn't really that useful as an anti-air. The hitbox on this move is very horizontal, meaning it won't catch any but the lowest air dashes to hit. In addition, the CH stagger only triggers if the opponent is grounded. Instead, this is a very good "anti-poke". Characters like Ky and Venom have very far reaching f.S attacks that don't move their hitbox forward much, and this move can beat those attacks and counter your opponent for a nice follow-up, as this move forces stagger on CH on either hit. It can be quite scary in blockstrings as well, canceling into 2P and back into itself from there, along with being + on block. Finally, the long upper body invincibility allows you to go through many fireballs. Parrying a meaty Charged Stun Edge and going into a 6P is a basic strategy against Ky.

6K
GGAC Jam 6K.png
Should normally hold 4 after a dash so you don't accidentally get this instead of 5K.
Damage Tension GB+ GB- Level Guard Cancel Startup Active Recovery Static Diff
16,26 2.64,3.84 10×2 7×2 3 HLF CJR 6 4(6)8 20 -14

Probably one of Jam's least useful normals. Only real use for this seems to be to use after a blocked 5H, and from there you have to cancel this move to avoid the horrible frame disadvantage. Note that on hit, the opponent is forced to stand, changing their hitbox.

6H
GGAC Jam 6H.png
Not pictured: the hitbox extending about 1.5 character lengths out.
Damage Tension GB+ GB- Level Guard Cancel Startup Active Recovery Static Diff
28 3.84 20 6 5 HLF R 18 6 10 +5

The ultimate palm, it's great in neutral and amazing in blockstrings. The range is much much MUCH farther out than just where Jam strikes, and has a very small bit behind her where it can still land. Not useful for crossups, but due to its throw invincibility for the first 23 frames along with large amounts of strike invincibility through the move, it is great as a meaty. If your opponent is forced to block this, it essentially lets you do whatever you want. +5 is enough to make an airtight blockstring into 5K, or you could prepare frametraps with other moves, or link to 2D or 6P and start mix-up. On hit, the opponent is forced to stand, and if they are hit in mid-air they cannot tech for 22F. The followup can be delayed until the 32nd frame this move is active, and can come out as soon as the 19th frame. Unfortunately the large startup limits its usefulness in places where you may think it would be great. In blockstrings, better players will attempt to slashback against it if it is used predictably, stopping your momentum. In addition, while it is grab invul, it is still slower than many other character's 6H or 5H, meaning that it can be risky to use against a tick throw setup. However on CH this move is lethal, gaining even more hitstun, making links easy.

H Follow-Up
GGAC Jam 6HH.png
Sticks your opponent to the wall, very satisfying to hit with.
Damage Tension GB+ GB- Level Guard Cancel Startup Active Recovery Static Diff
58 3.84 20 6 5 HLF R 10 7 23 -11

The follow up to 6H is a great combo tool, forcing wall stick and where most of the damage from the wall loop comes from. It is possible to use this as delayed as possible after a blocked 6H to try and get a CH, but remember this move is very unsafe on block and easily punished. Note this move has some upper body invincibility like 6H, through the first 7 frames, though this move should very rarely be used outside of a combo. After a hit, the opponent is stuck to the wall for 24 frames and cannot tech for 48F.

5D
GGAC Jam 5D.png
A very hard to see 5D, makes up for its slow startup.
Damage Tension GB+ GB- Level Guard Cancel Startup Active Recovery Static Diff
16 2.64 8 20 3 HF R 24 4 12 -2

Jam can cancel any standing normal that doesn't use the H or D buttons into her 5D, so you can always use it as a threat. Her dust is very hidden in its animation, making it more surprising when it does come out, though it is unsafe on block and rather slow so don't get predictable. Fortunately Jam's Dust combos and Impossible Dust combos are fairly easy and do a good amount of damage, so this move is very rewarding when it does hit.

Dead Angle Attack
GGAC Jam 2S.png
Has the same animation as her 2S, only always knocks down.
Damage Tension GB+ GB- Level Guard Cancel Startup Active Recovery Static Diff
20 2.64 10 7 3 Any R 13 6 12 -4

Uses the same move animation of 2S. More useful or not depending on the matchup; indispensable against A.B.A. due to its knockdown, for instance. Impossible to combo from without an RC; though the force 50% proration ensures that a combo would not hurt that much. Note that Jam is invincible completely through the first half of the move, then through the second half she is only throw invincible.

2P
GGAC Jam 2P.png
Actually slower than her 5P, but still very useful.
Damage Tension GB+ GB- Level Guard Cancel Startup Active Recovery Static Diff
6 1.44 3 8 1 HLF cCR 4 2 4 +4

Standard crouching poke. Slower than 5P, but doesn't wiff on crouchers and is +4 on block. Good for tick throws, and can safely stuff out approaches from the ground. Prorates 90%.

2K
GGAC Jam 2K.png
This along with 2D are her farthest pokes, and this is very fast.
Damage Tension GB+ GB- Level Guard Cancel Startup Active Recovery Static Diff
8 1.44 3 8 1 LF cCR 5 3 9 -2

Decent crouching poke, though any time you use this you should immediately do a 2D afterwards for knockdown or to start a combo with 236S~K. Prorates 80%. Best times to use this is when your 2D just isn't fast enough.

2S
GGAC Jam 2S.png
Great move for scaring opponents as it's deadly on CH.
Damage Tension GB+ GB- Level Guard Cancel Startup Active Recovery Static Diff
26 2.64 10 7 3 HLF CR 6 5 9 +0

The best threat Jam has, deceptively far range, safe on block, and with a CH the opponent is staggered, enabling you to combo into a FB Hyappo Shinshou. Against some characters you can space this right to shut them down on the ground, as it comes out fast enough to stuff most other normals and pokes. Prorates 80%. Note the hitbox extends out to be a bit past her palm; that's about where you want to be hitting.

2H
GGAC Jam 2H.png
Probably her best AA without parrying.
Damage Tension GB+ GB- Level Guard Cancel Startup Active Recovery Static Diff
20×2 3.84×2 14,14 6×2 4 HLF CR 9 4,4 25 -12

Jam's best anti-air against crossups if you're not parrying. Great in combos when your opponent is above you, but has almost no horizontal range. Hitting your opponent out of the air with it drags them toward you and makes them unable to tech, setting them up perfectly for a 6H. Outside of using it as an AA or as a combo tool though, it's rather bad, and will likely get you punished if you whiff with it.

2D
GGAC Jam 2D.png
Slightly slower than 2K but leads to more damage.
Damage Tension GB+ GB- Level Guard Cancel Startup Active Recovery Static Diff
28 2.64 8 7 3 LF CJRF 6 4 16 -6

Amazing sweep, coming out fast and boasting the best range out of all of Jam's normals. Unsafe on block however, so you have to JC into something to make it safe. After landing it you can 236S~K to combo if you have a Ryujin Card charged, though the timing varies on the matchup. FRC timing: 1-6. Using the FRC properly can make your blockstrings and pressure VERY scary, as it allows you to essentially cancel any move that gatlings into 2D early.

j.P
GGAC Jam jP.png
Can mash this on a jump-in to try and cover it, but it's nowhere near as good as other character's.
Damage Tension GB+ GB- Level Guard Cancel Startup Active Recovery Static Diff
11 1.44 3 8 1 HA cCR 5 4 14 --

Standard jumping jab, though really lacks any sort of range against grounded opponents. Mostly used to put two j.S attacks together in a combo. Possible to mash while IADing in, though it's easily beaten back my most character's AA.

j.K
GGAC Jam jK.png
Combo filler.
Damage Tension GB+ GB- Level Guard Cancel Startup Active Recovery Static Diff
14 1.44 3 8 1 HA CR 5 8 11 --

Farthest reaching air normal, though really quite poor at that. Used as combo filler into j.D.

j.S
GGAC Jam jS.png
If your opponent is above you, they lose.
Damage Tension GB+ GB- Level Guard Cancel Startup Active Recovery Static Diff
28 2.64 10 7 3 HA CJR 4 5 9 --

Finally, the good air normals. j.S has an amazing hitbox above Jam, and comes out extremely fast, basically meaning if you're below the opponent in the air and you use this, you'll probably win. Many Jam players will simply use this as they jump to prevent the opponent from jumping over them, and to control their airspace. You can cancel move this with a double jump to hitconfirm into a combo, or cancel into a j.P and back into this if you need them higher. Note this move forces the opponent to float, even on ground hit, so it is possible to hit a grounded enemy with this, land, and continue a combo. While this is damaging, the horizontal hitbox of this move is very small, meaning you'll have to be right next to your opponent.

j.H
GGAC Jam jH.png
Crossup hitbox
Damage Tension GB+ GB- Level Guard Cancel Startup Active Recovery Static Diff
35 2.64 10 7 3 HA CR 7 10 16 --

Good move that hits all around Jam, making for crossups when you're low to the ground. If you hit a grounded opponent with this and you're low enough, you can land and combo into a 2P or a 5K and get knockdown. Against an aerial opponent, the best thing you can do after this is a Ryujin. Using after an IAD and hitting deep with it is a combo starter, and it's something many new players like to use, but it's also easy to punish by simply blocking and grabbing as soon as Jam lands. To prevent this, hitconfirm into j2K when they block this, pushing them away enough and making it safe.

j.D
GGAC Jam jD.png
Great on CH, decent air-to-air poke.
Damage Tension GB+ GB- Level Guard Cancel Startup Active Recovery Static Diff
16,28 2.64×2 10×2 7×2 3 HA CR 7 3(4)6 16 --

Mostly needs to be spaced and used so the second hit will land, hopefully for a CH. Even without a CH, the second hit acts like j.S and you can land and continue a combo. Awkward hitbox, but used in combos to go into Gekirin. Note that Jam has 4 additional frames of recovery after landing if she uses this move. A very good combo starter, but hard to use.

Throws

Throw
GGAC Jam throw.png
"Ohohohohoho!"
Damage Tension GB+ GB- Level Guard Cancel Startup Active Recovery Static Diff
60 4.00 -- 6×2 -- 43dot FR -- -- -- --

Depending on the matchup, you have several options without FRCing your grab. Most normal weight characters you can simply Super Jump and lead a combo into gekirin to reset them low to the ground, but lower weight characters you'll have to Super Jump and attack with air normals. FRCing this however sets the opponent up right in the air right in front of Jam, for a simple and easy combo set-up. It also sets the throw proration to 70%, though the grab does not actually deal damage when FRC'd.

Air Throw
GGAC Jam airThrow.png
Thigh neck-snap go!
Damage Tension GB+ GB- Level Guard Cancel Startup Active Recovery Static Diff
60 5.98 -- 6,7 -- 88dot -- -- -- -- --

Out of the corner, you should be landing and charging a card immediately after air grabbing. It is possible to wall loop the opponent if you air grab them into the corner, though the 50% proration will result in a very low damage loop.

Special Moves

Breath of Asanagi
22K, S, or H
GGAC Jam 22K.png
The animation is the same no matter what button you press.
GGAC Jam 22KIcons.png
Damage Tension GB+ GB- Level Guard Cancel Startup Active Recovery Static Diff
-- -- -- -- -- -- -- -- -- Total:57 --

Jam focuses her Ki and charges up one of her three kick moves; which move is charged depends on the button press. Pressing K buffs her Ryujin, S buffs Gekirin, H buffs Kenroukaku. You can store up to 3 charges for each special at max. Note that Jam does not gain a charge until the last frame before she is able to move again, so you need to commit to this move. The best time to use this is after a knockdown, but depending on the player you may be able to charge during neutral. Charging on knockdown sacrifices oki, but makes Jam's hitconfirms that much more punishing, hopefully making your opponent more scared of you.

Ryujin
236K air OK
GGAC Jam 236K.png
"WHOOOOTCHAAAAA~!"
Version Damage Tension GB+ GB- Level Guard Cancel Startup Active Recovery Static Diff
Ground 50 2.50/8.40 20 6 5 HLF R 17 6 25+11 Landing -23

Jam's flying kick, coupled with an aura of Ki in the shape of a dragon head. This move straight up hurts if it hits, if it's blocked you're going to be punished. This version should never really be used, instead use a TK Ryujin to use the aerial version, as it comes out much faster and has the same properties on hit.

Version Damage Tension GB+ GB- Level Guard Cancel Startup Active Recovery Static Diff
Aerial 52 2.00/7.20 20 6 5 All R 9 6 11 Landing --

As stated above, the Aerial version comes out much faster than a grounded Ryujin, making this overall the superior version to use. Like the original, however, it is still very unsafe when blocked. Both this and the grounded version, however, wall bounce on CH, enabling you to combo after a CH. Though this move should not really be used outside of combos, it is possible to use the TK Ryujin to reposition yourself around the field. IAD Ryujin effects

Version Damage Tension GB+ GB- Level Guard Cancel Startup Active Recovery Static Diff
Charged 66 --/12.00 20 15 5 All R 11 16 17 Landing --
  • 1-9 invincible to strikes
  • Airborne from frame 1 on
  • Causes wall stick on hit (untechable for 80F, stick lasts 35F)
  • Consumes one charge stock on frame 1.


What hurts more than a Ryujin? A charged Ryujin! All three kicks can be canceled into their charged version if the appropriate card available, and you have made contact on hit or block with another kick or Force Break Hyappo Shinshou. A charged version can also be used after Jam's 236S~K, even if the move does not connect. Jam's charged Ryujin does a bit more damage, though the best part of this move doesn't come from the damage; this move causes wall stick for 35F, and forces untechable time for 80F. Being able to use this in combos is great, as it lead to a free, highly damaging Wall Loop, from which you could get knockdown and charge another Ryujin card to do it again! This will probably be the kick you're charging the most, for this reason.

Gekirin
214K air OK
GGAC Jam 214K.png
A flaming axe kick. Very useful.
Version Damage Tension GB+ GB- Level Guard Cancel Startup Active Recovery Static Diff
Ground 42 2.00/4.80 10 7 3 HA R 19 13 3+10 Landing -9

Jam jumps in the air and flies back down with a flaming axe kick, being one of her standing overheads. Similar to Ryujin, you'll probably want to TK this most of the time, as not only does that makes the move safer and enables more combo opportunities on hit, but also means the move comes out slightly faster. Startup to hit a crouching opponent with the same hitbox as Sol is 21F.

Version Damage Tension GB+ GB- Level Guard Cancel Startup Active Recovery Static Diff
Aerial 38 1.50/3.60 10 7 3 HA R 17 13 10 Landing --
  • Causes ground bounce on hit (untechable for 35F)
  • Has a minimum height requirement

Jam's aerial Gekirin, acting the same as her grounded version with one key difference; on hit the opponent is bounced into the air, letting you combo afterwards. The important part to this move is using it during an IAD, which is covered later. Using this without the IAD is relatively safe however, as it pushes you far enough away from the opponent to avoid most counter attacks. IAD Gekirin effects

Version Damage Tension GB+ GB- Level Guard Cancel Startup Active Recovery Static Diff
Charged 21×2 -/4.80×2 10×2 11 3 HA R 12 3,4,6 12 Landing --

The Charged version of Gekirin can be activated at any time the charged Ryujin could be activated, so long as the appropriate card is available. This version comes out much faster than either of the other versions, hits multiple times, and floats on hit for easy comboing. The disadvantage of course, is that a card must be available and it is still not safe on block. Probably still a good kick to charge, if you for some reason do not need to charge Ryujin, though not used nearly as much.

Kenroukaku
623K air OK
GGAC Jam 623K.png
Not as good as Volcanic Viper, but it'll do.
Version Damage Tension GB+ GB- Level Guard Cancel Startup Active Recovery Static Diff
Ground 14×4 2.00/2.40×4 10×4 3×4 3 HLF R 7 4,4,5,10 20+6 Landing -36

Jam pulls a Terry Bogard and imitates his Rising Tackle. Jam's DP/Reversal, it is invincible to strikes on frame one, lasting 3 frames into the active frames. On hit, the opponent is knocked up into the air with Jam, causing untech time for 22F. While it's not nearly as good as Volcanic Viper, it's still a rather decent DP, anti-airing against crossups very well and having plenty of invincibility. Still, like any DP, Jam is very vulnerable if this is blocked, so ensure you have either 50% meter to RC or, alternatively, burn a charged Gekirin or Ryujin to cancel into and make it safe!

Version Damage Tension GB+ GB- Level Guard Cancel Startup Active Recovery Static Diff
Aerial 12×3 1.50/1.80 10×3 3×3 3 All R 5 4,4,5,10 6 Landing --

Unlike Gekirin and Ryujin, the aerial version of this move isn't used much. Having almost no invincibility, only on frames 2-3, the biggest advantage of this move is what happens when you IAD Kenroukaku. Otherwise, it acts the same as a grounded Kenroukaku, only instead this only hits 3 times. IAD Kenroukaku effects

Version Damage Tension GB+ GB- Level Guard Cancel Startup Active Recovery Static Diff
Charged 15×7 -/2.40 10×7 4×7 3 All R 5 2×6, 11 11 Landing --

This move has much more invincibility than the normal Kenroukaku, From frames 1-17, though as you cannot use it on its own like the other charged kicks, that seems rather pointless. It is still very unsafe on block, so using it after a blocked or wiffed 236S~K is unwise as well. Jam hits 7 times during this move and the untech time is increased to 60F, and while this move does quite a bit of damage, you should really be charging either Ryujin or Gekirin first.

Bakushuu
236S
GGAC Jam 236S.png
Can go under a lot of projectiles and get in fast.
Damage Tension GB+ GB- Level Guard Cancel Startup Active Recovery Static Diff
-- 2.00/- -- -- -- -- -- -- -- Total: 46 --

Jam's command dash, in which she bursts forward extremely fast. You should never allow this to go through the whole animation before canceling into a followup, as Jam is in CH state until she finishes the animation, and she stalls for quite a while after the dash. Note though, that the move can go under many fireballs and similar height moves, as the move is invincible above the feet starting on frame 8, and starting on frame 24 this changes to being a low stance. Frames 6-24 are available to cancel into a follow-up.

Mawarikomi
236S~P
GGAC Jam 236SP.png
"Over here!"
Damage Tension GB+ GB- Level Guard Cancel Startup Active Recovery Static Diff
-- -- -- -- -- -- -- -- -- Total: 26 -.

Pressing P during Bakushuu makes Jam slide to one side of the opponent. You can use this to get through moves that would normally beat out Hyappo Shinshou. If Jam is close enough to the opponent upon using this, she can pass through the opponent and cross them up during the first 14 frames. In addition, she is invincible above the feet, letting her pass through many moves. Using this in a blockstring is a good, if gimmicky way to cross up your opponent when they're scared into blocking. You can also slide through and grab, though overusing this will make your grabs very obvious and likely get countered or broken.

Ashibarai
236S~K
GGAC Jam 236SK.png
Only way to hit low out of Bakushuu, sometimes worth it to get out of anti-puffball pokes.
Damage Tension GB+ GB- Level Guard Cancel Startup Active Recovery Static Diff
30 -/7.20 8 -- 3 LF R 10 8 22 -16

The K follow-up to Bakushuu. Starting on frame 10 and lasting until frame 31, Jam is in a low stance. On hit, this move causes stagger. However, the move is in CH state until the end of recovery and very unsafe on block, meaning you should focus on using this move in combos. With a kick charged through Breath of Asanagi, you can cancel into the kick from frames 3-38, making it one of your important hitconfirms.

Hyappo Shinshou
236S~S
GGAC Jam 236SS.png
The infamous Puffball.
Damage Tension GB+ GB- Level Guard Cancel Startup Active Recovery Static Diff
50 -/7.20 14 7 5 HLF R 18 3 15 +1

The S follow-up to Bakushuu, also affectionately known as the "Puffball". Has a huge hitbox around Jam as it comes out, although you cannot combo from this version without an RC, except on CH. Still great for catching people jumping out or if you need to space a puffball right. If you have meter though, you should be more inclined to use the Force Break version of this move, as without CH this move cannot do much on its own, and prorates 75%. Useful in block strings however as long as you can scare them into blocking, as it is +1 on block.

Senri Shinshou
236S~H
GGAC Jam 236SS.png
Jam dashes twice before this, crossing up if she's close enough.
Version Damage Tension GB+ GB- Level Guard Cancel Startup Active Recovery Static Diff
No Crossup 50 -/14.40 14 6 5 HLF RF 24 3 12 +4

This follow-up to Bakushuu is performed when H is pressed, and when you are spaced to not pass through the opponent. The frames where Jam does pass through are frames 2-11, if she does not, she continues to dash until she is right next to the opponent and unleashes a puffball of Ki, similar to Hyappo Shinshou. While this move takes longer to start up and is more obvious than Hyappo Shinshou, it is more safe when blocked at +4, and has an FRC point from frames 21-24, right before the attack comes out and continuing into its first active frame. However spacing this attack is hard as Jam will always get as close as she can, which is actually helpful if this move is FRC'd, leading to an almost unreactable grab. The final advantage to this move is that unlike Hyappo Shinshou, you can combo off of a Senri Shinshou. The move will always cause wall bounce with plenty of untechable time, meaning you can dash in and attack with a f.S and continue into a combo. However using it stops Jam's low profile from Bakushuu, meaning you can get hit with fireballs and such.

Version Damage Tension GB+ GB- Level Guard Cancel Startup Active Recovery Static Diff
Crossup 50 -/9.60 14 6 5 HLF RF 29~ 3 15 +1

This version of Senri Shinshou only happens if you pass through the opponent with the first 11 frames of pressing H during Bakushuu. Jam slides past and quickly reverses direction, during which she is in a low stance for 6F. Like the normal version of Senri Shinshou, this also wall bounces, though you're not able to combo from this version without a CH. This move is rather gimmicky, as any decent player will easily react to the crossup and is it only +1 on block, unlike the normal Senri Shinshou's +4. If you land a CH however, this move can lead into stun as it has a dizzy modifier of x1.5. Note that the startup listed in frame data is variable; the closer Jam is while activating this attack, the sooner it comes out.

Hochifu
Parry)
GGAC Jam Parry.png
A green flash will appear when you successfully parry an attack.
Damage Tension GB+ GB- Level Guard Cancel Startup Active Recovery Static Diff
-- -/4.00 -- -- -- -- -- -- -- -- --

See this section for more details.

Houeikyaku
j.2K
GGAC Jam j2K.png
Good for spacing and beating out weaker anti-airs.
Damage Tension GB+ GB- Level Guard Cancel Startup Active Recovery Static Diff
16,10×n 1.50/3.60,1.8×n 14×n 6,8×n 4,1×n HA R 10 Till Landing 6 Landing +8

Jam's dive kick. If the initial dive lands, Jam continues falling while doing multiple bicycle kicks on the opponent as she falls. Fairly decent in blockstrings as an overhead if you do it as soon as possible, coming out on the 14th frame, though unable to combo off of without an RC. If it is blocked this move becomes a bit more useful, but note that if you use this move too close to the opponent you can be easily grabbed upon landing.

Choujin
236P, j.236P
GGAC Jam 236P.png
Flip!
Version Damage Tension GB+ GB- Level Guard Cancel Startup Active Recovery Static Diff
Ground -- 0.50/-- -- -- -- -- F -- -- Total: 41 --

Flip! Jam jumps into the air, flipping over and reversing direction. Jam is immediately considered airborne as soon as you execute this move, and considered in CH state in the first 5F. Through the first 17F, Jam can pass through the opponent. Starting on frame 20, Jam can perform any action other than blocking, with or without FD. Note that holding forward or back during the move will slightly influence Jam's velocity, making her go a further or shorter distance. Helpful for ambiguous crossups! FRC timing: 6-8. FRCing this move makes Jam cover more horizontal distance through the air, instead of flipping upwards. It can be a scary way to cover distance, leading into crossups and high/low mix-up, but it can easily be mashed out of. Also be careful of getting air thrown! Note that this move reverses your inputs, so if you perform this move facing right, you will be considered to be facing left until you land again. Remember this while using this move during pressure! Also, you can use this move out of Bakushuu! Just input 236P during the dash and Jam will flip out of it. This is the only way to avoid some moves like Grand Viper once you've started the dash, and is a decent way to keep your opponent on edge.

Version Damage Tension GB+ GB- Level Guard Cancel Startup Active Recovery Static Diff
Aerial -- 0.50/-- -- -- -- -- F -- -- 2 Landing --

Air Flip! Acts the same as the grounded version, though Jam is in CH state for longer, the first 18F. The FRC timing changes as well, to frames 6-8. In addition, she can perform any action other than blocking, with or without FD, starting on frame 22. The momentum Jam has when FRCing this is different than the momentum she has from a grounded version since she started with a jump, making it more vertical than horizontal. Note that this move cannot be used after a double jump, but can be used during and after an air dash. This is important, as it allows Jam to use an IAD Choujin during mix up. More can be read under the IAD Choujin effects.

Force Breaks

Breath of Asanagi - Kyoku
22D,
GGAC Jam 22K.png
Same animation as 22X, only with a force break flash.
Damage Tension GB+ GB- Level Guard Cancel Startup Active Recovery Static Diff
-- -- -- -- -- -- -- -- -- Total: 64 --

This move has the same animation as the normal Breath of Asanagi, only with a Force Break flash added. Starting on frame 5, Jam can gain up to two charges. Pressing K will give you a Ryujin card, S will give you a Gekirin card, and H will give a Kenroukaku card. As soon as the button is pressed, Jam gains the card, even if she is hit out of the move. The first two button presses you make will determine what charges you gain, though you cannot overcharge.

Hyappo Shinshou
236S~D
GGAC Jam 236SS.png
Everyone fears this.
Damage Tension GB+ GB- Level Guard Cancel Startup Active Recovery Static Diff
65 -- 14 6 5 HLF R 14 3 15 +1

Jam's hugely threatening Force Break. Completely strike invincible starting on frame 3 and lasting until frame 13, and forcing wall stick on hit and untech for 60F, this move is the perfect setup for the Wall Loop. Due to how well this move can punish others and how well it can be used in combos, you should always try to have at least 25% meter for this attack. Note though that despite the power of this attack, it prorates 85%. Between this and the meter usage, you should not spam this move during combos, unless you are going for a dizzy. This move has a dizzy modifier of x1.25. During blockstrings, should you want to use a puffball, use the normal version and only use this if you feel you can catch your opponent trying to poke out. Having the threat of this is usually enough to keep an opponent scared into blocking.

Overdrives

Renhoukyaku
632146H
GGAC Jam 632146H.png
Super puffball. Not nearly as useful as the force break.
Damage Tension GB+ GB- Level Guard Cancel Startup Active Recovery Static Diff
18×9 -- 6×9 3×9 2 Any -- 10+0 After Super Flash 32 17 -7

Jam holds out her palm and creates a giant ball of Ki, hitting a large area in front of her and even covering above and behind her a bit. This super can be used as a reversal as it comes out on frame 0 and is invincible starting on frame 1, and knocks down the opponent right in front of Jam due to the vacuum effect. However, on block the vacuum effect still activates, which causes a problem as Jam is very punishable and you cannot RC this move. In general, this super is almost never used, as the risk is not worth the reward, and you have better things to spend 50 meter on.

Choukyaku Hououshou
632146S
GGAC Jam 632146S.png
Jam rushes forward before this, delivering a multi-hit super into a rising phoenix.
Damage Tension GB+ GB- Level Guard Cancel Startup Active Recovery Static Diff
20,9×10,40,80 -- 20 6,2×10,6×2 5,3×10,5×2 HLF R 7+0 After Super Flash 21 24 -26

Jam's other reversal super, this one a fair bit more useful than Renhoukayku. Jam dashes forward on activation, useful for catching people trying to bait out a reversal with a backdash. On hit, Jam unleashes a barrage of attacks, ending with a launching kick and a flashy explosion. If the initial dash is blocked, the rest of the strikes do not come out. Note that if the opponent is in the air when they are hit, Jam continues her attack, though it is possible for the opponent to fall out of the attack and for Jam to be left vulnerable. Should all the attacks land, the opponent is knocked down right in front of Jam.

Geki: Saishinhou
236236H
GGAC Jam 236236H.png
Sadly, the flame pillar doesn't have a hitbox.
Damage Tension GB+ GB- Level Guard Cancel Startup Active Recovery Static Diff
50,70 -- 20×2 6×2 5 HLF RF 1+2 After Super Flash 3,3 36 -20

Jam uppercuts her opponent, the first hit staggering them and the second sending them flying into the air. While this move is not a reversal super, it can still be used on wakeup to beat meaty attacks as it is invincible to strikes for the first 8 frames. However on block it is extremely unsafe, though it does contain an FRC point on frames 3-4; just after the first hit lands but before the second hits. This can be useful with meter to burn, as while it does cost 75% meter, the first hit forces proration of 150% and with stagger allows you to combo into a Ryujin or another hard-hitting move. The second hit can also be comboed from, though it forces proration of 75%.

Tousai Hyakuretsuken
64641236P+K
GGAC Jam 64641236PK.png
You're already dead.
Damage Tension GB+ GB- Level Guard Cancel Startup Active Recovery Static Diff
1×100 -- 20 1,0×99 5,1×99 Any -- 7+29 After Super Flash 14 27 -22

Jam's joke super, this one is unique in that it costs 100% Tension. Jam does her best Kenshiro impression as she dashes forward, and if this hits she launches 98 punches into the opponent followed by one last uppercut, for a total of 100 hits. Each hit deals 1 damage, so the move is not affected by defense or guts modifiers, but you should really never be using this move in a serious match.

Instant Kill

Gasenkotsu
In IK mode: 236236H
GGAC Jam IK.png
TEN! JOU! TEN! KA! YUI! KA! DOKU! SON!
Damage Tension GB+ GB- Level Guard Cancel Startup Active Recovery Static Diff
Fatal -- 20 -- -- Any -- 11+6 After Super Flash 12 22 -15

Jam's Instant Kill. Somewhat useful, as Jam can easily dizzy her opponent depending on the matchup, and a few good CH Ryujin or Puffballs will likely do the job. She gets into her IK state after 54F of the animation, making it possible to launch this attack before they can recover from stun. Still very, very rarely useful, even if it is strike invincible on frames 12-16. Special note: The 8 characters Jam shouts, when read as a sentence, translate to "I am Heaven and Earth, I am all that is Holy." Fitting for a move named "Narcissism".


Strategy

Generally speaking, Jam is a very rushdown character. Her strengths lie in her speed and power, able to turn any random hit into large damage and punish with fast, high-priority moves. Her pressure is also top-notch through strong normals and her IAD crossups. Her major weakness over all of this however, is her lack of range versus the rest of the cast. Jam can very easily be out spaced if you don’t know what you’re doing or act reckless. Learn to read your opponent, and learn how to train them into expect one thing while you do another. This is all fairly general advice, though without it you’ll end up outspaced, punished, and frustrated.

Your main strategy when playing Jam should be working yourself to get your opponent in your threat zone, and scaring them to try to get out or press a button, then punishing them for doing so. Frame traps are one of Jam's strongest tools, along with knowing your spacing and range of your normals. Once you get that first hit, you should always focus on getting knockdown to charge a card. After charging you are that much more threatening.

Offense

Jam has 3 main ways of poking her way into lethal range. f.S is one of her longest-range pokes, is jump and special cancelable, and is -1 on block. You can hitconfirm this into a TK Ryujin for knockdown or big damage should you have a Asanagi-K stored. f.S is also a strong anti-air, and useful if your opponent jumps. However, she has 2S as her strongest poke. It lacks range, so you should be comfortable with how far it extends and know its maximum range. Fish for Counter Hits with it, as it is hugely punishing. From a CH 2S you can do almost anything. Finally, it’s safe on block, being +- 0.

5K and 5P are also good pokes, though their range is more limited. Both are safe on block, 5K being +1 and 5P being +3, and come out very fast, 5K having 5f startup and 5P having 3f startup. It’s important to note that 5P wiffs on most characters while crouching, and on certain characters like Zappa or Faust while standing.

Each of Jam’s 3 Kicks along with Choujin change their properties when performed during an instant air dash. Gekirin, Choujin and Kenroukaku become much more useful because of this, though IAD Ryujin is not as important to master. These IAD effects are importantly to know how to utilize if you ever want to press your offensive as Jam, as they make her mix up much scarier and harder to guess out of.

IAD Ryujin

j.66236K - Rather than flying across the screen, Jam slowly moves forward while losing some altitude. If this is blocked you die. Can also be performed by doing j.6236K. Doing this is fairly useless, as it is so incredibly risky, but on a CH Ryujin makes the opponent bounce off the wall, and you'll oftentimes land in the perfect position with plenty of time to do whatever you want to combo the opponent.

IAD Gekirin

j.66214K - Jam’s kick goes straight down with this. Used for crossups, but is unsafe on block when you cross up with it. Hitconfirming off of it can easily lead into a wall loop or at the very least good damage. Still not very safe no matter how tight you make it, so don’t be too predictable. Practice this until you can do it as fast as you can.

IAD Kenroukaku

j.6623K - Jam goes downwards instead of up during this. Very useful for crossing up the opponent, plus a move with invincibility that goes downward is hilarious. Probably the most difficult to perform. Against lightweight opponents, you can land and pick them off the ground with a grounded normal, comboing from there. Getting lazy or sloppy with inputs can result in a IAD Ryujin however, which as discussed is very unsafe.

IAD Choujin

j.66236P - Jam’s flip goes downwards, she gains no vertical lift. Can be used as a somewhat gimmicky mixup, crossing up and attacking low instead of hitting with a high, or FRCd and attacking with a high crossup.

Mix Up and Pressure

Okay, so now you’ve managed to work your way into your effective range on the opponent as Jam. Now you have to work on cracking their defense. This can be one of the most frustrating things to do as any character, as you’ve worked hard enough as it is just getting to the point where you can hit the guy, well now you have to work even harder.

Jam’s mix-up, fortunately, is pretty strong and her abare (the ability to turn any random hit into damage) is extremely good. In addition, you have very strong normal, and the movement to stay on your opponent. Jabs as frame traps are very effective, and her 6H is a ridiculous +5 on block. If you can scare your opponent into blocking even more, you can use IAD to continue pressure, and mix-up with IAD Gekirin, or IAD Choujin. Mawarikomi and Senri Shinshou FRC are good ways to grab your opponent while they are scared into blocking, though doing this too often will result in throw breaks and punishes.

Finally, know your opponent. Knowing if your opponent, for example, likes to mash DP while under pressure should be a huge factor on your mix-up. Read your opponent, learn their habits, and train them to make mistakes.

Okizeme

On your first knockdown, you should focus on charging a card. This should always be what you try to do whenever you do not have a card stocked, because not only does it make your next hit lead into amazing damage (as long as you can hitconfirm!), it also is possible to continue offense after a knockdown + charge. You'll find it hard to do much more than run in and press with 2S or f.S, and you'll have to be careful of reversals still, but few opponents have options fast enough to beat it.

If you are not charging a card, Jam has some very strong left/right and high/low game off of a knockdown. Some basic ones are using IAD Gekirin, using Choujin into IAD Gekirin or normal Gekirin, Choujin FRC into a j.H or land 5K, IAD Kenroukaku, Choujin into IAD Kenroukaku. With 50 meter, you can also use Houeikyaku as an instant overhead, RCing to combo into knockdown or, if they block, RC land 5K, RC IAD j.H j.2K, or RC IAD Choujin 5K or Grab. With fast hands, you could even do j.2K RC IAD Kenroukaku. Very scary and hard to block! It is important to note though that many of these require strong execution, and while the opponent may not know where you are going to be attacking from, it does become quite obvious that you're attempting strong okizeme, meaning some opponents may just mash a reversal, so be careful!

After a wall loop (covered later), you can pry them off the wall with 2H or 236SH, then use the untech time to start your mean corner okizeme. Going into 236S 236P is your starter, and from there you can IAD Kenroukaku to mix them up by going behind them, IABD to attack from the front with Gekirin, or use a 236S~P starter to start behind them, and then use IAD Kenroukaku, or IABD j.D, or even IAD Choujin! It's very easy to get back into another wall loop with just a little meter from here too! Some characters with wide hitboxes like Potemkin can even be crossed up after a 236S~P with a TK Gekirin, something even more mean.

Defense

Due to Jam's lack of range, you will likely find yourself feeling like you're on the defensive any time you're not on the offensive. Fortunately, Jam's amazing normals and ability to parry make her a threat even while she is forced to passive. Poking out of blockstrings with 5K, 2P, or 2S is possible, and Kenroukaku is a fairly good DP that is immune to crossups. Don't underestimate her Dead Angle Attack; though it lacks much range it knocks the opponent down, instantly flipping the momentum of the match. Of course, this all applies against an opponent that is actively up close and pressuring you, while being on the defensive against a zoner like Dizzy feels much different.

Against a character trying to zone you, you simply have to know how they're controlling the space and be able to weave your way into a threatening position. Bakushuu is able to go under many fireballs, and Senri Shinshou FRC allows for a quick, if somewhat unsafe and costly way in. Parrying projectiles meant to cover a jump-in or other rush in is nice, and lets you have more time to react to what they're doing. In some situations, TK Ryujin can even be useful, covering up distance nicely. Thanks to Jam's amazing normals and damage output, once you do get into a threatening range against most characters attempting to zone you, you'll have the offensive flow.

Parrying

Parrying (or Hochifu) is integral to playing Jam, as it’s one of her strongest defenses. Listed in the move list as 546, parrying is done by being at neutral before pressing back, then moving to forward, within 8 frames of an attack hitting you. Parrying can only be done versus attacks that can be blocked high, and on a successful parry, you will recover much faster than if you had normally blocked the attack. In addition, on a failed parry attempt, you cannot attempt again for 15F. This does not apply to a successful parry attempt, allowing you to parry multi-hit moves.

Parrying is best done when your opponent does an obvious jump-in, or while waking up. Note many opponents are aware of Jam’s parry and will play much more carefully versus her than against other characters due to it.

During a successful parry, you can input attacks during the hitstop. The last attack input will come out at the end of the hitstop. Doing this, you can get easy punishes on opponent’s attacks. 2S is very strong, as its CH stagger state is amazing. 5P can be done if you need speed to beat out the opponent’s next attack. 5S is a strong anti-air after a parry, and can lead to an easy air combo. A grab can also be done if your opponent is very close, though it is not optimal.

Burst Cancelling

An advanced techinque using the parry. Immediately after a successful parry, burst and cancel with Faultless Defense. Your invincibility from the burst carries through even after the burst itself is cancelled, making it very safe. A burst is obviously needed to do this, and you should be 100% certain you can do it, otherwise you will lose a burst and likely be punished.

Combo Theory

It should be noted that lots of Jam’s combos rely on the position on the screen and who she is fighting against. The best advice one can give is to simply go into training mode and learn her basic combos, both midscreen and in the corner. You should not be simply memorizing the combo, but how it works and when it is useful. In a real match, after hitconfirming you should be able to “feel” what to do next and where it will put them. There’s no way to learn this other than by playing a lot.

Some general tips however, are that after a wall stick, a wall loop may be possible should you be close enough. Also, should your opponent be in the air in front of you, a f.S is your best option to JC from and combo from. 6H to 6P is a tough link, but possible should you memorize the timing of 6H's recovery. Also, the combos below may change depending on your opponent! Millia, for instance, you can combo straight into a Ryujin (236K) after a 2D. In another example, Chipp is very hard to combo with 2D 236S K 236K.

Basic Combos


Ground Combos
  • Stuff, 5H(3), 6H xx 6P, 5H(3), 6H H (or link 6H to 2D)
  • Stuff, 2D, 22K/S/H
  • Stuff, fS, 2369K
  • Stuff, 5H(3), 236SD, 236SH, Wall Loop (25 METER)
  • CH 2D, 236SD, 236SH, Wall Loop (25 METER)
  • 236SD, 236SH, c.S, f.S, JC, Air Combo (25 METER)
  • Stuff, 2D, 2369K (v. Millia, May, Faust)
  • Stuff, 5H(3), 236SK, charged 236K, Wall Loop (ASANAGI-K)
  • Stuff, 2D, 236SK, charged 236K, Wall Loop (ASANAGI-K)

Air Combos
  • j.S, j.P, j.S, JC, j.D(2) j.214K
  • j.K, JC, j.D(2) j.214K
  • j.S, JC, j.S, j.H, j.236K
  • j.K, JC, j.D(1) j.236K

Counter Hit 236SS, 236SH
  • CH 236SS or 236SH, dash, c.S, f.S, JC, Air Combo
  • CH 236SS or 236SH, dash, 2H(1), 6H H
  • CH 236SS or 236SH, dash, 2H(1), 6H xx c.S, f.S, JC, Air Combo
  • CH 236SS or 236SH, 236SD, dash, Wall Loop (25 METER)
  • CH 236SS or 236SH, 236K, charged 236K, 5K, Wall Loop (ASANAGI-K)
  • CH 236SS or 236SH, 236SD, 236SH, c.S, 2H(1), 236SD, 236SH, hold 4, 2H(1), 6H H (50 METER)
  • CH 236SS or 236SH, 236SD, 236SH, jump back, j.D(1), j.236K, charged 236K, 5K, Wall Loop (25 METER, ASANAGI-K)

214K Starter
  • 214K xx 2P, 2H(1), 6H H
  • 214K xx 2P, 2H(1), 6H xx c.S, f.S, JC, Air Combo
  • TK 214K, dash f.S, JC, Air Combo
  • TK 214K, 2H(1), 236SD, 236SH, Hold 4, c.S, JC, j.D(1), 236K, charged 236K, land, 5K, 2H(1), 6H H (25 Meter, ASANAGI-K)
  • TK 214K, 6H H, Wall Loop (Corner Only)
  • TK 214K, charged 214K, 2H(1), 6H H (ASANAGI-S)
  • 236SK*, charged 214K, 2P, 2H(1), 6H H (ASANAGI-S)
    • 236SK can either hit, or be canceled into "Charged 214K" early to create a mix-up.
  • IAD 214K, c.S, f.S, JC, Air Combo
  • IAD 214K, 236SD, 236SH, Wall Loop (25 METER)

Jump-Ins
  • j.H xx 5K, 2D
  • j.H xx 6P, 5H(3), 6H H
  • j.D(2) xx 2H, 6H xx f.S JC Air Combo
  • j.D(2) xx 2H, 236SD, 236SH, Wall Loop

Anti-Air
  • AA c.S, JC, Air Combo
  • AA c.S, 2H(1), 6H xx c.S, JC, Air Combo
  • AA 6P, 2H(1), 6H H
  • AA 5P, 2H(1), 236SD, 236SH, c.S, f.S, JC, Air Combo
  • AA 5P, 2H(1), 236SD, 236SH, jump back, j.D(1), j.236K, charged 236K, 5K, Wall Loop (25 METER, ASANAGI-K)

Dust Combos
  • 5D, SJC, j.H, JC, j.H, JC, j.H, JC, j.S, JC, j.H, 236K
  • 5D, SJC, j.P, j.214K, c.S, f.S, JC, Air Combo
  • 5D, SJC, FD, j.H, land, 4, c.S, 2H(1), 6H xx c.S, JC, Air Combo
  • 5D, SJC, FD, j.H, land, 4, c.S, 2H(1), 236SD, Wall Loop (25 METER)
  • 5D, SJC, FD, j.H, land, 4, c.S, 2H(1), 236K, charged 236K, Wall Loop (ASANAGI-K)

Throw Starter
  • Throw, j.S, JC, j.S, 623K
  • Throw, SJC, j.D(2), j.214K
  • Throw, SJC, j.S, j.H, 236P (Go for an Airgrab reset, or do an IAD j.623K if they don't tech)
  • Throw, FRC, c.S, JC, Air Combo (25 METER)
  • Air Throw, 5K, Wall Loop (Corner Only)

Other Combos
  • j.2K, RC, 6P, 5H(3), 6H H (50 METER)
  • j.2K, RC, 5K, 2D (50 METER)
  • IAD 623K, 5K, 2H(1), 6H xx c.S JC Air Combo
  • IAD 623K, 5K, 2H(1), 236SD, 236SH, Wall Loop (25 METER)
  • 236236H, dash, 2H(1), 6H xx c.S, JC, Air Combo (50 METER)
  • 236236H, 236K, charged 236K, 5K, Wall Loop (50 METER, ASANAGI-K)

Wall Loop

Jam's Wall Loop (also known as "The Loop", "6H Loop" or "Jammin") is one of her largest sources of damage, which is saying quite a bit from a character that can knock off 50-60% of an opponent's life easily without it. It is probably one of her most important threats, and helps keep your opponent scared of moves that lead into it and from getting into the corner in general.

The Loop

2H (1) 6H H dash x N is the most simple loop. Using this is likely to only get a max of 2 repetitions, unless the opponent was knocked higher into the air before starting the loop. After the 3rd rep of this version, the opponent can tech out. In order to get more reps, and therefore more damage, you need to add in an attack after the 6H H. Most characters can be juggled with either a 5K, 2P, or 2S. Which move you need to use depends on which character you are fighting, how long you've been looping them, and how close they are to the ground. Note that the basic loop does not work on Sol Badguy, and so learn the specific loop against him (2H[2] Delay 6H H dash 2K xN)

A tip: If you want to play it safe and don't trust yourself to get the full loop, end it after the second rep. You'll get knockdown or a chance to start mix up, and in most situations it's near 50% of their life anyway.

There is no "best" universal loop, as it all depends on the situation and which character you are fighting. The best advice one can offer is to get into training mode and attempt the loop from varying starting points on the field, different heights the opponent sticks to the wall at, and different characters to fight against. From there, you can get a handle on which variation to use.

Openers

Many of Jam's moves lead into the loop, but the major requirements are that the opponent be near the corner, and either be in the air or be stuck to the wall. Common openers include IAD 214K, 236S D, and Asanagi-K 236K. It is also possible to combo into it off of an AA CH 6H or an AA 2H. Note that no matter where they are on the screen, if they are in the air you can do a 2H (1) 236S D and likely loop from there.

Ending the Loop

After a successful Wall Loop, you have many options to end it. After a two-rep loop, end it with 6H H 22x to charge a card safely, and still have some time for oki. Note that depending on what you did into the loop however, they may be able to tech out, making this unsafe. With meter, you have more options. After three reps, ending in 6H H, you can use a FB Hyappo Shinshou to reset the wall stick and height, before using 2H. Hitting them out of the air with 2H pulls them away from the wall slightly, and from there you can special cancel into Mawarikomi or Choujin, and use an IAD Gekirin, 5K, or other mix up, leading into another combo near the corner. Being able to do this makes your wall loops that much more scary.

Other Tips and Advice

6H -> 6P Link

Many new players find this link to be quite hard to do, as it can be quite unforgiving at being a 3 frame link. There are two tricks to it though, one to learn, and one to preform. When learning, it is best to perform 6H and immediately hold 4, and watch for the exact moment Jam starts to walk backwards. Do this a few times so you know the timing, then perform 6H 6PP. Known as "double tapping", pressing P twice in quick succession will give you more chances to make the link. Repeat this process until you are absolutely comfortable with the link; it's one of Jam's best sources of meterless, grounded damage.

Comboing into Wall Loop from Varying Heights

Characters in Guilty Gear all have different weights that will change how fast they fall to the ground after slamming off the wall. This is important when you're comboing from a puffball or a Ryujin into a wall loop! If the character is particularly high or light, you can use 6H H to start the loop, avoiding excessive combo proration and making sure they don't get knocked out of the loop by going too high. If they're very low and you're worried about them hitting the ground, use a 2K or 5K before going to the 2H(1) 6H H. This will lower the overall damage you get and make it possible for them to tech out earlier though, so watch out! There is no real universal trick to doing the wall loop, so practice it against a variety of opponents and with different heights!

j.214K Combo Ender Followup

When aircomboing, most of the time you'll finish with a j.214K (Gekirin), which forces your opponent to tech very low to the ground. Depending on the height at which you finished your combo and where you are on screen, you can do a very easy hitconfirm or tech chase to punish your opponent's tech. From midscreen, you can run underneath them and use a 2H, or 6P as a crossunder as the long active frames will catch them after the invul of the tech wears off. Charging is also an option, but be prepared to parry or be put on the defensive if they tech towards you.

When you end the combo in the corner, you have a very simple hitconfirm. As soon as Jam lands after the j.214K, throw out a standing jab. If the jab connects, they didn't tech, and you can continue into a combo and get a bit more damage. If the jab wiffs, jump and airgrab as they're trying to tech. From an airgrab, you can 5K/6K into Wall Loop and get some meter and corner oki started. Practice this hitconfirm, it makes your corner game very scary!

Some Character Specific Notes

The largest part of character specific worries Jam has to think about are during her wall loop and after a 2D connecting. The wall loop has its own section, but as a short recap you should just mostly worry about the character's weight and hitbox. Sol is the only character that requires his own specific loop. After a 2D however, you have options depending on the character you are fighting. The most common thing to combo into (if a charged Ryujin is available) is 236SK 236K. Against most middle and heavyweight characters, it is much easier to combo into if the 2D is point blank. Lighter weight characters you can do at a full range. Chipp, however, is VERY hard to combo in this way. Millia and May are just the opposite. After a successful 2D, you can go straight into a 236K and from there combo into your charged Ryujin for maximum damage.

Faust and Potemkin can be comboed off a 2D by JCing and going into air normals. Check the Combo section for more details.

If you can hitconfirm a CH 2D, then you can combo into a Ryujin. Depending on the character, you may or may not have to Tiger Knee the Ryujin. The characters you have to TK Ryujin against: Sol, Johnny, Chipp, Jam, O-Sol, Eddie, Testament, Potemkin, Faust. The characters you do not have to TK Ryujin: Zappa, Millia, May, Slayer. Any character not listed you cannot combo in this way.

More Parrying Advice

The most basic way to learn the parrying timing is going into training mode, and practice parrying Stun Edges from Ky at different ranges. Once you get comfortable with this, you should be able to confirm a parry and go into an attack. Parrying during your wakeup is another good way to learn, inputting the parry as Jam gets up to stop a meaty attack. As you get used to parrying, you will be able to move on to parrying obvious jump-ins and overheads, which you should always do once you're comfortable with it, and parry even during opponent's frame traps and after your own blocked attacks. As an example, parrying after a blocked IAD 214K is a good way to catch a move that is a punish. Don't get careless and know your opponent though, as they could try to punish with a low.

A basic option select can be used during Jam's wakeup is to input 46H. If they attack with a meaty, you will parry the attack. If they are too close and don't do anything with grab invulnerability, they will be grabbed. Otherwise, Jam will 6H. While it is good if you see them do a mid or high as a meaty, again, don't overuse it and get caught by a meaty low, and get CH in the process.

Alternate Color Chart

P K S H D
AC
Jam normal p.png
Jam normal k.png
Jam normal s.png
AC Jam normal h.png
AC Jam normal d.png
EX
Jam ex p.png
Jam ex k.png
Jam ex s.png
Jam ex h.png
Jam ex d.png
Slash
Jam slash p.png
Jam slash k.png
Jam slash s.png
Jam slash h.png
Jam slash d.png
#R
Jam reload p.png
Jam reload k.png
Jam reload s.png
Jam reload h.png
Jam reload d.png