Disclaimer
Content here can be considered incomplete until expertise is given.
Much of this page is very much still a work in progress
| Table of Contents | |||||||||||
|---|---|---|---|---|---|---|---|---|---|---|---|
| Scale | Matchup Legend | ||||
|---|---|---|---|---|---|
| Very Favorable | Favorable | Even | Unfavorable | Very Unfavorable | |
- Replay Theater is a great resource to find high level matches.
- Character Strategy pages generally have at least some basic counter-strategy.
- Please keep in mind the matchup chart is subjective and not all players may agree.
Template
Summary template
Overview | Frame Data | Matchups | Strategy | Reverse Matchup Return to Top
Overview
General information about a character and their playstyle
Neutral
Information regarding the character's strengths/weaknesses and options in neutral, how Jin's own options interact with them.
Offense
Information on the character's offensive options (pressure options, mixups, okizeme and potential setups/gimmicks) and potential ways to circumvent them (such as mash options, whether IB(B)ing specific parts allows for more options).
Defense
Information on the character's defensive options (fastest mash option, reversal options, potential gimmicks) and potential ways to deal with them if necessary.
Conclusion
Recap of the most important points and their potential consequences on the matchup.
Character Specific Notes
Character specific interactions including but not limited to specific option selects, combo related optimisations and/or oddities, etc.
Amane
Arakune
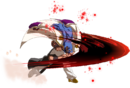
Azrael
Azrael's at his weakest in the neutral and as such in order to take full advantage of this matchup it is best for Jin to play at a range where Azrael is forced to make bigger commitments. Applying offense on Azrael can potentially be quite tricky due to his backdash and relatively strong mash options whereas defending Azrael will mostly rely on utilising different Option Selects, having a good awareness of his pressure reset options and utilising Barrier liberaly will prove to be incredibly useful for this specific matchup.
Overview | Frame Data | Matchups | Strategy | Reverse Matchup Return to Top
Overview
Azrael is a close range brawler who thrives off-of frustrating the opponent into making potentially dangerous commitments on their defense in order to deal with his offense. Defined by his relatively short pressure but potentially devastating mixups and risky to interrupt pressure resets, Azrael is at his strongest whenever he is right next to his opponent.
Neutral
Azrael struggles a lot in neutral against Jin, staying away from his effective range and throwing out 5C, 3C and potentially even 5D in neutral will keep him in check from recklessly using his 236A GuardAllStartup13~23Recovery24Advantage+1, 5C
 GuardMidStartup15Recovery16Advantage-3 and 6C
 GuardMidStartup28Recovery9LAdvantage+2 thus forcing him to reconsider how he attempts to approach you, do be aware that Azrael's 6A
 GuardMidStartup19Recovery14Advantage-4 can potentially stuff out moves like Jin's 5C if he is close enough but it will lose reliably to non B attribute moves like Jin's 3C but in that case Azrael can still attempt to utilise his own 3C
 GuardLowStartup15Recovery18Advantage-9 instead so it is best to avoid overusing any of the options listed. Azrael's 5C is also a pretty good poke, being aware of its effective range and the spacings at which it is possible to low profile it with 3C will be quite useful. Jin’s 236A isn’t as useful on the ground as it is in a lot of other matchups primarily due to Azrael’s ability to 214B
 GuardAllStartup5Recovery36~111Advantage-26 the projectile but it is still possible to use them in the air pretty reliably. In the event that he ends up absorbing a projectile then it is possible to low profile the Phalanx projectile (236B
 GuardAllStartup5RecoveryTotal 26Advantage-2) and still not get hit by the projectile with 3C if Azrael attempts to do it immediately. In the air, j.C stuffs out basically every single one of his potential approaches however try to avoid getting in close-range air-to-air situations as Azrael’s air buttons are very good in that regard. Beware of hanging above Azrael anywhere on screen, in the air his j.C
 GuardHigh/AirStartup12Recovery15Advantage- is very good at hitting you if you’re right above him and depending on spacing he can also use his 6CGuardMidStartup28Recovery9LAdvantage+2 to swat you out of the air if you’re at a lower height or IADing towards him. On top of that, his grounded normals are generally very good at dealing with most of your air approaches, the only button he struggles to anti-air reliably is j.2C, in which case he is forced to rely on the more committal and awkward to use 6B
 GuardMidStartup13Recovery37Advantage-24.
Offense
However, once Azrael gets in it can get pretty tricky, his A buttons are extremely potent in their effective range but his offense is not particularly oppressive compared to a lot of other characters because it is full of gaps but it still nonetheless applies mental stack on you due to the fact that he can make you pay dearly for any woefully timed mashes, jump out attempts or if he ever blocks C-DP you’re in for a lot of pain as the counterhit and crouch recovery state gives him one of his most damaging meterless combos available to him. It should also be noted that by design Azrael will usually come on top from pretty much every single trade in the close range and as such it is best to just block if that ever happens. Aside from that, his teleport-dash cross up is another aspect of his offense that can be difficult to deal with, thankfully there are a couple of option selects to use, do be aware that some of these options might potentially lose to Azrael’s own options after a cross up dash or not be reliable in every situation where a cross-up dash is attempted, such as after Azrael gets a knockdown.
- 1AB : Barrier/2B, by tapping 1AB during Azrael's pressure either barrier will come out if he does not cross up or 2B will if he does it. Will lose to cross up TK 214B and if gthe Azrael player is observant he will notice barrier flicker if you're constantly mashing this specific option select.
- 1[B]AAA : Barrier/2A, Tapping 1AB and then holding the B button while repeatedly tapping A will result in barrier if Azrael does not cross up or in 2A if he does it. Will lose to cross up TK 214B and if the Azrael player is observant he will notice barrier flicker if you're constantly mashing this specific option select.
- 1ABC : Barrier/Throw, beats out cross up TK specials however it is unreliable against TK 214B if the Azrael player can do it perfectly, might expose you to TRM setups or it can just be teched if he doesn't do anything. It is also unreliable if Azrael is not exactly point blank whenever he does the dash cross up as its very much possible for the throw to whiff.
- 1[D]ABC : Barrier/OD, needs OD and while it is safe it just creates another situation where things might go either way depending on what the Azrael does.
- 421AB~X : Barrier/DP, might expose you to TRM setups if C-DP is being used, can naturally just be blocked and punished instead after a crossup. On most characters he can attempt another cross up by doing IAD j.B in order to make the DP whiff or in order to mix your inputs, however both of Jin’s DPs hit around him so this is inconsequential if the DP is done immediately. If he attempts to crossup as you're inputting either one of your DPs, Azrael will end up getting hit.
In regards to his pressure specifically, as mentioned earlier Azrael’s pressure is very short compared to most Blazblue characters meaning that he generally has to go for some form of mixup very early on or attempt a potentially risky pressure reset. While it is possible to stuff out any of his attempts at mixing you up or on his pressure resets it also carries an inherent risk as his counterhit combos are quite deadly. Here are some of his potential pressure resets :
- 236A
 GuardAllStartup13~23Recovery24Advantage+1 : Gustav, it is +1 on block and will always guarantee that his 5A
 GuardMidStartup6Recovery9Advantage-1 connects even on a trade. The easiest way to deal with Gustav is to just instant block it which can be tricky but nonetheless doable especially if done from longe range or if the Azrael player constantly autopilots it after making you block his 5C, do keep in mind however that while he loses his turn he is still able to attempt a DP or simply backdash out of your attempt at gaining your turn back. Aside from that, it is also possible to just gamble with a reversal if you do not manage to IB gustav but wiser Azrael players will start baiting those options out by either backdashing or just blocking them. Aside from that, on normal block Azrael gets a new turn to run his offense and is in throw range.
 - 5BB
 GuardMidStartup11Recovery9Advantage+5 :5B
 GuardMidStartup9Recovery10Advantage±0 on its own is neutral on block but the followup B is +5, there is a 1F gap technically so it is possible to DP out (especially on IB) though do be aware that he isn’t forced to immediately go into the followup and such he can simply do something else entirely or make you regret using a DP by just blocking it or making it whiff.
 - Rejump pressure reset : Azrael’s rejump pressure isn't particularly hard to anti-air with Jin, depending on the way you blocked his previous buttons it might even be possible to jump-up airthrow or challenge with j.A. Azrael's only jump cancellable buttons on block are his 5A and 5B while standing, in the air all of his non-drive normals are jump cancellable except for his j.2C
 GuardAllStartup22Recovery10Advantage-. What is scary however, is his ability to potentially attempt an IAD crossup j.B because at certain spacings it will reliably allow Azrael to hit his opponents even while they're crouching. Luckily, Jin's C-DP can hit him out of it pretty reliably and in the worst case scenario it is not the hardest thing to react to.
 - Menacingly walking towards you, usually after a 5A. It is possible to contest him with any button or to simply jump but obviously whether or either of those options ends up working will depend entirely on the Azrael player.
- 6C
 GuardMidStartup28Recovery9LAdvantage+2 : Lunges with a forward kick, you can hit him out of it pretty reliably with most of your buttons. If it is done meaty you can also DP it pretty reliably otherwise you will have to hold it. It will also catch out fuzzy jump attempts or airdashes at certain heights pretty reliably on top of being air unblockable.
 - TCL Mindgames : self explanatory, whiffing or blocking either the first or second part of his 236C
 GuardAllStartup13Recovery18Advantage-4 rekka doesn’t necessarily mean that he gives up his turn because if you ever try to contest it might be a potentially deadly gamble for you. It is possible to DP out of it if he staggers but naturally that comes with its own set of previously discussed risks.
 - 214C
 GuardAllStartup47RecoveryTotal: 55Advantage+12 : Somewhat of a gimmicky option that is massively plus on block, has guardpoint frames however it is possible to simply keep pressing buttons in to it and counterhit Azrael in the process. If you are crouching as Azrael does the move it will cross up over your head as well so beware.
 - Dash cross up : pretty hard to deal with reactively, it is generally better to OS it during his pressure by utilising any of the OSes discussed earlier. A bit trickier to deal with on wakeup as Azrael generally has enough advantage to be safe from wakeup mash options.
- 5D
 GuardHighStartup21Recovery20Advantage-4 : His go-to overhead option during pressure, decently fast but it is possible to react to it or potentially even mash a button as he attempts it, 2A mash in particular will allow for an air-hit if Azrael attempts it or potentially even attempt to throw him out of it (be aware that he is technically airborne in the first few frames of his 5D and as such the throw will need to be timed in the later frames of the startup). Be careful however as any mistimed mashes will lead in to a very damaging counterhit combo for Azrael. Relatively safe on block, Azrael's turn is ended after this.
 - 2D
 GuardLowStartup15Recovery12Advantage+2 :Low option Azrael can potentially attempt instead of an overhead, it is +2 on block but depending on the spacing it might be borderline impossible for Azrael to continue his pressure regardless.
 - 6D
 GuardHighStartup27Recovery14Advantage-2/3D
 GuardLowStartup24Recovery15Advantage-2 : Another set of Overhead/Low options with very similar animations, significantly slower but can potentially hit you from a further range while also having very good reward on counterhit if a mash attempt is caught. It is possible to simply fuzzy jump out from either option however.


Overall, most of Azrael's pressure normals are very stubby. Utilising (instant) barrier blocking will be very effective Azrael as that will force him to attempt his pressure resets or mixups way earlier than he might like if he does not want them to whiff entirely from being pushed out too far or in an attempt to keep you locked down.
Azrael’s oki in the isn’t anything extraordinary out of the corner most of the time, he generally has to make some strong commitments in order to catch any particular wakeup option and if he uses the wrong option in an attempt to catch one of your wakeup options he at best loses his turn or at worst gets punished for it, naturally in the corner these options will be far more reliable and oppressive. Here are some of the common options :
- 5AGuardMidStartup6Recovery9Advantage-1/5BGuardMidStartup9Recovery10Advantage±0 Meaty : standard meaty, be warned that he can hitstop OS both of Jin’s DPs with these.
- 2A
 GuardLow/AirStartup9Recovery9Advantage+2/2B
 GuardMidStartup12Recovery18Advantage-7 : his go-to no tech catches, 2A is generally preferred as it isn’t as committal compared to 2B.
 - Throw/5A TRM : Throw OS counterplay.
- 5DGuardHighStartup21Recovery20Advantage-4 : Overhead option, loses to late tech and rolls, however he can still block on a delay tech.
- 2DGuardLowStartup15Recovery12Advantage+2 : Low option, loses to backrolls and reversals.
- 6DGuardHighStartup27Recovery14Advantage-2 : Overhead option, loses to DPs and wakeup OD. It is + on normal block if done meaty.
- 3DGuardLowStartup24Recovery15Advantage-2 : Low option, generally works as a backroll callout and is also usually safe on wakeup OD.
- 66 5A/5B : crossup attempt that also acts as a meaty if its blocked, can be rolled out of generally.
- 66 TK special : 236A, 214B, 236C and 214C are all options he can TK after a forward dash. You’ll have to hold 236A if you manage to react properly, however in the case of TK 214B you will be able to get a heavy punish on Azrael while TK 236C comes with its own set of mindgames on block. The best way to deal with these is generally to option select, especially TK 214B because it is practically impossible to react to it (at its earliest if done perfectly it is a 13F crossup).
- IAD j.B
 GuardHigh/AirStartup9Recovery12Advantage- : safe jump if it is done after a 214D
 GuardLow/AirStartup27~57Recovery24Advantage-13.
 - 66 9jc j.B : corner crossup, setup done in order to reverse your inputs around whenever you attempt a DP.
- 66 9jc IAD j.B : corner crossup, similar to the setup above, but comes with added protection to delay wakeup rolls. Depending on your wakeup timing, this can put Azrael either in front or behind you.


Defense
Defensively, Azrael has a few options however all of them carry a risk. His fastest normal is his 6F 5A, whereas his fastest (and arguably riskiest) mash option is 214B with its 5F of startup, relatively generous hitbox and the ability to nullify projectiles it is a surprisingly decent defensive option that limits Snowflake usage just by existing. Aside from that, he can potentially attempt to use 214C as a pseudo-reversal with its guardpoint frames but they do not last very long at all and as such simply running your usual pressure on his wakeup will beat it clean. Do be aware that on wakeup this will usually cross you up if you’re crouching and if Azrael is not hit out of it. His actual reversal options are not particularly great either as they are very slow, his 623B GuardHigh/Low, AllStartup18Recovery30Advantage- reversal has 18F of startup and on top of that it can be low profiled pretty easily by the majority of the cast, however in Jin’s case he can only low profile it with 3C if he is right in front of him or if he is spaced out properly he can somewhat low profile with 2B. His 50 meter reversal in 214214D
 GuardAllStartup6+(129 Flash)+10Recovery46Advantage-28 has a startup of 16F. Both of those reversal options can be easily safe jumped.
Aside from that one of his best options on defense is his backdash, which has 1~20F of invul (28F total). The existence of his backdash alone hinders Jin’s ability to truly open Azrael up as he can easily do it whenever a 6A attempt is made on him to get out of pressure immediately. Thankfully it is possible to call it out in pressure if the Azrael player loves backdashing constantly with a 665B which is a risky option but it will allow you to get a meterless combo or with a slightly delayed 5D which will generally require at least 25 meter in order to convert properly but in contrast it is ever so slightly safer, far more reliable at any distance and harder to stuff out for Azrael if you aren't within range of his 5A.
After getting a knockdown on Azrael, Jin does possess an OS that will easily catch his wakeup backdash attempts and make his wakeup 623B whiff in (66)[3]B~A~C/(66)[3]A~B~C. If done properly, whenever he attempts a backdash the 3C will catch him whereas if a DP is attempted it will simply whiff over your 3C which will allow you to recover in time and attempt to punish him and of course if he simply wakes up normally he will be forced to block either a 2A or 2B. Unfortunately, Azrael can still generally roll out one way or another but it is nonetheless still possible to cover backrolls with 66[3]B~A~C whereas forward rolls will be checked reliably by [3]A~B~C. Be aware that this OS breaks down if the Azrael player utilises his 214214D as a wakeup option instead.
Conclusion
To conclude, this matchup is primarily Jin favored if you manage to control the neutral. However in the event that Azrael manages to get in to run his offense, things somewhat even out but might not necessarily go in Azrael's favor as Jin can rely on the common anti-Azrael OSs on top of the fact that all of his potential mash-out and/or reversal options are pretty decent against Azrael especially since all of Jin’s reversal options cover every area around him which deny Azrael’s cross up shenanigans somewhat effectively. Although, while Jin’s answers to Azrael’s pressure are pretty effective they are still very risky to use, especially C-DP due to the grounded counterhit + while crouching recovery. In essence, once Azrael is able to get past Jin’s neutral or overtake him on his offense thanks to his unorthodox defensive options the match will generally be decided by the players themselves and their responses/habits to each other’s attempts on both offense and defense.
Character Specific Notes
- (66)[3]B~A~C/(66)[3]A~B~C are both OSes that can cover most of Azrael's wakeup options, excluding 214214D. If able to, he can also attempt to roll out but it is still possible to rollcheck him with the OS.
Bang
Bullet
Carl
Celica
Es
Hakumen
Hakumen is a pretty slow character however he possesses strong neutral and defensive options. Playing this matchup will require a very patient and methodical approach in order to be able to close in on Hakumen and run your offense.
Hakumen's drives throw a wrench in how Jin has to structure his pressure, in order to deter him from using them it might be wiser to attempt mixups sooner instead of relying on frame traps or potentially try to Option Select his drives. However, due to his very tall crouching hurtbox 5A becomes a viable option on offense allowing for more extended pressure squences while also becoming an usable defensive mash option.
In comparison to his neutral and defense Hakumen's offense is somewhat lackluster meterlessly. In order to get any form of mileage out of his offense he is forced to invest hefty amounts of meter to either extend his pressure or attempt deadlier mixups.
Overview | Frame Data | Matchups | Strategy | Reverse Matchup Return to Top
Overview
Hakumen is a neutral oriented juggernaut who usually thrives in playing a slower paced game where he does his best in keeping the opponent at an arm’s length as he grows in power by the second thanks to his passive meter gain. His drives on their own force pretty much every single character in the game to adapt their offense and okizeme entirely and on top of that his OD also grants him an unparalleled damage ceiling and comeback potential, essentially meaning that as he loses HP he only becomes stronger and should he ever get a hit on you when he has resources to spend it is very likely you will suffer dearly.
Neutral
In neutral, Hakumen possesses longer ranged options compared to Jin but he is limited by a simple critical flaw, that being his movement. His hop dashes and long airdash do not do him any favors in that regard whatsoever, therefore he can struggle to position himself effectively at ranges where he can easily make use of his strong neutral buttons such as 4C, 3C, j.C and 623AA among many others. Much of the neutral game against Hakumen will boil down to dealing with his strong neutral options while also attempting to position yourself in ways that allow you to avoid them entirely or outright beat them as you try to approach him. It should also be noted that any P attribute moves will be hard to use against Hakumen due to the fact that all his sword normal normals can cut them to create a large hitbox in the area where the projectile was cut which also protects him from any other incoming projectiles and on top of that his parry drives also effectively destroy them while granting him invulnerability against any followup attacks, moves like 236A, 6D, 2D and 236D become significantly less useful in this matchup although not entirely useless as it is still possible to alter the timings of those moves in order to mess around with Hakumen's anti-projectile options. Here are some of Hakumen’s options in neutral and potential ways to deal with them effectively :
- 5C
 GuardMidStartup14Recovery20Advantage-3 : It is not particularly uncommon for Hakumen to use his 5C in neutral as it is quite reliable at beating players recklessly approaching towards him, especially in the air. If it is blocked he can cancel it immediately into a special to keep his turn otherwise on hit it will lead to pretty damaging combos if he is willing to spend resources.
 - 4C
 GuardAllStartup10Recovery24Advantage-4 : His main grounded neutral poke and control tool, possesses great horizontal range but it can be easily low-profiled by Jin’s 3C. At certain ranges it is also possible to effectively hit him out of its startup with 5D or 5C, keep in mind both require Jin to be within Hakumen’s 3C range in order to hit Hakumen if he ever attempts a 4C however so they are somewhat riskier to use. It is pretty hard to contest 4C at roundstart and as a result it is best to simply back away or gamble with either a 3C or an upwards jump. Punishing this move is impossible unless it is IB’d in melee range as it is only -4 on normal block, it is safe to attempt to approach him afterwards as he cannot cancel it on block into anything.
 - 3C
 GuardLowStartup8Recovery28Advantage-12 : Hakumen’s 3C is it a pretty good low with a fast startup. It is fast enough to beat a good amount of Jin’s options if he is within its effective range and potentially even make certain air buttons whiff if they’re not done low enough to the ground. The best way to deal with it is to simply advance slowly and block it as he cannot do anything afterwards without RCing. It is also possible to call it out by simply air dashing over it or with a 6B but of course those options come with their own risks. It is very hard to punish it at max range on block even though it is -12 although if Jin is close enough he can get a free 5C crouch confirm punish but at longer ranges it will be necessary to instant block in order to potentially get a microdash 5C punish at best or a 3C punish.
 - j.2A
 GuardHigh/AirStartup11Recovery12Advantage- : A pretty decent air option for Hakumen in closer ranges, primarily used to cut any potential projectiles in the air if you chose to utilize them against him. A spaced j.C in the air will beat it clean whereas 623B will hit him out of it if he is within its effective range.
 - j.C
 GuardAllStartup12Recovery32+3LAdvantage- : Hakumen’s main long range air-to-air control tool, it is slightly slower than Jin’s j.C but in exchange it has more range. It is also pretty decent at controlling certain ground spacings if it is done low enough to the ground much like Jin's j.C. Unless you are close enough to Hakumen, using any air buttons should be avoided as he will likely hit you out of them at longer ranges. Throwing out 623B if he is within its effective range is a good option and in some situations it is also possible to potentially hit him out of j.C with 5C, 5D or 2D from a decent distance, be aware that it is still possible for Hakumen to potentially hit Jin out of any of those options if he does j.C low enough to the ground.
 - 623AA
 GuardMidStartup6Recovery16Advantage-4 : His prime whiff punish, callout and movement option. 623AA is an insanely powerful move with the low magatama* cost of 1, this move will constantly have to be itching at the back of your mind constantly as it will be a constant threat in Neutral. It is possible to hit him out of it either during the first few frames of its startup or by utilizing a F or P attribute move. It is relatively safe on block at -4 and if he has any extra meter to burn he can keep his turn by special canceling into another special.
 - 214D
 GuardallStartup30Recovery18Advantage-7 : His advancing parry, another potential whiff punish, callout and movement option with far more considerable drawbacks and certain specific advantages. It costs 2 magatama and the main advantage it has over 623AA is the fact that it guardpoints everything except T attribute moves from frame 4 and onwards, as a result it can easily catch any of Jin’s attempts at pre-emptively stuffing out 623AA. Since it is still a drive guardpoint it is possible to hold 7 and block the parry followup if done pre-emptively while a jump cancellable move is used. On block it is -7 as the parry followup attack is always attempted and it is still possible for him to special cancel either at some point during the guardpoint catch or after the attack is done.


In short, approaching Hakumen slowly and trying to stick close to him is generally pretty ideal although his 3C remains a constant threat due to its very fast startup and of course the drives can also potentially stunt your offense.
If for whatever reason the Hakumen player is instead trying to approach you aggressively, the advantage shifts in Jin’s favor as he has plenty of ways to keep him out. If he is recklessly airdashing constantly towards you 623B is very reliable especially because of Hakumen's hurtbox. If they are very high above you 2C can be a reliable anti-air as well due to the fact that Hakumen’s hurtbox is once again still pretty big making it far less likely for it to whiff if he ever goes over your head, although that can still happen if he delays his jump in buttons long enough. It should be noted that trying to anti-air Hakumen in general will carry an inherent risk due to the fact that he possesses j.214A, a disjointed Projectile attribute move that can easily beat a lot of anti-airs and he also has j.D which is his air parry that will catch pretty much every anti-air attempt. Should their approach be more grounded, he can easily be kept out by using moves such as 5C, 3C and 5D, although with meter he might attempt to use either 623AA or 214D. 623AA in particular is renowned for the distance it covers and on top of that it will beat moves like 5C and 5D due to its B invul. It is not a bad idea to start throwing out 2B every now and then in neutral in order to potentially catch a 623AA attempt, 3C also being an option that covers more ground but it is also a lot more committal. His 214D on the other hand is a bit trickier, it is possible to hit him out of the startup as it only gains a guardpoint on frame 4 but that is a bit unreliable if you aren't already next to him while pressing a button already, another option is to throw out a jump cancellable button such as 5C in neutral and immediately hold up afterwards in order to avoid the followup parry attack. Naturally, options such as 2B, 3C, 5D will lose to his 214D pretty handily unless they somehow recover before his followup parry attack triggers. It is also possible to potentially throw him out of it his advancing parry but that shouldn't be an option to rely on unless they're very predictable with their 214D usage.
Offense
Offensively Hakumen is rather lackluster as his options are severely limited without spending meter and as a result he is somewhat reliant on conditioning with staggers/frame traps, pressure resets and strike/throw. Constantly using barrier against Hakumen is not a particularly bad idea as it will force him to make greater commitments or to spend his resources if he wishes to stick close to you. He does possess a fantastic 18F overhead with F attribute invul in 6B but few of his options gatling in to it immediately on block and as a result if he has not managed to successfully condition you to stay put it is possible to escape out of his 6B attempts either by mashing with a non F attribute move (keep in mind 5A becomes a viable mash option against Hakumen as it hits him crouching), using a reversal, throwing him out of it if he isn't spaced out properly or potentially jumping out depending on how far he has been pushed out. Once Hakumen has meter to spend and is willing to actually use it, things can become a bit tricky as he gains access to an extensive array of options that will keep his offense going as long as he is willing to keep spending the meter as virtually everything will cancel into his metered specials which themselves can be canceled into other metered specials. Here is a rough list of things to keep in mind with Hakumen’s pressure overall :
- Late gatlings and cancels on block : Hakumen will naturally rely on staggering with 2A
 GuardMidStartup7Recovery9Advantage0s and potentially frame trapping with a 2B
 GuardLowStartup8Recovery15Advantage-4/5B
 GuardMidStartup10Recovery15Advantage0/Special afterwards or attempt a 6B
 GuardHigh, MidStartup18Recovery23Advantage-4. Most of his gatlings are actually late cancels, meaning that he cannot immediately cancel his normals into each other but instead has to wait a few frames before he can cancel them. Virtually every single normal of Hakumen’s can be canceled into his drive which can be relevant if he somehow reads your mash attempts or tries to steal his turn back. Most of his normals are special cancellable, however his 4C and 3C cannot be canceled into anything else but one of his supers. His jump cancels on the other hand are a bit more limited and less threatening compared to Jin’s with only 5A
 GuardMidStartup5Recovery6Advantage+3 which whiffs on crouchers, 5B, j.2A, j.B
 GuardHigh/AirStartup9Recovery20Advantage-, 236B
 GuardLow, MidStartup9Recovery21Advantage-5(2) and j.214B
 GuardMidStartup11Recovery35Advantage- being jump cancellable on block.
 - Special Cancellable Specials : Hakumen can cancel all his specials into each other as long as he has the meter. Always keep this in mind at all times. Depending on the magatama at Hakumen’s disposal this can result in a pressure reset, frame trap, mixup or all of three options at once.
- 6A
 GuardMidStartup12Recovery16Advantage-1 : Somewhat limited pressure option that can be done from his 5A/2A pretty quickly and it is a delayed gatling from his 5B, if Hakumen spaces himself properly he can be neutral on block, if done close he will be -1. Its gatling options are also limited to 6B and his drives only and as a result if its done directly in front of you it is possible to just take your turn with a 5A which is also a jump cancellable button, which allows to OS his drives. Barrier blocking Hakumen before and as he does 6A can prove to be quite beneficial as it may make his followup options more committal and allow you to potentially escape from his clutches.
 - 6BGuardHigh, MidStartup18Recovery23Advantage-4 : Hakumen’s prime overhead option, he lacks any immediate cancels into it aside from his 5A which does not hit crouching and as a result he will have to rely on conditioning you in order to start using it properly. Without at least 50% meter he cannot get much from it and as such it is best to simply take it. In the event that it is blocked it is -4 on normal block and he can still cancel in to any of his drives, retake your turn back with 5A and attempt to OS his drives by holding 7.
- 623A
 GuardStartupRecovery18Advantage-(623AAGuardMidStartup6Recovery16Advantage-4) : 623AA is not a particularly great option in pressure on its own as it leaves him at -4, however with some extra meter he can potentially use it to frametrap with a special cancel. 623A on the other hand will form an integral part of his offense as it will allow him to reset pressure from some of his normals. Trying to challenge Hakumen to retake your turn after he does 623A in general poses a risk, as he is perfectly capable of slightly delaying the followup, which can technically still be mashed on with a F attribute move, or potentially gamble by using a drive move to callout any attempts at retaking your turn back. Generally, he will not use 623A off-of A normals as that will leave him pretty minus (-11 on normal block) while off-of B normals he will be -2 on normal block meaning it can still be a bit risky to challenge him. Otherwise, for other cases he will generally be neutral on normal block, particularly after C normals and out of most of his specials.
 - 214A
 GuardAllStartup14Recovery15Advantage+1 : His go-to special if he ever attempts to reset pressure, costs one magatama and it leaves him at +1. It is very likely for Hakumen to utilize this move after a blocked special as a low cost pressure reset. It is also possible for Hakumen to cancel into it from most of his normals, exceptions being 6A, 6B, 4C, 3C and 6C. Ideally this move is of course IB'd to prevent a pressure reset which may or may not be easier to do depending on the habits of the opponent or alternatively its possible to jump out of most his followup pressure options (particularly so if barriered or if spaced out).
 - 236BGuardLow, MidStartup9Recovery21Advantage-5 : Special that has 2 different hits, the first hit being a low with the followup being a mid. Costs 2 magatama and is particularly useful as a frametrap from any sort of special cancel if he is willing to spend the meter. Aside from the usual special cancels Hakumen can jump cancel it on its second hit in the event that it is blocked, but it is possible to make the second hit whiff entirely by holding barrier, which will net you a decent 5B/2B punish or even a 5C one if he is not able to special cancel or does not special cancel it quickly enough. -5 on block and it becomes neutral on block if the Hakumen utilizes 623A immediately after 236B(1).
- 41236C
 GuardHigh/Air, Low/AirStartup21Recovery18Advantage-2 : His infamous metered overhead. Possesses 2 different hits, first being overhead and the second one being a low, it can be used from basically everything except 6A, 6B, 4C, 3C and 6C on block. Thankfully it has a hefty magatama cost of 3 which makes it far more telegraphed and on top of that its startup is also quite fast at 21F. He is -2 if both hits are blocked, however if he cancels after 41236C(1) with 623A he is +2.
 - j.A
 GuardHigh/AirStartup7Recovery9Advantage- : A decent air-to-air button for Hakumen, he can potentially set up tick air-throws with it. Gatlings into j.B and of course it is special cancellable. Be aware of j.D
 - j.BGuardHigh/AirStartup9Recovery20Advantage- : A potent pressure option for Hakumen, has a surprisingly great hitbox that allows him to easily crossup opponents especially if he manages to sneak in with an IAD. It is of course still possible to special cancel j.B or simply jump cancel it and attempt another air normal or delayed special.
- j.2AGuardHigh/AirStartup11Recovery12Advantage- : Not exactly a stellar pressure tool but it has a decent downwards hitbox which can be useful, jump cancellable and special cancellable.
- j.2C
 GuardHigh/AirStartup16Recovery30Advantage- : Bigger hitbox than j.B but it is significantly slower, canceling into a drive is only possible after landing otherwise he can still cancel into a special in the air.
 - j.214A
 GuardAllStartup12RecoveryTotal 35Advantage-2 : A powerful special costing 1 magatama, it is a downwards disjointed hitbox that is also a projectile. It is notorious for beating most anti-air options and as such it is best to exercise caution when it is available. While it is technically minus on block it is very risky to attempt to take your turn back after this move as it will recover fast enough to the point where Hakumen can attempt a j.D to deal with any potential anti-air attempts. His other option will generally be j.B to try and keep his turn but it is possible to anti-air him pretty reliably out of it and as such Hakumen primarily relies on his opponents to respect the threat of j.D in order to use it properly. Generally, the best course of action will be to utilise the anti-drive OS, particularly useful with 2C in this scenario as it will hit him out of any air normals he may attempt and if he does a j.D simply holding 7 will prevent the followup from catching you while letting you attempt to take your turn again after he lands. Another way to potentially deal with the situation afterwards is to ideally IB his j.214A and then immediately perform a rising air-throw as that will easily counter most of his options afterwards (of course he can still tech the throw if he does not a press anything).
 - j.214C
 GuardGuard Break 60/BarrierStartup15Recovery22+4LAdvantage- : Special costing 3 magatama, its use in pressure is not particularly amazing as it doesn’t do anything but trigger a guard crush effect on opponents who aren’t barriering, it will lead in to damaging combos on a guard crush however. Can have some decent usage in catching jump out attempts or delayed defensive mashes although it is potentially possible to hit him out of it with 5A.


Hakumen’s okizeme can vary quite a bit depending on how he ended his combo, generally it is somewhat decent and it will naturally be significantly more effective in the corner. Aside from losing his turn at worst he doesn’t necessarily have to make any big commitments in order to deal with any particular option off-of most enders that put him at a huge risk. One thing to note is that both 6B and 5C knockdowns on Hakumen’s side share the same possible oki options, although 5C is a hard knockdown compared to 6B meaning that if any of his tech catches actually work he will get a new combo afterwards instead of a blue beat. Here are some of the options he can perform after a knockdown and the conditions required:
- 2A/2B : His go to meaty and roll catches that can be utilized from basically everything. He can recover in time to block Jin’s DPs if 2A whiffs but 2A itself isn’t very reliable at catching backrolls however 2B is but in exchange it can be DP’d out of on e-tech pretty reliably. Both options will catch delay techs but e-tech/neutral tech will allow you to wakeup properly and block. Depending on the type of knockdown he got, he might even be able to fit in a forward hop 2A/2B.
- 6A : Usually done after a 6B knockdown, particularly potent against any form of delay teching, forcing the opponent to neutral tech in order to make it whiff. Nonetheless even on whiff Hakumen is still +5 (+8 on airborne 6B hits), which allows him to attempt to meaty you with 2A/2B again or attempt to bait a reversal.
- 5C : Similar option to 6A after a knockdown, except it is +1 (+4 on airborne 6B hits) on whiff. Primarily done in the corner as it is not reliable in the midscreen because the followup 2A needs Hakumen to be close. Trying to delay tech or roll will usually net him either a blue beat or reset and since it is a 5C starter it is arguably better to simply neutral tech.
- Falling j.2C : In most scenarios, Hakumen will utilise a falling j.2C(w) in order to auto-time the followup oki options better or to catch delay techs however in certain situations he can instead get the j.2C to hit as a meaty which will allow him to catch delay techs and forward rolls. He can also recover in time to block Jin’s DP if he ever attempts it, effectively acting as a safejump as well. Be aware that he will cross you up if you do not perform an instant neutral tech.
- j.A(w) > j.2C : Safejump against 9F or slower DPs off-of a 6B/5C knockdown. Works midscreen but it is more reliable in the corner.
- 669 > j.A(w) > j.B : Safejump that also acts as a crossup against 9F or slower DPs from a 6B/5C knockdown.
- Delay airdash j.B / Land 2B : Will require Hakumen to preserve an air action. After j.214A he can attempt to airdash j.B in an attempt to get a crossup hit or do nothing and simply land with 2B in order to catch rolls or delay tech. Can easily be reversaled out of.
- IAD j.214A crossup : Gimmicky option that will catch early backrolls, can just be delay teched, rolled out or reversaled out of as Jin’s DPs hit all around him.
Defense
Defensively, Hakumen is very hard to pressure due to the constant threat of his drives. Nothing much can be done other than attempting to OS his drives by using a jump cancellable button while holding 7 or learning the habits of the Hakumen’s player. Mixing in throws a lot more often in your offense can also prove to be very powerful as none of his drives can deal with them netting you a free throw counter. Aside from that in regards to his normals he possesses a 5F 5A GuardMidStartup5Recovery6Advantage+3 which he can somewhat utilize as an anti-air or as a mash option, otherwise his anti-air capabilities are rather limited as his 2C
 GuardMidStartup13Recovery33Advantage-17 suffers the same problems as Jin’s on top of having a slightly shorter vertical hitbox, aside from that his 5C can be a surprisingly potent AA option as well but its not a particularly reliable option either. Of course he can still attempt to utilise his drives, 5D in particular being a decent option as it can be held for roughly 40F which may potentially catch any delayed buttons. Another committal option Hakumen can attempt to use against air approaches is his j.214B as it is effectively an air-DP but it is pretty committal and he has to spend 2 magatama in order to use it but aside from that he does not possess a true grounded meterless reversal and as such he is somewhat reliant on either his drives or his 236236D Yukikaze metered reversal parry in order to escape pressure, it is essentially the same one as Jin’s but it is far more powerful as the superflash only triggers on the guardpoint frames activated on top granting him access to very damaging combos if he has the resources. Due to his rather tall crouching hurtbox, it is possible to utilise 5A very reliably in pressure at all times while jump cancel pressure can prove to be much more effective but he can of course still utilise his AA options or drives to defend himself, especially if you are being predictable.
Regarding all of his drives specifically :
GuardMidStartup13Recovery33Advantage-17 suffers the same problems as Jin’s on top of having a slightly shorter vertical hitbox, aside from that his 5C can be a surprisingly potent AA option as well but its not a particularly reliable option either. Of course he can still attempt to utilise his drives, 5D in particular being a decent option as it can be held for roughly 40F which may potentially catch any delayed buttons. Another committal option Hakumen can attempt to use against air approaches is his j.214B as it is effectively an air-DP but it is pretty committal and he has to spend 2 magatama in order to use it but aside from that he does not possess a true grounded meterless reversal and as such he is somewhat reliant on either his drives or his 236236D Yukikaze metered reversal parry in order to escape pressure, it is essentially the same one as Jin’s but it is far more powerful as the superflash only triggers on the guardpoint frames activated on top granting him access to very damaging combos if he has the resources. Due to his rather tall crouching hurtbox, it is possible to utilise 5A very reliably in pressure at all times while jump cancel pressure can prove to be much more effective but he can of course still utilise his AA options or drives to defend himself, especially if you are being predictable.
Regarding all of his drives specifically :
- 5D
 GuardStartupRecovery40Advantage- : Guardpoint only triggers from frame 6 and onwards, can be held for a decent amount of time (40F max). Will guard against mids and overheads, if the followup is blocked Hakumen is left at -1.
 - 2D
 GuardStartupRecovery46Advantage- : Guardpoint triggers frame 1, doesn't last long however. Will guard against mids and lows, if the followup is blocked Hakumen is left at -6.
 - 6D
 GuardStartupRecovery43Advantage- : Guardpoint triggers frame 1, also does not last long. Will guard point mids and overheads, if the followup is blocked Hakumen is left at -1.
 - j.D
 GuardStartupRecoveryUntil L+17Advantage- : Guardpoint triggers frame 1, does not last long either. Essentially guardpoints against everything, frame data can vary on block but he will be minus generally.
 - 214DGuardallStartup30Recovery18Advantage-7 : Guardpoint triggers from frame 4, lasts roughly as long as the dash and the followup attack is always attempted even if nothing was pressed, leaving Hakumen at -4.
- 236236D
 GuardStartupRecovery44Advantage- : 50 meter option, guardpoints against everything from frame 1. If triggered by a projectile it is possible to superjump out of the followup attack and depending at the height from which Yukikaze is hit it is also possible for it to whiff entirely.


Thankfully, Hakumen’s backdash lacks any form of strike invul, being only invulnerable to throws and as such it is pretty easy to potentially catch him out of it. On top of that, he is considered airborne during both his forward and backwards hop-dashes, meaning it is possible to get more damaging air-hit routings on him if he is caught. Do be aware that he can potentially attempt to perform one of his air specials with either of his hop dashes which may beat your options if you do not properly catch his hop dashes.
Getting a knockdown on him doesn’t make things any easier either as he once again can rely on either of his frame 1 drives to retake his turn, not to mention that utilizing any type of P attribute okizeme is discouraged because his drives will grant him invul frames if they connect with P attribute moves which he can then transfer into the subsequent special cancel to potentially punish you or start his pressure. Of course it is still possible to potentially throw off his timings by delaying either 6D or 236D every now and then in your pressure or okizeme. Utilizing meaty throws every now and then might deter him from performing drives often on his wakeup, however that exposes you to some of his most risky but also rewarding wakeup options at his disposal, TK'd air specials. While all of them can technically be used the most common ones are likely going to be TK j.214C and j.214B, both of them will beat clean any meaty throw attempts while also granting a potentially damaging combo. TK j.214C especially can also potentially catch a delayed meaty while TK j.214B can be used against oki utilising jumpins due to its invul frames as he gets off the ground.
Conclusion
To conclude, this matchup is arguably pretty even as both characters have answers to each other's toolkits and will primarily boil down entirely to player matchups. As long as you approach the matchup properly and play patiently while probing at the Hakumen’s habits it should be doable. Naturally if either player is reckless the balance of power will shift accordingly, particularly favoring whomever is able to capitalise on any interaction.
Character notes
- Magatama refers to the orbs that make up Hakumen's meter.
- It is possible to option select against Hakumen's drives by pressing a jump cancellable button and immediately holding 7, this will result in the follow up parry attack being blocked as Jin jumps up.
- The first j.C will always whiff in 5C > sjc j.C > j.2C > ... / j.2C > j.C > ... unless a delay is applied to it, alternative staircase routings like j.B > j.C > ... will work pretty reliably however.
- 5A hits him even while crouching.
- 623B > 623C can be quite unreliable due to his wonky air hurtbox, often requiring the use of 6623C.
- CH 6C > 6D works midscreen if done point blank, potential punish option on his Drive attempts.
Hazama
Hibiki
Tager
Izanami
Izayoi
Jin
Jubei
Kagura
Kokonoe
Lambda-11
Litchi
Mai
Makoto
Mu-12
Naoto
Nine
Noel
Nu-13
Platinum
Rachel
Ragna
Relius
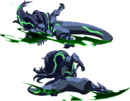
Susano'o
Despite the fact Susano'o is a relatively cumbersome character that doesn't start out with his full seal arsenal unlocked from the very beginning he is still a threat thanks to his incredibly strong normals and potent pressure. Thankfully, Jin has a few options that can keep Susano'o at bay somewhat reliably, however once Susano'o is able to get in close enough to utilise his normals it can be incredibly hard to contest them as the risk/reward is simply not in Jin's favor. If he is ever able to get in and open Jin up things can easily snowball out of control in to his favor, conversely if Jin is able to get in on Susano'o first it is possible to keep him locked down for a good while.
Overview | Frame Data | Matchups | Strategy | Reverse Matchup Return to Top
Overview
Susano'o is an offense oriented juggernaut defined by his strong offense, incredibly high average damage and the fact that most of his specials are locked behind a seal mechanic that he is able to unlock through the utilisation of his drive. He is arguably at his weakest once any round starts and as such he is incentivized to be aggressive in all stages of the game as that will allow him to snowball out of control as he gains access to more and more options that further amplify his neutral, offense and defense. While his offensive prowess is one of his stronger aspects, he nonetheless possesses a good array of defensive options (especially if he is able to unlock the appropriate seal) and his normals are a constant threat in neutral at their respective ranges.
Neutral
Susano'o's neutral is extremely potent thanks to his good array of normals, particularly so on the ground with his long reaching 5B and a good amount of advancing moves, chief among those being his 6B which covers a good amount of space in front and even above him while also advancing him forward on top of having a surprisingly low amount of recovery. In the air virtually all his normals are incredibly hard to contest in their effective ranges, thankfully Jin's j.C is potent against Susano'o as it outranges his longest reaching normals such as his j.B and j.C. In addition to that he also possesses 6A which is a potent hitscan projectile that hits from fullscreen that is generally useful against projectiles however it has virtually no vertical reach. Of course, on top of his normals he also possesses a good amount of specials that can be quite tricky to deal with in neutral. Here are the most common options Susano'o will use in neutral and potential ways to deal with them effectively :
- 5B
 GuardMidStartup9Recovery16Advantage-5: One of the cornerstones of Susano'o's entire movelist. It is a very hard to contest long reaching normal that covers a good amount of the ground space. Dealing with it is pretty hard as its recovery isn't particularly long either, ideally it is best to play ever so slightly outside its range and potentially hit him in counterpoking situations or it is called out with an airdash.
 - 6B
 GuardMidStartup18Recovery10Advantage+4: Another incredibly potent normal, it is a two-hit forward advancing move that covers a good amount of space, both in front and ever so slightly above Susano'o. Much like his 5B it is also very hard to contest properly and essentially requires a good awareness of your own spacing in relation to Susano'os. Unlike his 5B however, trying to airdash over it and potentially whiff punish that way can be tricky as Jin will need to be at a higher height during the airdash in order to avoid getting hit.
 - 3C
 GuardLowStartup12Recovery23Advantage-8: A two-hitting low move. Generally this it will not be used often in neutral as it is quite committal but it has a pretty good reach on top of its potential low profile having some potential use. If it whiffs it can potentially be hard to punish him reliably depending on distance but in most scenarios it won't be too hard to get a crouch confirm punish.
 - j.C
 GuardHigh/AirStartup12Recovery23Advantage-: A two-hitting air normal, both hits reach pretty far out. Can be really hard to contest during pressure but in neutral Jin can easily deal with an overzealous Susano'o player that overuses this move, especially off-of IADs, thanks to the fact that Jin's own j.C outranges in air-to-air situations and even on the ground 623B can be very reliable at swatting him down from the sky.
 - 236A
 GuardAllStartup15Recovery19Advantage-3 (Lvl1-3): "Tackle" is a forward advancing special Susano'o with some situational uses whose reward and travel speed varies with its levels. Allows Susano'o to cover a good portion of the screen at a very rapid pace, especially if the move is levelled up. Can also situationally be used to whiff punish Jin as it can slightly low-profile some of his air approaches in addition to just being a very fast forward advancing mid. Its main downside is that if it is blocked then Susano'os turn is effectively over as he is -3 and if it is IB'd then it is 5A punishable however on whiff it can be very hard to punish, unless of course Susano'o ends up whiffing it in front of Jin.
 - 236B
 GuardLow/Air×5, AllStartup18Recovery19+11LAdvantage-15: "Grand Viper" is another situational special similar to tackle in its usage in neutral, main difference that is a multi-hitting low move that advances forward much more rapidly while being far more risky but also more rewarding without requiring a seal levelup. On block he is -15 and the recovery on whiff is generally pretty punishable from most distances as well.
 - 214B
 GuardHigh/Air, All×2Startup23Recovery24Advantage-10 Lvl2: "Spin" or "Sonic", can be done both on the ground and in the air. The first hit is an overhead at all levels but in neutral specifically it is the level 2 variant that is the troublesome one thanks to the added-followup projectile attack it gets. In essence, it is a big disjointed hitbox that covers a good portion of the screen in front of Susano'o. If Susano'o is spaced properly by making you block the projectile hitbox on its own, he will be +1. Whiff punishing this move can be tricky but as long as the projectile hitbox is not blocked it is very much feasible with a normal like 5C. And of course if he does not space it properly and the entire move ends up blocked from a close hit he will be -10.


Offense
Placeholder
Defense
Placeholder
Conclusion
Placeholder
Character Specific Notes
Placeholder
Taokaka
Terumi
Tsubaki
Valkenhayn