Robo-Kisequé (talk | contribs) m (→Navigation: frivolous category, removed: Category:BBCPE Character) |
|||
| (76 intermediate revisions by 7 users not shown) | |||
| Line 1: | Line 1: | ||
{| | ==Overview== | ||
| | {{CharLinks | ||
|charMainPage=BBCPE/Hazama | |||
| | |videos=http://horibuna.web.fc2.com/BBCP/BBCP_HZ.html | ||
|| | |forums=http://www.dustloop.com/forums/index.php?/forums/forum/92-hazama/ | ||
[[File:BBCP_Hazama_Portrait.png|350px | }} | ||
<div id="home-content" class="home-grid"> | |||
{{card|width=4 | |||
|content=Hazama is a captain of the Novus Orbis Librarium's Intelligence Department and the main antagonist of the series. In reality, he is Yuuki Terumi, a former member of the Six Heroes and the creator of the Azure Grimoire and by extension the Black Beast.<br/> | |||
Hazama maintains a calm and quiet demeanor around most people, pretending to be harmless as a member of the Intelligence Department. He claims to hate fighting and prefers to avoid conflict. This, however, is simply a guise to his true nature. When people see through it, he shows his true colors as selfish and manipulative; destroying other people's lives and twisting their beliefs for his own gain. He has no qualms with killing those who get in his way, and does not seem to show any kind of remorse for his actions. | |||
}} | |||
{{card|width=2|height=3 | |||
|header=Hazama | |||
|content=[[File:BBCP_Hazama_Portrait.png|350px]] | |||
{{CharData-BBCPE | |||
|health=11,000 | |health=11,000 | ||
|comboRate=70% | |comboRate=70% | ||
| Line 15: | Line 22: | ||
;Movement Options | ;Movement Options | ||
:Chain Movement, Double Jump, 1 Airdash, Dash type: Step | :Chain Movement, Double Jump, 1 Airdash, Dash type: Step | ||
}} | }} | ||
{{card|width=4 | |||
{{ | |header=Drive: Ouroboros | ||
|content=Named after a snake that eats its own tail, Hazama's Drive is manifested as a stretching chain in the shape of a snake. He can cover many different angles and distances by shooting a drive move. What's more is that, at any point during the chain's travel, Hazama can follow up by either retracting the chain (~A) or using the snake head as an anchor point to perform unique maneuvers (~B, ~C, or ~D). Most of the time, if the snake head hits the opponent, you can follow up by zipping in with ~D and linking an air normal to convert into a combo. However, there are certain distances, and it differs for each drive move, where the chain will cause minimal hit or block stun, so you must be careful not to try and hit your opponent with chains up close or in the particular chain's "dead zone." | |||
|header2=Overdrive: Jörmungandr | |||
|content2=When Hazama enters overdrive, the limiter on his chains is released, eliminating the aforementioned "dead zone" and also gives his chains double damage. He also gains a life-stealing ring that encompasses a large radius around him, meaning that anybody close to you will have their health slowly leeched away. The life-steal ring does not persist while you are in hitstun (i.e., being combo'd). | |||
}} | |||
{{ProsAndCons | |||
|intro= | |||
|pros= | |||
Named after a snake that eats its own tail, Hazama's Drive is manifested as a stretching chain in the shape of a snake. He can cover many different angles and distances by shooting a drive move. What's more is that, at any point during the chain's travel, Hazama can follow up by either retracting the chain (~A) or using the snake head as an anchor point to perform unique maneuvers (~B, ~C, or ~D). Most of the time, if the snake head hits the opponent, you can follow up by zipping in with ~D and linking an air normal to convert into a combo. However, there are certain distances, and it differs for each drive move, where the chain will cause minimal hit or block stun, so you must be careful not to try and hit your opponent with chains up close or in the particular chain's "dead zone." | |||
When Hazama enters overdrive, the limiter on his chains is released, eliminating the aforementioned "dead zone" and also gives his chains double damage. He also gains a life-stealing ring that encompasses a large radius around him, meaning that anybody close to you will have their health slowly leeched away. The life-steal ring does not persist while you are in hitstun (i.e., being combo'd). | |||
= | |||
* Fast projectile that covers many angles | * Fast projectile that covers many angles | ||
* Multiple movement options allowing for varied approaches | * Multiple movement options allowing for varied approaches | ||
* Solid mix-up tools: command grabs, standing overheads and lows, safe-on-block normals | * Solid mix-up tools: command grabs, standing overheads and lows, safe-on-block normals | ||
* Good, stable damage conversion that can be attained from most any hit | * Good, stable damage conversion that can be attained from most any hit | ||
* Solid overdrive that adds both life drain and gradual damage to his offense | |||
|cons= | |||
* Not much in the way of mid-range pokes outside of 2B or 3C | * Not much in the way of mid-range pokes outside of 2B or 3C | ||
* No meterless reversal | * No meterless reversal; relies heavily on defensive system mechanics and overall gameplan depends on heat amount | ||
* Quite immobile without use of drive followups; has a set-distance forward dash and short air dashes | |||
}} | |||
</div>= | |||
<br clear=all/> | <br clear=all/> | ||
{| class="wikitable" style="text-align: center;" | {| class="wikitable" style="text-align: center;" | ||
| Line 63: | Line 57: | ||
==Normal Moves== | ==Normal Moves== | ||
====== < | ===<big>5A</big>=== | ||
<div class="attack-container"> | |||
<div class="attack-gallery"> | |||
| | <gallery widths="210px" heights="210px" mode="nolines"> | ||
| | BBCS_Hazama_5A.png |High, fast jab. | ||
| | </gallery> | ||
</div> | |||
| | <div class="attack-info"> | ||
{| class="wikitable attack-data" | |||
{{AttackDataHeader-BBCPE}} | |||
|- | |||
{{AttackData-BBCPE | |||
|header=no | |||
|damage=300 | |damage=300 | ||
|cancel=CSOJR | |cancel=CSOJR | ||
| Line 91: | Line 90: | ||
|invul= | |invul= | ||
|hitbox= | |hitbox= | ||
}} | }} | ||
} | |} | ||
====== < | *Whiffs on crouching characters except for Hakumen and Tager | ||
As it comes out very fast and has a high hitbox, Hazama's 5A is a very good anti-air. It also has decent range for a jab. Not recommended during pressure as characters can crouch under it, but can be used to set up tick throws due to its frame advantage. | |||
</div> | |||
| | </div> | ||
| | |||
| | ===<big>5B</big>=== | ||
<div class="attack-container"> | |||
<div class="attack-gallery"> | |||
<gallery widths="210px" heights="210px" mode="nolines"> | |||
BBCS_Hazama_5B.png |Fast, close-ranged knee. | |||
</gallery> | |||
</div> | |||
<div class="attack-info"> | |||
{| class="wikitable attack-data" | |||
{{AttackDataHeader-BBCPE}} | |||
|- | |||
{{AttackData-BBCPE | |||
|header=no | |||
|damage=550 | |damage=550 | ||
|cancel=SOR | |cancel=SOR | ||
| Line 124: | Line 130: | ||
|invul= | |invul= | ||
|hitbox= | |hitbox= | ||
}} | }} | ||
} | |} | ||
====== < | *Air unblockable | ||
Hazama's main normal for pressure. 5B has a shorter range than most of the cast, but has a great frame advantage, leading to great stagger pressure. | |||
</div> | |||
| | </div> | ||
| | |||
| | ===<big>5C</big>=== | ||
<div class="attack-container"> | |||
|damage= | <div class="attack-gallery"> | ||
<gallery widths="210px" heights="210px" mode="nolines"> | |||
BBCS_Hazama_5C.png |Short-range, two hit swing of his knives. | |||
</gallery> | |||
</div> | |||
<div class="attack-info"> | |||
{| class="wikitable attack-data" | |||
{{AttackDataHeader-BBCPE}} | |||
|- | |||
{{AttackData-BBCPE | |||
|header=no | |||
|damage=400×2 | |||
|cancel=SO(J)R | |cancel=SO(J)R | ||
|p1=100 | |p1=100 | ||
| Line 157: | Line 170: | ||
|invul= | |invul= | ||
|hitbox= | |hitbox= | ||
}} | }} | ||
} | |} | ||
====== < | *Air unblockable | ||
A staple move for combos and blockstrings. 5C has a short range and is unsafe on block, but can be cancelled to make it safe. It can be jump cancelled on hit, but not on block. Will usually be used in combos rather than neutral. | |||
</div> | |||
| | </div> | ||
| | |||
| | ===<big>2A</big>=== | ||
<div class="attack-container"> | |||
<div class="attack-gallery"> | |||
<gallery widths="210px" heights="210px" mode="nolines"> | |||
BBCS_Hazama_2A.png | Fast, crouching jab. | |||
</gallery> | |||
</div> | |||
<div class="attack-info"> | |||
{| class="wikitable attack-data" | |||
{{AttackDataHeader-BBCPE}} | |||
|- | |||
{{AttackData-BBCPE | |||
|header=no | |||
|damage=300 | |damage=300 | ||
|cancel=CSOR | |cancel=CSOR | ||
| Line 190: | Line 210: | ||
|invul= | |invul= | ||
|hitbox= | |hitbox= | ||
}} | }} | ||
} | |} | ||
====== < | *Very fast crouching jab for pressure | ||
Hazama's 2A is faster than most other characters, and is safe on block. Can be used for tick throws and stagger pressure, and is overall a very good move. | |||
</div> | |||
| | </div> | ||
| | |||
| | ===<big>2B</big>=== | ||
<div class="attack-container"> | |||
<div class="attack-gallery"> | |||
<gallery widths="210px" heights="210px" mode="nolines"> | |||
BBCS_Hazama_2B.png |Hazama has legs. | |||
</gallery> | |||
</div> | |||
<div class="attack-info"> | |||
{| class="wikitable attack-data" | |||
{{AttackDataHeader-BBCPE}} | |||
|- | |||
{{AttackData-BBCPE | |||
|header=no | |||
|damage=450 | |damage=450 | ||
|cancel=SOR | |cancel=SOR | ||
| Line 223: | Line 250: | ||
|invul= | |invul= | ||
|hitbox= | |hitbox= | ||
}} | }} | ||
} | |} | ||
====== < | One of the few moves Hazama has during neutral, due to its range and low-hitting properties. A decent move for footsies that can lead to a short combo on hit. | ||
</div> | |||
</div> | |||
| | |||
| | ===<big>2C</big>=== | ||
| | <div class="attack-container"> | ||
<div class="attack-gallery"> | |||
<gallery widths="210px" heights="210px" mode="nolines"> | |||
BBCS_Hazama_2C.png |The god anti-air. | |||
</gallery> | |||
</div> | |||
<div class="attack-info"> | |||
{| class="wikitable attack-data" | |||
{{AttackDataHeader-BBCPE}} | |||
|- | |||
{{AttackData-BBCPE | |||
|header=no | |||
|damage=660 | |damage=660 | ||
|cancel=SOJR | |cancel=SOJR | ||
| Line 256: | Line 289: | ||
|invul=8-15H | |invul=8-15H | ||
|hitbox= | |hitbox= | ||
}} | }} | ||
} | |} | ||
====== < | *Head invuln from 8F-15F | ||
*Floats on CH | |||
*Air unblockable | |||
| | A very powerful anti-air that leads to great damage anywhere, but has poor horizontal range. On counter hit, the opponent is knocked very high in the air, allowing for a wide range of followups. Can be jump cancelled on hit and block, adding another layer of mixup opportunities. | ||
| | </div> | ||
| | </div> | ||
===<big>6A</big>=== | |||
<div class="attack-container"> | |||
<div class="attack-gallery"> | |||
<gallery widths="210px" heights="210px" mode="nolines"> | |||
BBCS_Hazama_6A.png |No one blocks this. | |||
</gallery> | |||
</div> | |||
<div class="attack-info"> | |||
{| class="wikitable attack-data" | |||
{{AttackDataHeader-BBCPE}} | |||
|- | |||
{{AttackData-BBCPE | |||
|header=no | |||
|damage=600 | |damage=600 | ||
|cancel=SrR | |cancel=SrR | ||
| Line 289: | Line 331: | ||
|invul= | |invul= | ||
|hitbox= | |hitbox= | ||
}} | }} | ||
} | |} | ||
====== < | *Hard knockdown on air hit | ||
*Forces crouch on hit | |||
Hazama's standing overhead. Gatlings from 5A, 2A, 5B, and 2B. Very hard to notice, and relatively safe on block. When it hits an opponent in the air, it causes a hard knockdown to pick them up with moves like 5C. Cannot be comboed off of without Heat or CH. | |||
| | </div> | ||
| | </div> | ||
| | |||
===<big>6B</big>=== | |||
<div class="attack-container"> | |||
<div class="attack-gallery"> | |||
<gallery widths="210px" heights="210px" mode="nolines"> | |||
BBCS_Hazama_6B.png |Watch your shins. | |||
</gallery> | |||
</div> | |||
<div class="attack-info"> | |||
{| class="wikitable attack-data" | |||
{{AttackDataHeader-BBCPE}} | |||
|- | |||
{{AttackData-BBCPE | |||
|header=no | |||
|damage=600 | |damage=600 | ||
|cancel=SrR | |cancel=SrR | ||
| Line 322: | Line 372: | ||
|invul= | |invul= | ||
|hitbox= | |hitbox= | ||
}} | }} | ||
} | |} | ||
====== < | *Fatal Counters | ||
*Staggers on CH | |||
Hazama's standing low. Gatlings from 5A, 5B, and 2B. Similar to 6A, it is very hard to see, and can bait out an attack. Landing this as a Fatal Counter leads to huge damage even without Heat. Cannot be comboed off of without Heat or CH. | |||
</div> | |||
| | </div> | ||
| | |||
===<big>6C</big>=== | |||
|damage= | <div class="attack-container"> | ||
<div class="attack-gallery"> | |||
<gallery widths="210px" heights="210px" mode="nolines"> | |||
BBCS_Hazama_6C.png |Now ground bounces. | |||
</gallery> | |||
</div> | |||
<div class="attack-info"> | |||
{| class="wikitable attack-data" | |||
{{AttackDataHeader-BBCPE}} | |||
|- | |||
{{AttackData-BBCPE | |||
|header=no | |||
|damage=400×3 | |||
|cancel=R | |cancel=R | ||
|p1=100 | |p1=100 | ||
| Line 355: | Line 413: | ||
|invul= | |invul= | ||
|hitbox= | |hitbox= | ||
}} | }} | ||
} | |} | ||
====== < | *Ground bounces on air hit | ||
*Staggers on CH | |||
6C is most often used in combos due to its ground bounce, allowing a followup in most cases. The last hit has a relatively long-lasting hitbox, and can meaty the opponent's air tech. Very rewarding on CH, and somewhat safe on block since it creates space. Can be comboed into from 5C if the opponent is crouching, though doesn't have a reliable followup. | |||
| | </div> | ||
| | </div> | ||
| | |||
===<big>3C</big>=== | |||
<div class="attack-container"> | |||
<div class="attack-gallery"> | |||
<gallery widths="210px" heights="210px" mode="nolines"> | |||
BBCS_Hazama_3C.png |His only good mid-screen poke. | |||
</gallery> | |||
</div> | |||
<div class="attack-info"> | |||
{| class="wikitable attack-data" | |||
{{AttackDataHeader-BBCPE}} | |||
|- | |||
{{AttackData-BBCPE | |||
|header=no | |||
|damage=700 | |damage=700 | ||
|cancel=SOR | |cancel=SOR | ||
| Line 388: | Line 454: | ||
|invul= | |invul= | ||
|hitbox= | |hitbox= | ||
}} | }} | ||
} | |} | ||
====== < | *Causes hard knockdown on CH | ||
Hazama's best neutral tool, with good range. Hits low. Is relatively safe on block due to the space it creates and can be cancelled into many of his specials. On counter hit, it can be followed up with a charged Zaneiga, making it a powerful starter. | |||
</div> | |||
| | </div> | ||
| | |||
| | ===<big>J.A</big>=== | ||
<div class="attack-container"> | |||
<div class="attack-gallery"> | |||
<gallery widths="210px" heights="210px" mode="nolines"> | |||
BBCS_Hazama_jA.png |Safe air poke. | |||
</gallery> | |||
</div> | |||
<div class="attack-info"> | |||
{| class="wikitable attack-data" | |||
{{AttackDataHeader-BBCPE}} | |||
|- | |||
{{AttackData-BBCPE | |||
|header=no | |||
|damage=300 | |damage=300 | ||
|cancel=CSOJR | |cancel=CSOJR | ||
| Line 421: | Line 494: | ||
|invul= | |invul= | ||
|hitbox= | |hitbox= | ||
}} | }} | ||
} | |} | ||
====== < | A short but useful attack that is good for pressure. It can hit standing opponents from a jump, so it its relatively easy to set up a fuzzy guard from it. | ||
</div> | |||
</div> | |||
| | |||
| | ===<big>J.B</big>=== | ||
| | <div class="attack-container"> | ||
<div class="attack-gallery"> | |||
<gallery widths="210px" heights="210px" mode="nolines"> | |||
BBCS_Hazama_jB.png | Good air to air. | |||
</gallery> | |||
</div> | |||
<div class="attack-info"> | |||
{| class="wikitable attack-data" | |||
{{AttackDataHeader-BBCPE}} | |||
|- | |||
{{AttackData-BBCPE | |||
|header=no | |||
|damage=450 | |damage=450 | ||
|cancel=SOJR | |cancel=SOJR | ||
| Line 454: | Line 533: | ||
|invul= | |invul= | ||
|hitbox= | |hitbox= | ||
}} | }} | ||
} | |} | ||
====== < | A long range kick that functions well as an air-to-air. Can also be used when approaching with chains, and has a crossup hitbox in its later active frames. | ||
</div> | |||
</div> | |||
| | |||
| | ===<big>J.C</big>=== | ||
| | <div class="attack-container"> | ||
<div class="attack-gallery"> | |||
<gallery widths="210px" heights="210px" mode="nolines"> | |||
BBCS_Hazama_jC1.png |CCCCC... | |||
</gallery> | |||
</div> | |||
<div class="attack-info"> | |||
{| class="wikitable attack-data" | |||
{{AttackDataHeader-BBCPE|version=yes}} | |||
|- | |||
{{AttackData-BBCPE | |||
|header=no | |||
|version=j.C (1) | |version=j.C (1) | ||
|damage=600 | |damage=600 | ||
| Line 488: | Line 573: | ||
|invul= | |invul= | ||
|hitbox= | |hitbox= | ||
}} | }} | ||
|- | |||
{{AttackData-BBCPE | |||
|header=no | |header=no | ||
|version=j.C (2) | |version=j.C (2) | ||
| Line 513: | Line 598: | ||
|invul= | |invul= | ||
|hitbox= | |hitbox= | ||
}} | }} | ||
|- | |||
{{AttackData-BBCPE | |||
|header=no | |header=no | ||
|version=j.C (3) | |version=j.C (3) | ||
| Line 538: | Line 623: | ||
|invul= | |invul= | ||
|hitbox= | |hitbox= | ||
}} | }} | ||
|- | |||
{{AttackData-BBCPE | |||
|header=no | |header=no | ||
|version=j.C (4) | |version=j.C (4) | ||
| Line 563: | Line 648: | ||
|invul= | |invul= | ||
|hitbox= | |hitbox= | ||
}} | }} | ||
|- | |||
{{AttackData-BBCPE | |||
|header=no | |header=no | ||
|version=j.C (5) | |version=j.C (5) | ||
| Line 588: | Line 673: | ||
|invul= | |invul= | ||
|hitbox= | |hitbox= | ||
}} | }} | ||
} | |} | ||
====== < | Mostly used as a combo ender. Hazama's j.C is rarely used as an approach tool due to it being overshadowed by his other air normals, and instead functions as an air combo finisher, as it now floats higher and can no longer be looped. | ||
</div> | |||
</div> | |||
| | |||
| | ===<big>J.2C</big>=== | ||
| | <div class="attack-container"> | ||
<div class="attack-gallery"> | |||
<gallery widths="210px" heights="210px" mode="nolines"> | |||
BBCS_Hazama_j2C.png |Death from above. | |||
</gallery> | |||
</div> | |||
<div class="attack-info"> | |||
{| class="wikitable attack-data" | |||
{{AttackDataHeader-BBCPE}} | |||
|- | |||
{{AttackData-BBCPE | |||
|header=no | |||
|damage=620 | |damage=620 | ||
|cancel=SOJR | |cancel=SOJR | ||
| Line 621: | Line 712: | ||
|invul= | |invul= | ||
|hitbox= | |hitbox= | ||
}} | }} | ||
|} | |||
*Brings Hazama lower to the ground | |||
A more common normal to use for chain approaches. It is somewhat slow, which allows it to set up for crossups due to its large hitbox beneath him. Hazama gets closer to the ground when performing this move, allowing him to land quicker and perform certain followups during combos. | |||
</div> | |||
</div> | |||
<br clear=all/> | <br clear=all/> | ||
| Line 640: | Line 731: | ||
D cancel 12F~ possible to cancel into various aerial moves. | D cancel 12F~ possible to cancel into various aerial moves. | ||
<br/><br/> | <br/><br/> | ||
====== < | ===<big>5D</big>=== | ||
<div class="attack-container"> | |||
<div class="attack-gallery"> | |||
| | <gallery widths="210px" heights="210px" mode="nolines"> | ||
| | BBCS_Hazama_5D.png |Horizontal chain. | ||
| | </gallery> | ||
</div> | |||
|version=5D (/ | <div class="attack-info"> | ||
{| class="wikitable attack-data" | |||
{{AttackDataHeader-BBCPE|version=yes}} | |||
|- | |||
{{AttackData-BBCPE | |||
|header=no | |||
|version=5D (/far) | |||
|cancel=SOR | |cancel=SOR | ||
|damage=250/500 | |damage=250/500 | ||
| Line 662: | Line 759: | ||
|frameAdv= | |frameAdv= | ||
|hitbox= | |hitbox= | ||
}} | }} | ||
|- | |||
{{AttackData-BBCPE | |||
|header=no | |header=no | ||
|version=5D | |version=5D (OD) | ||
|cancel=SOR | |cancel=SOR | ||
|damage=500 | |damage=500 | ||
|starter=S | |starter=S | ||
|p1=80 | |p1=80 | ||
| Line 681: | Line 778: | ||
|frameAdv= | |frameAdv= | ||
|hitbox= | |hitbox= | ||
}} | }} | ||
} | |} | ||
====== < | *Launches a chain straight forward | ||
5D is not used too often in neutral, but it does well against characters that focus on the ground game, like Tager and Relius. It sees a lot of use in combos, allowing followups for 6C and Ressenga, but otherwise is not used as much as others. | |||
</div> | |||
| | </div> | ||
| | |||
| | ===<big>A Follow-up</big>=== | ||
<div class="attack-container"> | |||
<div class="attack-gallery"> | |||
<gallery widths="210px" heights="210px" mode="nolines"> | |||
BBCS_Hazama_AFollowup.png |Having second thoughts? | |||
</gallery> | |||
</div> | |||
<div class="attack-info"> | |||
{| class="wikitable attack-data" | |||
{{AttackDataHeader-BBCPE}} | |||
|- | |||
{{AttackData-BBCPE | |||
|header=no | |||
|damage= | |damage= | ||
|cancel= | |cancel= | ||
| Line 708: | Line 812: | ||
|frameAdv= | |frameAdv= | ||
|hitbox= | |hitbox= | ||
}} | }} | ||
} | |} | ||
====== < | Retracts a chain that is already out. This followup is used mid combo or to make a whiffed chain safe. It now consumes one Ouroboros stock, but is offset by having 3 stocks. | ||
</div> | |||
</div> | |||
| | |||
| | ===<big>B Follow-up</big>=== | ||
| | <div class="attack-container"> | ||
<div class="attack-gallery"> | |||
<gallery widths="210px" heights="210px" mode="nolines"> | |||
BBCS_Hazama_BFollowup.png |Angled approach for baiting and other options. | |||
</gallery> | |||
</div> | |||
<div class="attack-info"> | |||
{| class="wikitable attack-data" | |||
{{AttackDataHeader-BBCPE}} | |||
|- | |||
{{AttackData-BBCPE | |||
|header=no | |||
|damage= | |damage= | ||
|cancel= | |cancel= | ||
| Line 735: | Line 845: | ||
|frameAdv= | |frameAdv= | ||
|hitbox= | |hitbox= | ||
}} | }} | ||
} | |} | ||
====== < | The B followup allows Hazama to approach with a very sharp angle. Due to the way he flies back before moving, it can be used to bait out anti-airs and reversals. | ||
</div> | |||
</div> | |||
| | |||
| | ===<big>C Follow-up</big>=== | ||
| | <div class="attack-container"> | ||
<div class="attack-gallery"> | |||
<gallery widths="210px" heights="210px" mode="nolines"> | |||
BBCS_Hazama_CFollowup.png |Confusing and tricky maneuver. | |||
</gallery> | |||
</div> | |||
<div class="attack-info"> | |||
{| class="wikitable attack-data" | |||
{{AttackDataHeader-BBCPE}} | |||
|- | |||
{{AttackData-BBCPE | |||
|header=no | |||
|damage= | |damage= | ||
|cancel= | |cancel= | ||
| Line 762: | Line 878: | ||
|frameAdv= | |frameAdv= | ||
|hitbox= | |hitbox= | ||
}} | }} | ||
} | |} | ||
====== < | After a short delay, Hazama instantly travels to the other end of the chain. On hit or block, this followup will make Hazama cross up the opponent. Additionally, if used on an opponent's wakeup, if timed correctly, it can make the opponent's reversal come out in the completely wrong direction. | ||
</div> | |||
</div> | |||
| | |||
| | ===<big>D Follow-up</big>=== | ||
| | <div class="attack-container"> | ||
<div class="attack-gallery"> | |||
<gallery widths="210px" heights="210px" mode="nolines"> | |||
BBCS_Hazama_DFollowup.png |WOOHOO! | |||
</gallery> | |||
</div> | |||
<div class="attack-info"> | |||
{| class="wikitable attack-data" | |||
{{AttackDataHeader-BBCPE}} | |||
|- | |||
{{AttackData-BBCPE | |||
|header=no | |||
|damage= | |damage= | ||
|cancel= | |cancel= | ||
| Line 789: | Line 911: | ||
|frameAdv= | |frameAdv= | ||
|hitbox= | |hitbox= | ||
}} | }} | ||
} | |} | ||
====== < | Hazama flies towards the end of his chain. Any attacks performed at this time carry his momentum. This followup is generally used for approaching and escaping, as it carries him quite a large distance in the direction of the chain. | ||
</div> | |||
</div> | |||
| | |||
| | ===<big>2D</big>=== | ||
| | <div class="attack-container"> | ||
<div class="attack-gallery"> | |||
|version=2D (/ | <gallery widths="210px" heights="210px" mode="nolines"> | ||
BBCS_Hazama_2D.png |Vertical chain. | |||
</gallery> | |||
</div> | |||
<div class="attack-info"> | |||
{| class="wikitable attack-data" | |||
{{AttackDataHeader-BBCPE|version=yes}} | |||
|- | |||
{{AttackData-BBCPE | |||
|header=no | |||
|version=2D (/far) | |||
|cancel=SOR | |cancel=SOR | ||
|damage=400/800 | |damage=400/800 | ||
| Line 817: | Line 945: | ||
|frameAdv= | |frameAdv= | ||
|hitbox= | |hitbox= | ||
}} | }} | ||
|- | |||
{{AttackData-BBCPE | |||
|header=no | |header=no | ||
|version=2D | |version=2D (OD) | ||
|cancel=SOR | |cancel=SOR | ||
|damage=800 | |damage=800 | ||
|starter=S | |starter=S | ||
|p1=80 | |p1=80 | ||
| Line 836: | Line 964: | ||
|frameAdv= | |frameAdv= | ||
|hitbox= | |hitbox= | ||
}} | }} | ||
} | |} | ||
====== < | *Launches a chain at a 90 degree angle | ||
Hazama throws a chain directly upwards. Can be used in select combos, but is more often used as an evasive maneuver. In the corner, using the B followup launches Hazama very high in the air, allowing him to escape situations very few characters can punish. | |||
</div> | |||
| | </div> | ||
| | |||
| | ===<big>6D</big>=== | ||
<div class="attack-container"> | |||
|version=6D (/ | <div class="attack-gallery"> | ||
<gallery widths="210px" heights="210px" mode="nolines"> | |||
BBCS_Hazama_6D.png |30 degree angle chain. | |||
</gallery> | |||
</div> | |||
<div class="attack-info"> | |||
{| class="wikitable attack-data" | |||
{{AttackDataHeader-BBCPE|version=yes}} | |||
|- | |||
{{AttackData-BBCPE | |||
|header=no | |||
|version=6D (/far) | |||
|cancel=SOR | |cancel=SOR | ||
|damage=300/600 | |damage=300/600 | ||
| Line 864: | Line 999: | ||
|frameAdv= | |frameAdv= | ||
|hitbox= | |hitbox= | ||
}} | }} | ||
|- | |||
{{AttackData-BBCPE | |||
|header=no | |header=no | ||
|version=6D | |version=6D (OD) | ||
|cancel=SOR | |cancel=SOR | ||
|damage=600 | |damage=600 | ||
|starter=S | |starter=S | ||
|p1=80 | |p1=80 | ||
| Line 883: | Line 1,018: | ||
|frameAdv= | |frameAdv= | ||
|hitbox= | |hitbox= | ||
}} | }} | ||
} | |} | ||
====== < | *Launches a chain at a 30 degree angle. | ||
One of the more commonly used chains in neutral, 6D is used to stuff air approaches, but sees little use elsewhere. This chain is best used to force characters to stay on the ground, and is very strong in certain matchups like Arakune. | |||
</div> | |||
| | </div> | ||
| | |||
| | ===<big>4D</big>=== | ||
<div class="attack-container"> | |||
|version=4D (/ | <div class="attack-gallery"> | ||
<gallery widths="210px" heights="210px" mode="nolines"> | |||
BBCS_Hazama_4D.png |70 degree angle chain. | |||
</gallery> | |||
</div> | |||
<div class="attack-info"> | |||
{| class="wikitable attack-data" | |||
{{AttackDataHeader-BBCPE|version=yes}} | |||
|- | |||
{{AttackData-BBCPE | |||
|header=no | |||
|version=4D (/far) | |||
|cancel=SOR | |cancel=SOR | ||
|damage=300/600 | |damage=300/600 | ||
| Line 911: | Line 1,053: | ||
|frameAdv= | |frameAdv= | ||
|hitbox= | |hitbox= | ||
}} | }} | ||
|- | |||
{{AttackData-BBCPE | |||
|header=no | |header=no | ||
|version=4D | |version=4D (OD) | ||
|cancel=SOR | |cancel=SOR | ||
|damage= | |damage=600 | ||
|starter=S | |starter=S | ||
|p1=80 | |p1=80 | ||
| Line 930: | Line 1,072: | ||
|frameAdv= | |frameAdv= | ||
|hitbox= | |hitbox= | ||
}} | }} | ||
|} | |||
*Launches a chain at a 70 degree angle | |||
This chain is not all that good for zoning outside of a combo, and much like 2D it is good for running away. 4D~D is used after landing 5C or 2C on an airborne opponent, as this is your staple anti-air hitconfirm. Typically used to add damage before ending a combo with j.C > Hirentotsu. | |||
</div> | |||
</div> | |||
====== < | ===<big>J.D</big>=== | ||
<div class="attack-container"> | |||
<div class="attack-gallery"> | |||
| | <gallery widths="210px" heights="210px" mode="nolines"> | ||
| | BBCS_Hazama_jD.png |Horizontal chain. | ||
| | </gallery> | ||
</div> | |||
|version=j.D (/ | <div class="attack-info"> | ||
{| class="wikitable attack-data" | |||
{{AttackDataHeader-BBCPE|version=yes}} | |||
|- | |||
{{AttackData-BBCPE | |||
|header=no | |||
|version=j.D (/far) | |||
|cancel=SOR | |cancel=SOR | ||
|damage=250/500 | |damage=250/500 | ||
| Line 959: | Line 1,107: | ||
|frameAdv= | |frameAdv= | ||
|hitbox= | |hitbox= | ||
}} | }} | ||
|- | |||
{{AttackData-BBCPE | |||
|header=no | |header=no | ||
|version=j.D | |version=j.D (OD) | ||
|cancel=SOR | |cancel=SOR | ||
|damage= | |damage=500 | ||
|starter=S | |starter=S | ||
|p1=80 | |p1=80 | ||
| Line 978: | Line 1,126: | ||
|frameAdv= | |frameAdv= | ||
|hitbox= | |hitbox= | ||
}} | }} | ||
|} | |||
*Launches a chain straight forward | |||
Has longer reach than ground 5D and isn't as fixed as 5D either (i.e. you can use it at different heights). Good for pressing grounded or aerial opponents. Can use to either keep opponents away or go in on them. Since chain follow-ups can be canceled faster now, j.5D~D into another aerial chain like j.6D or j.4D is quite the slick maneuver if you want to close the gap between you and your opponent. Not used in combos much, but if you land it on an opponent as a starter, don't be afraid to chain in. | |||
</div> | |||
</div> | |||
====== < | ===<big>J.2D</big>=== | ||
<div class="attack-container"> | |||
<div class="attack-gallery"> | |||
| | <gallery widths="210px" heights="210px" mode="nolines"> | ||
| | BBCS_Hazama_j2D.png |Directly downward chain. | ||
| | </gallery> | ||
</div> | |||
|version=j.2D (/ | <div class="attack-info"> | ||
{| class="wikitable attack-data" | |||
{{AttackDataHeader-BBCPE|version=yes}} | |||
|- | |||
{{AttackData-BBCPE | |||
|header=no | |||
|version=j.2D (/far) | |||
|cancel=SOR | |cancel=SOR | ||
|damage=250/500 | |damage=250/500 | ||
| Line 1,007: | Line 1,161: | ||
|frameAdv= | |frameAdv= | ||
|hitbox= | |hitbox= | ||
}} | }} | ||
|- | |||
{{AttackData-BBCPE | |||
|header=no | |header=no | ||
|version=j.2D | |version=j.2D (OD) | ||
|cancel=SOR | |cancel=SOR | ||
|damage= | |damage=500 | ||
|starter=S | |starter=S | ||
|p1=80 | |p1=80 | ||
| Line 1,026: | Line 1,180: | ||
|frameAdv= | |frameAdv= | ||
|hitbox= | |hitbox= | ||
}} | }} | ||
|} | |||
*Launches a chain at a -90 degree angle | |||
This chain is good for those times that you're really high up in the air and you want to get back on the ground quicker or hit the opponent if they're directly under you. This chain has a deceptive horizontal hitbox, or rather, you wouldn't think it would hit opponents below you at certain positions to the left or right but it does. This chain is used the least in terms of combos, but just like j.5D, be sure chain in if you land a good hit. | |||
</div> | |||
</div> | |||
====== < | ===<big>J.6D</big>=== | ||
<div class="attack-container"> | |||
<div class="attack-gallery"> | |||
| | <gallery widths="210px" heights="210px" mode="nolines"> | ||
| | BBCS_Hazama_j6D.png |-30 degree angle chain. | ||
| | </gallery> | ||
</div> | |||
|version=j.6D (/ | <div class="attack-info"> | ||
{| class="wikitable attack-data" | |||
{{AttackDataHeader-BBCPE|version=yes}} | |||
|- | |||
{{AttackData-BBCPE | |||
|header=no | |||
|version=j.6D (/far) | |||
|cancel=SOR | |cancel=SOR | ||
|damage=250/500 | |damage=250/500 | ||
| Line 1,055: | Line 1,215: | ||
|frameAdv= | |frameAdv= | ||
|hitbox= | |hitbox= | ||
}} | }} | ||
|- | |||
{{AttackData-BBCPE | |||
|header=no | |header=no | ||
|version=j.6D | |version=j.6D (OD) | ||
|cancel=SOR | |cancel=SOR | ||
|damage= | |damage=500 | ||
|starter=S | |starter=S | ||
|p1=80 | |p1=80 | ||
| Line 1,074: | Line 1,234: | ||
|frameAdv= | |frameAdv= | ||
|hitbox= | |hitbox= | ||
}} | }} | ||
|} | |||
*Launches a chain at a -30 degree angle | |||
This chain is frequently used to approach/pressure opponents on the ground. Like j.5D it is also one of your best mobility options. In combos, this chain is most commonly used after tossing an opponent into the corner with Jakou > RC or after Jabaki wallbouncing (far away). | |||
</div> | |||
</div> | |||
====== < | ===<big>J.4D</big>=== | ||
<div class="attack-container"> | |||
<div class="attack-gallery"> | |||
| | <gallery widths="210px" heights="210px" mode="nolines"> | ||
| | BBCS_Hazama_j4D.png |-70 degree angle chain. | ||
| | </gallery> | ||
</div> | |||
|version=j.4D (/ | <div class="attack-info"> | ||
{| class="wikitable attack-data" | |||
{{AttackDataHeader-BBCPE|version=yes}} | |||
|- | |||
{{AttackData-BBCPE | |||
|header=no | |||
|version=j.4D (/far) | |||
|cancel=SOR | |cancel=SOR | ||
|damage=250/500 | |damage=250/500 | ||
| Line 1,103: | Line 1,269: | ||
|frameAdv= | |frameAdv= | ||
|hitbox= | |hitbox= | ||
}} | }} | ||
|- | |||
{{AttackData-BBCPE | |||
|header=no | |header=no | ||
|version=j.4D | |version=j.4D (OD) | ||
|cancel=SOR | |cancel=SOR | ||
|damage= | |damage=500 | ||
|starter=S | |starter=S | ||
|p1=80 | |p1=80 | ||
| Line 1,122: | Line 1,288: | ||
|frameAdv= | |frameAdv= | ||
|hitbox= | |hitbox= | ||
}} | }} | ||
|} | |||
*Launches a chain at a -70 degree angle | |||
This chain can be used to catch opponents who are dashing in on you and are close enough to where j.6D would not hit with maximum hitstun or would whiff entirely. It can also be used like j.2D to catch opponents while you are at high altitudes. Also not seen in combos that much, but like j.5D and j.2D, it is completely valid as a starter. | |||
</div> | |||
</div> | |||
====== < | ===<big>J.8D</big>=== | ||
<div class="attack-container"> | |||
<div class="attack-gallery"> | |||
| | <gallery widths="210px" heights="210px" mode="nolines"> | ||
| | BBCS_Hazama_j8D.png |30 degree angle chain. | ||
| | </gallery> | ||
</div> | |||
|version=j.8D (/ | <div class="attack-info"> | ||
{| class="wikitable attack-data" | |||
{{AttackDataHeader-BBCPE|version=yes}} | |||
|- | |||
{{AttackData-BBCPE | |||
|header=no | |||
|version=j.8D (/far) | |||
|cancel=SOR | |cancel=SOR | ||
|damage=400/800 | |damage=400/800 | ||
| Line 1,151: | Line 1,323: | ||
|frameAdv= | |frameAdv= | ||
|hitbox= | |hitbox= | ||
}} | }} | ||
|- | |||
{{AttackData-BBCPE | |||
|header=no | |header=no | ||
|version=j.8D | |version=j.8D (OD) | ||
|cancel=SOR | |cancel=SOR | ||
|damage= | |damage=800 | ||
|starter=S | |starter=S | ||
|p1=80 | |p1=80 | ||
| Line 1,170: | Line 1,342: | ||
|frameAdv= | |frameAdv= | ||
|hitbox= | |hitbox= | ||
}} | |||
|} | |||
*Launches a chain at a 30 degree angle. | |||
Good runaway chain. Usually sees use in combos when doing something like 4D > j.8D > Jakou. | Good runaway chain. Usually sees use in combos when doing something like 4D > j.8D > Jakou. | ||
</div> | |||
</div> | |||
<br clear=all/> | <br clear=all/> | ||
==Universal Mechanics== | ==Universal Mechanics== | ||
====== < | ===<big>Forward Throw</big>=== | ||
<div class="attack-container"> | |||
<div class="attack-gallery"> | |||
| | <gallery widths="210px" heights="210px" mode="nolines"> | ||
| | BBCS_Hazama_FThrow.png |And the kick is good! | ||
| | </gallery> | ||
</div> | |||
<div class="attack-info"> | |||
{| class="wikitable attack-data" | |||
{{AttackDataHeader-BBCPE}} | |||
|- | |||
{{AttackData-BBCPE | |||
|header=no | |||
|cancel=SOR | |cancel=SOR | ||
|damage=1400 | |damage=0, 1400 | ||
|starter=S | |starter=S | ||
|p1=100 | |p1=100 | ||
| Line 1,198: | Line 1,378: | ||
|frameAdv= | |frameAdv= | ||
|hitbox= | |hitbox= | ||
}} | |||
|} | |||
*1400 minimum damage | |||
Sends the opponent flying up and forward. If you don't follow it up, it puts the opponent very far away. Can now be followed up midscreen with stance dash into Zaneiga (S) for a good combo. In the corner you can special cancel link Zaneiga/Gashoukyaku. | Sends the opponent flying up and forward. If you don't follow it up, it puts the opponent very far away. Can now be followed up midscreen with stance dash into Zaneiga (S) for a good combo. In the corner you can special cancel link Zaneiga/Gashoukyaku. | ||
</div> | |||
</div> | |||
====== < | ===<big> Back Throw</big>=== | ||
<div class="attack-container"> | |||
<div class="attack-gallery"> | |||
| | <gallery widths="210px" heights="210px" mode="nolines"> | ||
| | BBCS_Hazama_BThrow.png |Now wallbounces anywhere. | ||
| | </gallery> | ||
</div> | |||
<div class="attack-info"> | |||
{| class="wikitable attack-data" | |||
{{AttackDataHeader-BBCPE}} | |||
|- | |||
{{AttackData-BBCPE | |||
|header=no | |||
|cancel=SOR | |cancel=SOR | ||
|damage=1400 | |damage=0, 1400 | ||
|starter=S | |starter=S | ||
|p1=100 | |p1=100 | ||
| Line 1,224: | Line 1,412: | ||
|frameAdv= | |frameAdv= | ||
|hitbox= | |hitbox= | ||
}} | }} | ||
|} | |||
*1400 minimum damage | |||
Hazama's back throw midscreen causes a wallbounce allowing for a follow up. Special cancel into stance then link Zaneiga (S) for a combo. Is harder to comb the closer you are to the corner, often requiring Houtenjin when your back is directly to the corner. | |||
</div> | |||
</div> | |||
====== < | ===<big>Air Throw</big>=== | ||
<div class="attack-container"> | |||
<div class="attack-gallery"> | |||
| | <gallery widths="210px" heights="210px" mode="nolines"> | ||
| | BBCS_Hazama_AThrow.png |GO TO HELL! | ||
| | </gallery> | ||
</div> | |||
<div class="attack-info"> | |||
{| class="wikitable attack-data" | |||
{{AttackDataHeader-BBCPE}} | |||
|- | |||
{{AttackData-BBCPE | |||
|header=no | |||
|cancel=SOR | |cancel=SOR | ||
|damage=1400 | |damage=0, 1400 | ||
|starter=S | |starter=S | ||
|p1=100 | |p1=100 | ||
| Line 1,250: | Line 1,446: | ||
|frameAdv= | |frameAdv= | ||
|hitbox= | |hitbox= | ||
}} | }} | ||
|} | |||
This throw works really well due to its range and is even more effective due to Hazama's movement options. There are many situations where Hazama can fly in and just catch people in the air. Air throw causes a very high bounce now allowing for link into 6A or 5C for a combo. | |||
</div> | |||
</div> | |||
====== < | ===<big>Counter Assault</big>=== | ||
<div class="attack-container"> | |||
<div class="attack-gallery"> | |||
<gallery widths="210px" heights="210px" mode="nolines"> | |||
| | BBCS_Hazama_5B.png | | ||
| | </gallery> | ||
</div> | |||
<div class="attack-info"> | |||
{| class="wikitable attack-data" | |||
{{AttackDataHeader-BBCPE}} | |||
|- | |||
{{AttackData-BBCPE | |||
|header=no | |||
|damage=0 | |damage=0 | ||
|cancel=R | |cancel=R | ||
| Line 1,284: | Line 1,485: | ||
|invul=1-20I | |invul=1-20I | ||
|hitbox= | |hitbox= | ||
}} | |||
|} | |||
*Same animation as 5B. | *Same animation as 5B. | ||
*Not a bad option to use to escape pressure due to Hazama's lack of reversals. | *Not a bad option to use to escape pressure due to Hazama's lack of reversals. | ||
</div> | |||
</div> | |||
====== < | ===<big>Crush Trigger</big>=== | ||
<div class="attack-container"> | |||
<div class="attack-gallery"> | |||
| | <gallery widths="210px" heights="210px" mode="nolines"> | ||
BBCP_Hazama_CrushTrigger.png | | |||
| | </gallery> | ||
</div> | |||
<div class="attack-info"> | |||
{| class="wikitable attack-data" | |||
{{AttackDataHeader-BBCPE}} | |||
|- | |||
{{AttackData-BBCPE | |||
|header=no | |||
|damage=1000 | |damage=1000 | ||
|cancel=R | |cancel=R | ||
| Line 1,317: | Line 1,525: | ||
|invul= | |invul= | ||
|hitbox= | |hitbox= | ||
}} | |||
|} | |||
*Crush-trigger breaks guard without being barrier blocked. | *Crush-trigger breaks guard without being barrier blocked. | ||
*Depletes opponents barrier gauge on a successful block. | *Depletes opponents barrier gauge on a successful block. | ||
*Can charge to deplete more of the opponents barrier gauge on block. | *Can charge to deplete more of the opponents barrier gauge on block. | ||
*Can be used to tack on good extra damage, primarily in OD combos. | *Can be used to tack on good extra damage, primarily in OD combos. | ||
</div> | |||
</div> | |||
<br clear=all/> | <br clear=all/> | ||
==Specials== | ==Specials== | ||
====== < | ===<big>Venom Sword</big>=== | ||
<span class="input-badge">'''236A'''</span> | |||
<div class="attack-container"> | |||
| | <div class="attack-gallery"> | ||
<gallery widths="210px" heights="210px" mode="nolines"> | |||
| | BBCS_Hazama_jabaki.png |Don't get (corner) carried away | ||
| | </gallery> | ||
</div> | |||
<div class="attack-info"> | |||
{| class="wikitable attack-data" | |||
{{AttackDataHeader-BBCPE}} | |||
|- | |||
{{AttackData-BBCPE | |||
|header=no | |||
|damage=450 | |damage=450 | ||
|cancel=R | |cancel=R | ||
| Line 1,345: | Line 1,560: | ||
|frameAdv=+1 | |frameAdv=+1 | ||
|hitbox= | |hitbox= | ||
}} | |||
|} | |||
Hazama's other projectile. This move complement's Hazama's overall gameplan really well because it forces the opponent away from Hazama no matter how it connects (hit or block), and also leaves him at slight frame advantage to boot. | Hazama's other projectile. This move complement's Hazama's overall gameplan really well because it forces the opponent away from Hazama no matter how it connects (hit or block), and also leaves him at slight frame advantage to boot. | ||
In short midscreen strings, you can use this after 3C to add some significant corner push at the cost of the oki options you'd get after a closer knockdown. It wallbounces aerial opponents in the corner and can cancel into stance on hit to lead into damaging combos in the corner. | In short midscreen strings, you can use this after 3C to add some significant corner push at the cost of the oki options you'd get after a closer knockdown. It wallbounces aerial opponents in the corner and can cancel into stance on hit to lead into damaging combos in the corner. | ||
</div> | |||
</div> | |||
====== < | ===<big>Serpent's Benediction</big>=== | ||
<span class="input-badge">'''214D'''</span> | |||
<div class="attack-container"> | |||
| | <div class="attack-gallery"> | ||
<gallery widths="210px" heights="210px" mode="nolines"> | |||
| | BBCS_Hazama_jasetsu.png |Winding up... | ||
| | </gallery> | ||
</div> | |||
<div class="attack-info"> | |||
{| class="wikitable attack-data" | |||
{{AttackDataHeader-BBCPE}} | |||
|- | |||
{{AttackData-BBCPE | |||
|header=no | |||
|damage= | |damage= | ||
|cancel= | |cancel= | ||
| Line 1,370: | Line 1,592: | ||
|frameAdv= | |frameAdv= | ||
|hitbox= | |hitbox= | ||
}} | }} | ||
} | |} | ||
====== < | Hazama enters a unique stance. Pressing a button during this will allow Hazama to perform a specific followup. Can be cancelled from most of his normals, and sets up a high-low mixup due to its possible followups. Often seen cancelled from 3C, and can also be cancelled from Jabaki on hit. | ||
</div> | |||
| | </div> | ||
| | ===<big>Serpent's Redemption/Jakatsu</big>=== | ||
<span class="input-badge">'''214D~66/44'''</span> | |||
| | <div class="attack-container"> | ||
<div class="attack-gallery"> | |||
<gallery widths="210px" heights="210px" mode="nolines"> | |||
BBCP_Hazama_jakatsu.png |Smooth moves | |||
</gallery> | |||
</div> | |||
<div class="attack-info"> | |||
{| class="wikitable attack-data" | |||
{{AttackDataHeader-BBCPE}} | |||
|- | |||
{{AttackData-BBCPE | |||
|header=no | |||
|damage= | |damage= | ||
|cancel= | |cancel= | ||
| Line 1,394: | Line 1,622: | ||
|frameAdv= | |frameAdv= | ||
|hitbox= | |hitbox= | ||
}} | |||
|} | |||
Hazama can dash during his stance. You can use this to position the follow-ups for maximum effectiveness, most notably to forward dash so his super command grab will connect. Follow-ups are immediately available during either version of Jakatsu. | Hazama can dash during his stance. You can use this to position the follow-ups for maximum effectiveness, most notably to forward dash so his super command grab will connect. Follow-ups are immediately available during either version of Jakatsu. | ||
</div> | |||
</div> | |||
====== < | ===<big>Falling Fang</big>=== | ||
<span class="input-badge">'''214D~A'''</span> | |||
<div class="attack-container"> | |||
| | <div class="attack-gallery"> | ||
| | <gallery widths="210px" heights="210px" mode="nolines"> | ||
| | BBCS_Hazama_ressenga.png |Bop on the head, comboable | ||
| | </gallery> | ||
</div> | |||
<div class="attack-info"> | |||
{| class="wikitable attack-data" | |||
{{AttackDataHeader-BBCPE|version=yes}} | |||
|- | |||
{{AttackData-BBCPE | |||
|header=no | |||
|version=Ressenga | |version=Ressenga | ||
|cancel=R | |cancel=R | ||
| Line 1,418: | Line 1,653: | ||
|frameAdv=+1 | |frameAdv=+1 | ||
|hitbox= | |hitbox= | ||
}} | }} | ||
|- | |||
{{AttackData-BBCPE | |||
|header=no | |header=no | ||
|version=Ressenga (S) | |version=Ressenga (S) | ||
| Line 1,433: | Line 1,668: | ||
|frameAdv=+5 | |frameAdv=+5 | ||
|hitbox= | |hitbox= | ||
}} | |||
|} | |||
A forward-moving, relatively fast overhead. The forward moving part is nice because it allows you to do an overhead in places where 6A wouldn't reach, especially if you get pushed out by barrier blocking. | A forward-moving, relatively fast overhead. The forward moving part is nice because it allows you to do an overhead in places where 6A wouldn't reach, especially if you get pushed out by barrier blocking. | ||
Regular version causes a small ground bounce which can not be comboed after without meter, counter hit, or no tech. S version causes a larger ground bounce that can be followed up without meter with 5C. | Regular version causes a small ground bounce which can not be comboed after without meter, counter hit, or no tech. S version causes a larger ground bounce that can be followed up without meter with 5C. | ||
</div> | |||
</div> | |||
====== < | ===<big>Rising Fang</big>=== | ||
<span class="input-badge">'''214D~B'''</span> | |||
<div class="attack-container"> | |||
| | <div class="attack-gallery"> | ||
| | <gallery widths="210px" heights="210px" mode="nolines"> | ||
| | BBCS_Hazama_gashoukyaku.png |Flash kick, also comboable | ||
| | </gallery> | ||
</div> | |||
<div class="attack-info"> | |||
{| class="wikitable attack-data" | |||
{{AttackDataHeader-BBCPE|version=yes}} | |||
|- | |||
{{AttackData-BBCPE | |||
|header=no | |||
|version=Gashoukyaku | |version=Gashoukyaku | ||
|cancel=R | |cancel=R | ||
| Line 1,459: | Line 1,701: | ||
|frameAdv=-22 | |frameAdv=-22 | ||
|hitbox= | |hitbox= | ||
}} | }} | ||
|- | |||
{{AttackData-BBCPE | |||
|header=no | |header=no | ||
|version=Gashoukyaku (S) | |version=Gashoukyaku (S) | ||
|cancel=R | |cancel=R | ||
|damage= | |damage=715×2 | ||
|guard=HL | |guard=HL | ||
|attribute=B | |attribute=B | ||
| Line 1,474: | Line 1,716: | ||
|frameAdv=-18 | |frameAdv=-18 | ||
|hitbox= | |hitbox= | ||
}} | |||
|} | |||
An anti-air rising kick with a large vertical reach. Hazama's normal anti-airs are good, but this really takes the cake in terms of range and priority due to its invincibility. Because follow-ups cannot be done until the 7th frame of Jasetsu, this cannot be used as a reversal under normal wake-up circumstances. | An anti-air rising kick with a large vertical reach. Hazama's normal anti-airs are good, but this really takes the cake in terms of range and priority due to its invincibility. Because follow-ups cannot be done until the 7th frame of Jasetsu, this cannot be used as a reversal under normal wake-up circumstances. | ||
The normal version of this move is now key to converting midscreen meterless strings into extended combos. The strong version of this move causes the opponent to fly far away midscreen allowing for easy link into Jakou. At certain heights can link dash 6D after charged version. Can link into 6A or 6C in the corner. | The normal version of this move is now key to converting midscreen meterless strings into extended combos. The strong version of this move causes the opponent to fly far away midscreen allowing for easy link into Jakou. At certain heights can link dash 6D after charged version. Can link into 6A or 6C in the corner. | ||
</div> | |||
</div> | |||
====== < | ===<big>Devouring Fang</big>=== | ||
<span class="input-badge">'''214D~C'''</span> | |||
<div class="attack-container"> | |||
| | <div class="attack-gallery"> | ||
| | <gallery widths="210px" heights="210px" mode="nolines"> | ||
| | BBCS_Hazama_zaneiga.png |(Mint Chocolate) Ice Cream Scoop, deliciously comboable | ||
| | </gallery> | ||
</div> | |||
<div class="attack-info"> | |||
{| class="wikitable attack-data" | |||
{{AttackDataHeader-BBCPE|version=yes}} | |||
|- | |||
{{AttackData-BBCPE | |||
|header=no | |||
|version=Zaneiga | |version=Zaneiga | ||
|cancel=R | |cancel=R | ||
| Line 1,500: | Line 1,749: | ||
|frameAdv=-1 | |frameAdv=-1 | ||
|hitbox= | |hitbox= | ||
}} | }} | ||
|- | |||
{{AttackData-BBCPE | |||
|header=no | |header=no | ||
|version=Zaneiga (S) | |version=Zaneiga (S) | ||
| Line 1,515: | Line 1,764: | ||
|frameAdv=+1 | |frameAdv=+1 | ||
|hitbox= | |hitbox= | ||
}} | |||
|} | |||
Hazama's other standing low. This is also one of the strongest combo starters/extenders in Hazama's arsenal. Normal version is now the go to move to end combos midscreen after 3C for oki. Normal version causes crumple on standing opponents which is comboable after. Charged version retains the launch leading to damaging combos. | Hazama's other standing low. This is also one of the strongest combo starters/extenders in Hazama's arsenal. Normal version is now the go to move to end combos midscreen after 3C for oki. Normal version causes crumple on standing opponents which is comboable after. Charged version retains the launch leading to damaging combos. | ||
</div> | |||
</div> | |||
====== < | ===<big>Serpent's Haste</big>=== | ||
<span class="input-badge">'''214D~D'''</span> | |||
<div class="attack-container"> | |||
| | <div class="attack-gallery"> | ||
<gallery widths="210px" heights="210px" mode="nolines"> | |||
| | BBCS_Hazama_Kamae_Chuudan.png |Winding down... | ||
| | </gallery> | ||
</div> | |||
<div class="attack-info"> | |||
{| class="wikitable attack-data" | |||
{{AttackDataHeader-BBCPE}} | |||
|- | |||
{{AttackData-BBCPE | |||
|header=no | |||
|damage= | |damage= | ||
|cancel= | |cancel= | ||
| Line 1,538: | Line 1,794: | ||
|frameAdv= | |frameAdv= | ||
|hitbox= | |hitbox= | ||
}} | |||
|} | |||
And then sometimes it's best not to do anything at all. Stance-cancelling is good if you think your opponent is going to mash out of your stance mix-up, or if you've been pushed far enough out that your follow-ups will whiff without forward stance dashing. | And then sometimes it's best not to do anything at all. Stance-cancelling is good if you think your opponent is going to mash out of your stance mix-up, or if you've been pushed far enough out that your follow-ups will whiff without forward stance dashing. | ||
</div> | |||
</div> | |||
====== < | ===<big>Wind Serpent's Fang</big>=== | ||
<span class="input-badge">'''j.214B'''</span> | |||
<div class="attack-container"> | |||
| | <div class="attack-gallery"> | ||
<gallery widths="210px" heights="210px" mode="nolines"> | |||
| | BBCS_Hazama_hirentotsu.png |Long time, no see | ||
| | </gallery> | ||
</div> | |||
<div class="attack-info"> | |||
{| class="wikitable attack-data" | |||
{{AttackDataHeader-BBCPE}} | |||
|- | |||
{{AttackData-BBCPE | |||
|header=no | |||
|damage=700 | |damage=700 | ||
|cancel=R | |cancel=R | ||
| Line 1,561: | Line 1,824: | ||
|frameAdv= | |frameAdv= | ||
|hitbox= | |hitbox= | ||
}} | |||
|} | |||
An aerial spike. Pretty much only exists to end combos or convert rogue air hits into knockdowns. If you tiger knee it, it can go over certain moves, though you should consider how risky it is to do that as opposed to just jumping and chaining in. Also completely stops air momentum at the cost of not being able to do anything until you land and also having landing recovery. Emergency techable. | An aerial spike. Pretty much only exists to end combos or convert rogue air hits into knockdowns. If you tiger knee it, it can go over certain moves, though you should consider how risky it is to do that as opposed to just jumping and chaining in. Also completely stops air momentum at the cost of not being able to do anything until you land and also having landing recovery. Emergency techable. | ||
</div> | |||
</div> | |||
====== < | ===<big>Bloody Fangs</big>=== | ||
<span class="input-badge">'''236C'''</span> | |||
<div class="attack-container"> | |||
| | <div class="attack-gallery"> | ||
<gallery widths="210px" heights="210px" mode="nolines"> | |||
| | BBCS_Hazama_gasaishou.png |GATCHA | ||
| | </gallery> | ||
</div> | |||
<div class="attack-info"> | |||
{| class="wikitable attack-data" | |||
{{AttackDataHeader-BBCPE}} | |||
|- | |||
{{AttackData-BBCPE | |||
|header=no | |||
|damage=0 | |damage=0 | ||
|cancel= | |cancel= | ||
| Line 1,584: | Line 1,854: | ||
|frameAdv=+7 | |frameAdv=+7 | ||
|hitbox= | |hitbox= | ||
}} | |||
|} | |||
Hazama's normal command grab. Has slightly more range than his ground throws which allows you to do other normals into tick throws that you wouldn't normally be able to, namely dashing 2B. Upon a successful grab, it awards 5 heat and allows you to link anything with less than 7 frames of startup, most optimally it can be converted into 3C xx 214D~B into air ender. | Hazama's normal command grab. Has slightly more range than his ground throws which allows you to do other normals into tick throws that you wouldn't normally be able to, namely dashing 2B. Upon a successful grab, it awards 5 heat and allows you to link anything with less than 7 frames of startup, most optimally it can be converted into 3C xx 214D~B into air ender. | ||
</div> | |||
</div> | |||
====== < | ===<big>Hungry Coils</big>=== | ||
<span class="input-badge">'''623D'''</span> | |||
<div class="attack-container"> | |||
| | <div class="attack-gallery"> | ||
<gallery widths="210px" heights="210px" mode="nolines"> | |||
| | BBCS_Hazama_jakou.png |Back to the corner with you! | ||
| | </gallery> | ||
</div> | |||
<div class="attack-info"> | |||
{| class="wikitable attack-data" | |||
{{AttackDataHeader-BBCPE}} | |||
|- | |||
{{AttackData-BBCPE | |||
|header=no | |||
|damage=0, 1800 | |damage=0, 1800 | ||
|cancel=R | |cancel=R | ||
| Line 1,607: | Line 1,884: | ||
|frameAdv= | |frameAdv= | ||
|hitbox= | |hitbox= | ||
}} | }} | ||
|} | |||
*Fatal Counter | |||
A special chain that catches air opponents and flings them behind Hazama. Very risky to use as an anti-air, only use if you are hard-reading your opponent. Otherwise, it's a great way to change positioning during a combo and tacks on a good deal of damage. If close to the corner, but not close enough to trigger the wallbounce, you can combo after this by RCing the second hit then following up with j.6D~D. On corner wallbounce, many things can be linked afterwards though most of the time it's safer just to OTG 5C into some ender. Can now cancel anytime after the second hit into 632146C. | |||
</div> | |||
</div> | |||
<br clear=all/> | <br clear=all/> | ||
==Distortion Drives== | ==Distortion Drives== | ||
====== < | ===<big>Serpent's Infernal Rapture</big>=== | ||
<span class="input-badge">'''236236B'''</span> | |||
<div class="attack-container"> | |||
| | <div class="attack-gallery"> | ||
| | <gallery widths="210px" heights="210px" mode="nolines"> | ||
| | BBCS_Hazama_Jayoku_Houtenjin.png |Straight to Heaven | ||
| | </gallery> | ||
</div> | |||
<div class="attack-info"> | |||
{| class="wikitable attack-data" | |||
{{AttackDataHeader-BBCPE|version=yes}} | |||
|- | |||
{{AttackData-BBCPE | |||
|header=no | |||
|version=Jayoku Houtenjin | |version=Jayoku Houtenjin | ||
|damage=1800 | |damage=1800 | ||
| Line 1,638: | Line 1,919: | ||
|frameAdv=-32 | |frameAdv=-32 | ||
|hitbox= | |hitbox= | ||
}} | }} | ||
|- | |||
{{AttackData-BBCPE | |||
|header=no | |header=no | ||
|version=(OD) Jayoku Houtenjin | |version=(OD) Jayoku Houtenjin | ||
| Line 1,653: | Line 1,934: | ||
|frameAdv=-32 | |frameAdv=-32 | ||
|hitbox= | |hitbox= | ||
}} | |||
|} | |||
This move lost quite a bit of damage as of CP 1.1 but nonetheless is still a very viable move to invest 50 meter in. With the right starters you can still easily break anywhere between 4-5K. This is also Hazama's only real reversal, though it will still get counter-hit if an active move connects with your hitbox. Then again, that trade is likely in your favor. GCOD Houtenjin is an option too and can lead to a ton of damage to turn the match in your favor. | This move lost quite a bit of damage as of CP 1.1 but nonetheless is still a very viable move to invest 50 meter in. With the right starters you can still easily break anywhere between 4-5K. This is also Hazama's only real reversal, though it will still get counter-hit if an active move connects with your hitbox. Then again, that trade is likely in your favor. GCOD Houtenjin is an option too and can lead to a ton of damage to turn the match in your favor. | ||
</div> | |||
</div> | |||
===<big>Eternal Coils of the Dragon Serpent</big>=== | |||
<span class="input-badge">'''632146C'''</span> | |||
<div class="attack-container"> | |||
| | <div class="attack-gallery"> | ||
| | <gallery widths="210px" heights="210px" mode="nolines"> | ||
| | BBCS_Hazama_Mizuchi_Rekkazan.png |Does it hurt? | ||
| | </gallery> | ||
</div> | |||
<div class="attack-info"> | |||
{| class="wikitable attack-data" | |||
{{AttackDataHeader-BBCPE|version=yes}} | |||
|- | |||
{{AttackData-BBCPE | |||
|header=no | |||
|version=Mizuchi Rekkazan | |version=Mizuchi Rekkazan | ||
|damage=200, 0, | |damage=200, 0, 500×8, 3200 | ||
|cancel=R | |cancel=R | ||
|guard=all | |guard=all | ||
| Line 1,677: | Line 1,965: | ||
|frameAdv=-46 | |frameAdv=-46 | ||
|hitbox= | |hitbox= | ||
}} | }} | ||
|- | |||
{{AttackData-BBCPE | |||
|header=no | |header=no | ||
|version=(OD) Mizuchi Rekkazan | |version=(OD) Mizuchi Rekkazan | ||
|cancel=R | |cancel=R | ||
|damage=200, 0, | |damage=200, 0, 250×24, 500, 2000 | ||
|guard=all | |guard=all | ||
|attribute=FP* | |attribute=FP* | ||
| Line 1,692: | Line 1,980: | ||
|frameAdv=-46 | |frameAdv=-46 | ||
|hitbox= | |hitbox= | ||
}} | |||
|} | |||
A combo ender. The initial projectile seeks and spawns at the opponent's feet. However, there is a minimum distance for this move, meaning that if the opponent is close enough, the initial projectile will whiff. Can also be used to situationally beat or catch projectiles like Jin's ice wave super, or Mu's 236D startup. OD version is great for ending combos, tacking on huge damage along with Hazama's OD life drain ring stealing health till the end of the animation. | A combo ender. The initial projectile seeks and spawns at the opponent's feet. However, there is a minimum distance for this move, meaning that if the opponent is close enough, the initial projectile will whiff. Can also be used to situationally beat or catch projectiles like Jin's ice wave super, or Mu's 236D startup. OD version is great for ending combos, tacking on huge damage along with Hazama's OD life drain ring stealing health till the end of the animation. | ||
</div> | |||
</div> | |||
===<big>The Serpent's Unholy Wrath</big>=== | |||
<span class="input-badge">'''214D~632146D'''</span> | |||
<div class="attack-container"> | |||
| | <div class="attack-gallery"> | ||
| | <gallery widths="210px" heights="210px" mode="nolines"> | ||
| | BBCP_Hazama_Orochi_Burensou.png|A thousand years of curb stomps | ||
| | </gallery> | ||
</div> | |||
<div class="attack-info"> | |||
{| class="wikitable attack-data" | |||
{{AttackDataHeader-BBCPE|version=yes}} | |||
|- | |||
{{AttackData-BBCPE | {{AttackData-BBCPE | ||
|header=no | |||
|version=Orochi Burensou | |version=Orochi Burensou | ||
|cancel=R | |cancel=R | ||
|damage= | |damage=0×2, 280×3, 57×9, 400, 800 | ||
|guard=T(80) | |guard=T(80) | ||
|attribute=T | |attribute=T | ||
| Line 1,716: | Line 2,011: | ||
|frameAdv= | |frameAdv= | ||
|hitbox= | |hitbox= | ||
}} | }} | ||
|- | |||
{{AttackData-BBCPE | |||
|header=no | |header=no | ||
|version=(OD) Orochi Burensou | |version=(OD) Orochi Burensou | ||
|cancel=R | |cancel=R | ||
|damage= | |damage=0×2, 280×3, 57×17, 400, 800 | ||
|guard=T(80) | |guard=T(80) | ||
|attribute=T | |attribute=T | ||
| Line 1,731: | Line 2,026: | ||
|frameAdv= | |frameAdv= | ||
|hitbox= | |hitbox= | ||
}} | }} | ||
|- | |||
{{AttackData-BBCPE | |||
|header=no | |header=no | ||
|version=Orochi Burensou (S) | |version=Orochi Burensou (S) | ||
|cancel=R | |cancel=R | ||
|damage= | |damage=0×2, 280×3, 97×9, 400, 800 | ||
|guard=T(80) | |guard=T(80) | ||
|attribute=T | |attribute=T | ||
| Line 1,746: | Line 2,041: | ||
|frameAdv= | |frameAdv= | ||
|hitbox= | |hitbox= | ||
}} | }} | ||
|- | |||
{{AttackData-BBCPE | |||
|header=no | |header=no | ||
|version=(OD) Orochi Burensou (S) | |version=(OD) Orochi Burensou (S) | ||
|cancel=R | |cancel=R | ||
|damage= | |damage=0×2, 280×3, 97×17, 400, 800 | ||
|guard=T(80) | |guard=T(80) | ||
|attribute=T | |attribute=T | ||
| Line 1,761: | Line 2,056: | ||
|frameAdv= | |frameAdv= | ||
|hitbox= | |hitbox= | ||
}} | |||
|} | |||
Hazama's super command grab. It's invulnerable until its active frames and does some pretty good damage. This move makes stance forward dash very threatening and opens up more mix-up potential to really crumble your opponent. It can also be rapid-cancelled from the second hit onward. | Hazama's super command grab. It's invulnerable until its active frames and does some pretty good damage. This move makes stance forward dash very threatening and opens up more mix-up potential to really crumble your opponent. It can also be rapid-cancelled from the second hit onward. | ||
</div> | |||
</div> | |||
<br clear=all/> | <br clear=all/> | ||
==Astral Heat== | ==Astral Heat== | ||
===<big>Hungry Darkness of 1000 Souls/Senkon Meiraku</big>=== | |||
<span class="input-badge">'''1632143D'''</span> or <span class="input-badge">'''63214632143D'''</span> | |||
| | <div class="attack-container"> | ||
| | <div class="attack-gallery"> | ||
| | <gallery widths="210px" heights="210px" mode="nolines"> | ||
| | BBCS_Hazama_Senkon_Meiraku.png |All bets are off | ||
BBCS_Hazama_Senkon_Meiraku2.png | | |||
</gallery> | |||
</div> | |||
<div class="attack-info"> | |||
{| class="wikitable attack-data" | |||
{{AttackDataHeader-BBCPE}} | |||
|- | |||
{{AttackData-BBCPE | {{AttackData-BBCPE | ||
|header=no | |||
|damage=Death | |damage=Death | ||
|cancel= | |cancel= | ||
| Line 1,785: | Line 2,089: | ||
|frameAdv=-45 | |frameAdv=-45 | ||
|hitbox= | |hitbox= | ||
}} | |||
|} | |||
A situationally comboable astral, though it can still be combo'd into with many if not all of the same things as in Continuum Shift and CP 1.0/1.1 (6A/6B, 3C, Zaneiga, etc). It's also got a lot of invulnerability, so it can be used against very slow moves or in situations where you can do this on reaction like during the superflash of some move. | A situationally comboable astral, though it can still be combo'd into with many if not all of the same things as in Continuum Shift and CP 1.0/1.1 (6A/6B, 3C, Zaneiga, etc). It's also got a lot of invulnerability, so it can be used against very slow moves or in situations where you can do this on reaction like during the superflash of some move. | ||
</div> | |||
</div> | |||
<br clear=all/> | <br clear=all/> | ||
==External References== | ==External References== | ||
* Japanese Name: ハザマ | * Japanese Name: ハザマ | ||
| Line 1,796: | Line 2,102: | ||
* Arcade Profile Dan Rankings: | * Arcade Profile Dan Rankings: | ||
*[http://www.dustloop.com/forums/showthread.php?15960-CP-Hazama-Video-Thread-Updated-4-3-2013 Character Video Thread] | *[http://www.dustloop.com/forums/showthread.php?15960-CP-Hazama-Video-Thread-Updated-4-3-2013 Character Video Thread] | ||
<br clear=all/> | <br clear=all/> | ||
==Navigation== | |||
{{CharLinks | {{CharLinks | ||
|charMainPage=BBCPE/Hazama | |charMainPage=BBCPE/Hazama | ||
| Line 1,807: | Line 2,110: | ||
}} | }} | ||
{{Navbar-BBCPE}} | {{Navbar-BBCPE}} | ||
<templatestyles src="Template:Move Card/shared/styles.css" /> | |||
Latest revision as of 07:54, 28 December 2023
Overview
Hazama is a captain of the Novus Orbis Librarium's Intelligence Department and the main antagonist of the series. In reality, he is Yuuki Terumi, a former member of the Six Heroes and the creator of the Azure Grimoire and by extension the Black Beast.

- Movement Options
- Chain Movement, Double Jump, 1 Airdash, Dash type: Step
- Fast projectile that covers many angles
- Multiple movement options allowing for varied approaches
- Solid mix-up tools: command grabs, standing overheads and lows, safe-on-block normals
- Good, stable damage conversion that can be attained from most any hit
- Solid overdrive that adds both life drain and gradual damage to his offense
- Not much in the way of mid-range pokes outside of 2B or 3C
- No meterless reversal; relies heavily on defensive system mechanics and overall gameplan depends on heat amount
- Quite immobile without use of drive followups; has a set-distance forward dash and short air dashes
=
| Health | 100 - 90% | 89 - 80% | 79 - 70% | 69 - 60% | 59 - 50% | 49 - 40% | 39 - 30% | 29 - 20% | 19 - 10% | 9 - 0% |
|---|---|---|---|---|---|---|---|---|---|---|
| Overdrive | 180F | 210F | 240F | 270F | 300F | 390F | 420F | 450F | 480F | 600F |
| This data is all copied over from BBCP 1.1. Replace with 2.0 data as it becomes available (and delete this warning) |
Normal Moves
5A

High, fast jab.

| Damage | Cancel | Guard | Startup | Active | Recovery | Frame Adv | Attribute | Invul |
|---|---|---|---|---|---|---|---|---|
| 300 | CSOJR | All | 5 | 3 | 9 | ±0 | B | - |
- Whiffs on crouching characters except for Hakumen and Tager
As it comes out very fast and has a high hitbox, Hazama's 5A is a very good anti-air. It also has decent range for a jab. Not recommended during pressure as characters can crouch under it, but can be used to set up tick throws due to its frame advantage.
5B
Fast, close-ranged knee.

5C

Short-range, two hit swing of his knives.

| Damage | Cancel | Guard | Startup | Active | Recovery | Frame Adv | Attribute | Invul |
|---|---|---|---|---|---|---|---|---|
| 400×2 | SO(J)R | HL | 10 | 1(1)6 | 28 | -15 | B | - |
- Air unblockable
A staple move for combos and blockstrings. 5C has a short range and is unsafe on block, but can be cancelled to make it safe. It can be jump cancelled on hit, but not on block. Will usually be used in combos rather than neutral.
2A

Fast, crouching jab.

2B

Hazama has legs.

2C

The god anti-air.

| Damage | Cancel | Guard | Startup | Active | Recovery | Frame Adv | Attribute | Invul |
|---|---|---|---|---|---|---|---|---|
| 660 | SOJR | HL | 13 | 3 | 37 | -23 | B | 8-15H |
- Head invuln from 8F-15F
- Floats on CH
- Air unblockable
A very powerful anti-air that leads to great damage anywhere, but has poor horizontal range. On counter hit, the opponent is knocked very high in the air, allowing for a wide range of followups. Can be jump cancelled on hit and block, adding another layer of mixup opportunities.
6A

No one blocks this.

| Damage | Cancel | Guard | Startup | Active | Recovery | Frame Adv | Attribute | Invul |
|---|---|---|---|---|---|---|---|---|
| 600 | SrR | H | 22 | 3 | 17 | -3 | B | - |
- Hard knockdown on air hit
- Forces crouch on hit
Hazama's standing overhead. Gatlings from 5A, 2A, 5B, and 2B. Very hard to notice, and relatively safe on block. When it hits an opponent in the air, it causes a hard knockdown to pick them up with moves like 5C. Cannot be comboed off of without Heat or CH.
6B

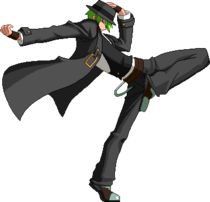
Watch your shins.

| Damage | Cancel | Guard | Startup | Active | Recovery | Frame Adv | Attribute | Invul |
|---|---|---|---|---|---|---|---|---|
| 600 | SrR | L | 25 | 3 | 13 | +1 | F | - |
- Fatal Counters
- Staggers on CH
Hazama's standing low. Gatlings from 5A, 5B, and 2B. Similar to 6A, it is very hard to see, and can bait out an attack. Landing this as a Fatal Counter leads to huge damage even without Heat. Cannot be comboed off of without Heat or CH.
6C

Now ground bounces.

| Damage | Cancel | Guard | Startup | Active | Recovery | Frame Adv | Attribute | Invul |
|---|---|---|---|---|---|---|---|---|
| 400×3 | R | All | 20 | 7•6•5 | 54T | -4 | FPr | - |
- Ground bounces on air hit
- Staggers on CH
6C is most often used in combos due to its ground bounce, allowing a followup in most cases. The last hit has a relatively long-lasting hitbox, and can meaty the opponent's air tech. Very rewarding on CH, and somewhat safe on block since it creates space. Can be comboed into from 5C if the opponent is crouching, though doesn't have a reliable followup.
3C

His only good mid-screen poke.

| Damage | Cancel | Guard | Startup | Active | Recovery | Frame Adv | Attribute | Invul |
|---|---|---|---|---|---|---|---|---|
| 700 | SOR | L | 14 | 4 | 21 | -6 | F | - |
- Causes hard knockdown on CH
Hazama's best neutral tool, with good range. Hits low. Is relatively safe on block due to the space it creates and can be cancelled into many of his specials. On counter hit, it can be followed up with a charged Zaneiga, making it a powerful starter.
J.A

Safe air poke.

J.B

Good air to air.

J.C

CCCCC...

| Version | Damage | Cancel | Guard | Startup | Active | Recovery | Frame Adv | Attribute | Invul |
|---|---|---|---|---|---|---|---|---|---|
| j.C (1) | 600 | SOJR | HA | 10 | 2 | 23 | - | H | - |
| j.C (2) | 300 | SOJR | HA | 5 | 2 | 23 | - | H | - |
| j.C (3) | 300 | SOR | HA | 5 | 2 | 23 | - | H | - |
| j.C (4) | 300 | SOR | HA | 8 | 3 | 21 | - | H | - |
| j.C (5) | 500 | SOR | HA | 8 | 2 | 26 | - | H | - |
Mostly used as a combo ender. Hazama's j.C is rarely used as an approach tool due to it being overshadowed by his other air normals, and instead functions as an air combo finisher, as it now floats higher and can no longer be looped.
J.2C

Death from above.

| Damage | Cancel | Guard | Startup | Active | Recovery | Frame Adv | Attribute | Invul |
|---|---|---|---|---|---|---|---|---|
| 620 | SOJR | HA | 14 | 4 | 23 | - | H | - |
- Brings Hazama lower to the ground
A more common normal to use for chain approaches. It is somewhat slow, which allows it to set up for crossups due to its large hitbox beneath him. Hazama gets closer to the ground when performing this move, allowing him to land quicker and perform certain followups during combos.
Drive Moves
Ouroboros
Maximum of 3 stocks at a time.
180F cooldown to regain 2 stocks after last stock consumed.
1 stock regained on block, 2 stocks regain on hit.
Stocks are consumed upon using either B, C, or D cancels.
All of Hazama's Drive moves add 200% meter gain to the combo.
B cancel 27~ possible to cancel into various aerial moves.
C cancel 26F~ possible to cancel into various aerial moves.
D cancel 12F~ possible to cancel into various aerial moves.
5D

Horizontal chain.

| Version | Damage | Cancel | Guard | Startup | Active | Recovery | Frame Adv | Attribute | Invul |
|---|---|---|---|---|---|---|---|---|---|
| 5D (/far) | 250/500 | SOR | all | 16 | - | 29 | - | BP* | - |
| 5D (OD) | 500 | SOR | all | - | - | 29 | - | BP* | - |
- Launches a chain straight forward
5D is not used too often in neutral, but it does well against characters that focus on the ground game, like Tager and Relius. It sees a lot of use in combos, allowing followups for 6C and Ressenga, but otherwise is not used as much as others.
A Follow-up

Having second thoughts?

B Follow-up

Angled approach for baiting and other options.

C Follow-up

Confusing and tricky maneuver.

| Damage | Cancel | Guard | Startup | Active | Recovery | Frame Adv | Attribute | Invul |
|---|---|---|---|---|---|---|---|---|
| - | - | - | - | - | - | - | - | - |
After a short delay, Hazama instantly travels to the other end of the chain. On hit or block, this followup will make Hazama cross up the opponent. Additionally, if used on an opponent's wakeup, if timed correctly, it can make the opponent's reversal come out in the completely wrong direction.
D Follow-up

WOOHOO!

| Damage | Cancel | Guard | Startup | Active | Recovery | Frame Adv | Attribute | Invul |
|---|---|---|---|---|---|---|---|---|
| - | - | - | - | - | - | - | - | - |
Hazama flies towards the end of his chain. Any attacks performed at this time carry his momentum. This followup is generally used for approaching and escaping, as it carries him quite a large distance in the direction of the chain.
2D

Vertical chain.

| Version | Damage | Cancel | Guard | Startup | Active | Recovery | Frame Adv | Attribute | Invul |
|---|---|---|---|---|---|---|---|---|---|
| 2D (/far) | 400/800 | SOR | all | 11 | - | 24 | - | BP* | - |
| 2D (OD) | 800 | SOR | all | - | - | 24 | - | BP* | - |
- Launches a chain at a 90 degree angle
Hazama throws a chain directly upwards. Can be used in select combos, but is more often used as an evasive maneuver. In the corner, using the B followup launches Hazama very high in the air, allowing him to escape situations very few characters can punish.
6D

30 degree angle chain.

| Version | Damage | Cancel | Guard | Startup | Active | Recovery | Frame Adv | Attribute | Invul |
|---|---|---|---|---|---|---|---|---|---|
| 6D (/far) | 300/600 | SOR | all | 16 | - | 27 | - | BP* | - |
| 6D (OD) | 600 | SOR | all | - | - | 27 | - | BP* | - |
- Launches a chain at a 30 degree angle.
One of the more commonly used chains in neutral, 6D is used to stuff air approaches, but sees little use elsewhere. This chain is best used to force characters to stay on the ground, and is very strong in certain matchups like Arakune.
4D

70 degree angle chain.

| Version | Damage | Cancel | Guard | Startup | Active | Recovery | Frame Adv | Attribute | Invul |
|---|---|---|---|---|---|---|---|---|---|
| 4D (/far) | 300/600 | SOR | all | 13 | - | 27 | - | BP* | - |
| 4D (OD) | 600 | SOR | all | - | - | 27 | - | BP* | - |
- Launches a chain at a 70 degree angle
This chain is not all that good for zoning outside of a combo, and much like 2D it is good for running away. 4D~D is used after landing 5C or 2C on an airborne opponent, as this is your staple anti-air hitconfirm. Typically used to add damage before ending a combo with j.C > Hirentotsu.
J.D

Horizontal chain.

| Version | Damage | Cancel | Guard | Startup | Active | Recovery | Frame Adv | Attribute | Invul |
|---|---|---|---|---|---|---|---|---|---|
| j.D (/far) | 250/500 | SOR | all | 13 | - | 40 | - | HP* | - |
| j.D (OD) | 500 | SOR | all | - | - | 40 | - | HP* | - |
- Launches a chain straight forward
Has longer reach than ground 5D and isn't as fixed as 5D either (i.e. you can use it at different heights). Good for pressing grounded or aerial opponents. Can use to either keep opponents away or go in on them. Since chain follow-ups can be canceled faster now, j.5D~D into another aerial chain like j.6D or j.4D is quite the slick maneuver if you want to close the gap between you and your opponent. Not used in combos much, but if you land it on an opponent as a starter, don't be afraid to chain in.
J.2D

Directly downward chain.

| Version | Damage | Cancel | Guard | Startup | Active | Recovery | Frame Adv | Attribute | Invul |
|---|---|---|---|---|---|---|---|---|---|
| j.2D (/far) | 250/500 | SOR | all | 13 | - | 40 | - | HP* | - |
| j.2D (OD) | 500 | SOR | all | - | - | 40 | - | HP* | - |
- Launches a chain at a -90 degree angle
This chain is good for those times that you're really high up in the air and you want to get back on the ground quicker or hit the opponent if they're directly under you. This chain has a deceptive horizontal hitbox, or rather, you wouldn't think it would hit opponents below you at certain positions to the left or right but it does. This chain is used the least in terms of combos, but just like j.5D, be sure chain in if you land a good hit.
J.6D
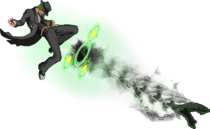
-30 degree angle chain.

| Version | Damage | Cancel | Guard | Startup | Active | Recovery | Frame Adv | Attribute | Invul |
|---|---|---|---|---|---|---|---|---|---|
| j.6D (/far) | 250/500 | SOR | all | 16 | - | 40 | - | HP* | - |
| j.6D (OD) | 500 | SOR | all | - | - | 40 | - | HP* | - |
- Launches a chain at a -30 degree angle
This chain is frequently used to approach/pressure opponents on the ground. Like j.5D it is also one of your best mobility options. In combos, this chain is most commonly used after tossing an opponent into the corner with Jakou > RC or after Jabaki wallbouncing (far away).
J.4D

-70 degree angle chain.

| Version | Damage | Cancel | Guard | Startup | Active | Recovery | Frame Adv | Attribute | Invul |
|---|---|---|---|---|---|---|---|---|---|
| j.4D (/far) | 250/500 | SOR | all | 13 | - | 40 | - | HP* | - |
| j.4D (OD) | 500 | SOR | all | - | - | 40 | - | HP* | - |
- Launches a chain at a -70 degree angle
This chain can be used to catch opponents who are dashing in on you and are close enough to where j.6D would not hit with maximum hitstun or would whiff entirely. It can also be used like j.2D to catch opponents while you are at high altitudes. Also not seen in combos that much, but like j.5D and j.2D, it is completely valid as a starter.
J.8D

30 degree angle chain.

Universal Mechanics
Forward Throw

And the kick is good!

| Damage | Cancel | Guard | Startup | Active | Recovery | Frame Adv | Attribute | Invul |
|---|---|---|---|---|---|---|---|---|
| 0, 1400 | SOR | T(80) | 7 | 3 | 17 | - | T | - |
- 1400 minimum damage
Sends the opponent flying up and forward. If you don't follow it up, it puts the opponent very far away. Can now be followed up midscreen with stance dash into Zaneiga (S) for a good combo. In the corner you can special cancel link Zaneiga/Gashoukyaku.
Back Throw

Now wallbounces anywhere.

| Damage | Cancel | Guard | Startup | Active | Recovery | Frame Adv | Attribute | Invul |
|---|---|---|---|---|---|---|---|---|
| 0, 1400 | SOR | T(80) | 7 | 3 | 17 | - | T | - |
- 1400 minimum damage
Hazama's back throw midscreen causes a wallbounce allowing for a follow up. Special cancel into stance then link Zaneiga (S) for a combo. Is harder to comb the closer you are to the corner, often requiring Houtenjin when your back is directly to the corner.
Air Throw

GO TO HELL!

| Damage | Cancel | Guard | Startup | Active | Recovery | Frame Adv | Attribute | Invul |
|---|---|---|---|---|---|---|---|---|
| 0, 1400 | SOR | T(120) | 7 | 3 | 12+3 | - | T | - |
This throw works really well due to its range and is even more effective due to Hazama's movement options. There are many situations where Hazama can fly in and just catch people in the air. Air throw causes a very high bounce now allowing for link into 6A or 5C for a combo.
Counter Assault
Crush Trigger

| Damage | Cancel | Guard | Startup | Active | Recovery | Frame Adv | Attribute | Invul |
|---|---|---|---|---|---|---|---|---|
| 1000 | R | Ba | 30-59 | 1 | 24 | +4 | B | - |
- Crush-trigger breaks guard without being barrier blocked.
- Depletes opponents barrier gauge on a successful block.
- Can charge to deplete more of the opponents barrier gauge on block.
- Can be used to tack on good extra damage, primarily in OD combos.
Specials
Venom Sword
236A

Don't get (corner) carried away

| Damage | Cancel | Guard | Startup | Active | Recovery | Frame Adv | Attribute | Invul |
|---|---|---|---|---|---|---|---|---|
| 450 | R | All | 15 | 2 | 21 | +1 | BP | - |
Hazama's other projectile. This move complement's Hazama's overall gameplan really well because it forces the opponent away from Hazama no matter how it connects (hit or block), and also leaves him at slight frame advantage to boot.
In short midscreen strings, you can use this after 3C to add some significant corner push at the cost of the oki options you'd get after a closer knockdown. It wallbounces aerial opponents in the corner and can cancel into stance on hit to lead into damaging combos in the corner.
Serpent's Benediction
214D

Winding up...

| Damage | Cancel | Guard | Startup | Active | Recovery | Frame Adv | Attribute | Invul |
|---|---|---|---|---|---|---|---|---|
| - | - | - | - | - | 104 total | - | - | - |
Hazama enters a unique stance. Pressing a button during this will allow Hazama to perform a specific followup. Can be cancelled from most of his normals, and sets up a high-low mixup due to its possible followups. Often seen cancelled from 3C, and can also be cancelled from Jabaki on hit.
Serpent's Redemption/Jakatsu
214D~66/44

Smooth moves

| Damage | Cancel | Guard | Startup | Active | Recovery | Frame Adv | Attribute | Invul |
|---|---|---|---|---|---|---|---|---|
| - | - | - | - | - | 35 total | - | - | - |
Hazama can dash during his stance. You can use this to position the follow-ups for maximum effectiveness, most notably to forward dash so his super command grab will connect. Follow-ups are immediately available during either version of Jakatsu.
Falling Fang
214D~A

Bop on the head, comboable

| Version | Damage | Cancel | Guard | Startup | Active | Recovery | Frame Adv | Attribute | Invul |
|---|---|---|---|---|---|---|---|---|---|
| Ressenga | 600 | R | HA | 19 | 3 | 13 | +1 | H | - |
| Ressenga (S) | 750 | R | H | 19 | 3 | 13 | +5 | H | 1-22F |
A forward-moving, relatively fast overhead. The forward moving part is nice because it allows you to do an overhead in places where 6A wouldn't reach, especially if you get pushed out by barrier blocking.
Regular version causes a small ground bounce which can not be comboed after without meter, counter hit, or no tech. S version causes a larger ground bounce that can be followed up without meter with 5C.
Rising Fang
214D~B

Flash kick, also comboable

| Version | Damage | Cancel | Guard | Startup | Active | Recovery | Frame Adv | Attribute | Invul |
|---|---|---|---|---|---|---|---|---|---|
| Gashoukyaku | 700 | R | HL | 9 | 8 | 33 | -22 | B | 1-12 All |
| Gashoukyaku (S) | 715×2 | R | HL | 9 | 2,6 | 33 | -18 | B | 1-12 All |
An anti-air rising kick with a large vertical reach. Hazama's normal anti-airs are good, but this really takes the cake in terms of range and priority due to its invincibility. Because follow-ups cannot be done until the 7th frame of Jasetsu, this cannot be used as a reversal under normal wake-up circumstances.
The normal version of this move is now key to converting midscreen meterless strings into extended combos. The strong version of this move causes the opponent to fly far away midscreen allowing for easy link into Jakou. At certain heights can link dash 6D after charged version. Can link into 6A or 6C in the corner.
Devouring Fang
214D~C

(Mint Chocolate) Ice Cream Scoop, deliciously comboable

| Version | Damage | Cancel | Guard | Startup | Active | Recovery | Frame Adv | Attribute | Invul |
|---|---|---|---|---|---|---|---|---|---|
| Zaneiga | 600 | R | LA | 21 | 3 | 17 | -1 | F | - |
| Zaneiga (S) | 900 | R | L | 21 | 3 | 17 | +1 | F | - |
Hazama's other standing low. This is also one of the strongest combo starters/extenders in Hazama's arsenal. Normal version is now the go to move to end combos midscreen after 3C for oki. Normal version causes crumple on standing opponents which is comboable after. Charged version retains the launch leading to damaging combos.
Serpent's Haste
214D~D

Winding down...

| Damage | Cancel | Guard | Startup | Active | Recovery | Frame Adv | Attribute | Invul |
|---|---|---|---|---|---|---|---|---|
| - | - | - | - | - | 18 total | - | - | - |
And then sometimes it's best not to do anything at all. Stance-cancelling is good if you think your opponent is going to mash out of your stance mix-up, or if you've been pushed far enough out that your follow-ups will whiff without forward stance dashing.
Wind Serpent's Fang
j.214B

Long time, no see

| Damage | Cancel | Guard | Startup | Active | Recovery | Frame Adv | Attribute | Invul |
|---|---|---|---|---|---|---|---|---|
| 700 | R | all | 11 | 3 | Until Landing+15L | - | H | - |
An aerial spike. Pretty much only exists to end combos or convert rogue air hits into knockdowns. If you tiger knee it, it can go over certain moves, though you should consider how risky it is to do that as opposed to just jumping and chaining in. Also completely stops air momentum at the cost of not being able to do anything until you land and also having landing recovery. Emergency techable.
Bloody Fangs
236C

GATCHA

| Damage | Cancel | Guard | Startup | Active | Recovery | Frame Adv | Attribute | Invul |
|---|---|---|---|---|---|---|---|---|
| 0 | - | T(90) | 12 | 2 | 31 | +7 | T | 1-12T |
Hazama's normal command grab. Has slightly more range than his ground throws which allows you to do other normals into tick throws that you wouldn't normally be able to, namely dashing 2B. Upon a successful grab, it awards 5 heat and allows you to link anything with less than 7 frames of startup, most optimally it can be converted into 3C xx 214D~B into air ender.
Hungry Coils
623D
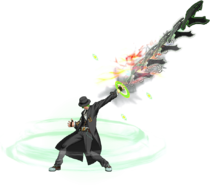
Back to the corner with you!

| Damage | Cancel | Guard | Startup | Active | Recovery | Frame Adv | Attribute | Invul |
|---|---|---|---|---|---|---|---|---|
| 0, 1800 | R | B | 14 | 13 | 31 | - | BP | - |
- Fatal Counter
A special chain that catches air opponents and flings them behind Hazama. Very risky to use as an anti-air, only use if you are hard-reading your opponent. Otherwise, it's a great way to change positioning during a combo and tacks on a good deal of damage. If close to the corner, but not close enough to trigger the wallbounce, you can combo after this by RCing the second hit then following up with j.6D~D. On corner wallbounce, many things can be linked afterwards though most of the time it's safer just to OTG 5C into some ender. Can now cancel anytime after the second hit into 632146C.
Distortion Drives
Serpent's Infernal Rapture
236236B
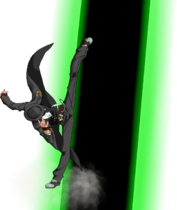
Straight to Heaven

| Version | Damage | Cancel | Guard | Startup | Active | Recovery | Frame Adv | Attribute | Invul |
|---|---|---|---|---|---|---|---|---|---|
| Jayoku Houtenjin | 1800 | R | all | 6+1 | 3 | 50 | -32 | B | 1-6 All |
| (OD) Jayoku Houtenjin | 2500 | R | all | 6+1 | 3 | 50 | -32 | B | 1-6 All |
This move lost quite a bit of damage as of CP 1.1 but nonetheless is still a very viable move to invest 50 meter in. With the right starters you can still easily break anywhere between 4-5K. This is also Hazama's only real reversal, though it will still get counter-hit if an active move connects with your hitbox. Then again, that trade is likely in your favor. GCOD Houtenjin is an option too and can lead to a ton of damage to turn the match in your favor.
Eternal Coils of the Dragon Serpent
632146C

Does it hurt?

| Version | Damage | Cancel | Guard | Startup | Active | Recovery | Frame Adv | Attribute | Invul |
|---|---|---|---|---|---|---|---|---|---|
| Mizuchi Rekkazan | 200, 0, 500×8, 3200 | R | all | 1+15 | 2 | 54 | -46 | FP* | 1-19P |
| (OD) Mizuchi Rekkazan | 200, 0, 250×24, 500, 2000 | R | all | 1+15 | 2 | 54 | -46 | FP* | 1-19P |
A combo ender. The initial projectile seeks and spawns at the opponent's feet. However, there is a minimum distance for this move, meaning that if the opponent is close enough, the initial projectile will whiff. Can also be used to situationally beat or catch projectiles like Jin's ice wave super, or Mu's 236D startup. OD version is great for ending combos, tacking on huge damage along with Hazama's OD life drain ring stealing health till the end of the animation.
The Serpent's Unholy Wrath
214D~632146D

A thousand years of curb stomps

| Version | Damage | Cancel | Guard | Startup | Active | Recovery | Frame Adv | Attribute | Invul |
|---|---|---|---|---|---|---|---|---|---|
| Orochi Burensou | 0×2, 280×3, 57×9, 400, 800 | R | T(80) | 12+0 | 3 | 40 | - | T | 1-12 All |
| (OD) Orochi Burensou | 0×2, 280×3, 57×17, 400, 800 | R | T(80) | 12+0 | 3 | 40 | - | T | 1-12 All |
| Orochi Burensou (S) | 0×2, 280×3, 97×9, 400, 800 | R | T(80) | 12+0 | 3 | 40 | - | T | 1-12 All |
| (OD) Orochi Burensou (S) | 0×2, 280×3, 97×17, 400, 800 | R | T(80) | 12+0 | 3 | 40 | - | T | 1-12 All |
Hazama's super command grab. It's invulnerable until its active frames and does some pretty good damage. This move makes stance forward dash very threatening and opens up more mix-up potential to really crumble your opponent. It can also be rapid-cancelled from the second hit onward.
Astral Heat
Hungry Darkness of 1000 Souls/Senkon Meiraku
1632143D or 63214632143D

All bets are off


| Damage | Cancel | Guard | Startup | Active | Recovery | Frame Adv | Attribute | Invul |
|---|---|---|---|---|---|---|---|---|
| Death | - | all | 1+16 | - | 116 | -45 | BP | 1-91 All |
A situationally comboable astral, though it can still be combo'd into with many if not all of the same things as in Continuum Shift and CP 1.0/1.1 (6A/6B, 3C, Zaneiga, etc). It's also got a lot of invulnerability, so it can be used against very slow moves or in situations where you can do this on reaction like during the superflash of some move.
External References
- Japanese Name: ハザマ
- Japanese Wiki
- Japanese BBS
- Arcade Profile Dan Rankings:
- Character Video Thread