No edit summary |
|||
| Line 88: | Line 88: | ||
|caption=Although the start-up is fast, 5A only sees somewhat occasional use | |caption=Although the start-up is fast, 5A only sees somewhat occasional use | ||
|data= | |data= | ||
{{AttackData- | {{AttackData-BBCF | ||
|damage=300 | |damage=300 | ||
|cancel=CSOJR | |cancel=CSOJR | ||
| Line 126: | Line 126: | ||
|caption=Fast and powerful, but can be dangerous to use in certain situations | |caption=Fast and powerful, but can be dangerous to use in certain situations | ||
|data= | |data= | ||
{{AttackData- | {{AttackData-BBCF | ||
|damage=660 | |damage=660 | ||
|cancel=SOR | |cancel=SOR | ||
| Line 168: | Line 168: | ||
|caption=The slower, but longer alternative to 5B | |caption=The slower, but longer alternative to 5B | ||
|data= | |data= | ||
{{AttackData- | {{AttackData-BBCF | ||
|damage=800 | |damage=800 | ||
|cancel=SO(J)R | |cancel=SO(J)R | ||
| Line 210: | Line 210: | ||
|caption=The ±0 frame advantage makes 2A a useful pressure tool | |caption=The ±0 frame advantage makes 2A a useful pressure tool | ||
|data= | |data= | ||
{{AttackData- | {{AttackData-BBCF | ||
|damage=300 | |damage=300 | ||
|cancel=CSOR | |cancel=CSOR | ||
| Line 248: | Line 248: | ||
|caption=Fast low, and can also be used as a footsie | |caption=Fast low, and can also be used as a footsie | ||
|data= | |data= | ||
{{AttackData- | {{AttackData-BBCF | ||
|damage=500 | |damage=500 | ||
|cancel=SOR | |cancel=SOR | ||
| Line 286: | Line 286: | ||
|caption=No longer a fatal, but still a very good move | |caption=No longer a fatal, but still a very good move | ||
|data= | |data= | ||
{{AttackData- | {{AttackData-BBCF | ||
|damage=720 | |damage=720 | ||
|cancel=SOR | |cancel=SOR | ||
| Line 322: | Line 322: | ||
|caption=An anti-air that has been buffed | |caption=An anti-air that has been buffed | ||
|data= | |data= | ||
{{AttackData- | {{AttackData-BBCF | ||
|damage=620 | |damage=620 | ||
|cancel=SO(J)R | |cancel=SO(J)R | ||
| Line 361: | Line 361: | ||
|caption=No chains into C make this move a dangerous one to use | |caption=No chains into C make this move a dangerous one to use | ||
|data= | |data= | ||
{{AttackData- | {{AttackData-BBCF | ||
|damage=720 | |damage=720 | ||
|cancel=SOR | |cancel=SOR | ||
| Line 400: | Line 400: | ||
|caption=Staple launcher off crouching opponents | |caption=Staple launcher off crouching opponents | ||
|data= | |data= | ||
{{AttackData- | {{AttackData-BBCF | ||
|damage=620*2 | |damage=620*2 | ||
|cancel=(S)OR, SOJR | |cancel=(S)OR, SOJR | ||
| Line 435: | Line 435: | ||
|caption=The okizeme setup off this move is still good, but not as versatile anymore | |caption=The okizeme setup off this move is still good, but not as versatile anymore | ||
|data= | |data= | ||
{{AttackData- | {{AttackData-BBCF | ||
|damage=720 | |damage=720 | ||
|cancel=SOJR | |cancel=SOJR | ||
| Line 480: | Line 480: | ||
|caption=Simple aerial jab | |caption=Simple aerial jab | ||
|data= | |data= | ||
{{AttackData- | {{AttackData-BBCF | ||
|damage=300 | |damage=300 | ||
|cancel=CSOJR | |cancel=CSOJR | ||
| Line 513: | Line 513: | ||
|caption=Aerial crossup move | |caption=Aerial crossup move | ||
|data= | |data= | ||
{{AttackData- | {{AttackData-BBCF | ||
|damage=500 | |damage=500 | ||
|cancel=SOJR | |cancel=SOJR | ||
| Line 546: | Line 546: | ||
|caption=Main aerial approach, due to the huge hitbox | |caption=Main aerial approach, due to the huge hitbox | ||
|data= | |data= | ||
{{AttackData- | {{AttackData-BBCF | ||
|damage=620 | |damage=620 | ||
|cancel=SOJR | |cancel=SOJR | ||
| Line 580: | Line 580: | ||
|caption=Valuable in combos, not so much elsewhere | |caption=Valuable in combos, not so much elsewhere | ||
|data= | |data= | ||
{{AttackData- | {{AttackData-BBCF | ||
|version=Normal | |version=Normal | ||
|damage=500, 680 | |damage=500, 680 | ||
| Line 608: | Line 608: | ||
A very important combo staple move. 5D is used in almost literally every combo in Ragna's arsenal, but outside of this, 5D doesn't see much other use. The move is somewhat safe compared to past iterations, but only primarily because 5D lost its Dash Cancel. The pushback on 5D is large, so if used either at the end of a gatling or at certain spacings, you can expect to come out unscathed, despite its poor frame advantage. | A very important combo staple move. 5D is used in almost literally every combo in Ragna's arsenal, but outside of this, 5D doesn't see much other use. The move is somewhat safe compared to past iterations, but only primarily because 5D lost its Dash Cancel. The pushback on 5D is large, so if used either at the end of a gatling or at certain spacings, you can expect to come out unscathed, despite its poor frame advantage. | ||
}} | }} | ||
{{AttackData- | {{AttackData-BBCF | ||
|version=Overdrive | |version=Overdrive | ||
|damage=500, 780 | |damage=500, 780 | ||
| Line 642: | Line 642: | ||
|caption=Safe move when spaced properly | |caption=Safe move when spaced properly | ||
|data= | |data= | ||
{{AttackData- | {{AttackData-BBCF | ||
|version=Normal | |version=Normal | ||
|damage=750 | |damage=750 | ||
| Line 670: | Line 670: | ||
In combos, 2D is very useful for optimizing damage with the use of 50 heat. As a footsie, 2D is Ragna's farthest reaching low, but its practicality as a footsie only applies to certain situations. For example, 2D can be used against Tager's Voltec Charge, Litchi's Straight Through, and Arakune's f-inverse on whiff. The hurtbox does not extend past the hitbox, so against supers that have long active frames, you can use 2D for a free, decent combo. | In combos, 2D is very useful for optimizing damage with the use of 50 heat. As a footsie, 2D is Ragna's farthest reaching low, but its practicality as a footsie only applies to certain situations. For example, 2D can be used against Tager's Voltec Charge, Litchi's Straight Through, and Arakune's f-inverse on whiff. The hurtbox does not extend past the hitbox, so against supers that have long active frames, you can use 2D for a free, decent combo. | ||
}} | }} | ||
{{AttackData- | {{AttackData-BBCF | ||
|version=Overdrive | |version=Overdrive | ||
|damage=850 | |damage=850 | ||
| Line 708: | Line 708: | ||
|caption=Great mix-up potential, but can be tricky to execute consistently | |caption=Great mix-up potential, but can be tricky to execute consistently | ||
|data= | |data= | ||
{{AttackData- | {{AttackData-BBCF | ||
|version=Normal | |version=Normal | ||
|damage=750 | |damage=750 | ||
| Line 743: | Line 743: | ||
Performing the throw is similar to performing the low, but it is riskier. To perform the low, use j.D just before landing, then input throw. The hitbox on throw is very small, so any sort of barrier or spacing will cause the throw to miss. You can utilize a kara throw (B~C) to gain a tiny bit of distance so that the throw will land. Overall, use the throw option scarcely. | Performing the throw is similar to performing the low, but it is riskier. To perform the low, use j.D just before landing, then input throw. The hitbox on throw is very small, so any sort of barrier or spacing will cause the throw to miss. You can utilize a kara throw (B~C) to gain a tiny bit of distance so that the throw will land. Overall, use the throw option scarcely. | ||
}} | }} | ||
{{AttackData- | {{AttackData-BBCF | ||
|version=Overdrive | |version=Overdrive | ||
|damage=850 | |damage=850 | ||
| Line 782: | Line 782: | ||
|caption=Trades damage for lifesteal | |caption=Trades damage for lifesteal | ||
|data= | |data= | ||
{{AttackData- | {{AttackData-BBCF | ||
|version=Normal | |version=Normal | ||
|damage=590 | |damage=590 | ||
| Line 809: | Line 809: | ||
Using j.D in combos is now a decision rather than a necessity. The high hitstun allows for larger combo versatility at later times in a combo, but the extremely low P2 will butcher the damage, which in turn also butchers the Heat Gain (as it is mostly reliant on damage values in Chrono Phantasma). However, the move has increased lifesteal from 30 to 100, making it useful to gain a bit of life and increase the Soul Eater rate. If you're going for damage, generally avoid this move when performing aerial combo routes. However, if you need some life gain, use as many j.D's as possible. | Using j.D in combos is now a decision rather than a necessity. The high hitstun allows for larger combo versatility at later times in a combo, but the extremely low P2 will butcher the damage, which in turn also butchers the Heat Gain (as it is mostly reliant on damage values in Chrono Phantasma). However, the move has increased lifesteal from 30 to 100, making it useful to gain a bit of life and increase the Soul Eater rate. If you're going for damage, generally avoid this move when performing aerial combo routes. However, if you need some life gain, use as many j.D's as possible. | ||
}} | }} | ||
{{AttackData- | {{AttackData-BBCF | ||
|version=Overdrive | |version=Overdrive | ||
|damage=690 | |damage=690 | ||
| Line 846: | Line 846: | ||
|caption="This will sting!" | |caption="This will sting!" | ||
|data= | |data= | ||
{{AttackData- | {{AttackData-BBCF | ||
|damage=0, 1400 | |damage=0, 1400 | ||
|cancel=-, SOR | |cancel=-, SOR | ||
| Line 881: | Line 881: | ||
|caption=Here comes the combo | |caption=Here comes the combo | ||
|data= | |data= | ||
{{AttackData- | {{AttackData-BBCF | ||
|damage=0, 1400 | |damage=0, 1400 | ||
|cancel=-, SOR | |cancel=-, SOR | ||
| Line 916: | Line 916: | ||
|caption=Pretty much his only mandatory throw | |caption=Pretty much his only mandatory throw | ||
|data= | |data= | ||
{{AttackData- | {{AttackData-BBCF | ||
|damage=0, 1400 | |damage=0, 1400 | ||
|cancel=-, SOR | |cancel=-, SOR | ||
| Line 951: | Line 951: | ||
|caption=Same animation as 5B, with the same start-up and hitbox | |caption=Same animation as 5B, with the same start-up and hitbox | ||
|data= | |data= | ||
{{AttackData- | {{AttackData-BBCF | ||
|damage=0 | |damage=0 | ||
|cancel=R | |cancel=R | ||
| Line 986: | Line 986: | ||
|caption=A Crush Trigger that is as basic as you can get | |caption=A Crush Trigger that is as basic as you can get | ||
|data= | |data= | ||
{{AttackData- | {{AttackData-BBCF | ||
|damage=1000 | |damage=1000 | ||
|cancel=R | |cancel=R | ||
| Line 1,024: | Line 1,024: | ||
|caption=Combo material for just about any mid-screen combo | |caption=Combo material for just about any mid-screen combo | ||
|data= | |data= | ||
{{AttackData- | {{AttackData-BBCF | ||
|damage=730 | |damage=730 | ||
|cancel=R | |cancel=R | ||
| Line 1,059: | Line 1,059: | ||
|caption=Typical combo ender for pushing your opponent towards the corner and for good corner okizeme | |caption=Typical combo ender for pushing your opponent towards the corner and for good corner okizeme | ||
|data= | |data= | ||
{{AttackData- | {{AttackData-BBCF | ||
|version=Normal | |version=Normal | ||
|damage=950 | |damage=950 | ||
| Line 1,088: | Line 1,088: | ||
Standard combo ender in the corner that allows for safe jump j.C okizeme against all DPs that have a start-up of 9 frames or more, meaning you will lose to extremely fast reversal supers such as Hazama's Jayoku Houtenjin. You typically want to avoid using this ender mid-screen unless it will send them into the corner. | Standard combo ender in the corner that allows for safe jump j.C okizeme against all DPs that have a start-up of 9 frames or more, meaning you will lose to extremely fast reversal supers such as Hazama's Jayoku Houtenjin. You typically want to avoid using this ender mid-screen unless it will send them into the corner. | ||
}} | }} | ||
{{AttackDataNoHeader- | {{AttackDataNoHeader-BBCF | ||
|version=Overdrive | |version=Overdrive | ||
|damage=1150 | |damage=1150 | ||
| Line 1,125: | Line 1,125: | ||
|caption=C version is your go-to reversal, while D version is your go-to combo ender for damage and light okizeme | |caption=C version is your go-to reversal, while D version is your go-to combo ender for damage and light okizeme | ||
|data= | |data= | ||
{{AttackData- | {{AttackData-BBCF | ||
|version={{C}} Inferno Divider<div><small>623C</small></div> | |version={{C}} Inferno Divider<div><small>623C</small></div> | ||
|damage=550*2 | |damage=550*2 | ||
| Line 1,149: | Line 1,149: | ||
|description= | |description= | ||
}} | }} | ||
{{AttackData- | {{AttackData-BBCF | ||
|header=no | |header=no | ||
|version=Aerial {{C}} Inferno Divider<div><small>j.623C</small></div> | |version=Aerial {{C}} Inferno Divider<div><small>j.623C</small></div> | ||
| Line 1,174: | Line 1,174: | ||
|description= | |description= | ||
}} | }} | ||
{{AttackData- | {{AttackData-BBCF | ||
|header=no | |header=no | ||
|version={{D}} Inferno Divider<div><small>623D</small></div> | |version={{D}} Inferno Divider<div><small>623D</small></div> | ||
| Line 1,199: | Line 1,199: | ||
|description= | |description= | ||
}} | }} | ||
{{AttackData- | {{AttackData-BBCF | ||
|header=no | |header=no | ||
|version=Aerial {{D}} Inferno Divider<div><small>j.623D</small></div> | |version=Aerial {{D}} Inferno Divider<div><small>j.623D</small></div> | ||
| Line 1,224: | Line 1,224: | ||
|description= | |description= | ||
}} | }} | ||
{{AttackData- | {{AttackData-BBCF | ||
|header=no | |header=no | ||
|version={{D}} Inferno Divider (OD)<div><small>623D</small></div> | |version={{D}} Inferno Divider (OD)<div><small>623D</small></div> | ||
| Line 1,249: | Line 1,249: | ||
|description= | |description= | ||
}} | }} | ||
{{AttackData- | {{AttackData-BBCF | ||
|header=no | |header=no | ||
|version=Aerial {{D}} Inferno Divider (OD)<div><small>j.623D</small></div> | |version=Aerial {{D}} Inferno Divider (OD)<div><small>j.623D</small></div> | ||
| Line 1,290: | Line 1,290: | ||
|caption=Otherwise known as "that one in the middle" | |caption=Otherwise known as "that one in the middle" | ||
|data= | |data= | ||
{{AttackData- | {{AttackData-BBCF | ||
|damage=310 | |damage=310 | ||
|cancel=R | |cancel=R | ||
| Line 1,325: | Line 1,325: | ||
|caption=For when you're otherwise just out of corner's reach | |caption=For when you're otherwise just out of corner's reach | ||
|data= | |data= | ||
{{AttackData- | {{AttackData-BBCF | ||
|damage=400 | |damage=400 | ||
|cancel=R | |cancel=R | ||
| Line 1,361: | Line 1,361: | ||
|caption=Ragna's most universal form of knockdown | |caption=Ragna's most universal form of knockdown | ||
|data= | |data= | ||
{{AttackData- | {{AttackData-BBCF | ||
|version=Normal | |version=Normal | ||
|damage=480 | |damage=480 | ||
| Line 1,384: | Line 1,384: | ||
|hitbox= | |hitbox= | ||
}} | }} | ||
{{AttackData- | {{AttackData-BBCF | ||
|header=no | |header=no | ||
|version=Overdrive | |version=Overdrive | ||
| Line 1,422: | Line 1,422: | ||
|caption=A risky overhead that now functions as a mid-screen combo part | |caption=A risky overhead that now functions as a mid-screen combo part | ||
|data= | |data= | ||
{{AttackData- | {{AttackData-BBCF | ||
|version=Ground | |version=Ground | ||
|damage=800 | |damage=800 | ||
| Line 1,446: | Line 1,446: | ||
|description= | |description= | ||
}} | }} | ||
{{AttackData- | {{AttackData-BBCF | ||
|header=no | |header=no | ||
|version=Air | |version=Air | ||
| Line 1,483: | Line 1,483: | ||
|caption=The follow-up to Gauntlet Hades, and now gets more love in regular combos | |caption=The follow-up to Gauntlet Hades, and now gets more love in regular combos | ||
|data= | |data= | ||
{{AttackData- | {{AttackData-BBCF | ||
|version=Normal | |version=Normal | ||
|damage=800 | |damage=800 | ||
| Line 1,506: | Line 1,506: | ||
|hitbox= | |hitbox= | ||
}} | }} | ||
{{AttackData- | {{AttackData-BBCF | ||
|header=no | |header=no | ||
|version=Overdrive | |version=Overdrive | ||
| Line 1,543: | Line 1,543: | ||
|caption=A beefy projectile used for resetting pressure. Now actually moves! | |caption=A beefy projectile used for resetting pressure. Now actually moves! | ||
|data= | |data= | ||
{{AttackData- | {{AttackData-BBCF | ||
|version=Normal | |version=Normal | ||
|damage=1000 | |damage=1000 | ||
| Line 1,567: | Line 1,567: | ||
|description= | |description= | ||
}} | }} | ||
{{AttackDataNoHeader- | {{AttackDataNoHeader-BBCF | ||
|version=Overdrive | |version=Overdrive | ||
|damage=600*3 | |damage=600*3 | ||
| Line 1,604: | Line 1,604: | ||
|caption=Massive corner carry potential mid-screen and a fantastic combo part in the corner | |caption=Massive corner carry potential mid-screen and a fantastic combo part in the corner | ||
|data= | |data= | ||
{{AttackData- | {{AttackData-BBCF | ||
|damage=0, 952 | |damage=0, 952 | ||
|cancel=-, SORDa | |cancel=-, SORDa | ||
| Line 1,639: | Line 1,639: | ||
|caption=The new king of lifesteal specials. Ground version is incredibly slow but advantageous. Aerial version is great for corner carry. | |caption=The new king of lifesteal specials. Ground version is incredibly slow but advantageous. Aerial version is great for corner carry. | ||
|data= | |data= | ||
{{AttackData- | {{AttackData-BBCF | ||
|version=Blood Scythe<div><small>214D</small></div> | |version=Blood Scythe<div><small>214D</small></div> | ||
|damage=1200 | |damage=1200 | ||
| Line 1,663: | Line 1,663: | ||
|description= | |description= | ||
}} | }} | ||
{{AttackData- | {{AttackData-BBCF | ||
|header=no | |header=no | ||
|version=Blood Scythe (OD)<div><small>214D</small></div> | |version=Blood Scythe (OD)<div><small>214D</small></div> | ||
| Line 1,687: | Line 1,687: | ||
|hitbox= | |hitbox= | ||
}} | }} | ||
{{AttackData- | {{AttackData-BBCF | ||
|header=no | |header=no | ||
|version=Aerial Blood Scythe<div><small>j.214D</small></div> | |version=Aerial Blood Scythe<div><small>j.214D</small></div> | ||
| Line 1,712: | Line 1,712: | ||
|description= | |description= | ||
}} | }} | ||
{{AttackData- | {{AttackData-BBCF | ||
|header=no | |header=no | ||
|version=Aerial Blood Scythe (OD)<div><small>j.214D</small></div> | |version=Aerial Blood Scythe (OD)<div><small>j.214D</small></div> | ||
| Line 1,750: | Line 1,750: | ||
|caption=When ending air combos, do you choose between okizeme, or damage? | |caption=When ending air combos, do you choose between okizeme, or damage? | ||
|data= | |data= | ||
{{AttackData- | {{AttackData-BBCF | ||
|damage=1010 | |damage=1010 | ||
|cancel=R | |cancel=R | ||
| Line 1,785: | Line 1,785: | ||
|caption=For when you choose damage | |caption=For when you choose damage | ||
|data= | |data= | ||
{{AttackData- | {{AttackData-BBCF | ||
|damage=900 | |damage=900 | ||
|cancel=R | |cancel=R | ||
| Line 1,822: | Line 1,822: | ||
|caption=Use this outside of Overdrive if it will kill. Use this during Overdrive for Soul Eater progression and possible relaunches in the corner. | |caption=Use this outside of Overdrive if it will kill. Use this during Overdrive for Soul Eater progression and possible relaunches in the corner. | ||
|data= | |data= | ||
{{AttackData- | {{AttackData-BBCF | ||
|version=Normal | |version=Normal | ||
|damage=1000, 2500 | |damage=1000, 2500 | ||
| Line 1,846: | Line 1,846: | ||
|description= | |description= | ||
}} | }} | ||
{{AttackData- | {{AttackData-BBCF | ||
|header=no | |header=no | ||
|version=Overdrive | |version=Overdrive | ||
| Line 1,883: | Line 1,883: | ||
|caption=A useless, blockable move without Overdrive. In OD, it's unblockable and actually a very good move. | |caption=A useless, blockable move without Overdrive. In OD, it's unblockable and actually a very good move. | ||
|data= | |data= | ||
{{AttackData- | {{AttackData-BBCF | ||
|version=Normal | |version=Normal | ||
|damage=0, 2700 | |damage=0, 2700 | ||
| Line 1,907: | Line 1,907: | ||
|description= | |description= | ||
}} | }} | ||
{{AttackData- | {{AttackData-BBCF | ||
|header=no | |header=no | ||
|version=Overdrive | |version=Overdrive | ||
| Line 1,945: | Line 1,945: | ||
|caption= | |caption= | ||
|data= | |data= | ||
{{AttackData- | {{AttackData-BBCF | ||
|version=Normal | |version=Normal | ||
|damage=2010 | |damage=2010 | ||
| Line 1,969: | Line 1,969: | ||
|description= | |description= | ||
}} | }} | ||
{{AttackData- | {{AttackData-BBCF | ||
|header=no | |header=no | ||
|version=Active Flow | |version=Active Flow | ||
| Line 2,009: | Line 2,009: | ||
|caption="There is no Hell, only darkness." | |caption="There is no Hell, only darkness." | ||
|data= | |data= | ||
{{AttackData- | {{AttackData-BBCF | ||
|damage=DESTROY | |damage=DESTROY | ||
|cancel= | |cancel= | ||
Revision as of 13:30, 26 October 2016
| Ragna the Bloodedge |
|---|
|
Health: 10,000
|
Overview
Ragna the Bloodedge is a wanted criminal with an extraordinarily large bounty on his head (well in the trillions) for attempting to destroy the NOL, and is Jin and Saya's older brother. He is a playable character in all iterations of BlazBlue thus far and is the main protagonist of the series.
Drive: Soul Eater
Soul Eater allows Ragna to absorb a portion of the damage of certain attacks for his own health. This mechanic was to offset the very low health that Ragna has. Soul Eater works regardless of hit or block, but does not work against Barrier Guard. Soul Eater has another mechanic where different percentages are applied to different Soul Eater moves depending on where it was in the combo. For example, using 5D (100 drain) then D Inferno Divider (50*2 drain) will result in less lifesteal (192 drain) than with 5D's and D Inferno Divider's lifesteal base values added together (200 drain).
- 1st Soul Eater hit = 100% lifesteal
- 2nd Soul Eater hit = 90% lifesteal
- 3rd Soul Eater hit = 95% lifesteal
- 4th Soul Eater hit = 100% lifesteal
Each Soul Eater hit after this increases lifesteal by 5% until scaling reaches 150%. The following Soul Eater hit then increases lifesteal to 160%, and then to 180%. 180% is the maximum value.
Edit: It seems lifesteal scaling was removed in CF.
Overdrive: Blood Kain IDEA
Ragna's Overdrive augments all of his Soul Eater moves. Not only do all of his Soul Eater moves have higher damage and steal more life from the opponent, but some also have different move properties and different hitboxes.
Pros/Strengths
- Able to drain opponent's life and replace as own
- Great footsies that can be hit confirmed easily
- Becomes very versatile with 50% Heat
- Solid okizeme setups, more so in the corner
- Decent Heat Gain off most combos
- Easy to pick up, easy to play character
- One of the best DPs in the game
- Overdrive greatly increases combo damage, versatility and lifesteal
Cons/Weaknesses
- Few safe and reliable mix-up options make most offensive approaches easy to read
- High risk, moderate reward
- Many defensive options are unsafe
- Tied for third lowest life in the game
- Poor meterless damage output at maximum footsie range
- Very weak character without 50% Heat, heavily relies on meter
- Struggles against zoning gameplay, even with movement options
- Highly encourages uncommon tactics to play well (may not be a con if you have the right mindset)
| Health | 100 - 91% | 90 - 82% | 81 - 73% | 72 - 63% | 62 - 54% | 53 - 45% | 44 - 35% | 34 - 0% |
|---|---|---|---|---|---|---|---|---|
| Overdrive | 240F | 270F | 300F | 330F | 360F | 390F | 420F | 480F |
| Official frame data has yet to be released. Excluding damage, cancel, proration and hitstun type, all values are based on BBCP Ver 1.10. |
Normal Moves
5A
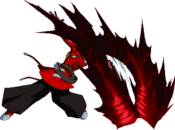
| 5A Although the start-up is fast, 5A only sees somewhat occasional use |
|---|
5B
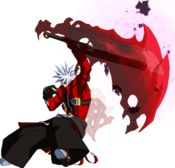
| 5B Fast and powerful, but can be dangerous to use in certain situations |
|---|
5C
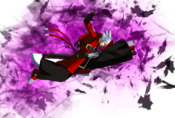
| 5C The slower, but longer alternative to 5B |
|---|
2A
| 2A The ±0 frame advantage makes 2A a useful pressure tool |
|---|
2B
| 2B Fast low, and can also be used as a footsie |
|---|
2C
| 2C No longer a fatal, but still a very good move |
|---|
6A
| 6A An anti-air that has been buffed |
|---|
6B
| 6B No chains into C make this move a dangerous one to use |
|---|
6C
| 6C Staple launcher off crouching opponents |
|---|
3C
| 3C The okizeme setup off this move is still good, but not as versatile anymore |
|---|
j.A
| j.A Simple aerial jab |
|---|
j.B
| j.B Aerial crossup move |
|---|
j.C
| j.C Main aerial approach, due to the huge hitbox |
|---|
Drive Moves
5D
| 5D Valuable in combos, not so much elsewhere |
|---|
2D
| 2D Safe move when spaced properly |
|---|
6D
| 6D Great mix-up potential, but can be tricky to execute consistently |
|---|
j.D
| j.D Trades damage for lifesteal |
|---|
Universal Mechanics
Forward Throw
| Forward Throw 5B+C or 6B+C "This will sting!" |
|---|
Back Throw
| Back Throw 4B+C Here comes the combo |
|---|
Air Throw
| Air Throw j.B+C Pretty much his only mandatory throw |
|---|
Counter Assault
| Counter Assault 6A+B during blockstun Same animation as 5B, with the same start-up and hitbox |
|---|
Crush Trigger
| Crush Trigger 5A+B A Crush Trigger that is as basic as you can get |
|---|
Specials
Hell's Fang
| Hell's Fang 214A Combo material for just about any mid-screen combo |
|---|
Follow-up
| Follow-up 214D after Hell's Fang Typical combo ender for pushing your opponent towards the corner and for good corner okizeme |
|---|
Inferno Divider
| Inferno Divider 623C/D (Air OK) C version is your go-to reversal, while D version is your go-to combo ender for damage and light okizeme |
|---|
Upper
| Upper 236C during Inferno Divider Otherwise known as "that one in the middle" |
|---|
Straight Punch
| Straight Punch 236C after Upper For when you're otherwise just out of corner's reach |
|---|
Ax Kick
| Ax Kick 214D after Upper Ragna's most universal form of knockdown |
|---|
Gauntlet Hades
| Gauntlet Hades 214B (air OK) A risky overhead that now functions as a mid-screen combo part |
|---|
Spin Kick
| Spin Kick 214D after Gauntlet Hades The follow-up to Gauntlet Hades, and now gets more love in regular combos |
|---|
Dead Spike
| Dead Spike 236D A beefy projectile used for resetting pressure. Now actually moves! |
|---|
Not Over Yet
| Not Over Yet 22C Massive corner carry potential mid-screen and a fantastic combo part in the corner |
|---|
Blood Scythe
| Blood Scythe 214D, j.214D The new king of lifesteal specials. Ground version is incredibly slow but advantageous. Aerial version is great for corner carry. |
|---|
Nightmare Edge
| Nightmare Edge j.214C When ending air combos, do you choose between okizeme, or damage? |
|---|
Additional Blow
| Additional Blow 214D after For when you choose damage |
|---|
Distortion Drives
Carnage Scissors
| Carnage Scissors 632146D Use this outside of Overdrive if it will kill. Use this during Overdrive for Soul Eater progression and possible relaunches in the corner. |
|---|
Devoured by Darkness
| Devoured by Darkness 214214D A useless, blockable move without Overdrive. In OD, it's unblockable and actually a very good move. |
|---|
Exceel Accel
| Seed of Tartarus ABCD during Overdrive |
|---|
Astral Heat
| Black Onslaught 2141236C "There is no Hell, only darkness." |
|---|
External References
- Japanese Name: ラグナ=ザ=ブラッドエッジ
- Japanese Wiki
- Japanese BBS
- Arcade Profile Dan Rankings
 Amane Nishiki [★]
 Arakune [★]
 Azrael [★]
 Bang Shishigami [★]
 Bullet [★]
 Carl Clover [★]
 Celica A. Mercury [★]
 Es [★]
 Hakumen [★]
 Hazama [★]
 Hibiki Kohaku [★]
 Iron Tager [★]
 Izanami [★]
 Izayoi [★]
 Jin Kisaragi [★]
 Jubei [★]
 Kagura Mutsuki [★]
 Kokonoe [★]
 Lambda-11 [★]
 Litchi Faye Ling [★]
 Mai Natsume [★]
 Makoto Nanaya [★]
 Mu-12[★]
 Naoto Kurogane [★]
 Nine the Phantom [★]
 Noel Vermillion [★]
 Nu-13 [★]
 Platinum the Trinity [★]
 Rachel Alucard [★]
 Ragna the Bloodedge [★]
 Relius Clover [★]
 Susano'o [★]
 Taokaka [★]
 Tsubaki Yayoi[★]
 Valkenhayn R. Hellsing [★]
 Yuuki Terumi [★]
Click [★] for character's full frame data
• HUD •
Controls •
Frame Data & System Data •
Patch Notes •
• Movement/Canceling •
Offense •
Defense •
Damage/Combo •
Attack Attributes •
Gauges •
Misc •


